I’m not going to lie. I am not religious. But I know people who are. As a supportive friend and family member, when they have a religious ceremony and invite me to this event in their lives, I will celebrate with them. And that is basically how the Simple Baptism Card came to be. I needed a card for an upcoming baptism, and me being me, I opted to design and make one myself instead of buying one.
As an Amazon Associate, I earn from qualifying purchases. This post contains affiliate links. I may receive a commission if you purchase an item from one of my links. This will not change the price you pay.
Supplies Needed to Make a Simple Baptism Card
This is a simple baptism card, so the supplies list should be simple, too! So, let’s get started!
- Cardstock – You will need 3 sheets of cardstock. I used the following:
- 8.5″ x 11″ white cardstock – this is for the dove and the letters
- 8.5″ x 11″ teal-green cardstock – this is for the outline of the dove and letters
- 12″ x 12″ bubble-looking cardstock – I opted for my card to have a design on it, but any plain color would work also.
- Glue – You will need glue for this. I used my Bearly Art Crafting glue, but any glue will work.
- Foam Tape – This is used to elevate the design and make it pop more.
- Cutting Machine and Cutting Mats – I use my Cricut Explore Air 2, but any other cutting machine will work. And you will need a cutting mat to hold the cardstock in place.
- SVG File – I designed this card, and you can get a copy of the file below, so keep reading if you would like a copy.
And that’s it! We have all our supplies and are ready to make this simple baptism card.
How to get the Simple Baptism Card SVG file
So, you’re here to check out my simple baptism card, and you are probably hoping it is free… and guess what! This one is! So, all you have to do is sign up for my newsletter below or jump over to my resource library if you are already a member to get access to this file.

How to use the Simple Baptism SVG File in Cricut Design Space
Once you have the file downloaded, you will need to do a few things:
- Unzip the file –
- Right-click on the file with your mouse and select Unzip
- Select a location where you want the file to be saved.
- Hit Enter and your file will be unzipped and saved.
- Upload the file to Cricut Design Space.
- Select the Upload Icon on the left side of your screen.
- Select the Upload Image button.
- Select the File from the location where the file was saved from above.
- Select the file from your DS Recently Uploaded documents. There should be a green rectangle around it.
- Hit the Add to Canvas button.
Once the Simple Baptism SVG file is on your Design Space canvas we can make some modifications.
For whatever reason, when designs are made outside of Cricut Design Space and uploaded, the dimensions do not always match up. As a result, we need to make a few quick checks and modifications, and we are ready to cut out the card:
- Verify that the height of the card is 7″. If not, verify that the lock dimensions are locked, and adjust the height to 7″. The width should be about 10″.
- Select the line in the middle of the card.
- Change the line from a Basic Cut to a Score Line in the operations dropdown menu
- Select the line and the card, and Attach them together so they are cut and scored together.
Once you have completed those checks and changes, you are ready to cut out the card.
Assembling the Simple Baptism card
Card Pieces Required
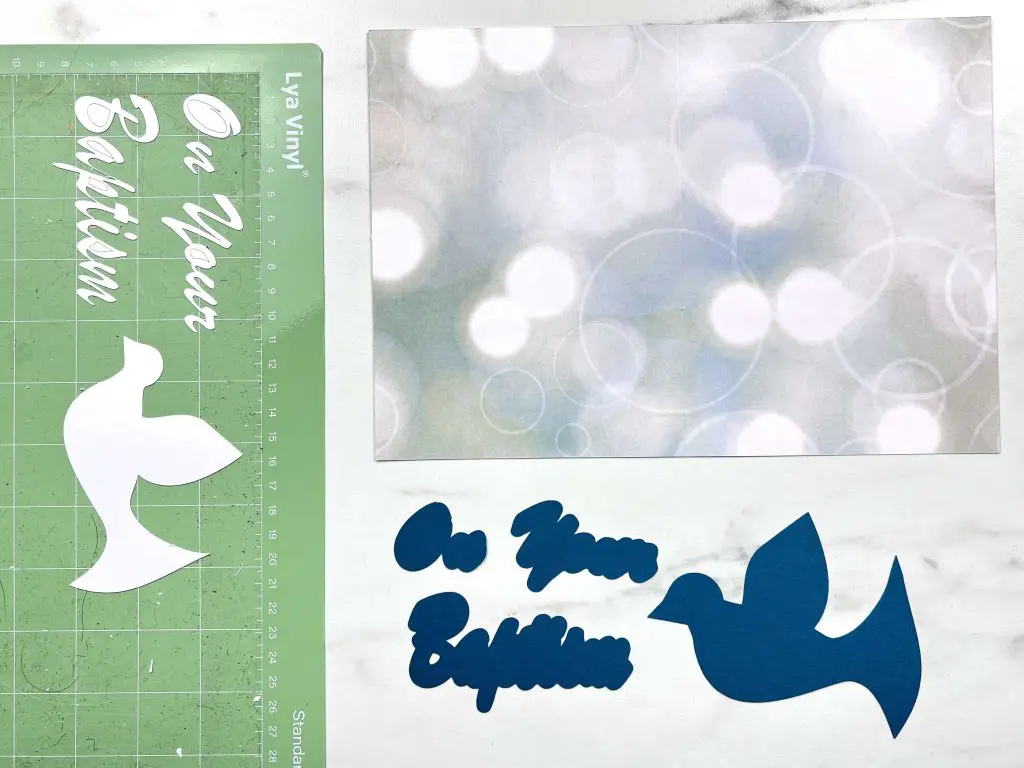
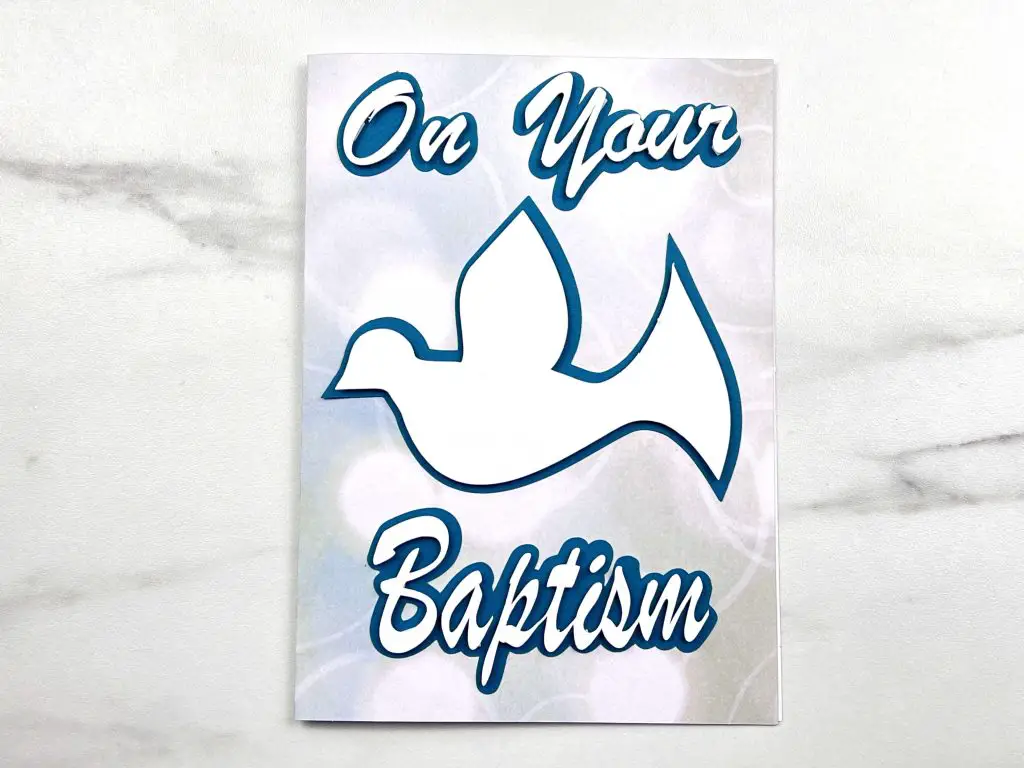
Once you have cut out your card pieces, you should have the following:
- 1 card backing
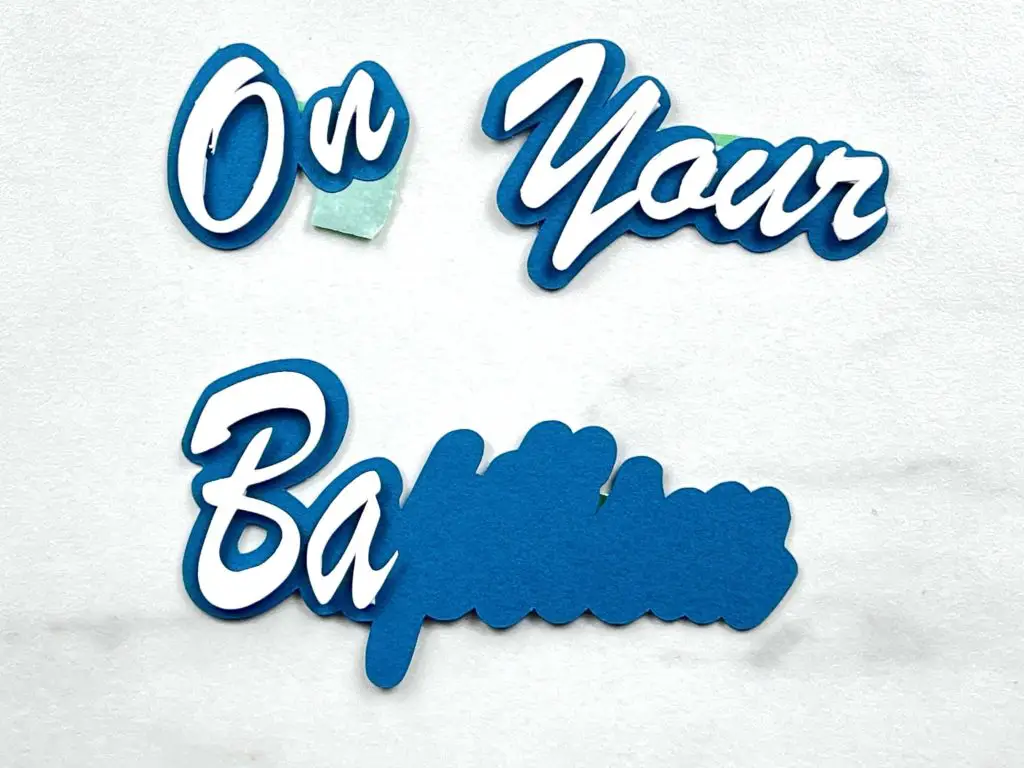
- 1 set of white letters – “On Your Baptism”
- 1 white dove,
- 1 outline in teal-green for the letters and words
- 1 teal-green dove outline
Now that we have all our parts, it is time to put this simple baptism card together.
Assembling the words
Let’s start by assembling the letters and words for this card first. I work on the letters because they are the hardest for me to do.
I leave my letters on the cutting mat. This way, I do not lose any pieces. Flip the cutting mat upside down and slowly pull it away from the letters. Try to do only one word at a time so that nothing rips.
Now, apply double-sided foam tape to the back of the words. Do not remove the protective tape cover just yet.
Find the corresponding teal-green outline for the word you have selected. With the protective cover still on the tape place the word over top of the outline. Lined up the outline and words. Once you are happy that everything is correct, remove the backing cover from the tape and gently place it onto the outline. If, after placement, it is not lined up perfectly, you can quickly pull it up and adjust the placement. If you press down hard the first time, you will not be able to pull up the letters without ripping some paper
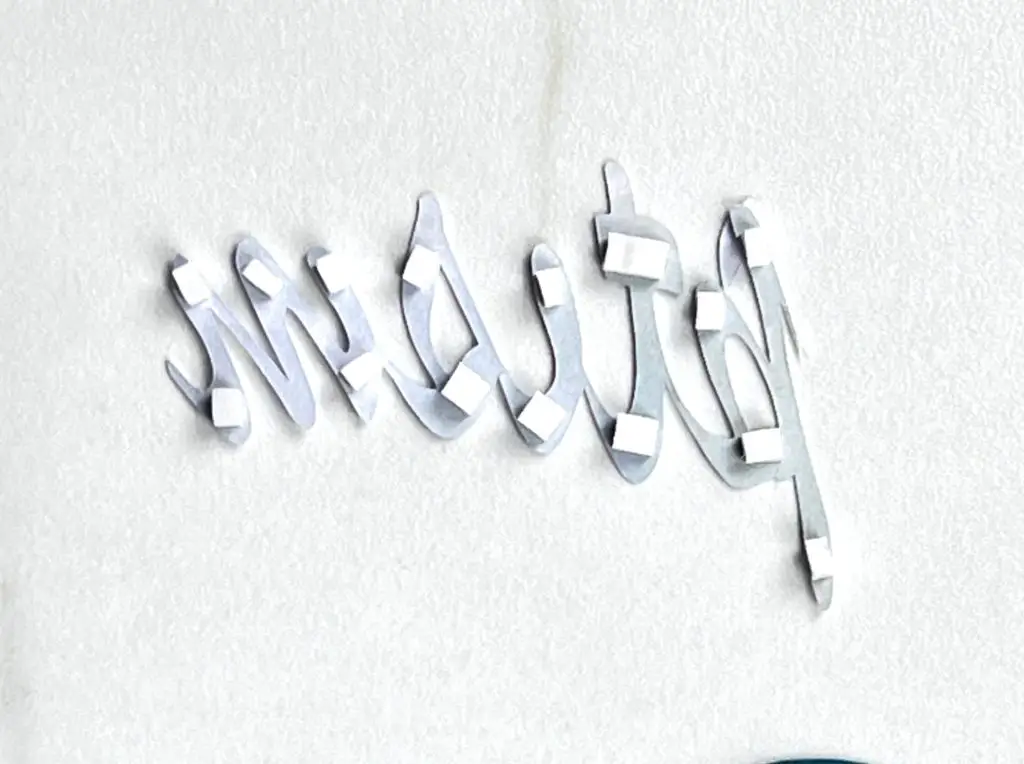
Now, repeat the same steps for the remaining words and letters.
Assembling the Dove
Similarly to the assembly of the letter above, use double-sided foam tape to attach the white dove to the teal-green dove outline.
Apply several pieces of double-sided foam tape to the back of the dove, remove the tape backing, and place it on the teal-green dove outline. If you place the dove down gently, you can lift it up and readjust it if it does not go down in the correct spot.
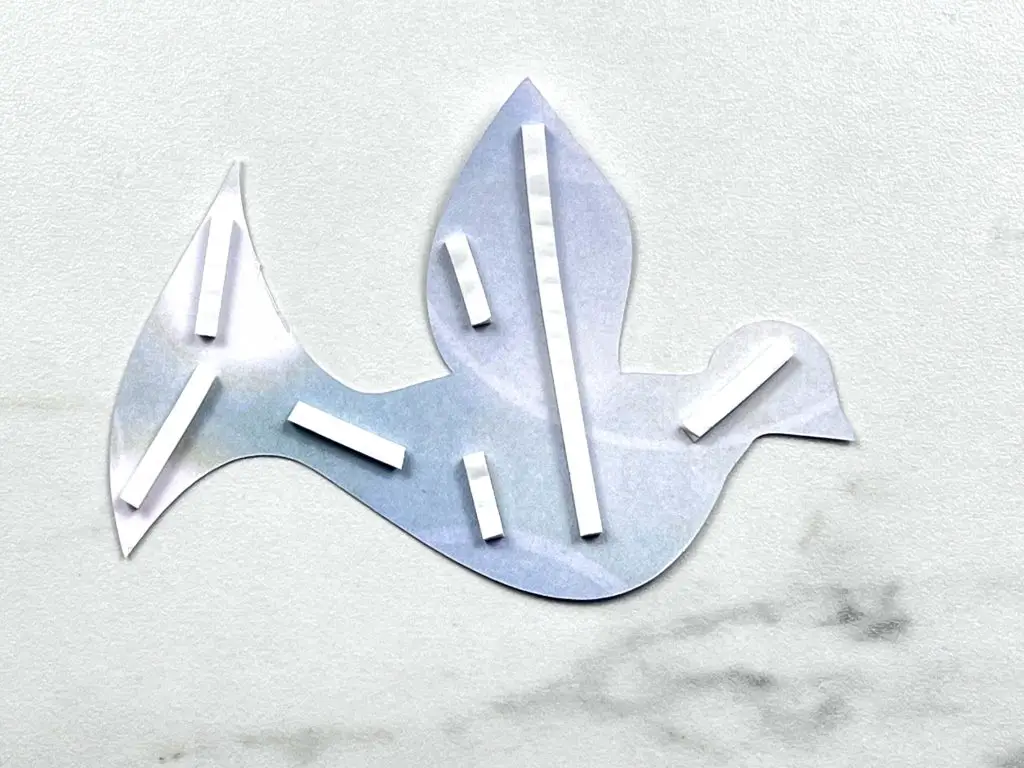
Once happy with the location of the dove on the outline, give it a good push down.
Assemble the Baptism card Pieces
Now that we have all the pieces ready we can assemble the card.
Let’s get that scored card that was cut at the beginning with our Cricut. Fold the card on the score-line. Pick a side which you want to be the front. I used a paper with a design on it, so I found the side I liked better.
Next, line up the words and the dove on the card. Do this with no glue. Just place all the pieces on the card. Make sure all the pieces fit or move them around to fit how you like.
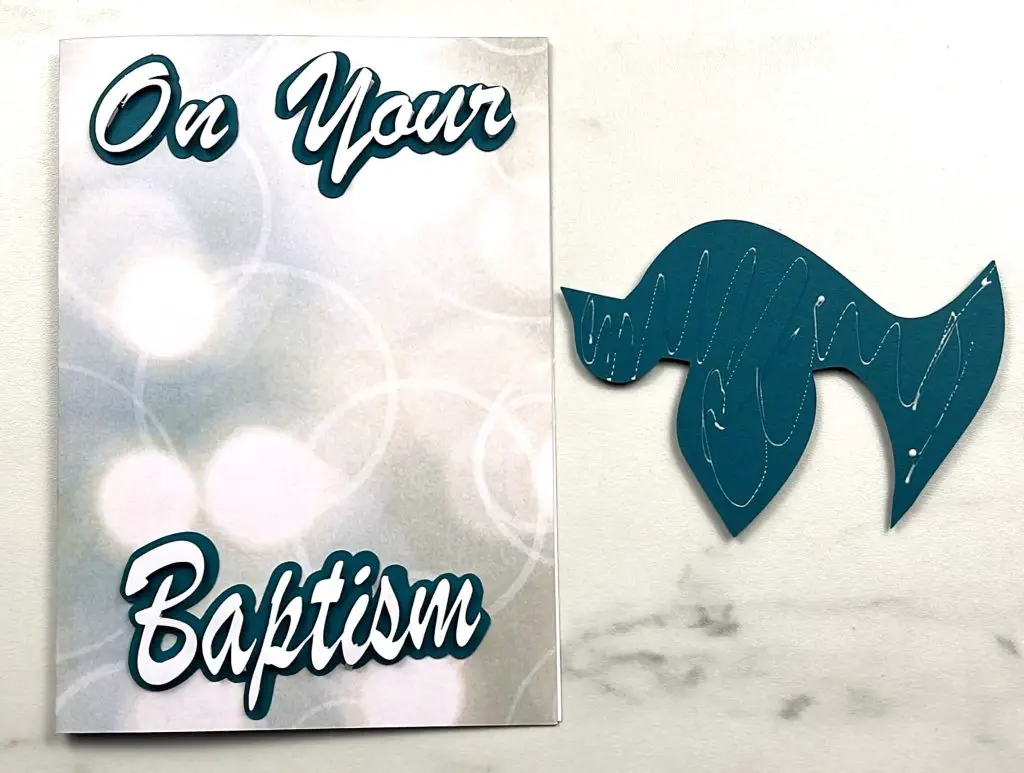
Once happy with the placement, apply some glue to the back of the words and dove and glue them onto the card.
Add a sentiment to the inside of the card
Now for the hardest part, and I am of no help here. You need to add a sentiment to the inside of the card. Probably something religious. Good luck with this piece. You are on your own here.
And that’s it! Your Simple Baptism Card is Complete!.
Things I learned Along the way
You know me… always learning… So, here are some takeaways from making this simple baptism card.
- When designing this card, I had intended to use only glue to hold the letters down onto the outline. So, I didn’t really pay attention to the thickness of the letters. Some of the letters are a bit thin, and I needed to really cut the double-sided foam tape into small small small pieces so that it would hold and keep the letters elevated. So, if you are also going to use double-sided foam tape, keep that in mind.
- I have been participating in numerous summits in the last while, and one of the major ones I participate in is a card summit. The other day, we were going to a birthday party, and I didn’t have a simple birthday card. And then a few days later, I had the same problem again… both times, I quickly made an ad-hoc card, but I was rather disappointed in myself for not being prepared… So now I’m on a mission to get my card supplies a bit fuller so I can have cards on hand. And that is how the baptism card came about.
- Making a card from scratch is cheaper and easier than buying one at the store. Now, I say cheaper because I have already purchased way too much cardstock. I will probably never get through all of it… but the money has been spent already. So, cheaper and easier.
- I really am terrible at picking out colors. I tried to match what I needed for this card, and I could not, for the life of me, pick 3 colors that worked. So, I really need to figure out colors….
- I think I’m fairly good at designing simple cards. So, the outside of the card is taken care of. But the inside… the sentimental statement inside the card, the one that is heartfelt and whatnot… well, that I cannot do well or quickly… It’s a good thing my penmanship is terrible, so no matter what I write, no one will know what it says anyway.
Did you enjoy making this card?
Did you enjoy making this card? Let me know in the comments below. If you tried it out, how did it go? Be sure to share your creations with me!
If you enjoyed this card, be sure to check out some of my other cards below:
- How To Make A Minecraft Card
- Super Simple Christmas Cards
- How To Make An 80th Birthday Shaker Card
- How To Assemble A Mother’s Day Shaker Card
- Hoppy Easter Shaker Card
- Valentine’s Day Shaker Card
And, if you want to make more paper crafts, be sure to check out my paper crafts here.