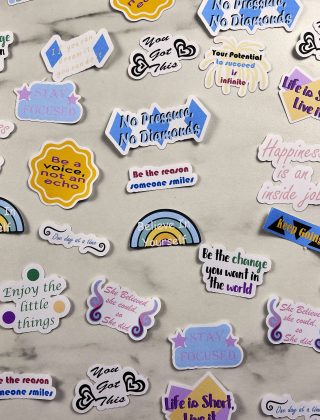
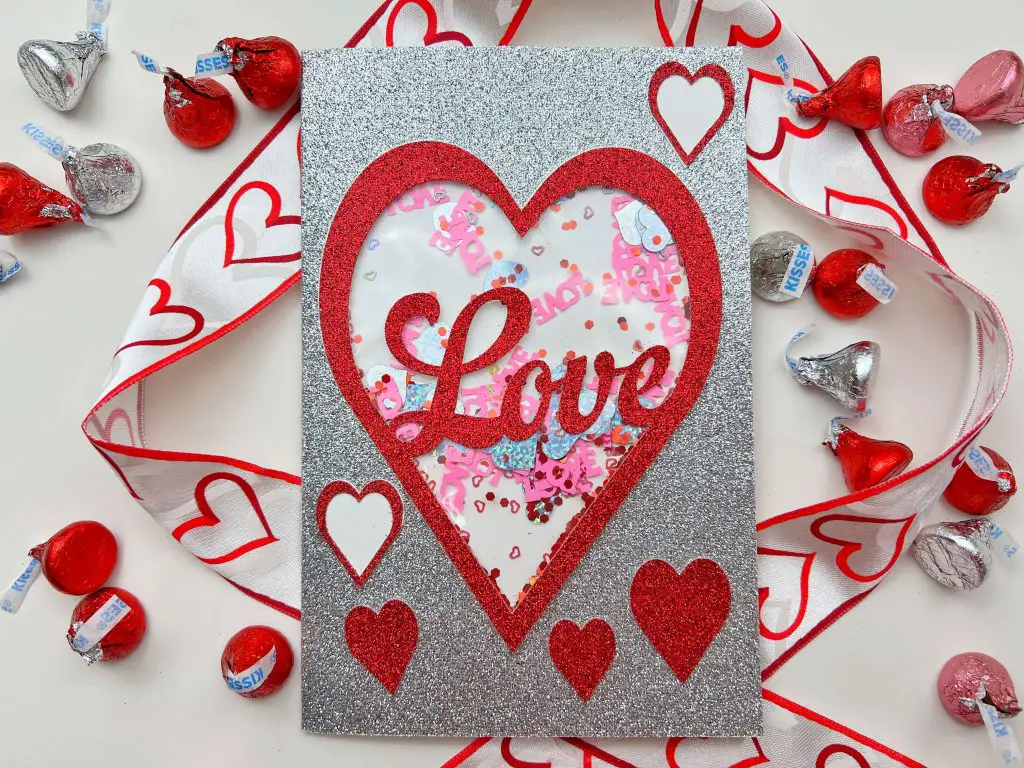
I have been trying out something new. I have seen many people making these cute shaker cards, and I thought I would try them out myself. And as Valentine’s Day is coming up quick, I have decided to make a Valentine’s Day Shaker Card. So, let’s jump in and design and assemble a Valentine’s Day Shaker Card together!
As an Amazon Associate, I earn from qualifying purchases. This post contains affiliate links. I may receive a commission if you purchase an item from one of my links. This will not change the price you pay.
Supplies Needed
Cards are fairly simple to make and do not need much, but as we are designing, we will need one more item:
- Design program – I am using Design Space for my Cricut. I only use the free shapes and fonts in Design Space and the ones I have on my system. So, basically, we will design a free Valentine’s day shaker card. If using in Design Space is not your thing, you can use any other design programs to help. My other go-to design programs are Vectornator for my iPad and Inkscape when on my computer.
- Card Stock – Ideally, you want red, pink, white or any Valentine’s Day-related colors. But you can use any color you like.
- Glue – I use Bearly Art Craft Glue – This is my go-to glue for cardstock since it dries quickly and does not leave stains when dry.
- Double-Sided Foam Tape – For the shaker card to work you need thick tape to make space between the cardstock and clear sheets.
- Gems/Glitter/Confetti – A shaker card needs stuff inside to shake around. You can use gems, glitter, confetti, or whatever you like. Using themed confetti is always fun as well.
- Cutting machine – I use my Cricut Explore Air 2, but you can use any Cricut model or a Silhouette or any other cutting machine as well.
- Clear sheet for the top of the shaker – There are several options that can be used. I have found that using zip-lock freezer bags works well, as they are clear and cheap. You can also use paper protector sheets, thick or thin. And if you want it to be very rigid and sturdy, you can use acetate sheets for crafts, or acetate sheets for baking which come in a roll for cheaper per square inch.
- Envelopes – You can create your own or buy large card envelopes here.
- 30 minutes to design and assemble the card.
Let’s design our Free Valentines Day Shaker Card
How to Design the Card
There are two simple ways that you can design the card backing. What I mean by this is the part of the card that opens and closes, the large cardstock pieces that are the card body.
Free Card Template from Design Space
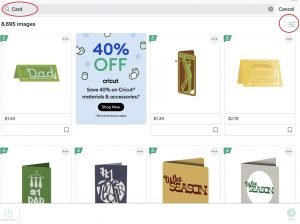
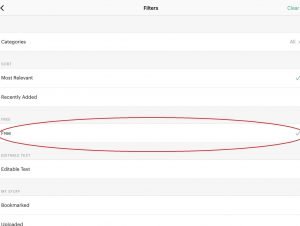
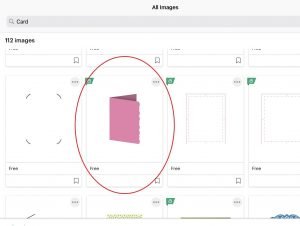
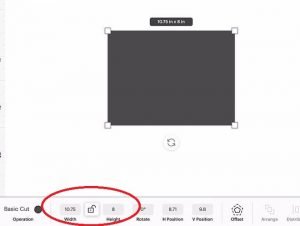
There are simple card templates available in Design Space for free. All you need to do is select IMAGES, type Card in the search menu, and use the filter to filter for FREE projects, and you will find a simple card, as seen below.
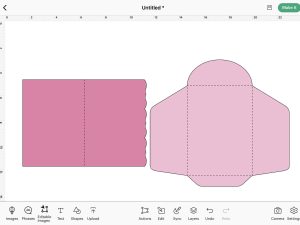
You will need to ungroup the card and envelope and modify the card to be 10.75″ wide by 8″ high. The envelope that is included in this design will not work with a card this size unless you have 12″x24″ cardstock or paper that you want to use to make an envelope. If that is the case, you will need to increase the envelope so that the card fits inside.
Also, the card that I am showing below is the one that is currently free. There are always one or two different available color cards, so you may not find this exact one.
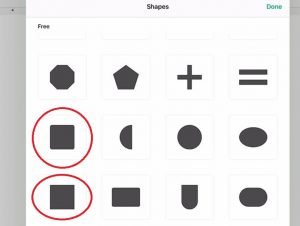
You can design your own card Template
You can easily design your own template as well. All you need to do is select SHAPES and then select either the square with rounded or pointed corners.
Select the EDIT menu, and change the dimension of the square to 10.75″ wide by 8″ high. You will need to UNLOCK the dimensions to adjust the length and width separately.
Now, pulling in a SCORE LINE from the SHAPES menu, increase the size to 8″ in height, and center it on the rectangle. Make sure to ATTACH the score line to the rectangle so that it scores in the correct place during the cutting process.

Design you heart Shaker
Designing a heart may sound simple, but just in case there are any questions, let’s go through it together. You know, just in case.
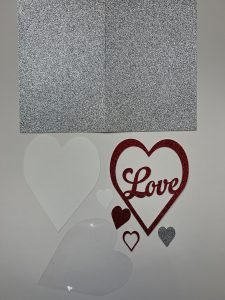
From the SHAPES Menu, select a heart. Make sure that the lock on the dimensions is unlocked, and change the size of the heart to be 4.8″ wide by 6″ high. You can make it a bit bigger or smaller, but you want it to fill up most of the front of the card. Once happy with the size, make three duplicates of this.
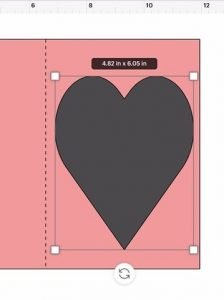
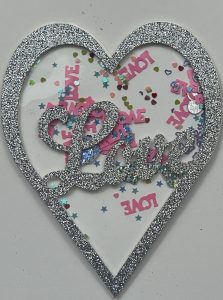
Place two duplicates aside for now, and change the color of one to white and the other to black.
With the third duplicate, lock the dimensions to keep the sizes proportionate. Now, reduce the size slightly. The smaller heart should allow for there to be a nice visible edge of the larger heart. You may need to ARRANGE the hearts and bring the smaller heart forward.
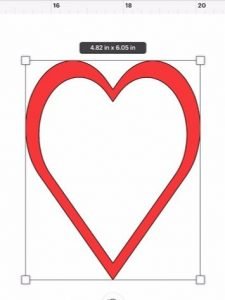
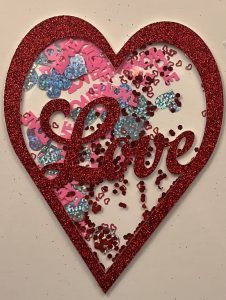
Center the 2 hearts on each other. Select both and SLICE them. You can DELETE the inner heart. This outer heart is the top portion of your shaker. You can now change the color to red.
Optional text on heart shaker
You do not need to add text onto the heart as I have, but if you want to keep reading this part. If not, then skip down to the next section.
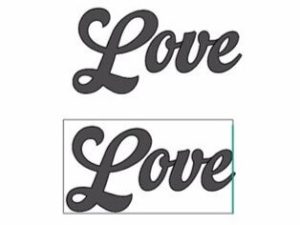
Go into your fonts and select a font you like. I chose a cursive font that I really like called Alameda Script. This is not a font in Design Space. I got it from dafont.com.
If you want to learn how to import fonts into Design Space, check out this post.
Select the font you like, and write the word, LOVE. Since we are using cursive, we will need to copy the text and have 2 text sections – one that is just the L, and one that is only OVE. Move them around so that the L connects to the OVE. Once you are happy with their placement, in your ACTIONS menu select COMBINE, and then WELD the two text sections together.
There is an option in Design Space to move the letters close together, but I have found that this will move all of the letters closer together, and the OVE will be too close together, and only the L will just be in the right spot.
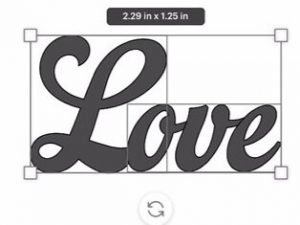
Bring the text over the heart outline and rotate the word onto a slight angle until you like the shape of it. You may need to increase the size of the text. But you want part of the L and part of the E to overlap the heart.

Once happy with the layout, weld these together as well.
Design Additional Heart and Embellishments
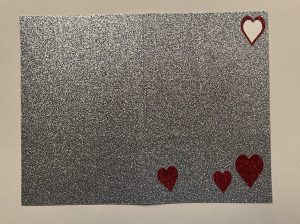
Now you can make a few more hearts to fill in any blank spaces on the front of the card. You do not need to do this. You can leave it blank, especially if you are using textured cardstock for the card itself.
I made a few more hearts, some that will be just red, some that will be red and white, and some white ones.
Check the Design
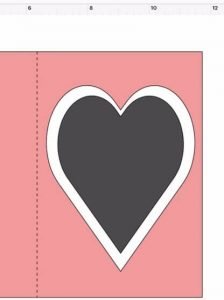
Place all of the pieces onto the front face of the card.
You will want to lay the white heart on the card face first. Then place the red heart outline with the word love on top. Arrange your embellishments the way you would like them to appear on the card.

The black heart from above will be your clear sheet.
Once you are happy with your design, hit MAKE IT, and send the design to your machine to cut.
Assembly your Valentines Day Shaker Card
Now that all your pieces are cut, it is time to start the assembly!
Let’s start with the hardest part first, and work towards an easy finish. So let’s start putting the heart shaker together first.
Assemble the Heart Shaker
For the heart assembly, we will be working with
- the white and clear hearts,
- the red heart with love,
- a bunch of glitter/gems/confetti,
- double-sided foam tape and
- glue
Attach the clean heart to the red love heart. There are 2 ways to do this. You can use glue to glue them together, or you can use double-sided foam tape. Both work well, but glue takes longer to dry. Once the clear sheet is attached securely to the red heart, use the double-sided foam tape and apply it all the way around the red heart. Make sure not to leave any gaps around the heart.

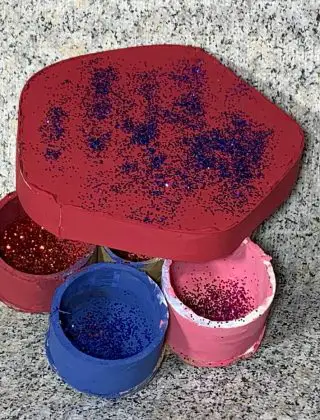
Once the tape is on, place the card face down (tape facing up) and add some glitter, confetti and gems. You want to add enough so that it is about 1/4 of the heart full. This may be messy.
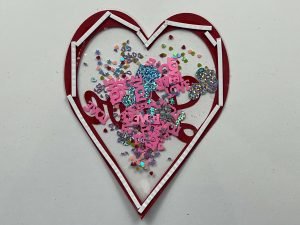
Once you have enough stuffing in the card, remove the tape backing and place the white heart on top of the tape and hold it down. When you flip it over, you will have your shaker heart done.
Give it a shake if you would like.

Combine all the card pieces
Fold the card in half. The score line should help with this.
Add the embellishments first. If you are using glitter cardstock you will need to use a lot of glue. I find placing a heavy book on top of the card helps keep everything in place.
Apply glue to the back of the shaker heart, and glue it onto the card. Depending on the cardstock used for the card, you may need to use a lot of glue or even double-sided tape. You will need to place it under a book if using glitter cardstock.
Now write a note inside the card, and your Valentine’s Day Shaker Card is complete!
That’s it! Your Valentines Day Shaker Card is done!
Things I learned Along the way – Tips for Making a Valentines Day Shaker Card
- Size matters! Making a small card is not ideal for shaker cards. They are hard to work with, and then provide very little space for adding in the beads, glitter and confetti to make the card amazing. You CAN make a small shaker card, but I do not recommend it. I found that bigger was better. That is why I opted for making a 10.75″ x 8″ card unfolded, and 5.375″ x 8″ folded.
- Glitter and confetti get everywhere! When adding your shaker bits, be it glitter, confetti, gems or whatever, make sure you are using a steady hand. Have your card flat on the table and do not have kids running around because they will contribute to making a very big mess.
- Envelopes – based on the size of this card, I have not designed a fancy envelope. You can buy standard envelopes to fit these cards. I have not found nice cardstock that is 24″ x 12″, and 12″ x 12″ is just a little bit too small to make it work.
Did you enjoy this tutorial on how to make a valentine’s day shaker card?
Did you enjoy this tutorial on how to make a Valentine’s Day shaker card? Let me know in the comments below.
If you like this tutorial, be sure to check out my other paper crafts here.
If you need to make more Valentine’s Day Gifts, check out this Heart-Shaped Candy Box