So, I started making shaker cards the other day, and I can’t stop. The other day I posted how to design a Mother’s Day Shaker Card with all Free Shapes in Design Space. (You can read that post here). Now, it is time to assemble our Mother’s Day Shaker Card because what good is a design without a final product, right? So, let’s jump in and assemble our Mother’s Day Shaker Card.
As an Amazon Associate, I earn from qualifying purchases. This post contains affiliate links. I may receive a commission if you purchase an item from one of my links. This will not change the price you pay.
Supplies Needed to make a Mother’s Day Shaker Card
Shaker Cards are fairly simple to make, a bit messy, but simple. So, here are the things we need.
- Shaker Card Design – You can check out this post on how to design this shaker card. I designed it in Cricut Design Space, but you can use any other Design Program you like. My other go-to design programs are Vectornator for my iPad, and Inkscape when on my computer.
- Card Stock – For this card, I will be using mostly scrap card stock pieces I have left over from other projects, but they came from more fancy cardstock collections, instead of the plain one-color card stock I have used on other projects recently.
- Glue – I use Bearly Art Craft Glue – This is my go-to glue for cardstock since it dries quickly and doesn’t leave stains when dry.
- Double-Sided Foam Tape – For the shaker card to work you need some thick tape to make space between the cardstock and clear sheets.
- Gems/Glitter/Confetti – As suggested by the name, a shaker card needs stuff inside to shake around. You can use gems, glitter, confetti, or whatever you like. Using themed confetti is always fun as well.
- Cutting Machine – I use my Cricut Explore Air 2, but you can use any Cricut model, or a Silhouette as well.
- Clear Sheet for the top of the shaker – There are lots of things you can use for this. I have found that using zip-lock freezer bags works well, as they are clear and cheap. You can also use paper protector sheets, the thicker ones are better, but you can use thin ones as well. And if you want it to be very rigid and sturdy, you can use acetate sheets for crafts, or you can use acetate sheets for baking which come in a roll for cheaper.
- Envelopes – For this craft, we are not designing envelopes, you can create your own, or buy large card envelopes here.
- About 15-20 minutes to assemble the card.
Let’s Start Assembling our Mother’s Day Shaker Card!
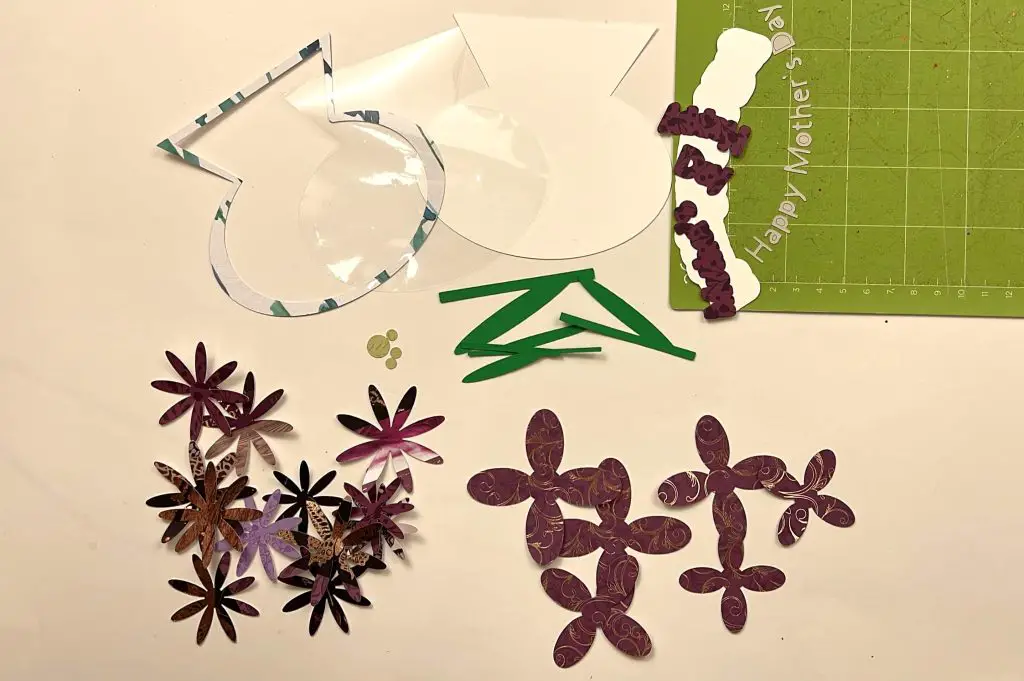
Ok, so we should have all of our pieces designed from the previous post, and now it is time to put it all together. All of our pieces should look something like this picture. And we should have:
- 3 daisies – a total of 4 petal sections for each daisy, a total of 12 petal sections, and 3 center pieces. All cut out in cardstock.
- 1 waterlily – this contains 6 petal sections and one center piece. All cut out in cardstock.
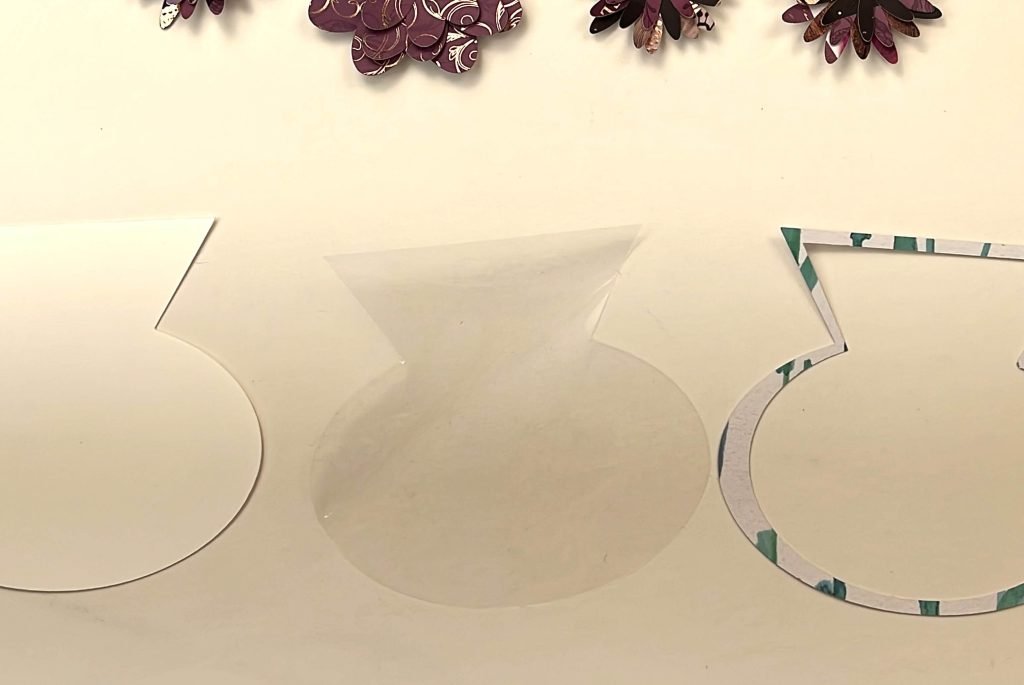
- Shaker Vase – this includes a solid vase back and a vase outline cut out in cardstock, and a solid vase plastic sheet cut out either in acetate or another clear film.
- Flower stems – 4 paper stems cut out in cardstock.
- Text – Your Happy Mother’s Day sentiment, cut out in either cardstock or vinyl, and your two text offsets.
- Card – and finally, your card. This should be cut out in cardstock. I waited until all of my flowers, vase and text were assembled before I cut out the card. This way I could pick a textured cardstock that matched the whole theme.
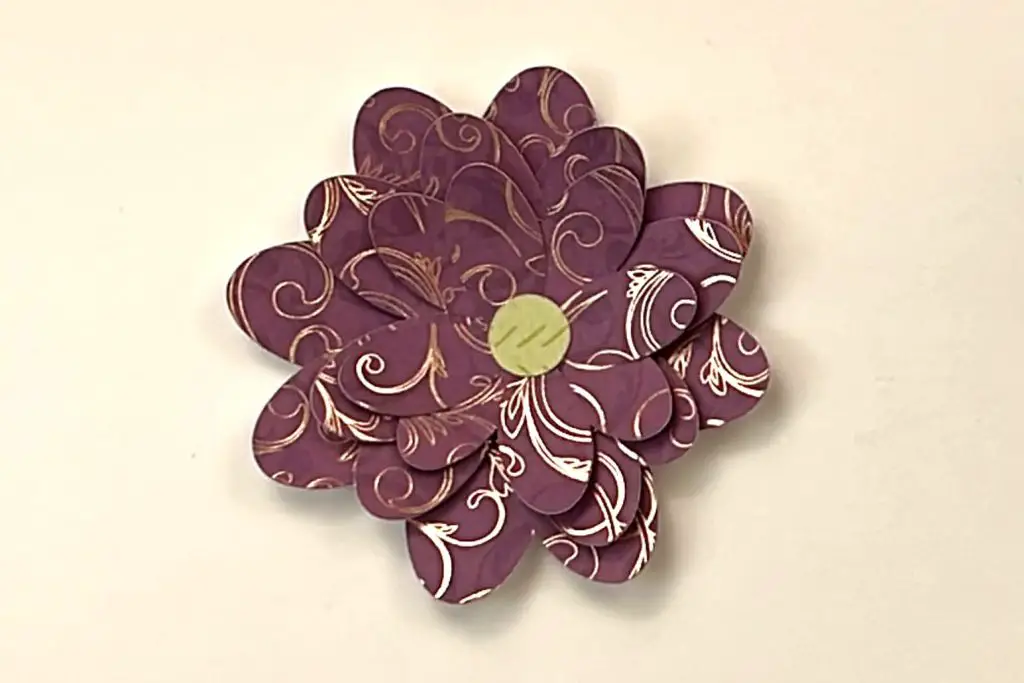
How to Assemble a Daisy
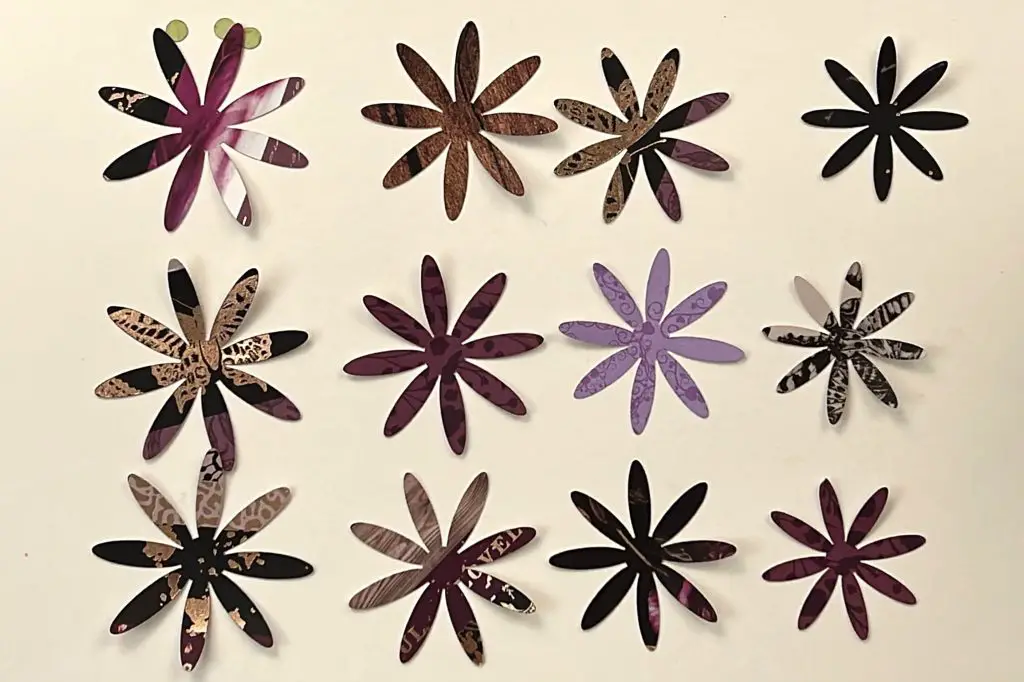
When cutting out the petals for the daisy, I used left over textured cardstock from other projects that I had done. So each petal section of the daisy is a different color with a different pattern.
The first thing that I recommend doing is sorting the daisy petals. Each daisy has 4 petal sections, each one smaller than the last. Organize the petals for each flower, so that you do not end up having the same size petals in any one flower. If you used all different colors as I did, now is the time to mix and match colors to make your flower colors look beautiful together.
Once your flowers are organized, using your thumb and pointer finger, gently roll the petals upwards on each petal. I found that rolling the petals individually gave the flower more depth, but you can do this at the very end if you prefer.
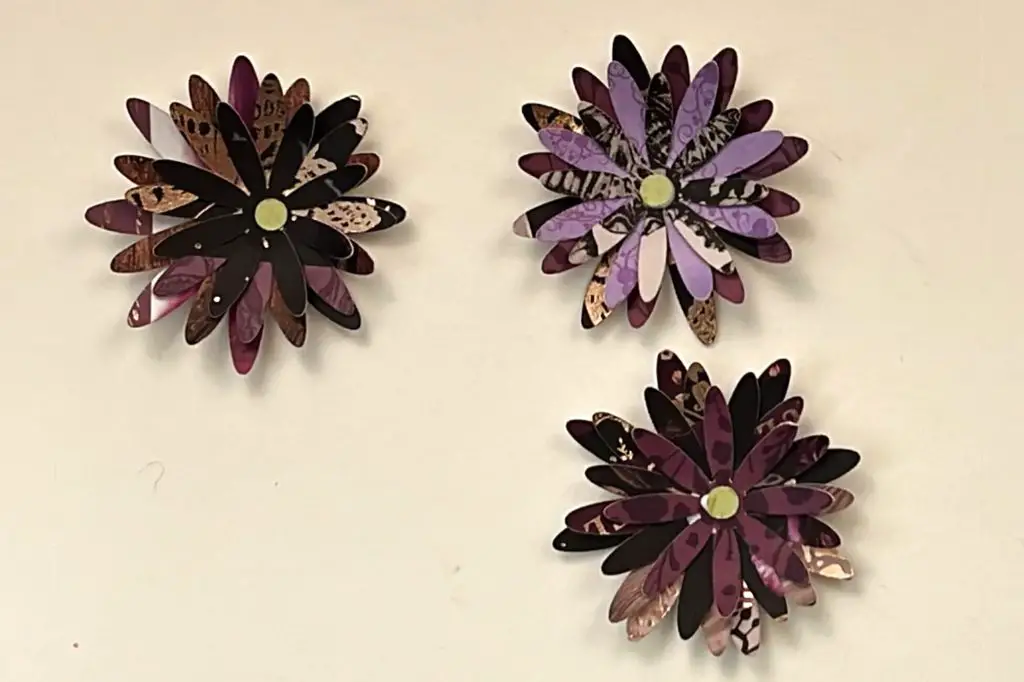
Once happy with the shape of the petals, use a dab of glue in the center of the largest petal and place the next largest on top. Repeat this for all 4 petal pieces. Then, finally, glue on the little center circle.
Now repeat this process for the remaining 2 flowers.
Once the daisies are assembled, put them aside and let them dry.
How to Assemble A Waterlily
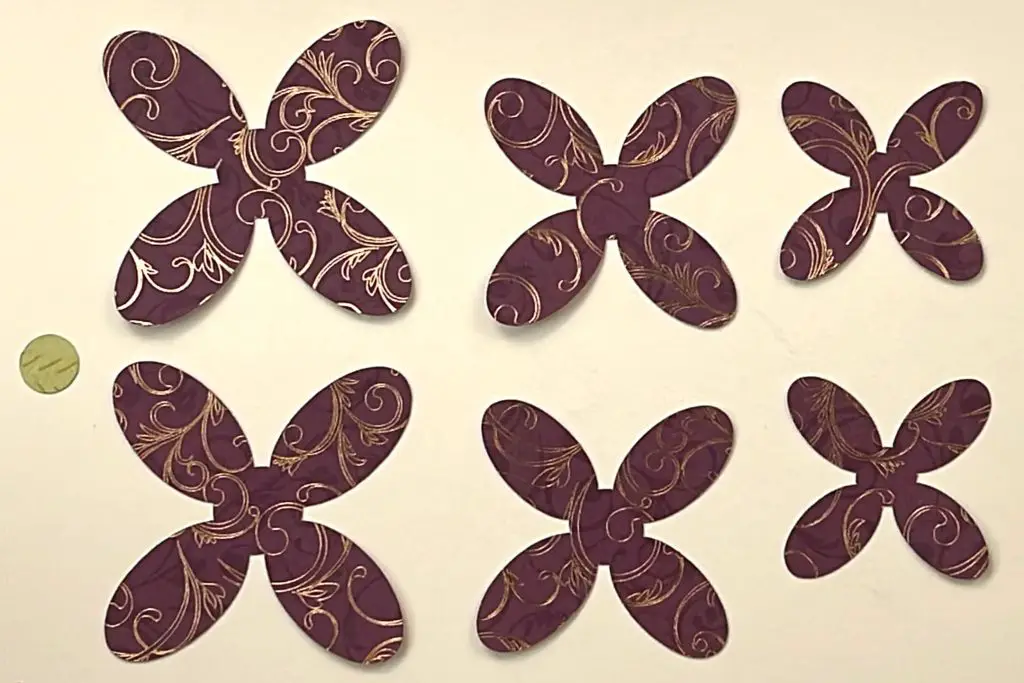
For my waterlily, I decided to use one color of textured cardstock. So all of the pieces are the same color, albeit a bit different based on where the flower was cut on the textured cardstock.
Again, we need to organize our petals.
Remember, in our design, there were 3 sections of petals and each section had 2 parts.
Arrange the petals in large, medium and small.
Once your petals are organized, using your thumb and pointer finger, gently roll the petals upwards on each petal. I found that rolling the petals individually gave the flower more depth, but you can do this at the very end if you prefer.
There are 2 ways to glue the petals together.
- You can glue each section together first, (large with large, medium with medium, and small with small) and then glue the three sections together, but slightly rotating the petals, so they do not completely overlap.
- You can glue each section together, one at a time, slightly rotating each petal section, so they do not overlap.
Either option for assembling the petals on the waterlily works great. Once the flower is glued together, glue on the center circle of the flower.
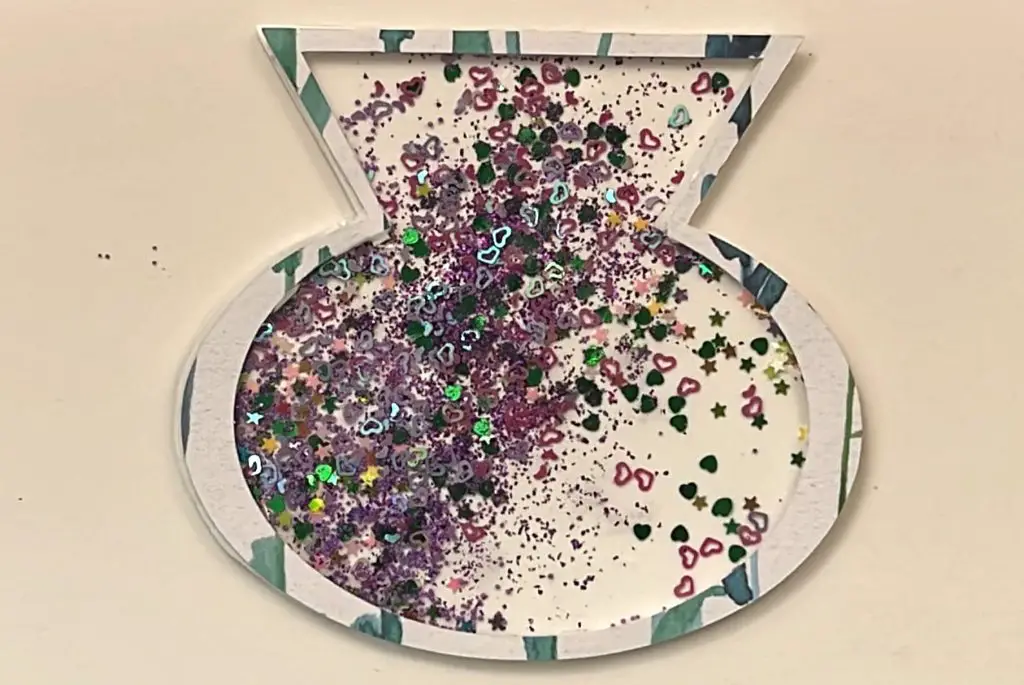
How to Assemble the vase
The vase is the most important, and as a result, the most challenging piece to put together. So, let’s start and prepare to get messy.
The first thing I like to do when working with the shaker part of any card is to glue the clear acetate sheet to the outline of the shape, in this case, the vase. As this shape is not 100% symmetrical, aligned the vase outline, the acetate and the vase backing. Once happy with the way all the pieces are facing, apply the glue to the cardstock outline of the base and place it on the acetate sheet. Once these two pieces are together, place them under a book to dry.
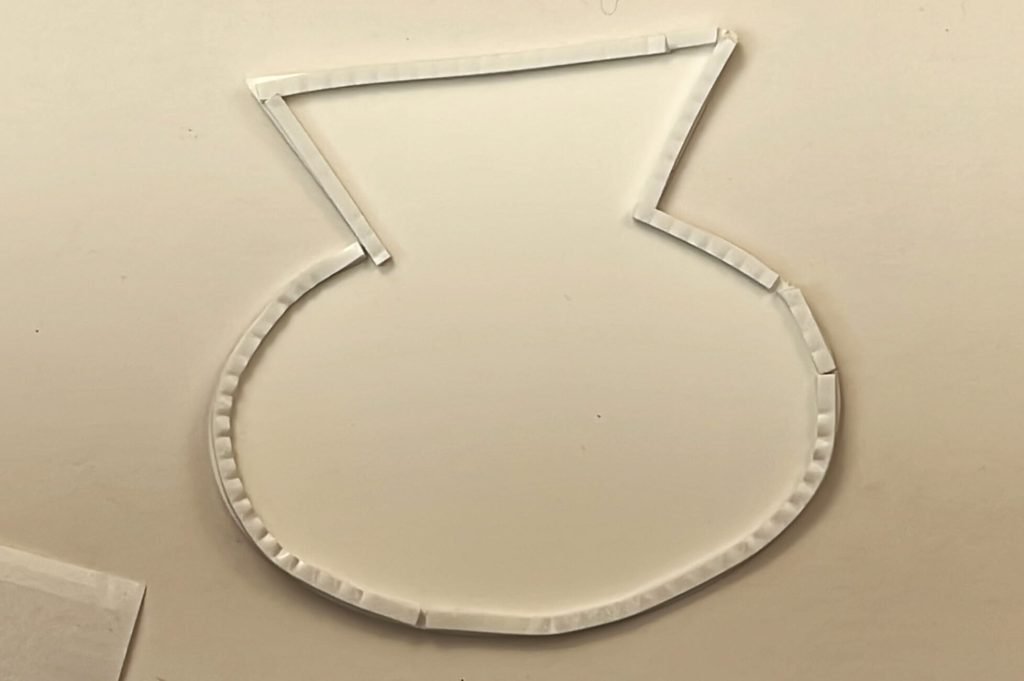
While these pieces are drying, using the double-sided foam tape, apply the foam tape around the edge of the back vase piece. Make sure there are no gaps between the pieces of tape. Do not remove the backing on the top of the tape yet.
Now for the messy part. Using glitter, gems, beads and confetti, whichever you have chosen, sprinkle a bunch into the vase. I like to use a lot so that there is some substance inside. I also try to match the glitter and confetti with the flowers, but this is not necessary.
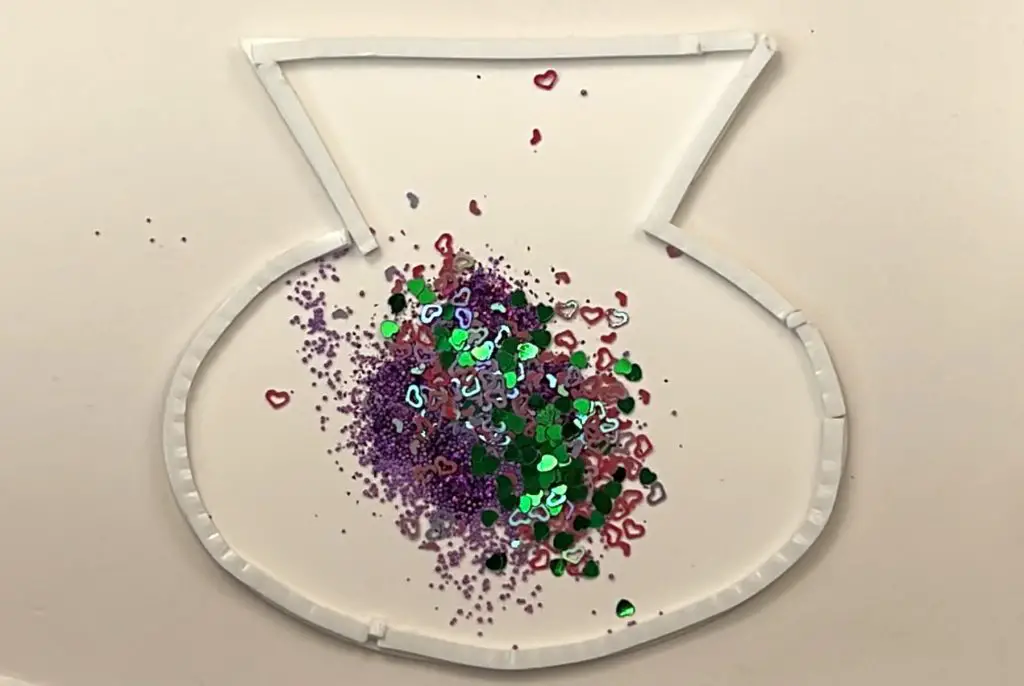
Once happy with the amount of glitter and gems inside, carefully remove the backing on the tape. Remember that tape is sticky, and your hand will stick to it if you touch it. And if your hand touches it, when you try to peel your hand off, the glitter and confetti will go flying everywhere. I know from experience. Sometimes, using reverse tweezers or a pick tool helps, but not always.
Now that you have a confetti and glitter mess, it is time to place the acetate sheet with the vase outline onto the double-sided foam tape. Carefully place the acetate onto the foam tape. Press it all the way around to make sure the tape is holding to the acetate.
Ok, the hard part is done!
Assemble the text
When we were designing the text, we had the sentiment written out as “Happy Mother’s Day”. Then we had 2 offsets to have sentiment pop. Working with text is always a challenge for me, and I prefer to use vinyl instead of cardstock for individual letters, but if you are a cardstock fan, you can use cardstock. I have done both so you can see which one you like.
Before we focus on the individual letters, let’s work on offsets, as this is the same for both methods.
Make sure your offsets are aligned and flipped in the proper direction. Then, simply apply glue to the smaller offset and glue it onto the larger offset.
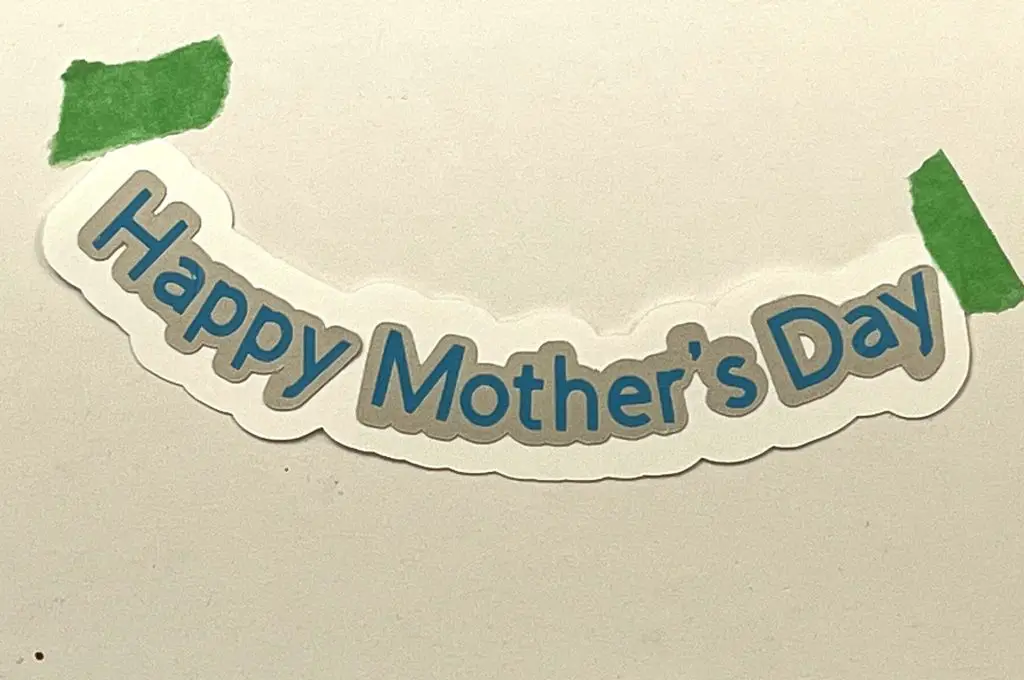
Text with vinyl
When using vinyl for letters, the first thing we need to do is weed the outside and inside of the letters. Then, place the vinyl face down onto the sticky side of the transfer tape. Using your burnishing tool, press the vinyl onto the transfer sheet. I find it is best to press on the front first and then press the back several times.
Once you are happy, remove the backing from the letters off the transfer sheet, not the transfer sheet from the backing.
I like to tape down the offsets with green painter’s tape to hold them in place. This way, the cardstock won’t move or pull up to the transfer tape while you are doing your finishing touches.
Align the letters over the offset, and slowly but firmly place them down onto the cardstock.
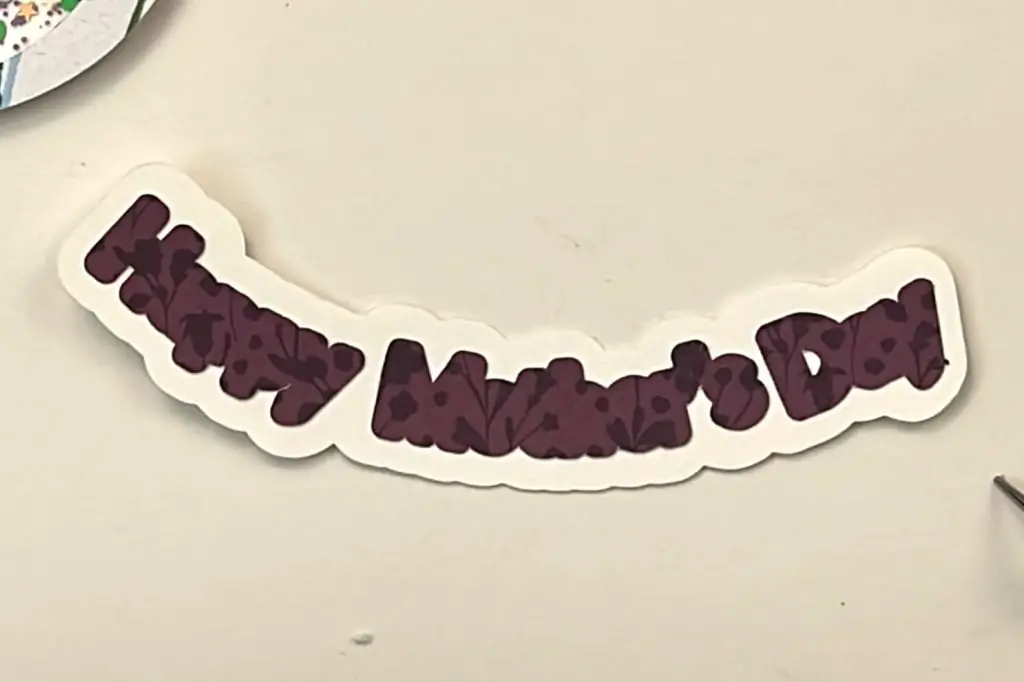
Text with cardstock
When working with cardstock for letters and phrases, I like to keep the work on the cutting mat until I need each letter.
Appling glue onto the backside of each letter, one at a time, place the letters where they belong on the offset.
This requires patience and some skill to align the cardstock. This also takes some time to do each letter.
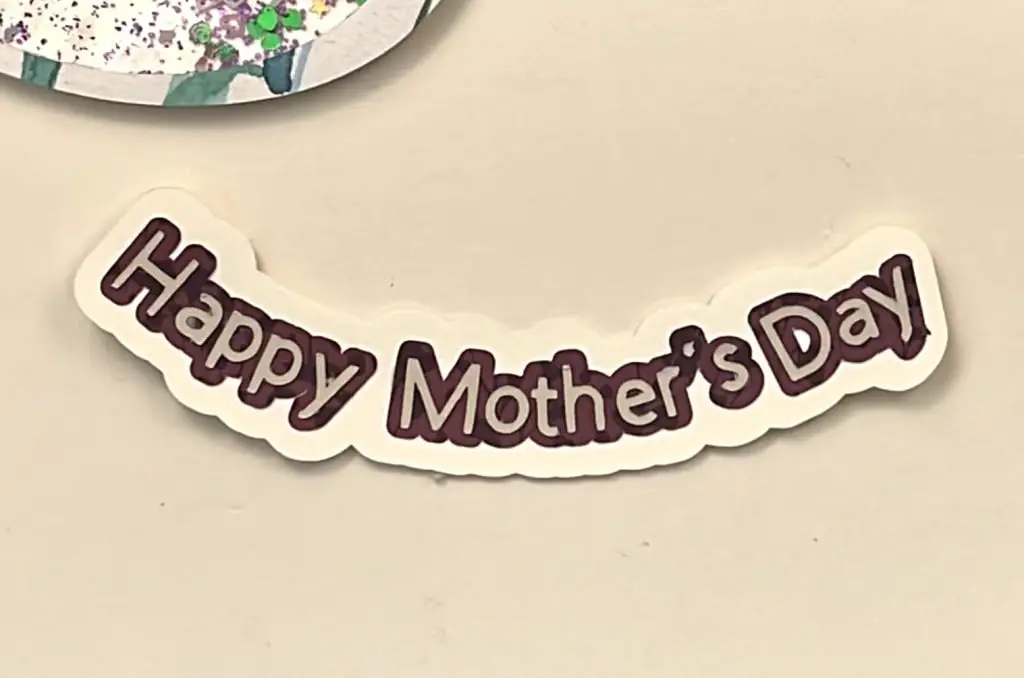
And now your sentiment is completed for the Mother’s Day Shaker Card.
Assemble your Mother’s Day Shaker Card
OK, now we have all the pieces ready to assemble our Mother’s Day Shaker Card.
If you are like me, and not good at picking colors, now is the time to figure out what color you want your card to be. I ran through several different color combinations by placing my loose card pieces onto different textured cardstock to see which worked best. Once happy with the look, I cut out the card on my Cricut.
Hopefully, you remembered to put your scoring stylus into your machine before you hit Make It, and folding the card is easy.
WITHOUT using glue, arrange all of the pieces of the card on the card to see how they fit.
Once you are happy with the placement of all of the pieces, use your glue and glue everything together. Make sure that all of the pieces of your card stay within the edges of the card itself, as you will need to fit this into an envelope.
I found that gluing in this order seemed to work well:
- vase – I found that leaving a gap at the top of the vase is helpful so that you can slide the flower stems into the top of the vase,
- Waterlily & waterlily stem,
- Daisies and stems at the same time,
- Sentiment onto the vase.
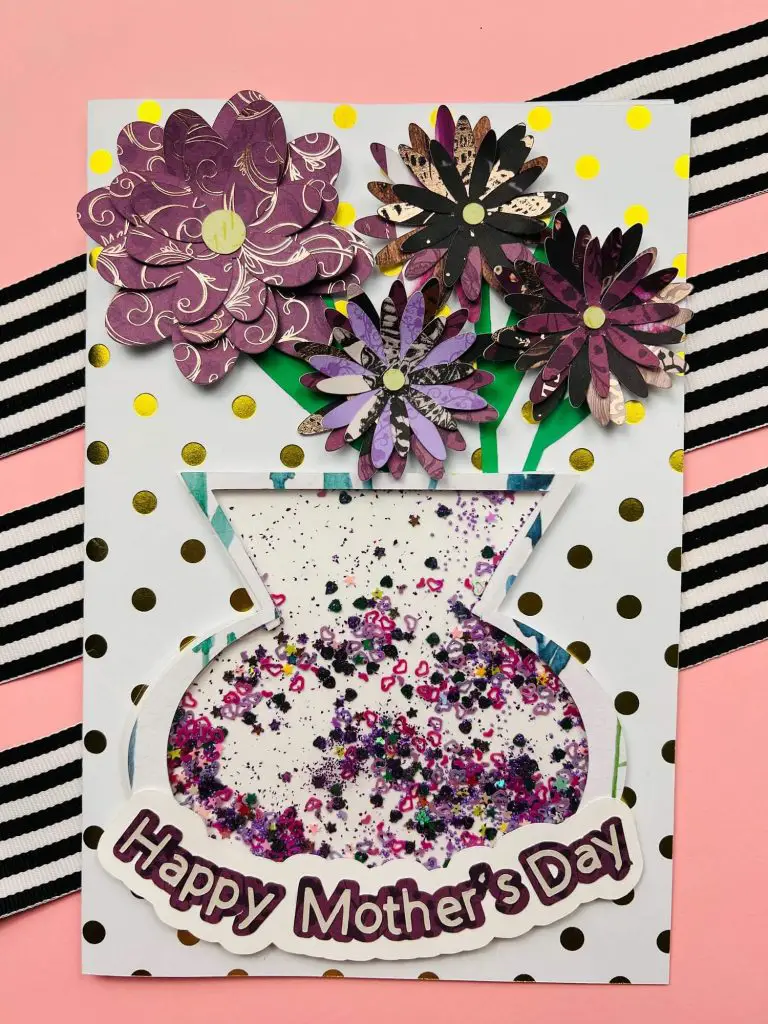
And that’s it!
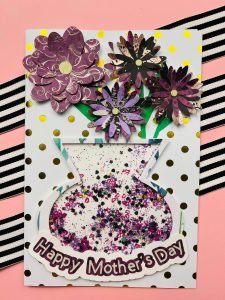
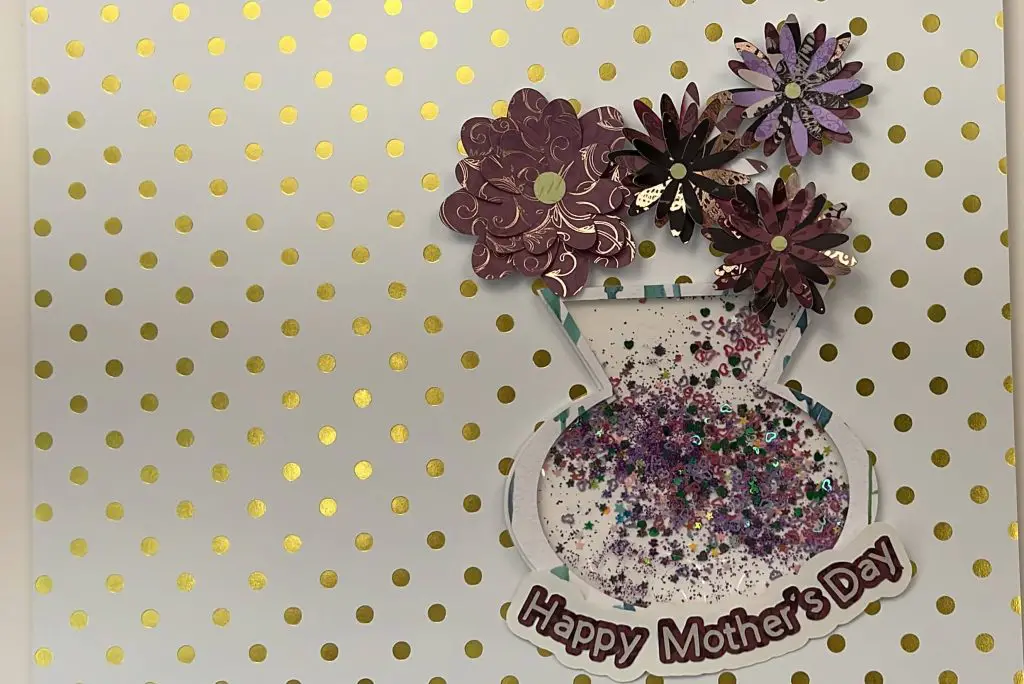
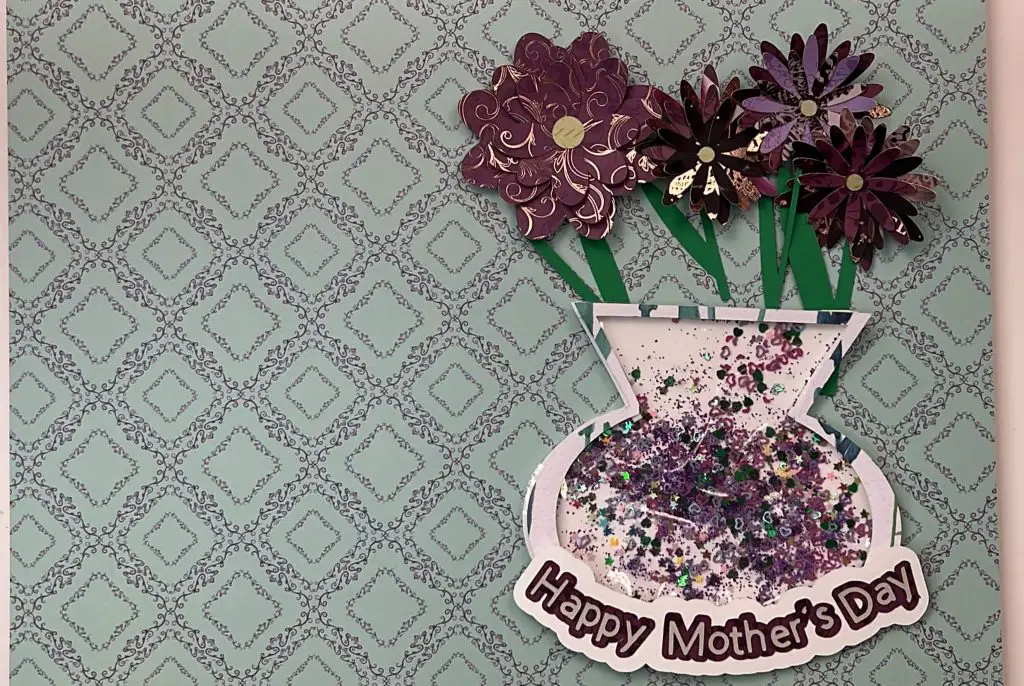
And That’s It! Your Mother’s Day Shaker Card is Complete!
Things I learned while assembling this card
So, what did we learn with the shaker card assembly? Well, here goes:
- Flower petals can be rolled before or after gluing. It takes more time to do each petal beforehand, but it also gives a bit nicer look. I find it gives the flower more depth. But you can just as easily, and more quickly roll the petals after the flower is all assembled to give it depth, and it still looks beautiful.
- Working with text on cardstock can be challenging. Especially if you are using a small text. I prefer to use vinyl. I find that it applies to the cardstock faster, and is easier to have it aligned properly. It has a bit less dimension than cardstock as it is typically thinner, but I like how it looks. I think it’s worth giving a shot.
- Leaving a gap at the top of the vase, when gluing it onto the card is very helpful. This way you can adjust the flower stems easily to fit the space you have. If you do by chance, glue the top of the vase, you will simply need to trim the stems to fit. The nice thing about the stems is that they are only there as minor decorations and are not nthe centerpiece of the card, so if they are slightly off, no one will notice.
Did you enjoy learning how to assemble a mother’s day shaker card?
Did you enjoy this tutorial on how to assemble a Mother’s Day Shaker Card? Let me know in the comments below if you made one and how it turned out!
If you enjoyed this paper craft, be sure to check out my other paper crafts here: