In my previous post, I explained how nagic and wands are the latest craze here at my house. So, we designed a custom wand box. Now, it is time to make the custom wand box. This is a simple process, so lets get started!
As an Amazon Associate, I earn from qualifying purchases. This post contains affiliate links. I may receive a commission if you purchase an item from one of my links. This will not change the price you pay.
Supplies needed to make a custom wand box
This craft does not require many supplies but does need a few things.
- Cardstock – I like to use Recollections Paper, but I also find that 12”x12” card stock from the local dollar store works well.
- Glue – I use Barely Art Precision Craft Glue. It dries quickly and does not leave creases on the paper when dried.
- Clear plastic for the display window – I used a large zip-lock freezer bag, but you could use clear acetate sheets if you have that instead.
- A wand – this is not required for creating the box, per se, but you will need one to put into the box and to measure when making the box. I printed a wand with my 3D printer. I got the free file from here. If you don’t have a 3d printer, that is ok, too. You can always just use a stick from a tree.
- A custom wand box design – You can follow along with this tutorial to make your own, or you can sign up for my news letter below and gain access to my design located in my resource library.

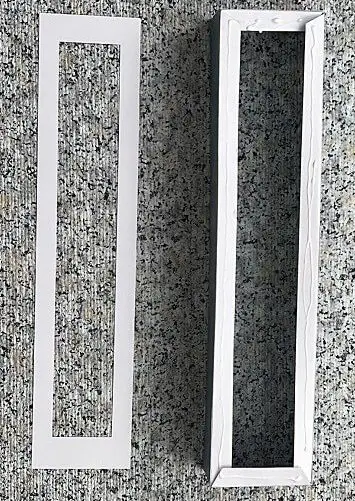
Assemble the Wand Box
Now that all the pieces have been cut out, it is time to assemble the box.
Before pulling out any glue, it is a good idea to fold all the score lines and make sure you match the top and bottom pieces together. You do not want to mistakenly combine top and bottom pieces together.
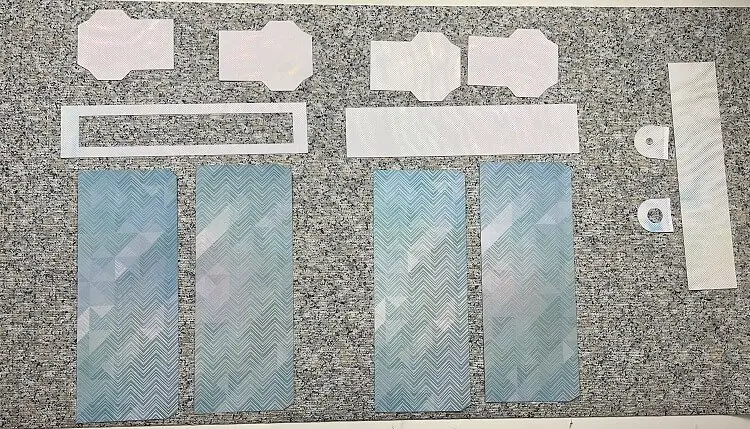
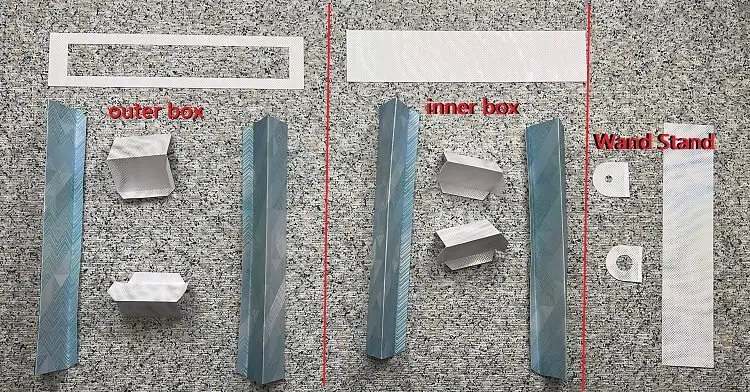
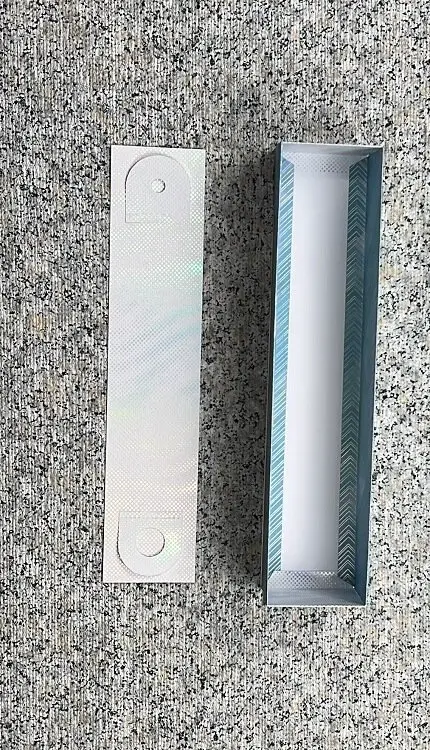
Assemble the Inner Wand Box
The Inner Wand Box has 5 main piece and 3 pieces for the wand stand.
Focusing just on the box pieces, glue all 5 pieces together.
I found that attaching the walls together first and then attaching them to the base worked best.
Also, remember that the walls will be folded in half to have a fancy design inside the box, so those flaps will need to be glued down as well.
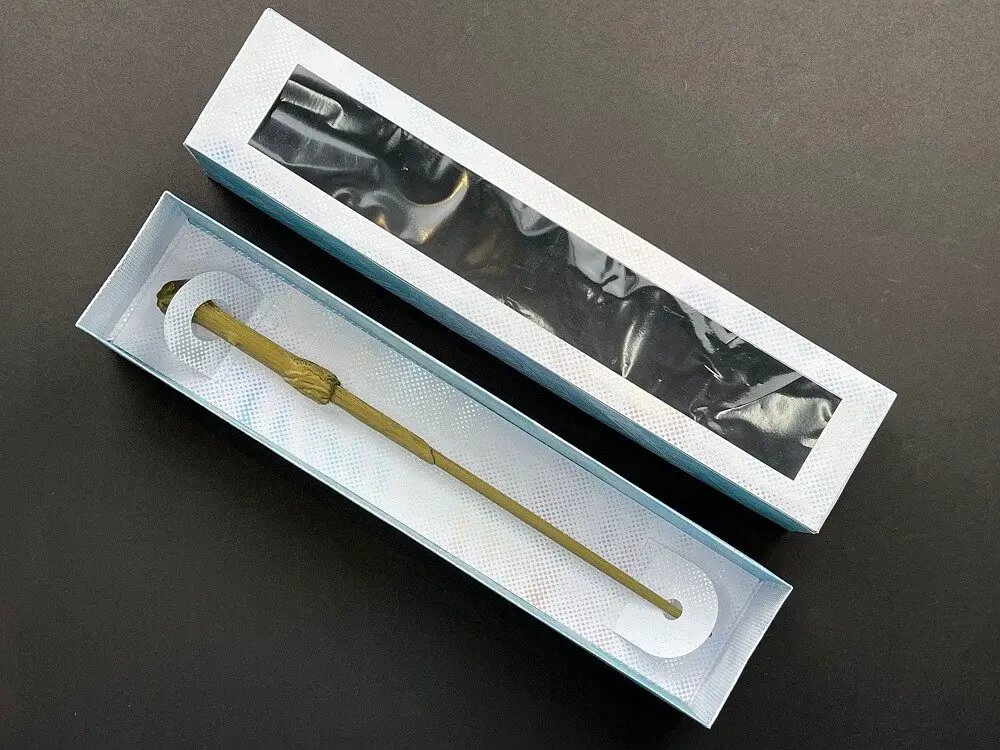
Assemble The Wand Stand
Making sure that the score lines are folded on the wand stand and allowing the design side of the cardstock to be facing upwards, glue the tabs onto the single rectangle.
It is a good idea to check the location of these tabs with the wand in hand before gluing them into place. If the tabs are too close together, the wand will not be able to get in/out of the box.
The wand stand can be glued into the inner box if you want, or it can be loose to help take the wand in/out.
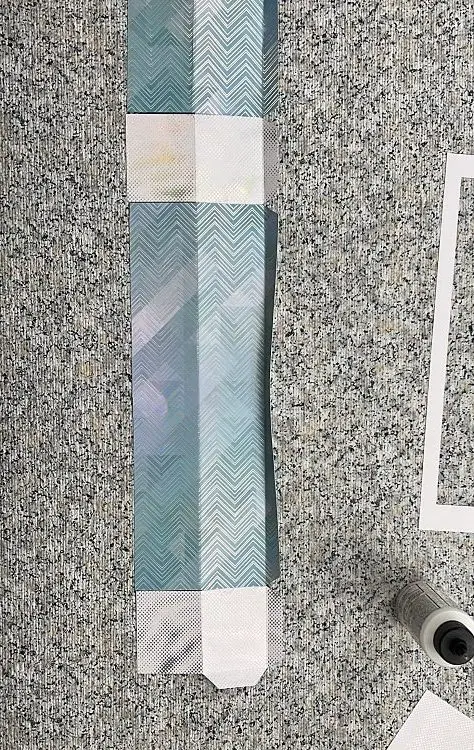
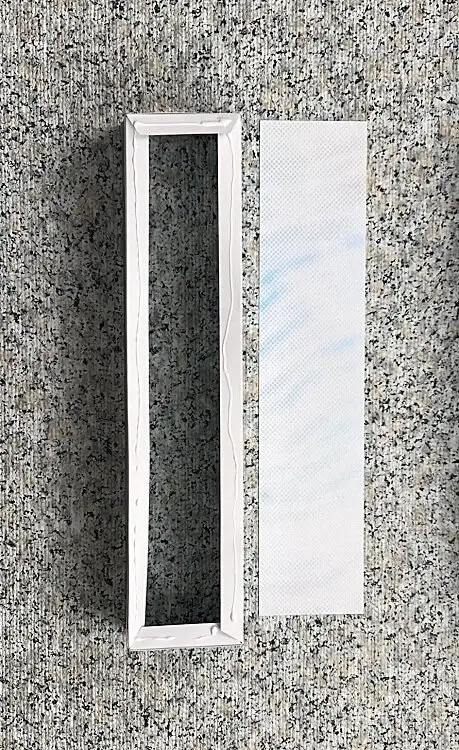
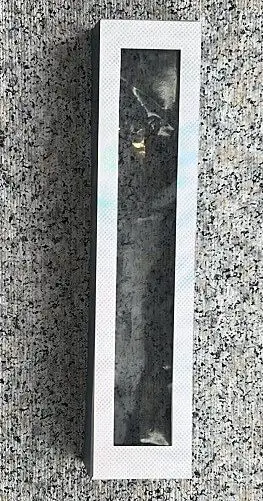
Assemble the Outer Wand Box
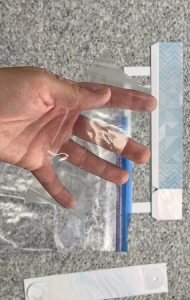
One thing that was not cut with my Cricut was a plastic sheet for the front peek-a-boo window of the wand box. I simply cut a rectangle from a large Ziplock freezer bag at 11.5″x 2.5″. This plastic sheet was glued onto the front face of the box before the side walls were attached to the front face.
Once the glue dried, I glued the side walls the same way as detailed above for the outer box.
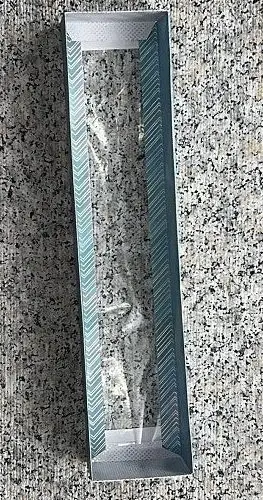
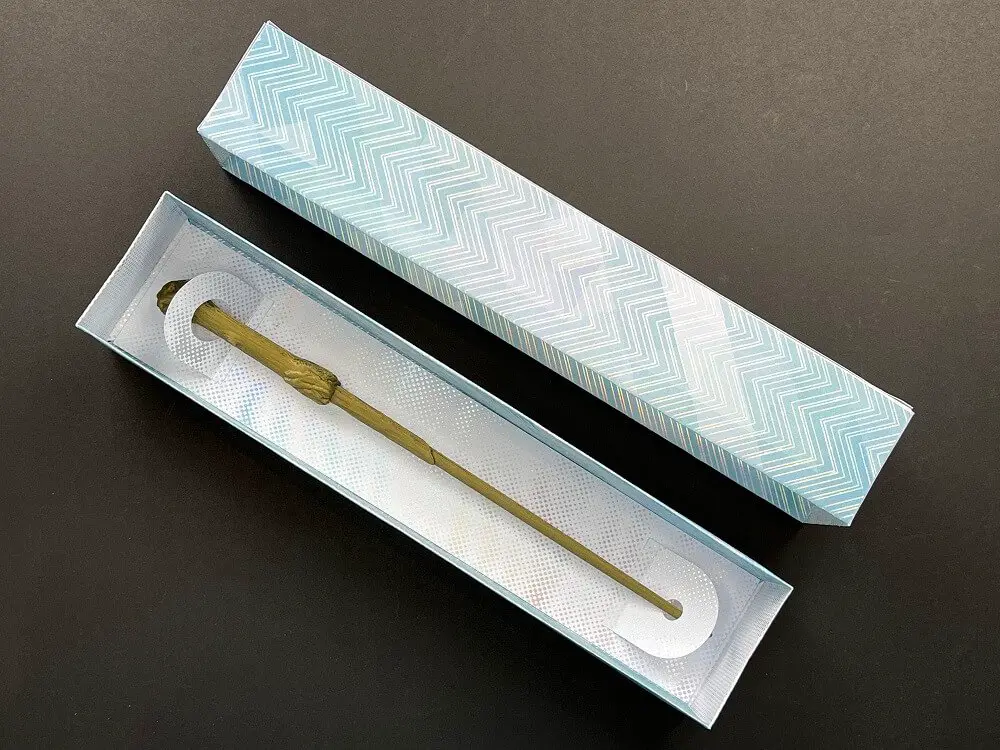
Let the glue dry, and insert your wand because your wand box is done!
And That’s It! Your Custom wand Box is Complete!
Frequently Asked Questions about Custom Wand Boxes
What if my wand is larger than the available 12″x12″ cardstock?
Some wands I have found are 13″ or longer and will not fit into a box that is cut from 12″ x 12″ cardstock. You can use 12″ x 24″ cardstock, but I have not found many nice designs on that size of paper. So you would be restricted to making simple solid colors.
You can use poster board and cut the sheets into 12″x24″, but again, there are fewer design options.
If you want to use fancy colorful cardstock, you could always increase the design size I have listed above, cut the design in half and add some tabs to join the box base and walls after they have been cut.
Does my custom wand box need to have a peek-a-boo window?
No, it does not need to have a peek-a-boo window. I thought having a see-through window was a nice addition so that you can see the wand inside.
What material is best for a peak-a-boo window?
I found using a Ziploc bag worked well as they come in large sizes, and I don’t do much crafting with transparent material. However, you could buy larger quantities of clear acetate sheets.
Did you find this tutorial helpful?
Did you find this tutorial on making custom wand boxes helpful? Let me know in the comments below. If you made this craft, share your thoughts and pics below!
If you liked this tutorial, don’t forget to check out my other paper crafts here.