Paper Hydrangeas
As I learn more and more about the crafting work, I thought I would expand my knowledge base and make some paper hydrangeas. But to make this task a bit more of a challenge, I decided to also design the petals. Now, I know there are lots of free and paid versions out there, but me being me, I thought this was as good of a time as any to start learning and expanding my papercraft skills. And that is how I stumbled upon how to make beautiful paper hydrangeas.
This post contains affiliate links. I may receive a commission if you purchase an item from one of my links. This will not change the price you pay.
What You Need:
- Paper. Lots and lots of paper. – This is the paper I use. Make sure when you are using paper for flowers, you buy paper with a solid core. This means the middle of the paper is the same color as the outside. Paper without a solid core is white on the inside.
- Styrofoam balls of varying sizes.
- Pins – These are the ones I used.
- Cut file.
- Cutting machine – I use my Cricut.
- A base for the flowers. A vase, a jar, or anything you wish. But you need to commit to something at the start of the project.
Let’s Begin!
Get the design
As I mentioned above, there are numerous free and paid versions of paper hydrangeas. You can also make your own. But, as you are here to learn from me, you can download my free design below.

Get your Free Paper Hydrangea Cut File Here!
Just sign up for my newsletter,
I will send you the file.
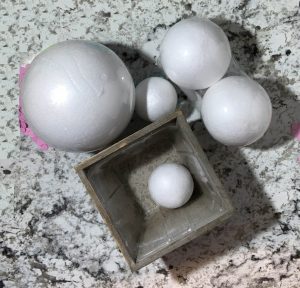
Select your styrofoam ball sizes
Select several styrofoam balls of varying sizes. This will be the body of your flower. I recommend not going crazy with the number of styrofoam balls or with the size you select.
The large ball I used was 5-inches, and it may have been a bit too much. The remaining balls I used were 2 and 3-inches in size. That was a much more manageable size.
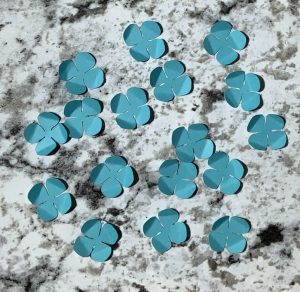
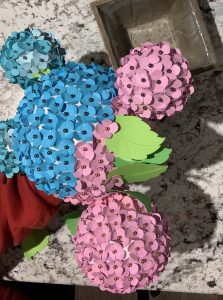
Cut, cut, cut
You will need a lot more flower petals than you think. Depending on how close you want the petals, you can use upwards of 50 flower peddles on a 2inch diameter ball.
I picked varying shades of purple and blue. Those colors remind me of the hydrangeas my mom had. But any color will do.
I recommend cutting at least 200 flower petals to start.
I sized the petal to be 0.75-inches in height.

Fold or crease your flowers
It is a good idea to crease all of my flower petals at once. So, I planned an evening of Tv watching to get this done.
I just used my fingertips and curled the edges a bit to give the petals some shape. Any pen or round edge would also work.
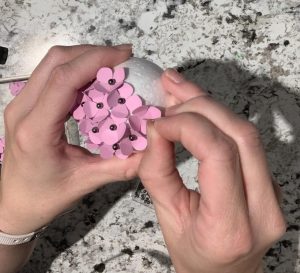
Attach the petals
Prepare yourself for a very long activity here, as attaching the petals can take a while.
Each petal requires its own pin. There are a few ways to attach the pins to the petals and then to the Styrofoam ball.
- Use a pincushion – Place the flower petal on the pincushion. Push the pin through the peddle, then move to the Styrofoam ball and insert the pin and flower petal into the ball.
- Place the flower petal on the ball and insert the pin through the petal into the ball.
- Other…? I am sure there are others, but I did not think of them.
Repeat the above for all of the petals until the Styrofoam ball is covered.
Attach all the Flower Balls Together
My initial plan was to use pipe cleaners to attach the Styrofoam balls together. However, this required that the balls be attached before adding all of the petals. This proved to be rather tricky, and everything started to fall apart rather quickly. So, instead, once all of the petals were installed on all of the Styrofoam balls, I used toothpicks. I inserted 2 on each ball for added support and pushed it into the 5-inch ball.
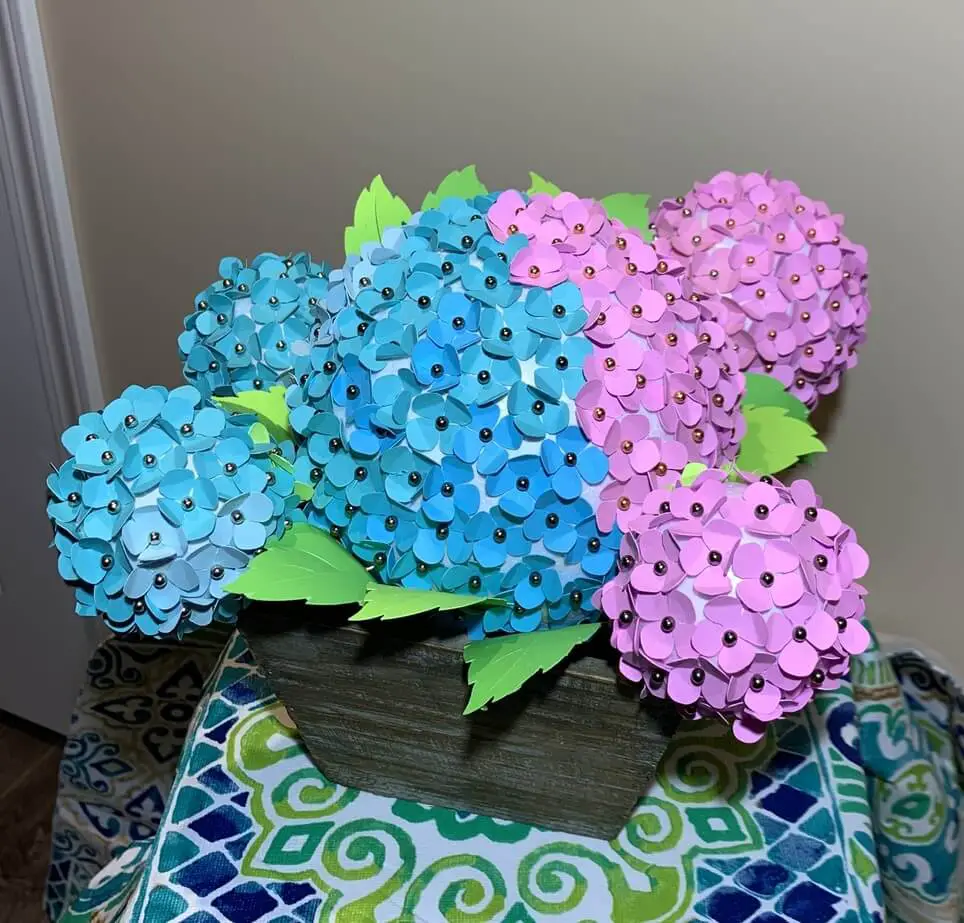
Attach all of the foam balls together and place them on your vase, jar, or whatever flower container you are using.
Optional – add leaves
I just found some random leaves in Design Space that were free at the time, and I printed off about 20. I rolled them to give them some shape and attached them to the flowers around the edges of the flower box that I used to make it look more life-like.
And That’s It! You’re Done!
Final Thoughts and What I Learned Along the way
As with all crafts that I do, some learning takes place. Here is what I learned this time around:
- This craft takes much longer than anticipated. I hoped to be done in a day or two. By the end of the project, it took about a week.
- If you are a parent, and you bought more Styrofoam balls than you needed, make sure you hide them or give them to your kids right away. If they see them, they will want to use them. They will not leave you alone about the Styrofoam balls until you give them up. Do yourself a favor! Give your kids the extra styrofoam balls after you have committed to the number that you need. Trust me on this.
- It is helpful to play with the placement before you attach the toothpicks and the small foam balls to the larger ones. You should have a good idea of where the attachment points are going to be.
- The petals will come out if you move the ball around too much and play with it.
- I have never really been a flower person myself, but I think these turned out well, and I would definitely do them again, but maybe not with a 6-inch Styrofoam ball. I might max out at a 4-inch.
Was this Tutorial Helpful?
Did you find this tutorial on how to make beautiful paper hydrangeas helpful? Let me know your thoughts in the comments below!
If you liked this tutorial, be sure to check out my other tutorials here.
Free Hydrangea Cut File
Get your Free Paper Hydrangea Cut File Here!
Just sign up for my newsletter,
I will send you the file.

You have such creative ideas! Nice job! These are so adorable and would be fun to do with kids too.
My kids really wanted to help, but pins are not their friends just yet! Thanks!
Wow this is amazing, very creative and vibrant. Thanks for sharing..
Thanks so much!
I love this idea. Thank you so much for sharing this post. 😊
Thanks!
you make this tutorial look so easy to follow and try! I miss making paper arts.
I found this much easier than rolling paper flower. But it may have taken longer… Thanks!
Your Hydrangeas look beautiful. Thanks for sharing the great tips on how to make them!
Thanks so much! I think they turned out great as well 😉
This is so creative!
Thanks!
I love this! Thank you so much! Definitely trying soon!
very concise and informative. thanks for sharing
This is so cute. I love the design and how easy it is to make.