The Back Story of the Clothespin Bag
Like all stories, the story of the clothespin bag began with chaos on a wonderful Saturday. It was a warm sunny day. The birds were chirping, the bees were buzzing, and I had a pile of laundry 5ft high that needed washing. Just what I wanted to do on a day like that! But it is a nice day outside, and I could easily hang my laundry out to dry.
I started my laundry, load one. I took it outside and start hanging it. Of course, by now, the wind had picked up. When I came back later with load two, the first load of hanging laundry was laying on the fresh-cut grass… of course, it was….
So, off I went looking for my clothespins to keep everything stables. They resided in the same plastic bag that I purchased them in. Picture a plastic bag with several holes, no visible top or bottom, pins falling out in all directions when you pick it up, but somehow with all the holes in the bag, moisture will not escape, so they are also sopping wet.
I took them outside, losing half of them on the way, and tried to attach them to my clothes. But of course, they fall all over the ground. I have nowhere to place them so that they are handy. So the struggle continues, or as I like to say, the struggle is real.
After getting the first load of laundry fixed, finish hanging the second and third loads, I decided this was not working. Especially, since the summer just started! More laundry will dry outside!
How to Make a Clothespin Bag
I know, I know, this sounds ludicrous! Who needs a Clothespin Bag? Why not just use an old shopping bag, the bag they came in, an old container, you name it?!?!?! Or easier yet, why not just buy one from the store? But clothespins will rust in plastic bags, and the wood ones will also swell… so if you are like me and you hang your clothes outside to dry in the summer, clothespins are needed.
As you know, I do not like to waste money. If I can make it myself, I will try.
What You Need:
- Clothespins
- An old shirt. I use old shirts instead of fabric because shirts hang well on hangers, and I have an abundance of old shirts.
- A sewing machine or needle and thread. Although, a sewing machine is much faster!
- A coat hanger – I used metal ones, but plastic will also do.
Let’s Begin!
Prep the Shirt
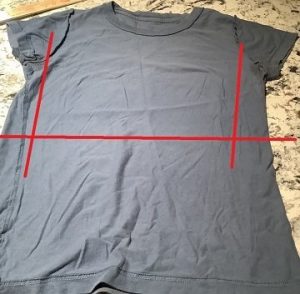
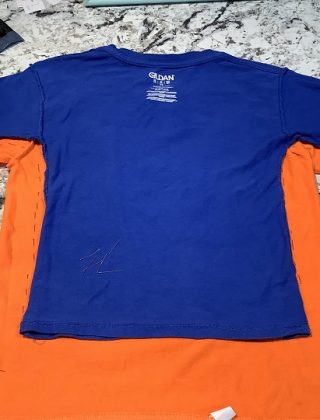
Ok, take your old t-shirt and flip it inside out.
Mark the shirt to show where you will need to sew it. This is not a precision job. I use an old bar of soap to mark the lines I need. But if you want it to look fancy, you can use pins or markers to indicate your sewing the lines.
Important: Do not mark your lines to the top of the sleeves as you need to leave space for the hanger to go through.
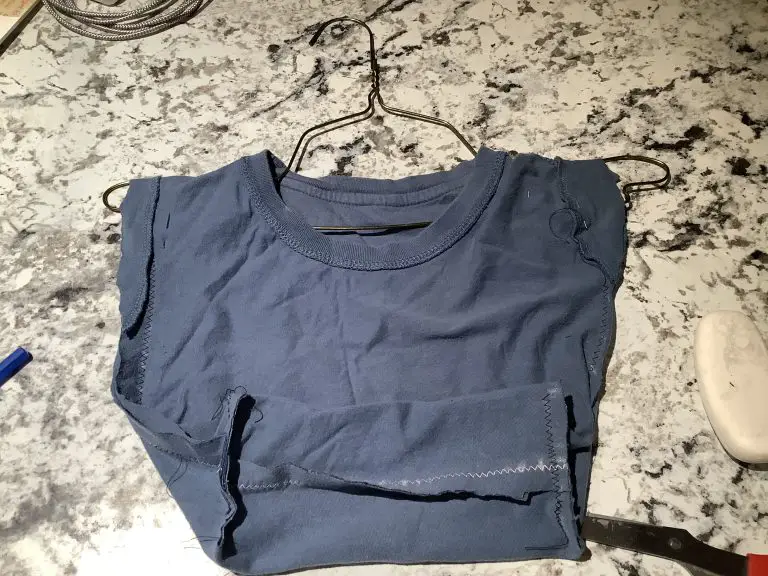
Sew the Shirt
Sew the shirt closed along the lines you have created. Again, do not sew to the top of the sleeves.
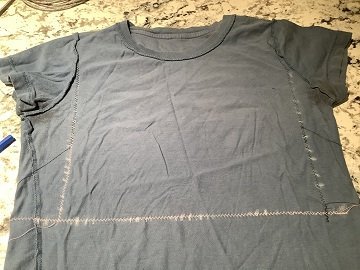
At the two bottom corners of the bag, open the shirt and fold it so that you can sew across the edge. This forces the bottom of the bag to stay open, making it easier to access the pins.
You will notice the vertical black stitching coming across the white horizontal stitches in the pic on the right.
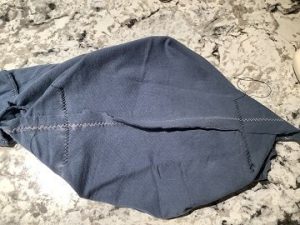
Cut all the surplus material off, including the excess triangle from the step above.
Insert coat hanger to check if it has enough room to go through the top of the sleeves.
In my case, I left too much space, so I marked it with a pin and did another pass with the sewing machine.
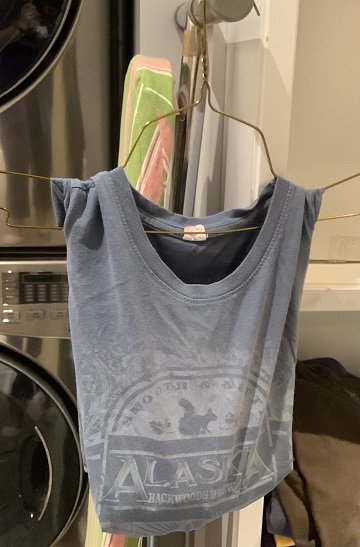
Flip shirt right side out and insert coat hanger and clothespins..
And That’s It! You’re Done!
Things I learned Along the Way
I hang dry clothes all year round.
- In the winter, when they are drying inside the house, the clothespin bag sits in a drawer. However, they get used every weekend outside from spring to autumn. Having the clothespins in a hanging bag that I can easily hang off my drying rack and is accessible makes hanging close super fast.
- Since the clothespin bag is made from an old shirt, I can always make a new one if I get bored of the design or if when becomes worn out.
- Sewing this took about 10-minutes and was well worth the effort.
- I could easily buy something at the dollar store that does the same thing. They probably sell one. But I prefer to keep my dollar in my pocket.
Was this Tutorial Helpful?
Did you find this tutorial on how to make a clothespin bag helpful? Let me know your thoughts in the comments below!
If you liked this tutorial, be sure to check out my other tutorials here.


yes, I found this tutorial helpful. I too, love hanging my laundry outside in nice weather. I have used different types of clothespin bags/containers throughout the years. Presently, I am using one that ties around my waist. It is similar to an apron, but not as long and it usually has 3 deep pockets all across the front. I like it because it simply goes with me every where and I don’t have to constantly keep moving it to use. Just my thoughts at the moment.
That’s a great idea! I was actually outside the other day with, it annoyed that it was always in the wrong spot! Thanks for the idea! I’ll have to try it out!
Loved this. I have been using an old plastic bucket (the handle broke off about a year ago) and wanted to just make a quick fix. This was perfect as I, too, have an abundance of old t-shirts on hand.