
The other day, I was making cards, cake toppers and random odds and ends with glitter card stock. And I have not used glitter card stock in a while. As a result, I forgot the best way to cut it. So, I thought it would be a good idea to talk about how to cut glitter card stock. As an added bonus, this method also works with card stock that has a white core.
And there is a very good reason why you should learn how to cut glitter card stock. If cut wrong, you will have white bits popping up in corners and around edges. And nobody wants a ruined craft because of incorrect cutting.
The Quick Trick for Cutting Glitter Cardstock
If your glitter cardstock keeps cutting with little white edges showing around your design, try this:
- Mirror your design in Cricut Design Space.
- Place the glitter cardstock on your mat glitter side down.
- Choose the Glitter Card Stock material setting.
- If the cardstock isn’t sticking securely, use painter’s tape around the edges to help hold it in place.
Then cut your design from the back of the cardstock.
Keep reading below and I’ll show you exactly how I do it and the difference it makes.
As an Amazon Associate, I earn from qualifying purchases. This post contains affiliate links. I may receive a commission if you purchase an item from one of my links. This will not change the price you pay.
Supplies needed when cutting glitter card stock.
Not many supplies are needed, but these are a few things we need:
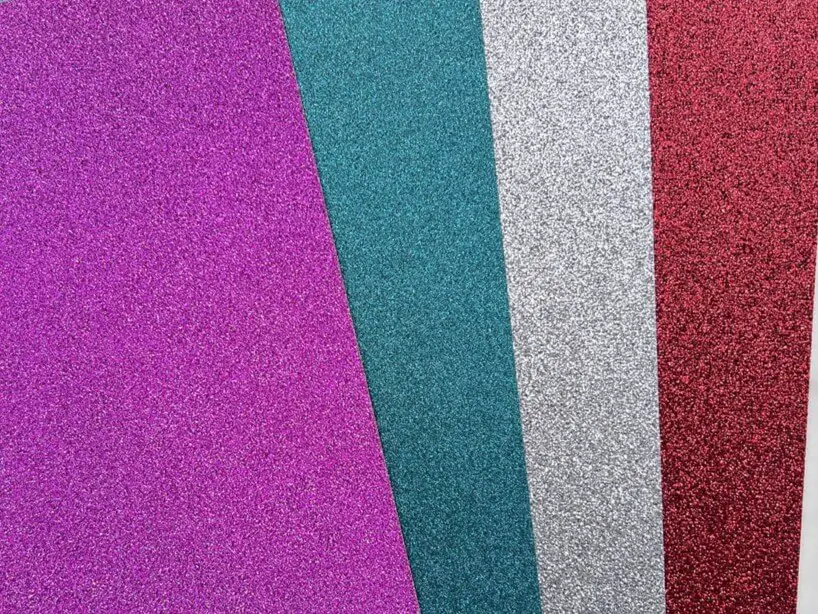
- Glitter card stock (or card stock that white-core)
- Cutting machine – I used my Cricut Explore Air 2, but any cutting machine will work.
- Cutting mat – most cutting machines will need this for cutting glitter card stock.
- Green Painters Tape – This is a must
How to set up your design to cut
Once your design has been completed and sized in Cricut Design Space, hit the Make button. This will take you to your cutting mat layout.
Take the time to review each mat layout. This helps as a final check to make sure all the pieces are attached and will cut correctly.
Finally, when working with the cutting mat layout which has the glitter card stock on it, you want to make sure you Mirror the cutting mat by selecting the Mirror Toggle Switch. This will flip the design and make it look backwards.
Send your design to your machine to cut it out.
How to attach glitter card stock to a cutting mat
Once your design is ready to cut and you get to the glitter card stock sheet, change your Materials settings to Custom. When prompted, search for and select Glitter Card Stock in the Materials Menu.
Before you put your cutting mat into the machine, you want to place your glitter card stock on the mat with the glitter side facing down.
If you are worried about the glitter card stock not sticking to your cutting mat. Either because there is sooo much glitter or because your cutting mats are not brand new, I recommend using green painter’s tape to hold it down. Simply tape the corners down to the mat and edges if you really want to hold it into place. This is what I do, just to be sure. Sometimes, there is a lot of loose glitter on the card stock, and it can make your glitter card stock move out of place while cutting.
Comparison of Cut Glitter card Stock
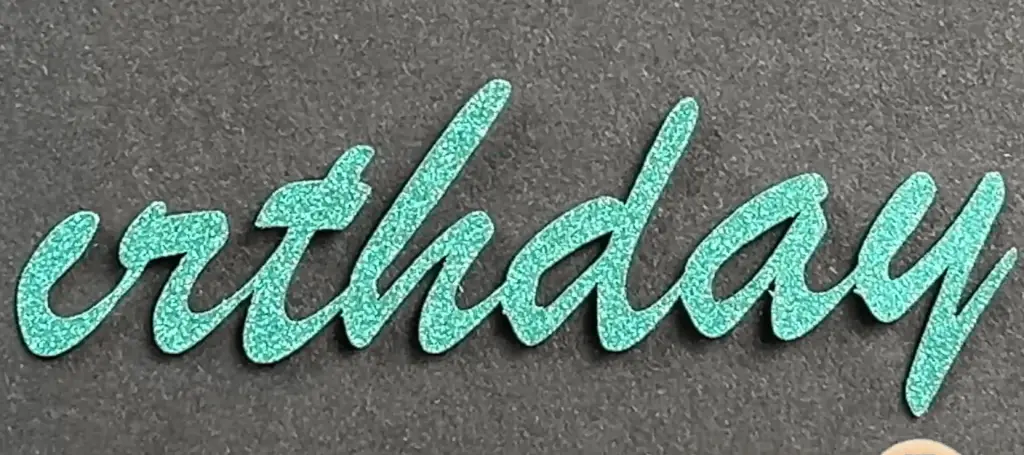
So, I wanted to show you what I am talking about so that you can see the difference between what happens when you cut glitter card stock with the glitter side facing up versus the glitter side facing down.
Glitter Card Stock Cut Glitter Facing Side Up

Glitter Card Stock Cut Glitter Side Facing Down
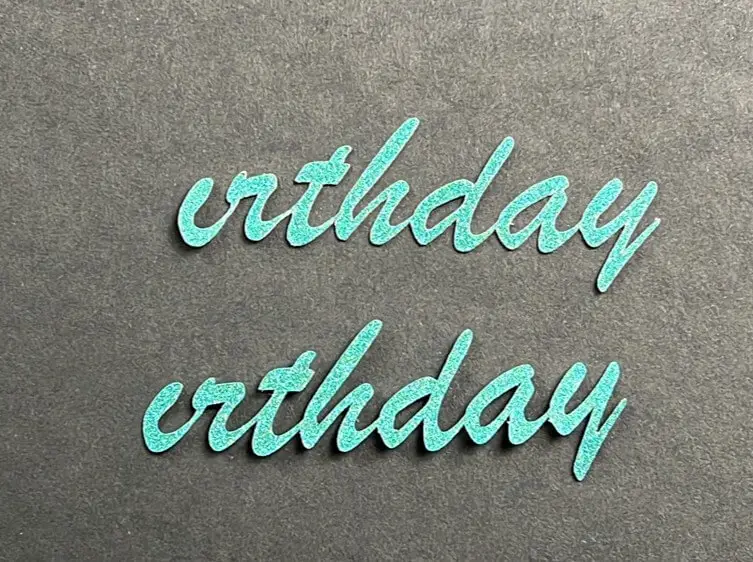
And to show you a comparison of the two cut pieces together, this next pictures had both cuts together. The top cut out is done with glitter facing side up and the bottom cut out is with the glitter facing side down.
Hopefully you can see the difference. It’s hard to take good pictures of glitter card stock as it tends to shine back during photos.
And There You Have It! That’s How To Cut Glitter Cardstock!
And that’s it! Your glitter cardstock is cut out with no white bits floating around!
Now Put That Glitter Cardstock to Work!
Now that you’ve got the trick for getting cleaner cuts, let’s actually make something with that glitter cardstock.
I use glitter cardstock in all kinds of projects, but it’s especially great for cake toppers because it gives them some sparkle and is usually sturdy enough to hold its shape.
Try my simple 80th Birthday Cake Topper next — I’ll show you how to design and assemble it step-by-step.
Frequently Asked Questions About Cardstock
What Happens If You Cut Glitter Cardstock With Glitter Side Up?
You can cut glitter card stock with the glitter side up. The only problem is that you will start to get these white bits showing up at corners and edges.
Sometimes, you can smooth them down or flatten them back into place so they are not as noticeable, but that is just more work for yourself than you want. Especially if you have an intricate design or are limited on time.
What cutting mat should you use with glitter card stock?
I find using the green cutting mat works well for glitter card stock. You can even go as far as to use a purple one, but this will pull off more of the glitter than you may want.
What is Solid Core Cards Stock?
Solid core card stock is when the inside of the paper is the same color as the outside. This is not very noticeable when you are using solid-core paper. However, if using non-solid core paper, such as white-core paper, you will notice this very quickly. You will notice that the center of the paper is white.
Did you find this tutorial on how to cut glitter card stock helpful?
Did you find this tutorial on How to cut glitter card stock helpful? Let me know in the comments below! Is this how you cut your glitter card stock? Or do you do it a different way? If you do it differently, let me know in the comments below and I will give it a try!
If you enjoyed this tip, be sure to check out my other tips and tricks here.
If you want to make some crafts with glitter, check out some of my paper crafts here, as I almost always use glitter!


Hello Katherine, This was a special message for me. I was just working on some glitter paper both with my Cricut and with my cutter. Your trick to place the glitter face down and mirror worked wonderfully even on my cutter. So it is great for both cutters. It was a bit more mess getting the glitter of the mat, but a baby wipe did the job.
Thank you so much for this tip and I’m going back now to read your other tips.
Debbie
I’m so glad I was able to help! Sometimes these “simple” tricks hide from us, and I just had to share!
Thanks so much and happy crafting!
Katherine
Thank you for this tip. Haven’t tried it, yet, but I know what you mean about the white bits. That’s what I dislike about glitter paper. I will try it! Also, I’m going to try Debra’s tip about doing it with cutters. It makes perfect sense.