Every year, Mother’s Day comes and goes, and every year kids love to give moms flowers. Flowers often cost lots of money, and they do not last very long. So, why not make a simple Mother’s Day paper vase that your kids can fill for you? This year, I thought it would be nice if my kids could pick flowers for me instead of wasting money on flowers. The most abundant flowers outside right now are dandelions, so I thought these would be perfect for a simple Mother’s Day Paper Vase for Flowers.
As an Amazon Associate, I earn from qualifying purchases. This post contains affiliate links. I may receive a commission if you purchase an item from one of my links. This will not change the price you pay.
Materials Needed to make a simple Vase for flowers
- Cardstock – any thickness will work. I used 80lb cardstock, but thicker cardstock is better.
- Permanent Vinyl – Optional for letters. I prefer vinyl instead of cardstock for letters as it is easier to transfer and stick on straight.
- Cut file – you can either create your own or sign up for my newsletter and get a copy of my cut file.
- Cutting machine – I use my Cricut Explore Air 2, but any cutting machine will work, and you can even draw it out by hand and cut with scissors.
- Crafting Glue – I use my Bearly Art Glue
- We need flowers, but these can wait until the very end. And it is best to wait until the last minute as dandelions only last a few hours.
- Approximately 20 minutes to prepare the paper vase. Additional time to pick flowers and fill the paper vase will be needed, but this is dependent on how many dandelions you have around the house and yard.
Let’s get started making our Simple Mother’s Day Paper Vase
Cut out the flower vase file
If you are using my file, simply cut it out with your Cricut or create your own. You will need to increase the size of my file to suit your needs, but I found that making the flower holder about 6-inches in height was a good size.
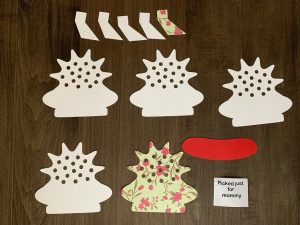
As I have an Explore Air 2, I cut out 5 paper vases/flower holders, 5 stand pieces, the front vase accent color in red cardstock, and the letters in black vinyl. If you have a Cricut Maker, you use a thicker material like Balsa Wood, and you will only need to cut one set of pieces, but you will need to modify the stand.
I like to use vinyl for letters and words as I always struggle to adhere paper letters straight.
Glue to Vase Pieces together
Glue all 5 paper vase pieces together. Make sure you align them the right way, as the file is not mirrored, and the holes will not align properly if the pieces are flipped.
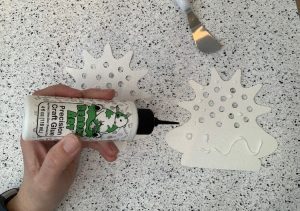
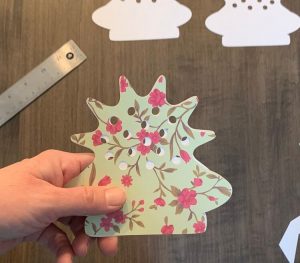
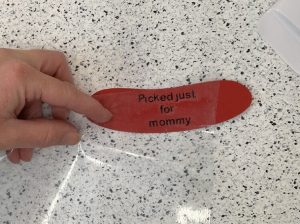
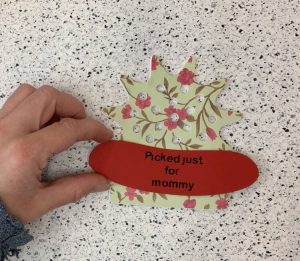
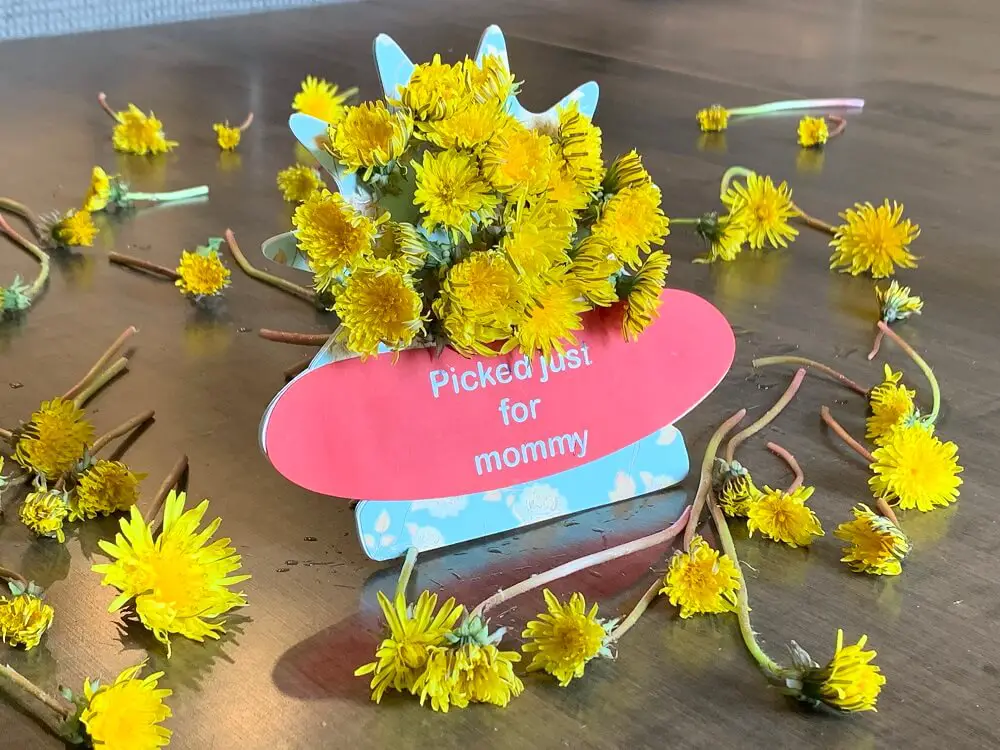
Glue the vase accent piece onto the flower holder, and apply the letters. As I used vinyl, I simply pulled off the letters with transfer tape and applied them to the accent piece.
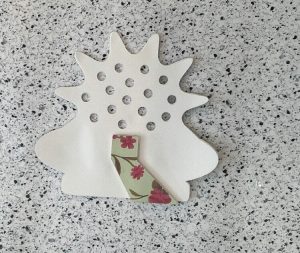
For the stands, before you glue, quickly run a scoring pen across the bottom of the square on all 5 pieces. This will help to fold later. Once the glue has dried, slightly bend the stand along the scored lines you created above.
Now, the tricky part is to align the stand with the flower holder. The stand is designed like a picture frame stand. The wide flat end will stand on the table. To do this, align the flat end with the bottom of the paper vase. You will want it every so slightly off-center from left to right. Once you are happy with the location, glue it on.
Insert Flower into your Simple Mother’s day Vase
Go find a bunch of flowers, in our case dandelions, and pull them through the holds of the flower holder. You can tie the ends up a bit or leave them loose. This part of the activity is fun for the kids.
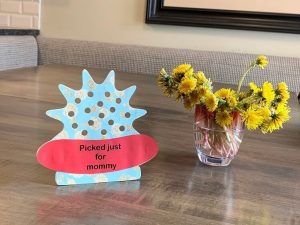
And that’s it! You’re done! Your Simple Mother’s Day Paper Vase is Done!
Things I learned a while designing and assembling the simple Mother’s Day Vase for Flowers
- This was a simple design, but I found that getting the stand into the correct location was a challenge on the first try. Making sure it is lined up with the bottom of the base was key to making sure it would sand.
- If you use my design, you do not want to go smaller than 5 inches in height. The holes for the flower stems will be too small, and you will not be able to pull the dandelions through.
- If you have never dealt with dandelions before, be warned, that the stems will weep and leave a white mess.
- I used 80lbs cardstock for my final design, and I needed 5 layers. During the prototype phase, I used poster board, and found it was much more sturdy. In the future, I will probably use a poster board for all the layers except the front one to give more rigidity to the whole vase.
- After gluing all of the pieces together, I place them under a heavy book to help the whole project stay flat.
Don’t want to read? Watch my Paper Vase YouTube Video instead
Did you enjoy this tutorial?
Did you enjoy this tutorial on making a simple Mother’s Day Paper Vase? Have you tried to make this project? If so, let me know how it went in the comments below! And be sure to check out my other paper tutorials found here.