Birthdays are a constant thing in my family. They come in waves, but there are always a few around, just sprinkled in random places as well. So, I needed to make a quick, simple happy birthday cake topper for a birthday that we just had here. So, I pulled one together quickly and ta-da! A simple Happy Birthday Cake Topper is ready to go! So, let’s jump in.
As an Amazon Associate, I earn from qualifying purchases. This post contains affiliate links. I may receive a commission if you purchase an item from one of my links. This will not change the price you pay.
Supplies needed to make a Simple Happy Birthday Cake Topper
Birthdays are fun and always need a little wow added, so I have designed a Simple Birthday Cake Topper. So, here is what you need to make one:
- Glitter Cardstock – I like to use glitter cardstock as the top layer. It makes the cake topper sparkle and shine. I am using blue glitter cardstock, but you can choose any color. You will simply need to adjust your colors below to match.
- 60lb Cardstock – I used 60lb Recollections card stock. I like to use the 8.5″ x 11″ but any size will do. You can even pull this together with scrap pieces if you want. For this design, you will need:
- 1 blue piece of cardstock- to match the glitter cardstock
- 1 white piece of cardstock
- 1 black piece of cardstock
- Glue – you will need two types of glue for this:
- Craft glue – I use my Barely Art Craft Glue – which will be needed for gluing some of the cardstock. However, any craft glue will work.
- Hot glue gun and Hot glue – this will be for gluing the cake topper to the cake topper stick.
- Double-sided foam tape – for elevating the cardstock
- Cake topper sticks – you can use plastic, paper or wooden ones. I used some wooden skewers that I had. They worked perfectly.
- Tweezers – for handling small parts.
- Cutting Machine – I use my Cricut Explore Air 2, but any cutting machine will work! You will need cutting mats for most machines as well.
- Cake topper file – you can get a copy of the SVG file for this project here.
Let’s Get Starting making this simple Happy Birthday Cake Topper
Upload the file to your Cricut Design Space
If you are using my file, you will need to upload the file to your Cricut Design Space. So, here are the things we need to do:
- Save the file on your computer somewhere that you can find it.
- Unzip the file – right-click your mouse button and select UnZip – Save it in a location where you can find it.
- Open Cricut Design Space and Start a New Project
- Select the Upload button in DS.
- Select Upload Image
- Select Browse
- Find the file, or you can click and drag your file over.
- Select the file as a Cut Image File.
- You can modify the name and add tags if you wish.
- Select Upload
- Select the file when the next screen appears – make sure it has a green box around it.
- Select Add to Canvas
Now that the file is on your Cricut Design Space Canvas, there are some things we need to review. You will want to verify the design size versus the paper size being used.
I did not want the cake topper to overpower the cake, so I selected the width and changed it to 7.5″. I made sure the lock dimensions were locked to keep my proportions locked.
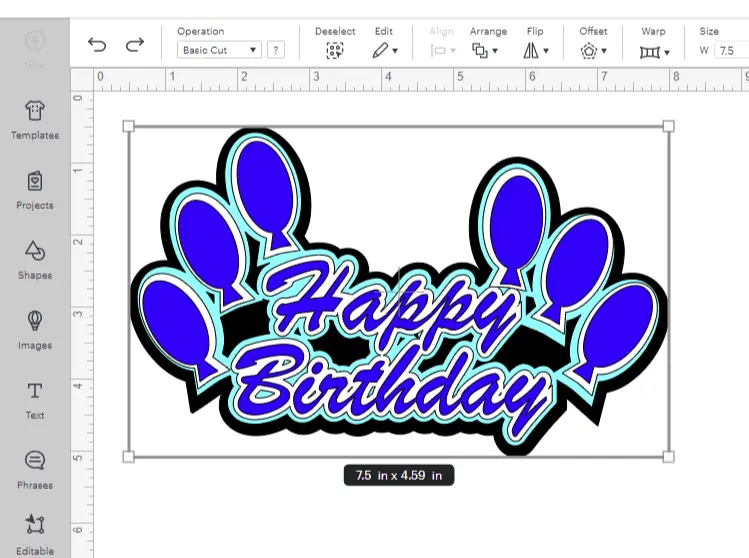
If you are happy with the colors, you can select Make. However, if you want to change the colors, select the Ungroup button and modify the colors to your liking.
Once happy, select Make.
Cutting out Glitter Cardstock
Once you send the simple Happy Birthday Cake Topper to Make for cutting, rotate the dial on your Cricut to Custom. You will then be prompted, prior to the cutting process, to select a material for this. Choose Glitter Cardstock.
For the other cardstock being cut, rotate the dial onto Cardstock.
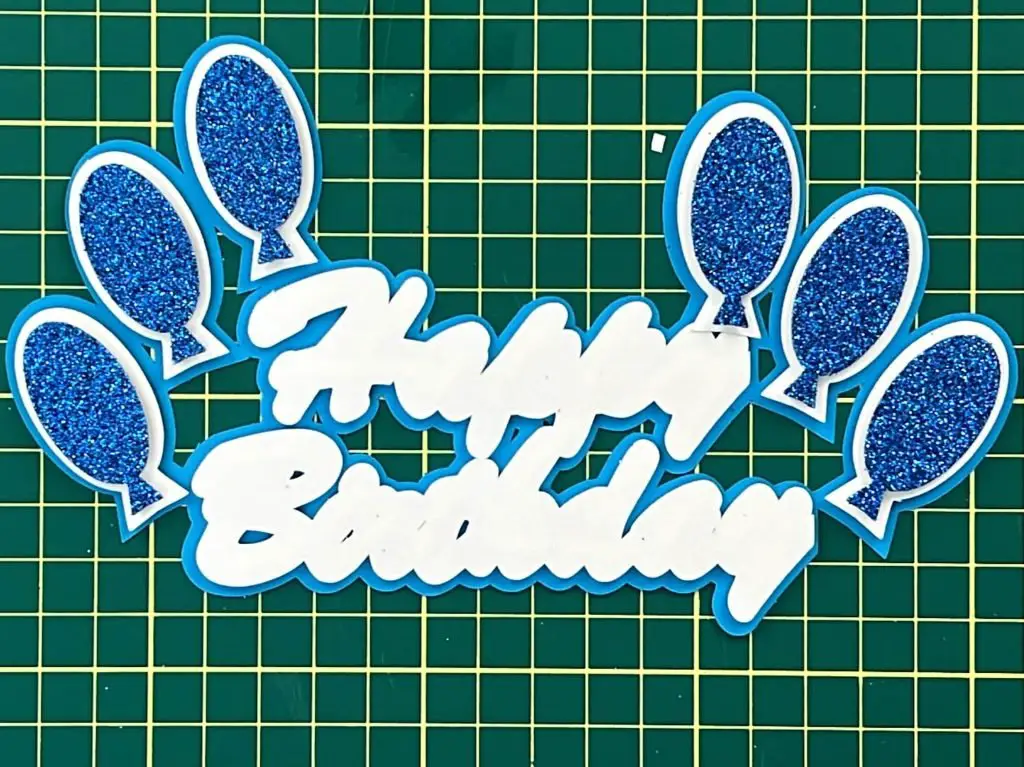
Assemble the Simple Birthday Cake Topper
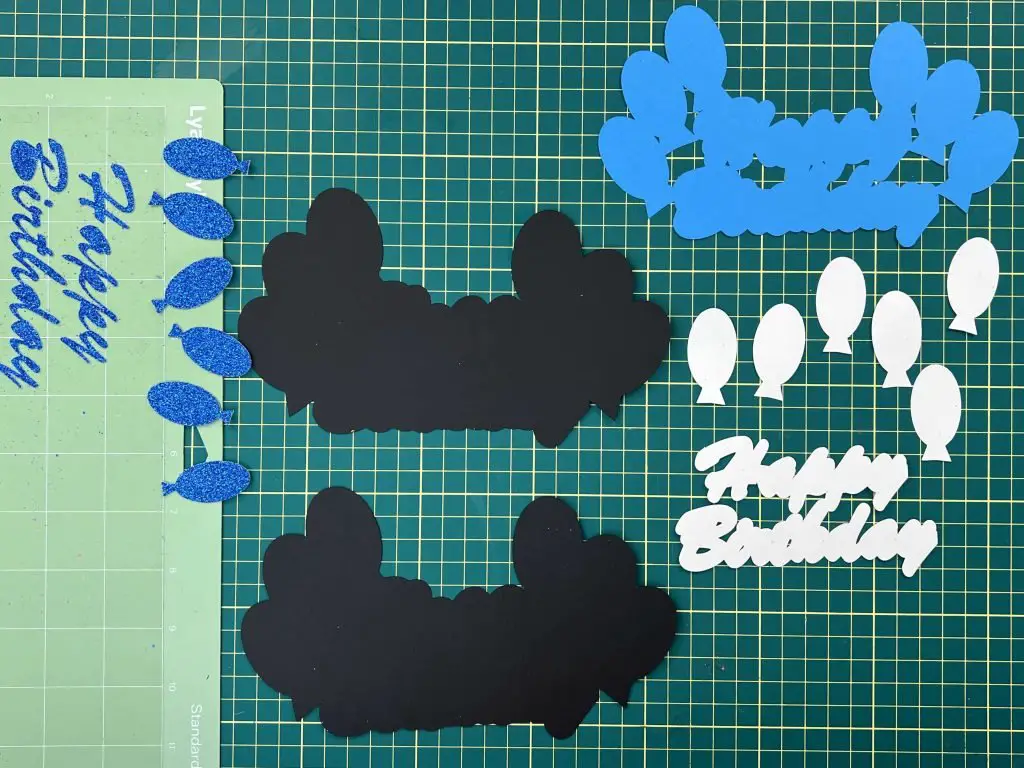
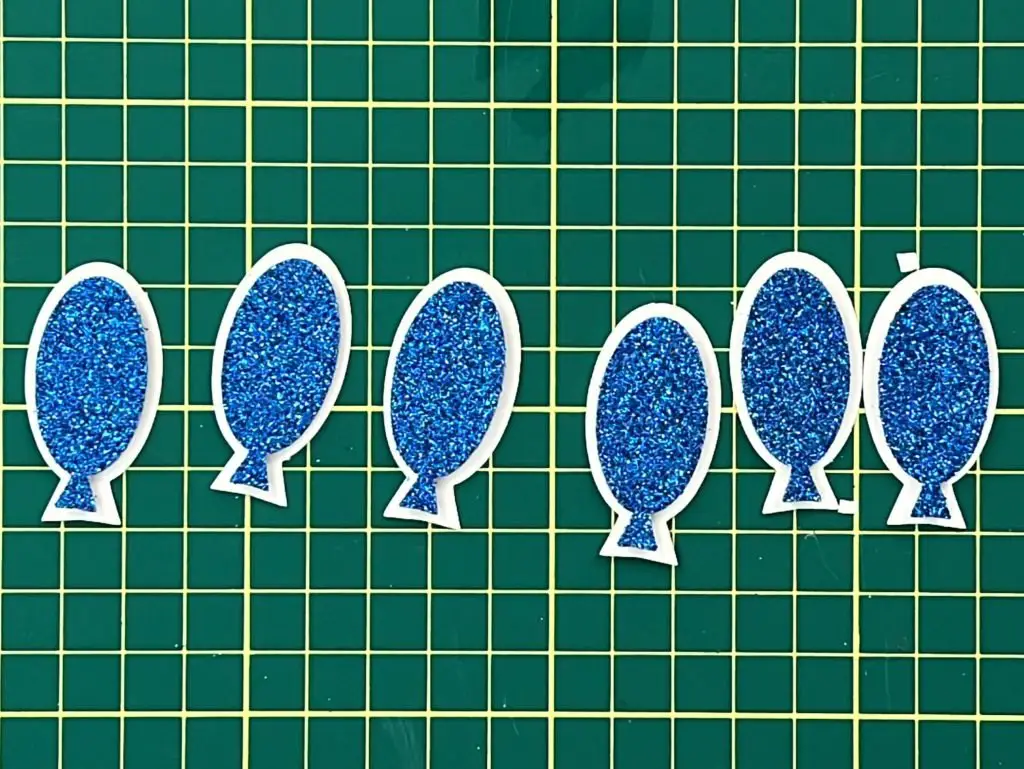
Once we have all the pieces cut out, we should have the following:
- 6 blue glitter balloons
- 6 white balloon outlines
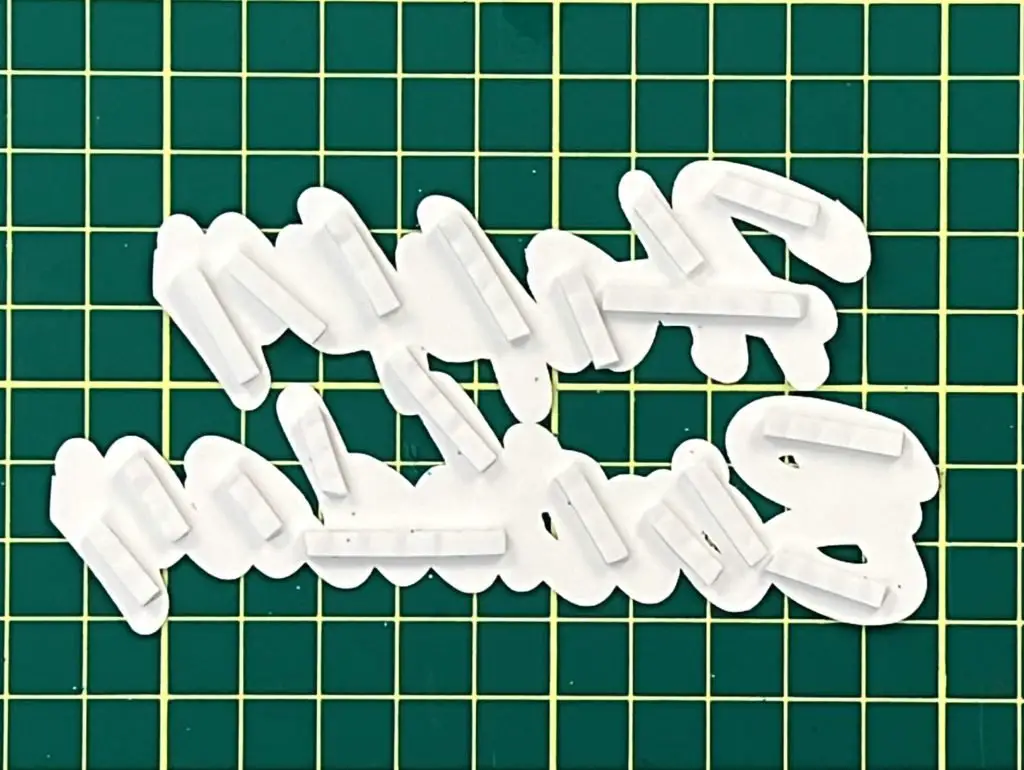
- Happy Birthday is written in blue glitter – this will be 5 pieces as the B, H and dot of the I are separate pieces.
- A white outline for Happy Birthday – one piece
- A blue outline for Happy Birthday and the Balloons – one piece.
- Two black outlines for the whole design.
Assemble the Balloons
I always like to start with some easy parts when assembling cake toppers to help me start on a good note. And the balloons are easy enough to work with.
Select the 6 glitter balloons, 6 white outlines and the double-sided foam tape.
Attach one strip of double-sided tape onto the back of each glitter balloon. I find it is best to work on the backside so that I do not end up with foam tape in the wrong spot.
Each balloon has a small stem. If you want to, you can place a small piece of foam tape there, as well. This is optional.
Once all 6 balloons have foam tape on them, remove the tape backing and carefully place them on the center of the white balloon outline.
If having trouble keeping the white outline steady while applying the blue balloon, use painter’s tape on the backside of the white balloon and tape it to your workspace.
Continue until all 6 balloons have a white background.
Assemble the Cake Topper Backing
Now that our simple balloons are done, it is time for the next simple part, the outlines!
Pull out some double-sided foam tape, the white text outline and the blue text and balloon outline. Apply double-sided foam tape to the back of the white outline of the text. Remove the tape backing and place it on the blue text and balloon outline.
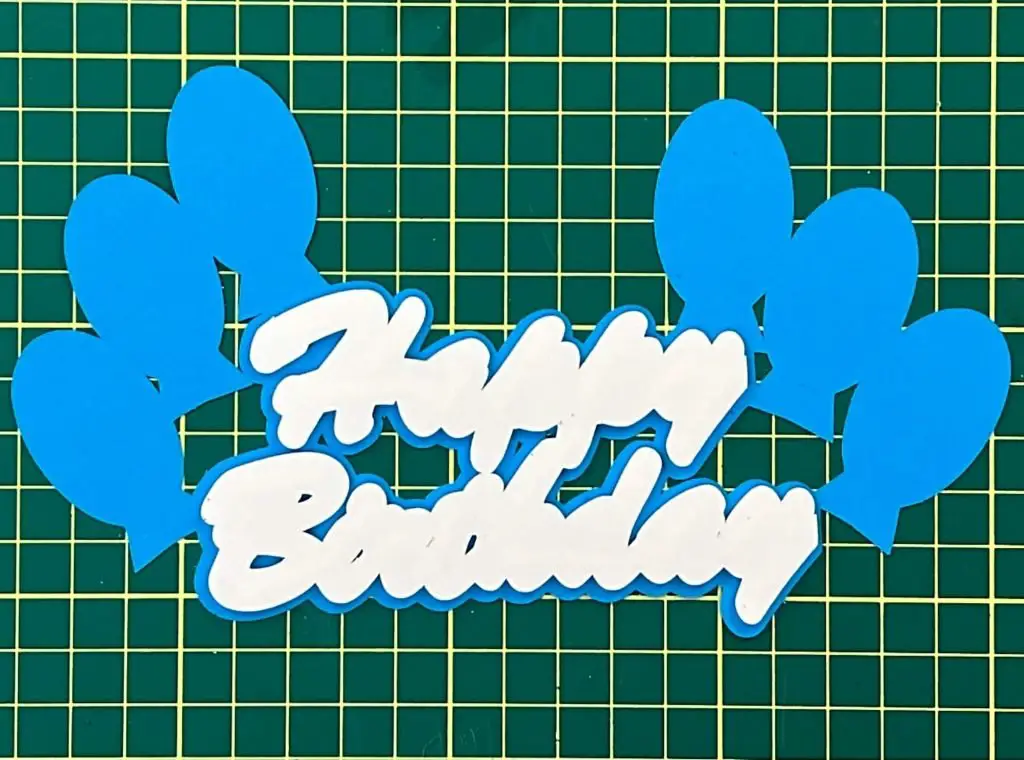
Now that we have the location of our text ready, we can happily place our balloons onto the backing as well.
Again, using double-sided foam tape, place it on the back of the balloons. Remove the backing tape from the balloons and place them onto the blue outline. All the balloons and balloon outlines are the same shape and size, so you can place them in any of the 6 available spots.
Assemble the Happy Birthday Text
I find that working with text is always my weakness. No matter how hard I try, it does not like to cooperate. But, as most things need a sentiment or a phrase, I must persevere.
I like to keep the text on my cutting mat until it is time to use it. This way, I do not lose any letters.
With the white text outline that is already on the blue outline, my glitter blue text and my craft glue, it is time to put the text together.
Slowly remove the text from the mat. I suggest one piece at a time.
When working with text, I like to hold the text with tweezers. Holding the text with tweezers, apply a narrow bead of glue on the back of the glitter blue letters. Gently place them down on the white outline. Again, take your next section of text off the cutting mat and continue gluing it onto the white outline.
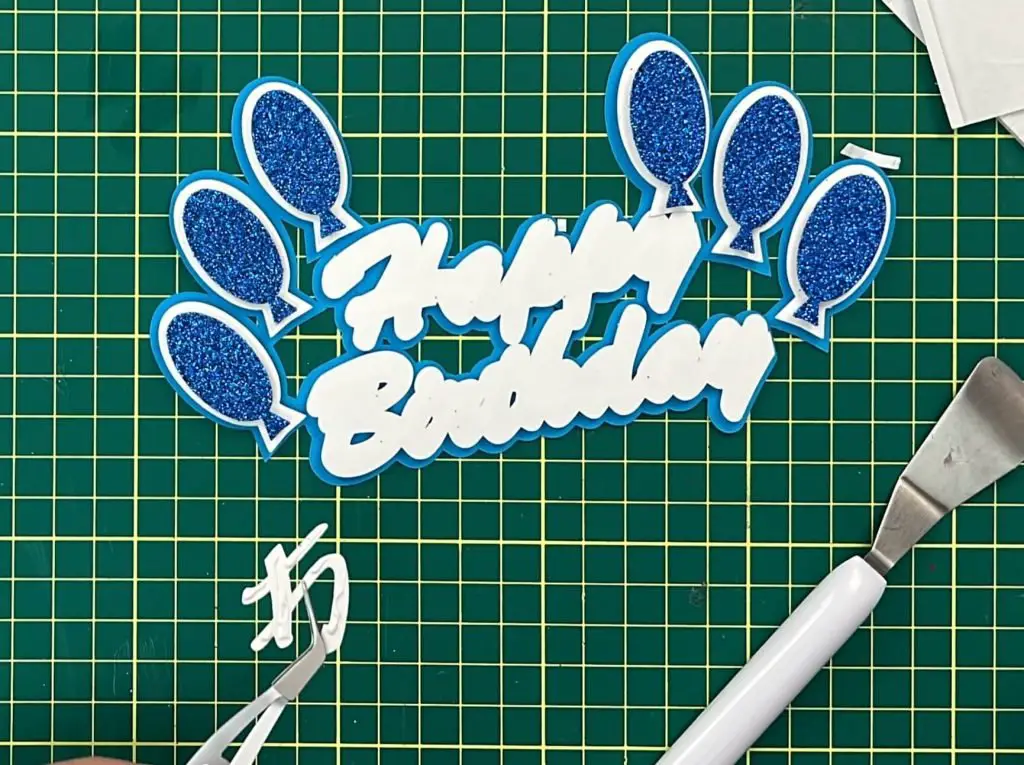

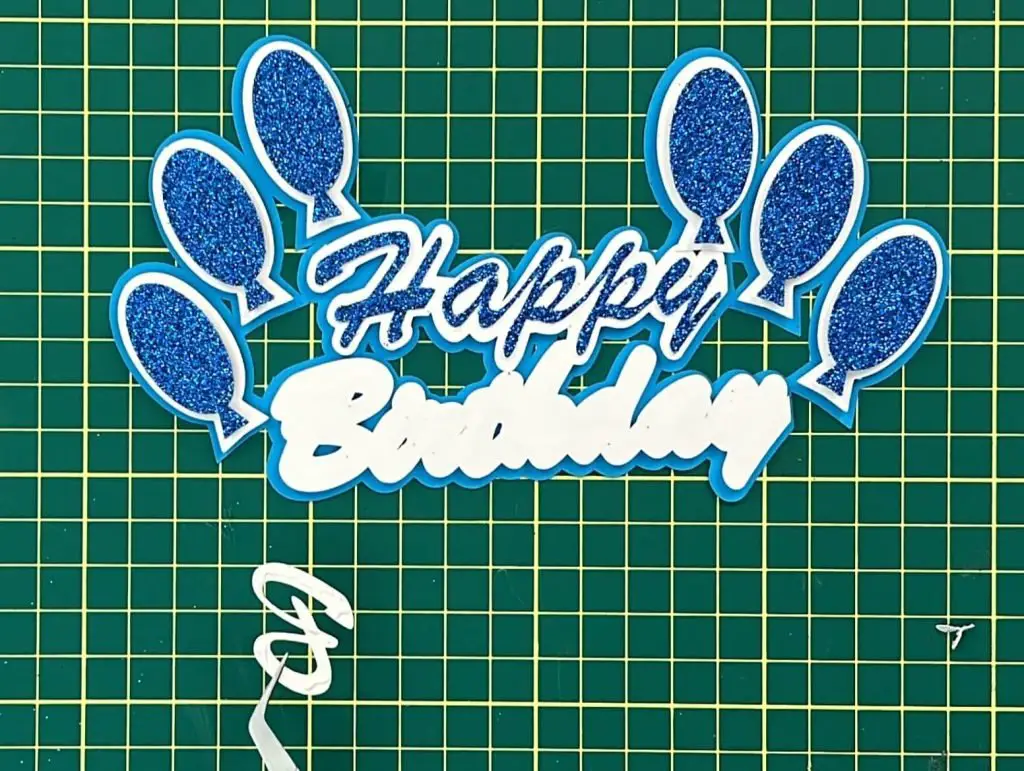
Continue this way until the entire phrase is glued onto the white background.
Assemble the balloons to the body of the cake topper
Once you have all the balloons and Happy Birthday on the blue cardstock, it is time to glue the whole thing onto one of the black outlines. However, before you apply glue, make sure you know which way the black paper is supposed to be facing. You want to make sure you apply the assembled cake topper onto the correct side of the black cardstock.
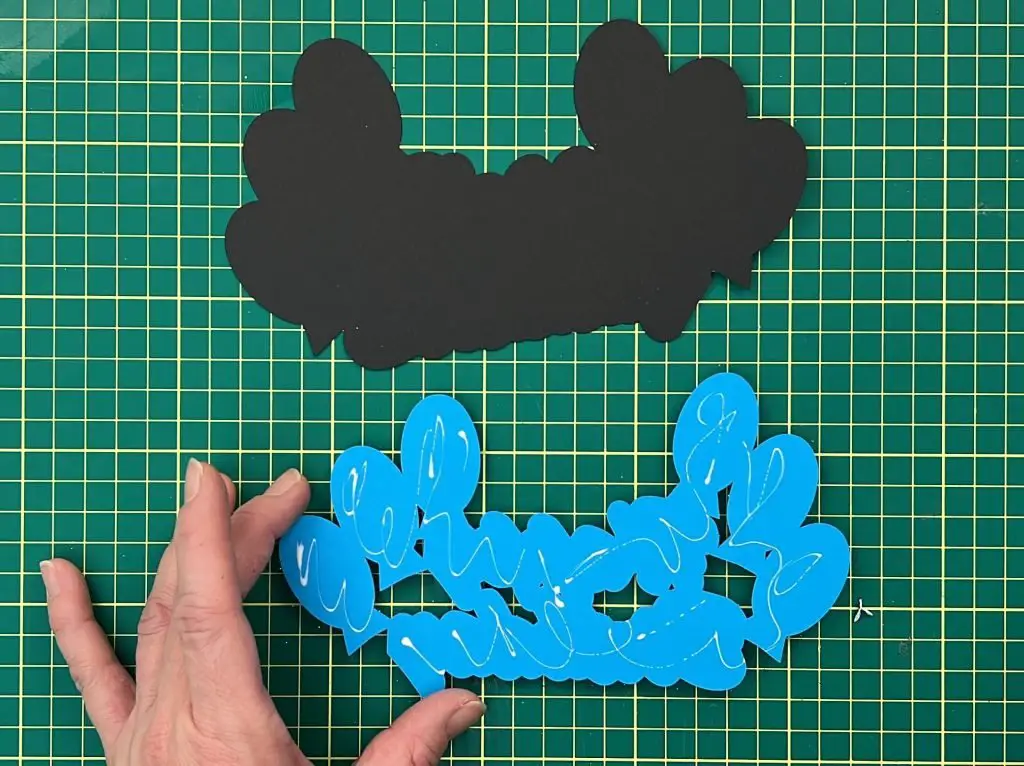
Again, I recommend applying the glue onto the blue cardstock and placing it onto the black. This way, you will not have glue in places where there is no card stock.
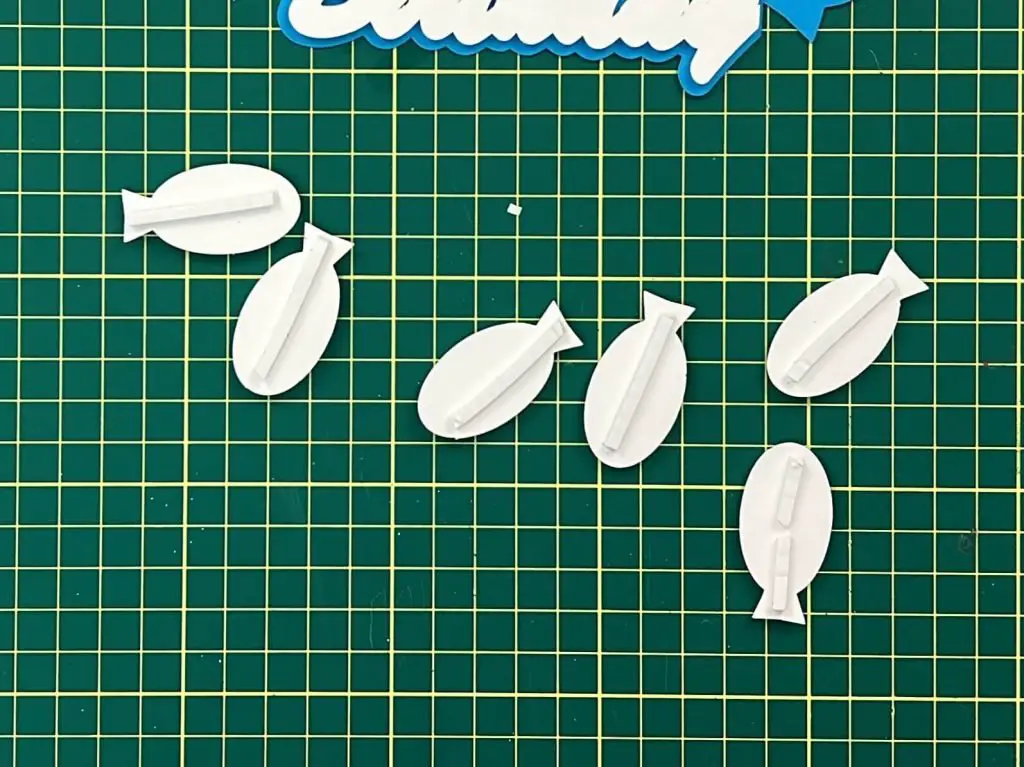
Assemble the cake topper stick
For this cake topper, I used 2 wooden skewers, but one will work if you prefer.
Flip the cake topper so that it is facing downwards. Place the skewers onto the black cardstock, and try to place them equidistant from each other. You also want to make sure that the skewers are the same length from the bottom of the cake topper. I used the lines of my workstation to align the distance of each skewer.
Once happy with their placement, apply hot glue onto the skewers so they adhere to the cardstock. I find that this works better than craft glue.
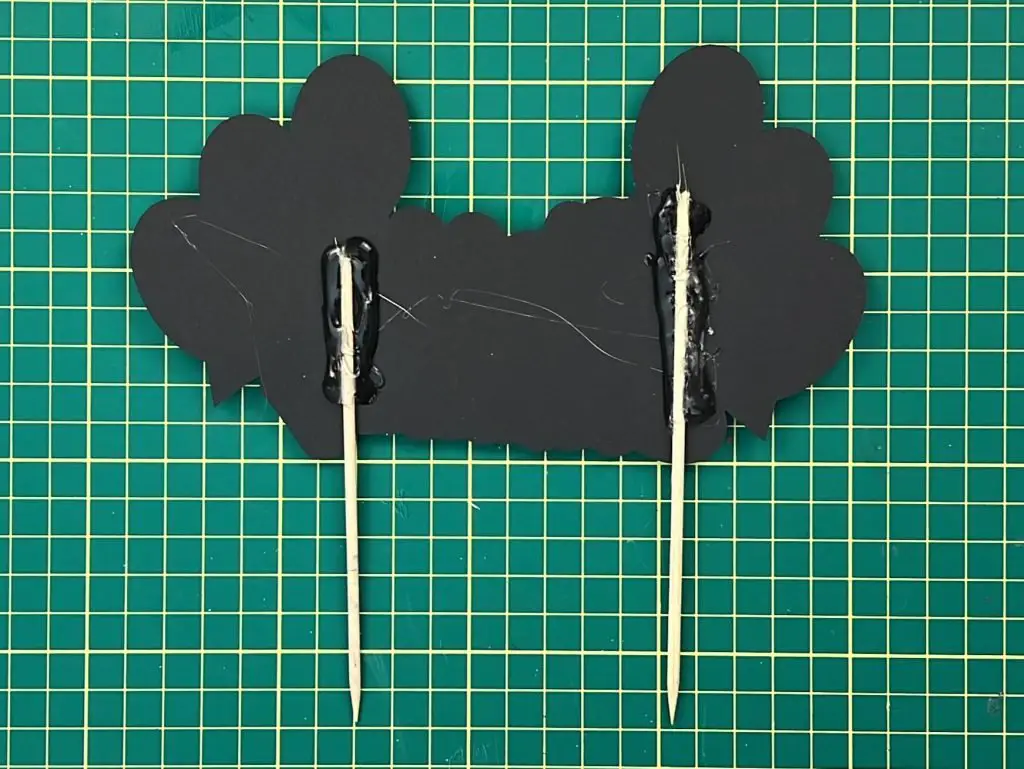
Hide the back of the cake topper
This is optional, but I learned this a while ago, and I have to say, it makes for a nicer final topper, so I do it now. But it is not required.
Verify the direction of the second black background. You want to have both the black cardstock pieces facing the same direction.
Apply double-sided foam tape around the edges of the unused piece of black cardstock. Leave space for the skewers along the bottom. Double-sided foam tape works well as it is almost the same thickness as the skewers. So, it leaves a good gap all around the cake topper.
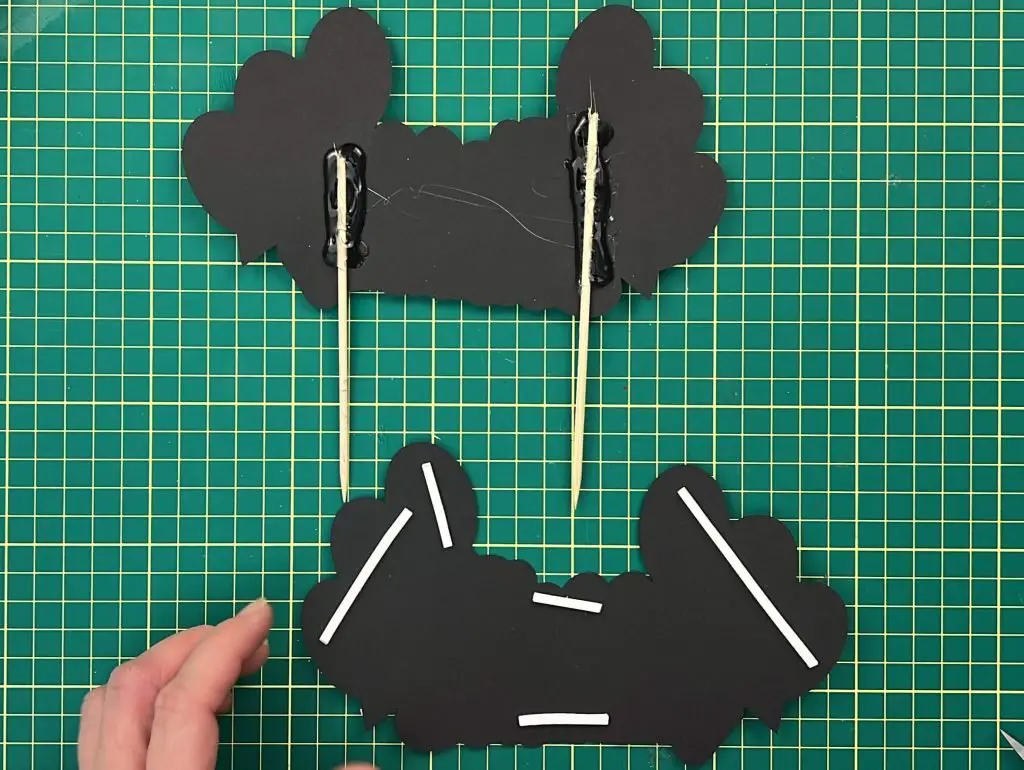
Once you have several pieces of double-sided foam tape on the black cardstock, remove the tape backing and place it onto the back of the cake topper.
And that’s it! You’re done! Your Simple Happy Birthday Cake Topper is Complete!

Things I learned while making this simple happy birthday cake topper
No project is the same for me, but with each one, I learn something new. So, here is what I have learned this time:
- Balloons need to be the same. I had this problem with a previous cake topper and have learned from my mistakes. When making balloons for a cake topper or any paper craft, they should all be the same size. This way, you do not need to worry about them placing them in the wrong spot.
- Making a cake topper last minute is a great idea, but keep in mind that if something is going to go wrong, it will happen with a last-minute project. I had a few mishaps trying to get my Cricut to cut these pieces out. But I am sure it was because this was a last-minute project.
- Don’t use new mats on a last-minute project. I wanted the card stock and the glitter card stock to stick well while cutting, so I pulled out some new mats, and because I was too lazy to wash the current ones I’m using…. well if the glitter card stock didn’t stick too well! I had to recut some of the words because I was in too big of a rush to get them all done. So, if you are using new mats for a project, slow down! And if it is a last-minute project, make sure you have an extra few moments to pull off the letters slowly. Or use your old mats.
- I need to get into the habit of washing my mats after projects are complete and not when I am about to start a project….
- When working with small pieces of cardstock, I sometimes find they like to move around, so I will use painter’s tape to tape them down to my workstation. Apply tape to the backside so it does not move around or interfere with my placement location on top.
- Tweezers are a lifesaver when gluing text. Trust me.
- I like to use double-sided foam tape to elevate the cake topper and make it pop. But it is not required. Using only glue on all the layers of cardstock will also produce a great result.
Did you enjoy making this simple happy birthday cake topper with me?
Did you enjoy making this simple happy birthday cake topper with me? Let me know in the comments below! If you tried making it, let me know how it turned out!
Do you like making toppers? Check out some of the other cake and cupcake toppers I have made:
- 70th Birthday Cake Topper
- Birthday Number Cupcake Toppers
- How to make FREE Halloween Cupcake Toppers
- DIY Thanksgiving Cupcake Toppers
If you need some birthday inspiration, check out my birthday page for all types of birthday crafts!