If you have been paying attention to my recent posts, you will notice a theme – lots and lots of wizard and wand-related things are happening, and you are right. We are all about wizards and witches for Halloween this year, and the last thing our wizards and witches need is a wizard cloak to complete our Halloween costume. So, let’s get started and learn how to make a wizard’s cloak.
As an Amazon Associate, I earn from qualifying purchases. This post contains affiliate links. I may receive a commission if you purchase an item from one of my links. This will not change the price you pay.
Supplies need to make a wizards cloak
Like with most of my sewing projects, I like to use existing fabric from previous projects. But I know not everyone happens to have large amounts just lying around, so you may need to purchase some of these items.
- Black fabric – I have a bunch from previous Halloween decorations that we no longer use, so I am happy to upcycle that. But if you do not have any lying around, you will need some from your local fabric store and buy some.
- Accent fabric – For this wizard cloak, I added an accent color inside the cloak hood to match the Hogwarts School House color. . In this case, I needed blue for Ravenclaw. For this, I pulled out some cotton fabric I had from old shirts that I use for sewing projects.
- Sewing machine/needle and thread – I use my sewing machine because it is much faster, but a needle and thread will do in a pinch.
- Matching thread – in my case, I needed black and blue.
- HTV Vinyl – this is for the school emblem on the front of the cloak. I made mine in HTV vinyl, but this is not required.
- Cutting machine – I used my Cricut Explore Air 2 to cut the HTV for the house emblem.
- Scissors/Rotary Cutter – I recently purchased a rotary cutter, and I find it works significantly better than scissors as you do not need to lift the fabric once you have your pattern ready for cutting.
- Pins – To hold things together.
- Iron & Ironing Surface – When sewing, it is always easier to use ironed fabric, so I have my trusty iron and ironing board. However, you can iron on any protected surface you have available.
OK, Let’s get started making our wizards cloak
Once we have all the pieces ready to go, it is time to start making our cloak.
Cloak Pattern
As with all my sewing projects, I do not use a pattern. I freehand the design. And I try to keep things simple.
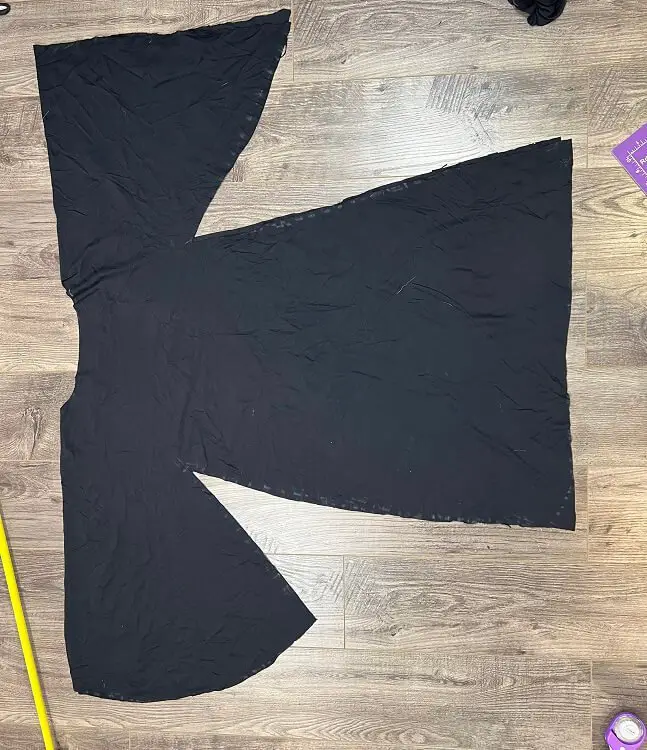
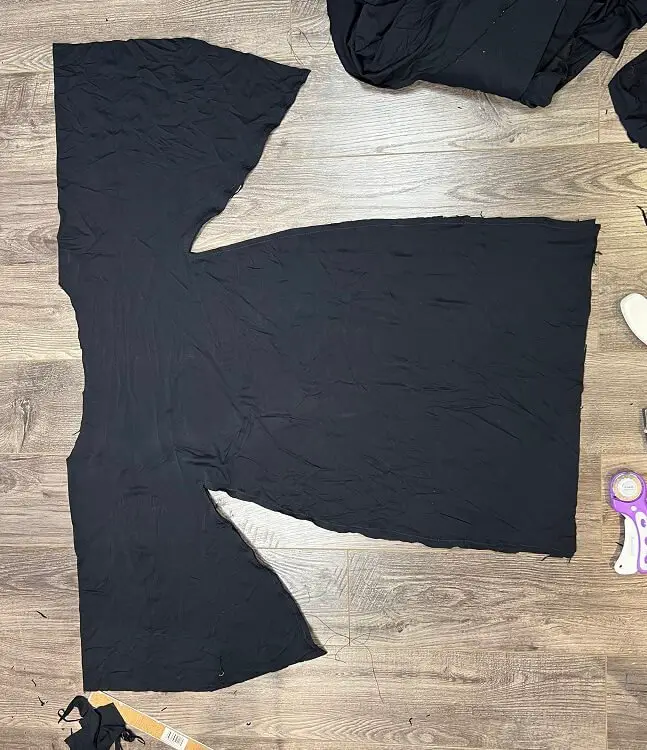
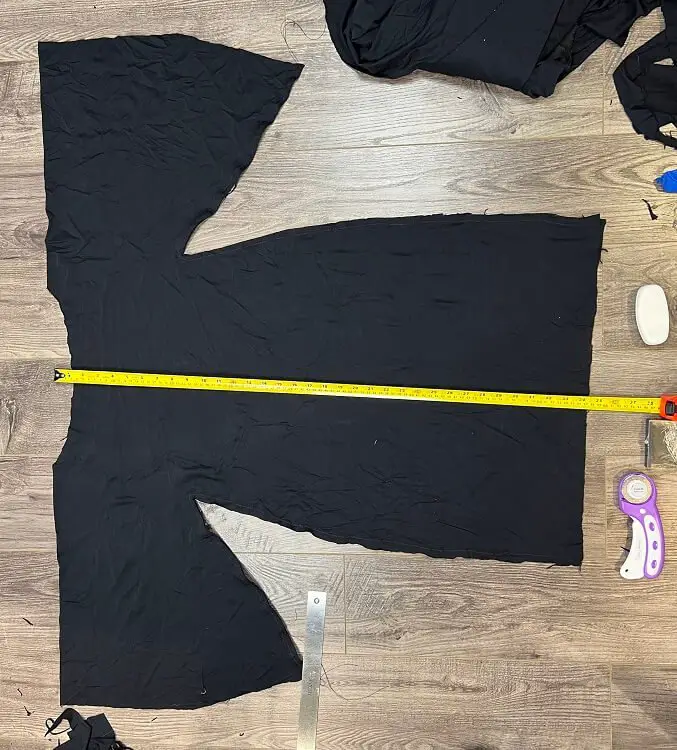
As this cloak needs a front, back and sleeves, I am using a large piece of fabric folded in 2. This way, I will have less sewing and only some cutting. With the fabric folded in 2, I need to have enough height to cover my wizard from shoulders to ankles and enough width to span from outstretched arm to outstretched arm. In this case, the height is 36 inches, and the width is 47 inches.
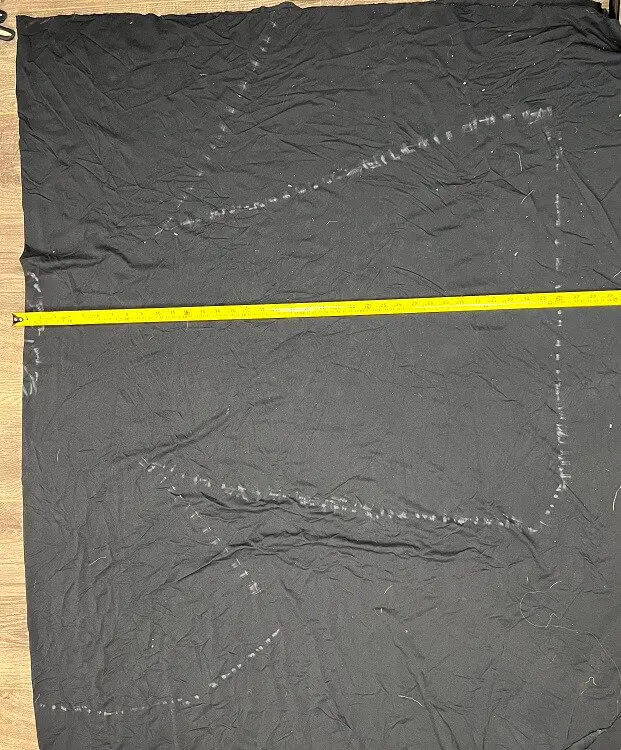
Quickly sketch out what the cloak should look like, making a small mark for the head/neck hole. I used soap to sketch the design, but chalk or washable fabric markers work well.
Once happy with the design, cut it out. Be sure to keep the 2 folded halves of the fabric together when cutting. This way, you have the front and back in place.
Once the cloak is cut, do a quick symmetry check by folding the cloak over and making sure the arm lengths are the same, and the left and right bottoms of the cloak extend the same distance. There might need to be some cutting required here.
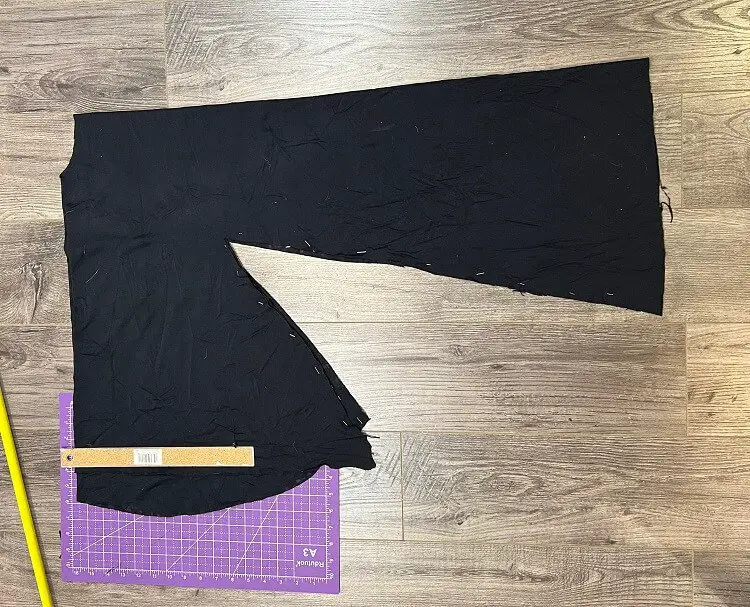
Once happy with the design, I pinned all the sections together that needed sewing – the underside of arms and sides of the cloak running from armpits to ankles.
Hood Pattern
I wanted the hood to resemble that of the wizard cloaks in the Harry Potter Movies, so it is not a hood like in a hoodie but has an extra bit of fabric at the back that hangs down.
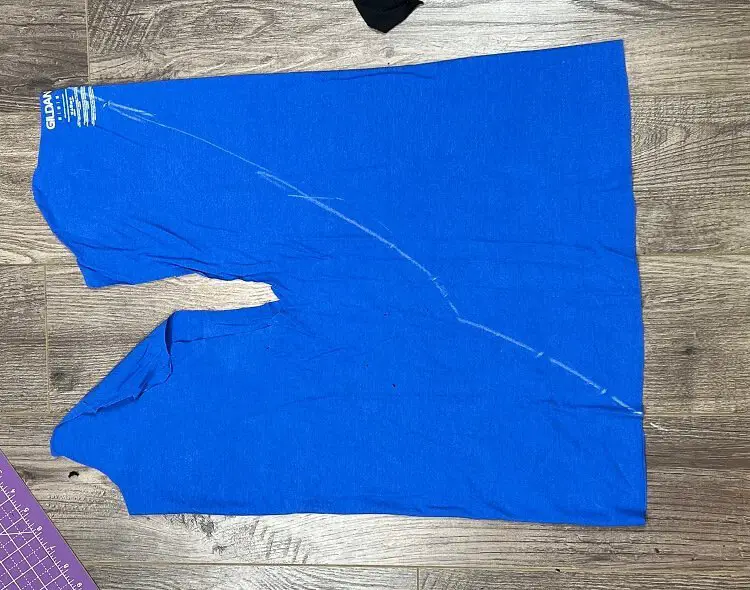
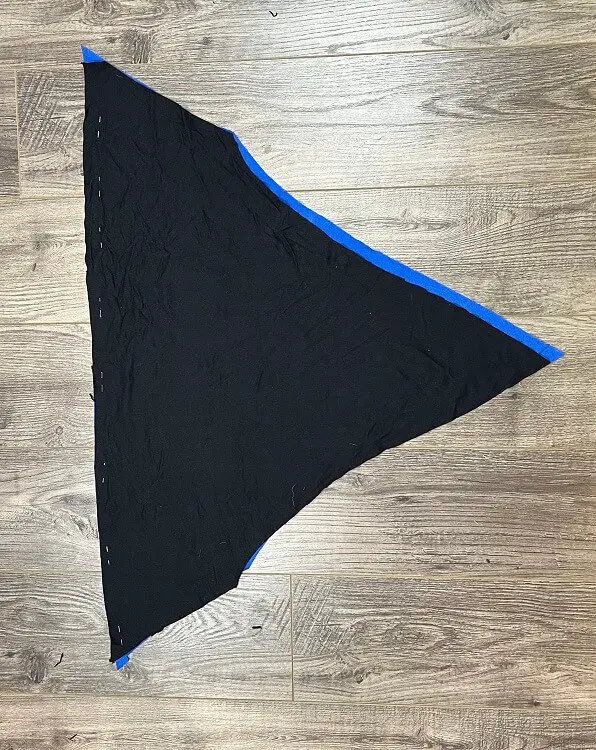
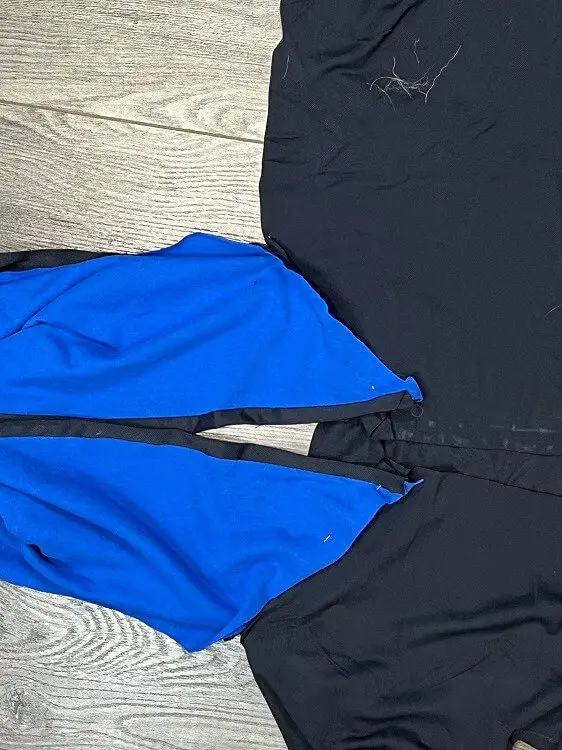
For this, I first cut up one of my old t-shirts. The fabric on the back and front was good to use still. Just cutting off the arms, neck and bottom seams, I could fold it in half, as shown in the picture here and sketch out the shape of the hood. Once this was cut out, I traced this design on the black fabric. The blue fabric will be used to accent the inside of the hood. The black fabric will be the color of the outside of the hood.
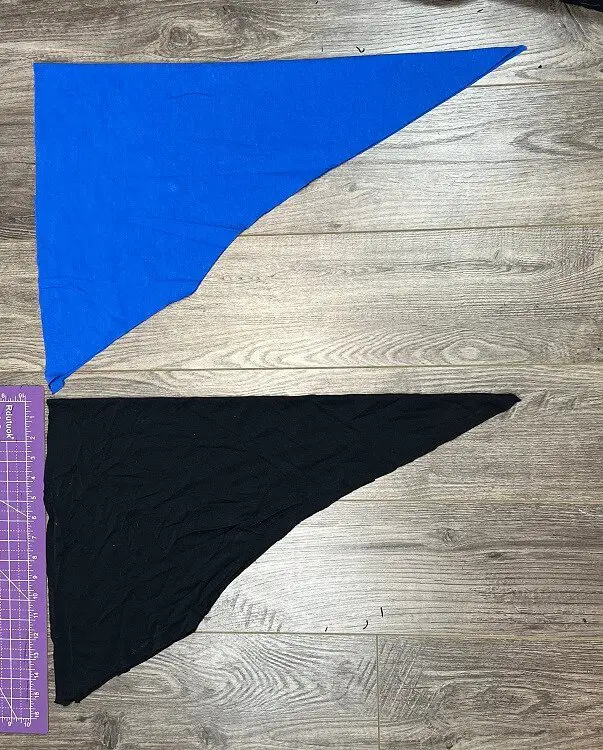
Pin the two pieces of fabric together at the front straight section, in preparation for sewing.
Sewing the Hood Together
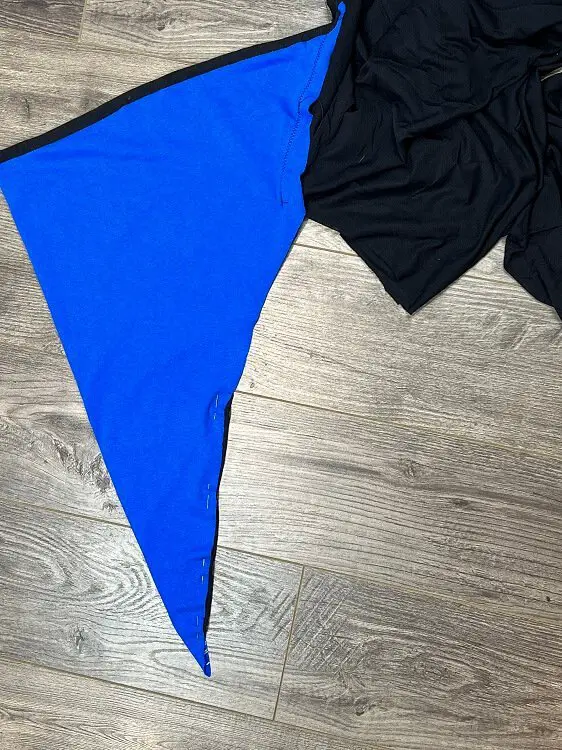
Quickly jumping to your sewing machine, and using blue and black tread, sew the two pieces of fabric together.
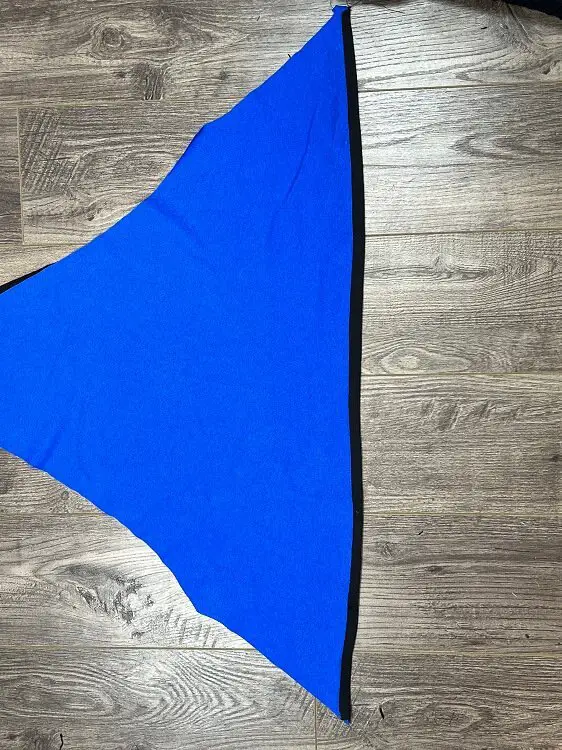
Once this is complete, the hood will need to be ironed. I folded the black fabric of the hood so that the black would come inside the hood, as shown here.
Sew the Cape together
Switching your tread to black and black on the sewing machine, sew the cape together. This will simply be sewing the pinned sections from above. That is, the underside of the sleeve and from the armpit to the ankles.
Front Opening of the Cloak
When the cloak is sewn together, lay it flat and measure the center. Draw a straight line from the center of the neck to the bottom of the cloak – this will be the front opening of the cloak. Now, make sure to only cut the top layer.
Attach the Hood to the Cloak
Attaching the hood to the cloak is a bit tricky. And requires a bit of spatial thinking.
The cloak and the hood need to be flipped inside out. You will be sewing the inside of the cloak. Align the tips of the hood to the front corners of the cloak opening. Pin the hood onto the cloak up to the top of the shoulders. Once that is pinned, run it through the sewing machine.
Then, pin the ends of the hood, still working inside out, about 2/3 of the length of the hood. Now you can sew this section.
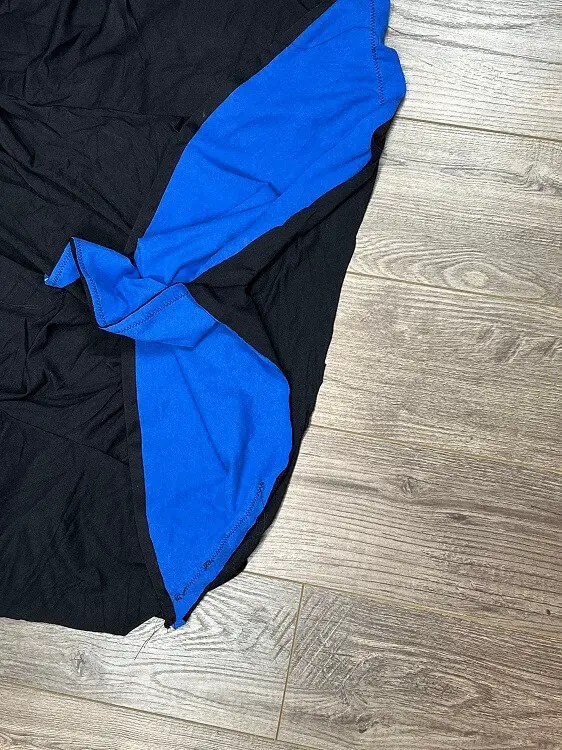
Once sewn, pin the remaining section of the hood to the cloak. This takes patience as you are sewing a triangle on the hood to a straight line on the cape Just take your time. I found pinning and sewing one side at a time helped.
Attaching the House Emblem to the Cloak – Optional
For now, the cloak is done, and we are moving on to the Ravenclaw House Emblem.
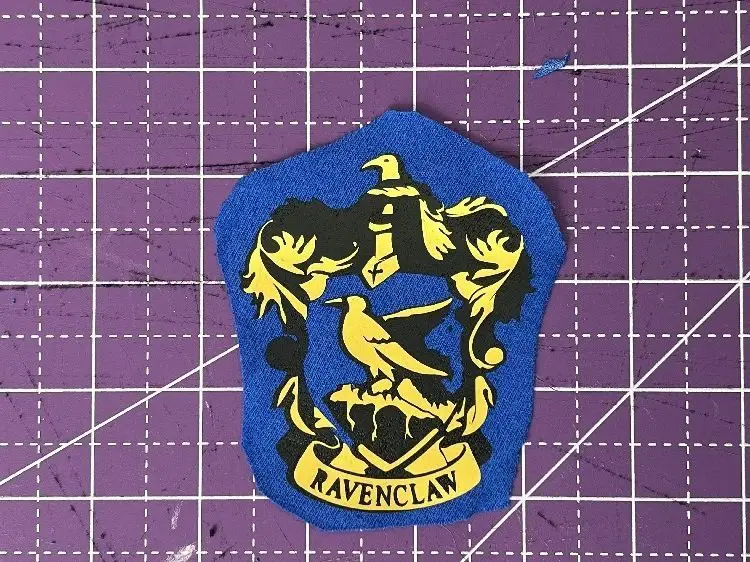
You can buy an official Ravenclaw House Emblem or make your own. I opted for making my own.
I found a design I liked on Google, took a screenshot of it, imported it to Design Space, cleaned out the edges, used the contour feature to add some colors, and the offset feature to add a border.
Once I was happy with the design, I sent it to Cut on my Cricut.
As I have an Explore Air 2, I can not cut fabric, so I cut out the offset piece, which will be the blue fabric in my case, and used it to trace and cut my fabric.
Then, quickly using my heat press, I ironed the emblem on the offset blue fabric piece.

Finally, sew the emblem patch onto the front left of the cloak.
Addition of Snaps or Velcro to keep cloak closed
This is not necessary, but in case you want the option for the cloak to stay closed, we used snaps at the collar and halfway down.
And that’s it! Your wizard cloak is complete!

Frequently Asked Questions about making a wizards Cloak
How long does it take to make a wizards cloak?
It took me about 2 hours to make the cloak from start to finish. It was much easier and faster than I had hoped, so I was pleased with that.
Can you make wizard cloaks for adults?
Yes, of course, you can! This will require much more fabric, but the same steps would apply. You would need to increase the overall height and width in your initial measurements.
Did you find this Tutorial on how to make a wizards cloak helpful?
Was this tutorial helpful? Did you try it out? Let me know in the comments below!
If you liked this tutorial, be sure to check out others like it: