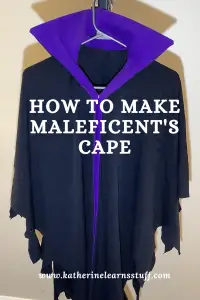
Every Witch Needs a Cape
My kids are old enough now that they want to pick their own Halloween Costumes. But as it turns out, buying new costumes at the store is very expensive! And if it is possible to save money, I am all for it. We decided that we wanted to be Maleficent, the sorceress from The Sleeping Beauty. So, on top of all the other bits and pieces we need, we need a cape! And now, here we are learning, how to make Maleficent’s cape for our Halloween costume.
As an Amazon Associate, I earn from qualifying purchases. This post contains affiliate links. I may receive a commission if you purchase an item from one of my links. This will not change the price you pay.
Tools and Materials Needed to Make Maleficent’s Cape
These are the tools and materials I used to make Maleficent’s cape. I have tried to organize them the best I can. And please remember, I try to use existing items from around the house, but you may need to buy some of these:
- Sewing machine
- Lots of black thread
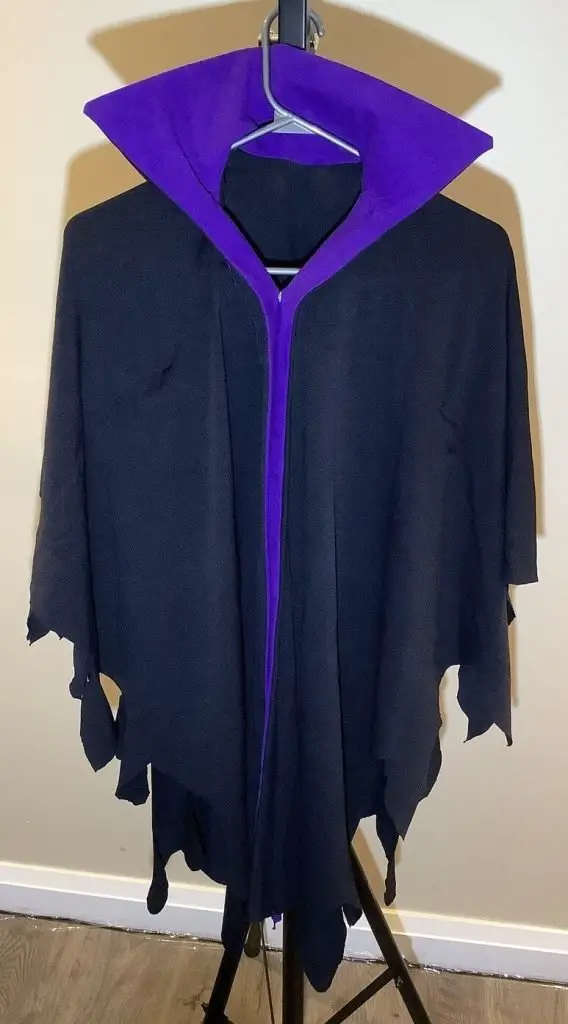
- Lots of black fabric
- Some accent fabric – we used purple from an old t-shirt
- Chalk marker for marking lines on fabric
- Pins – for holding the fabric together and in place
- Old plastic binder dividers
- A lot of space is needed for the initial cut, so you need floor space. Or a big table.
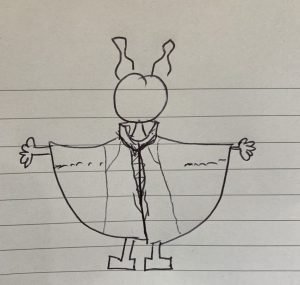
Create the Design
This may sound silly, but as we are free-handing this design, having a concept of what you are doing is very helpful, so you need to sketch it out. It does not need to be to scale, and it does not need to be pretty, but you need to have something to look back at. This is the design that we came up with.
Measurements Required for the Cape
Like with any sewing project, you need to measure twice and cut once. You do not want to waste material.
First, you want to measure the height of the cape. As this is for my daughter, I measured from the top of the shoulder to the ankles. We do not want a tripping hazard. We came up with 42″ in height.
Then, you need the arm span. Having arms out parallel to the ground, measure from the wrist to the middle of the back. This was 16″. We wanted hands to be visible so that getting candies and fixing hair is possible. So, we wanted it a bit shorter for functionality.
Preparing and Cutting the cape fabric.
Now that we have the measurements, we are ready to prepare the fabric.
Remember, this is a cape, so you will need to fold the material in half so that there is a front and back part. And by folding the fabric in half, you are saving a few passes with the sewing machine as you will not need to attach the front to the back.
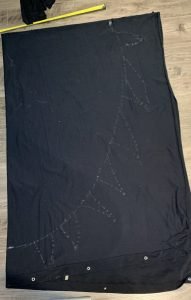
Lay the fabric smoothly on the floor. And fold it in half with one top and one bottom layer. Then, fold it again, so that your cape fabric is folded twice. Make sure there are no wrinkles in the fabric.
Starting at the folded side and using your fabric marker, mark off the measurements for the arms. In my case, it was 16 inches. This will be your shoulder line and arm length. Then, measure from the corner down for the height. For me, this was 42″.
Again, I did free-hand, so following the concept of my sketch, I made a semi-circle connecting the three marks.
As an option, you can add some jagged edges to give it some more character.
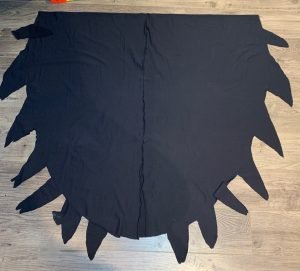
Once your design is drawn on the fabric, it is ready to cut. This is your cape.
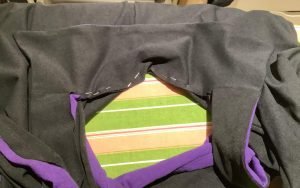
Unfold one layer of the cape so that it is still folded once. You will need to make a cut in the material through the height of the cape fabric. Make sure you are only cutting one layer of fabric, as this will be the opening/front of the cape.

Measure the cape Twice
This is an ideal opportunity to measure the cape on yourself or your kids to verify the size. Even though I measured it, the extra tassels gave the cut cape too much length, so I needed slightly to trim the front. We do not want little kids tripping while collecting candy.
Making the Collar For Maleficents Cape
In the Disney version of The Sleeping Beauty, Maleficent’s Cape has a purple trim around it. So we needed to recreate this.
The inside of the collar will be purple, and the outside will be black, matching the rest of the cape.
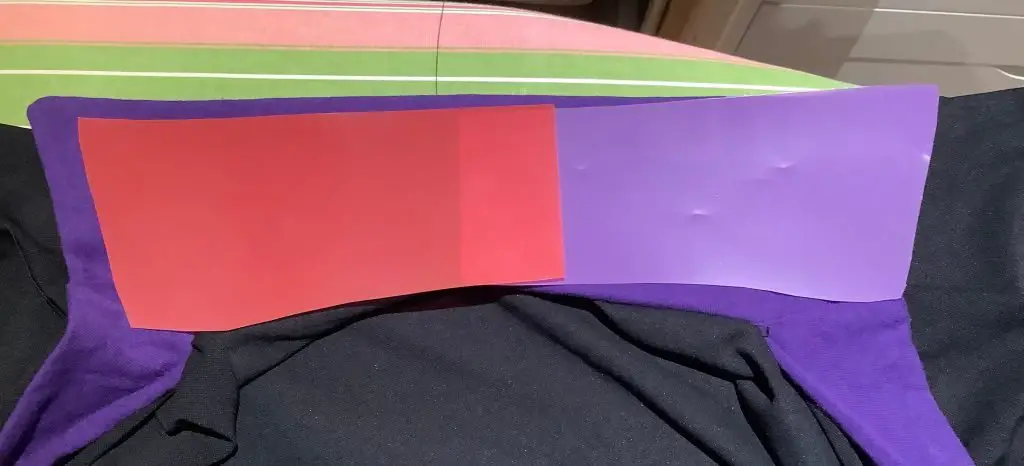
Cut out a rectangle in both the black and purple fabric. I did a quick measurement around my daughter’s neck/shoulders. 15″ seemed to be a good length to go around her neck and about 5″ in height.
For added shape and character, trim the bottom corner of the rectangle to give the collar an angle that jumps out.
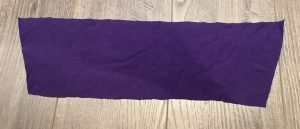
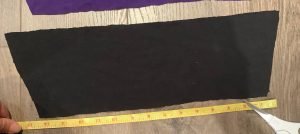
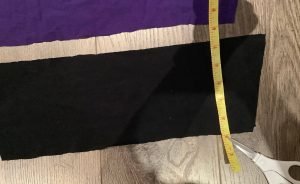
The purple collar also includes a section that comes down the front of the cape, so cutting two 3″ wide by 42″ long strips in both purple and black.
Before attaching the purple and black collar pieces together, attach the long trim pieces to the collar. I did the purple pieces first. Once they were sewn together, I laid the black fabric on top to align the trims on both sides.
Once both trim pieces are attached to the collar for both the black and purple fabric, align the collars and trims of both colors, making sure the seams are facing outwards. Sew the top seam of the black and purple collar together and only the outside section of the trim.
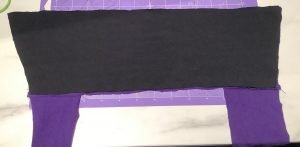
Once it is sewn together, flip it and iron the edges to keep the collar and trim straight.
Attach the Collar to the Cape
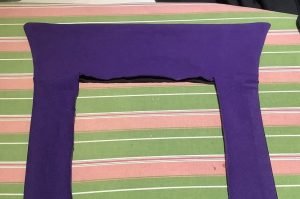
Align the cape so that it is flush and straight. Folding the collar in half, align it with the center of the cape/neck. Pin the collar to the cape on one side. Then unfold the collar and pin the other size. Aligning the cape center and collar center can be challenging, as the cape and collar will be circular. There will be some bunching around the center point of the collar.
Run it through the sewing machine, but just far enough to allow the collar to be attached, but not so far as to sew into the trim.
Make the Collar Rigid
Using your old plastic binder dividers, cut them into the size needed to fit into the collar. This requires a bit of trial and error. This is easy, as you can just measure based on the outside of the collar. There are still small gaps inside the trim pieces of the collar to slip the plastic in. I used 2 pieces of plastic as I did not have anything that was 15″ long.
Once the plastic binder dividers are inside the collar, align them into the correct spot. Sew the plastic into place with a small section at the bottom center of the collar. This will keep the shape of the collar.
This could have been done before the collar was attached to the cape. I found it difficult to attach the collar to the cape, with the rigid plastic inside, so I opted to do it afterward.
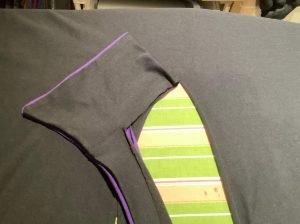
Connect the Trim to the Cape
Using pins to align the trim and cape and hold them together, sew the trim onto the cape. Any surplus can be cut off.
I did a quick pass with the sewing machine at the bottom of the trim to stop it from fraying.
Optional Additions to the Cape
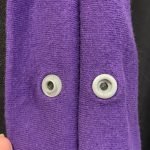
Add Snaps to the Cape
Adding Snaps to the cape to help keep it closed. I use snaps for a whole lot of things, so I have a handy set, but attaching some snap (or buttons) allows the cape to stay closed and secure while walking.
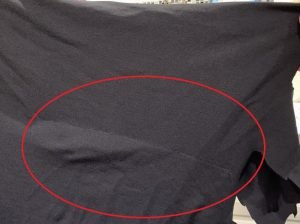
Making Sleeves in the Cape
Sewing sleeves – This is not required, but I did one quick pass on the sewing machine about 6 inches down from the top of the cape. This is to help keep the arms in place and stops the cape from moving around as much. This size works well to wear over a winter coat, as it is typically cold for Halloween.
And that’s it! You’re all done! Your Maleficent Cape is done!
Now you just need to make a scepter to go with it! Fortunately for you, we have already done that, and you can find it here – How to Make Maleficent’s Scepter

And once the cape and scepters are complete, you need to apply your Halloween face Paint! Check out some tips and tricks on how to do that here!
Did you find the Tutorial On How to Make Maleficents Cape Helpful?
Let me know if this tutorial on How to Make Maleficent’s Cape was Helpful! It was my first sewn costume ever, so I am rather pleased with how it turned out! Let me know!
You can also check out my other sewing tutorials here.
If capes aren’t your thing, learn How to Make a Skeleton Costume here.
Don’t forget to sign up for my newsletters! You’ll get inside tips on upcoming posts and additional behind the scenes details about what’s happening on the site!