We recently purchased new windows. This was an expense we had been saving for, for years. And I dreaded the whole process up to installation, but afterward, there were several things I did not think about. The main one is that none of my curtains or blinds fit the new windows. So everything needed to be redone. And as we just bought new windows, I was not keen on drilling hooks into the frame or installing new California shutters into the window box. So, I needed a new solution. And as I’m always looking for a quick, inexpensive but neat solution, I decided that I needed to learn how to makes curtain straps/curtain tie-backs to hold my curtains.
As an Amazon Associate, I earn from qualifying purchases. This post contains affiliate links. I may receive a commission if you purchase an item from one of my links. This will not change the price you pay.

What you need to Make Curtain Straps
Every project has a list of materials that we need to successfully complete the job! This project is no different! So, here goes!
- Our faithful cutting machine – I use my Cricut Explore Air 2
- Faux leather – I still have an abundance of glitter faux leather. This is the one I use.
- Plastic Snaps – I like plastic ones because they come in many different colors, so they can match your curtain straps nicely. Metal ones will work also. I use these ones.
Let’s Get Started! First, we need to measure our curtains!
All curtains come in different sizes, just like windows. You may have a dark curtain and a sheer curtain, or just a sheer curtain, or a decorative curtain. Each person’s idea of what looks right is different. So, you need to measure how thick the diameter of the curtains will be.
Grab the whole curtain panel, 2 panels, or however many pieces you want to strap together.
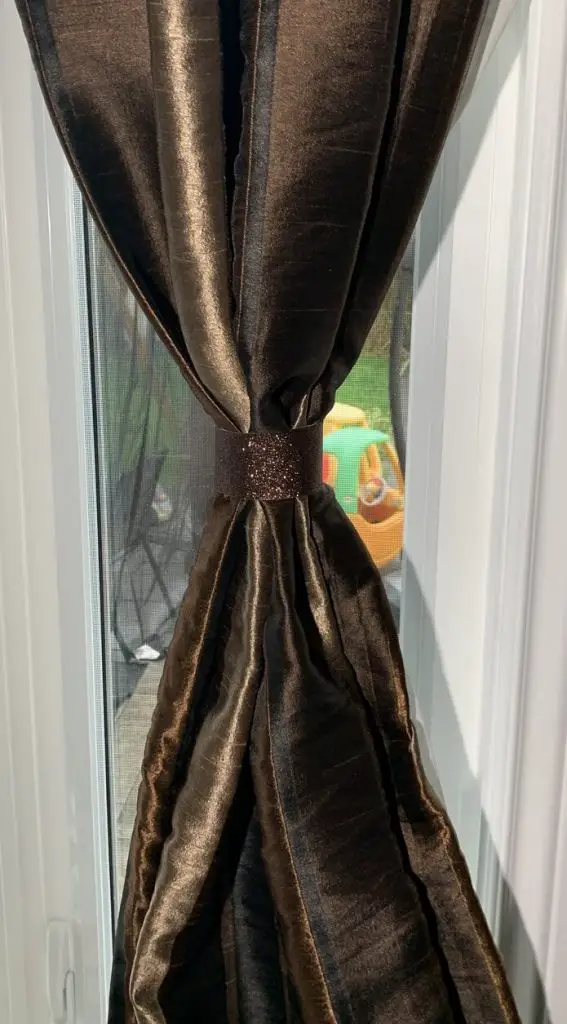
Using a tape measure, bunch the curtains together to see how big the strap will be. Keep in mind if you want a tight curtain strap or a loose one. In my case, I was looking for a tight strap which was about 10 inches.
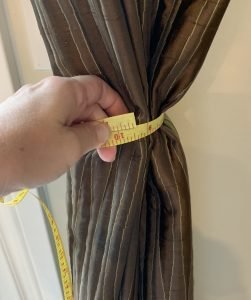
As I wanted some overlap with the straps, I needed to cut the faux leather larger than my 10 inches so that I wouldn’t be forced to squeeze the curtains tighter, nor would I run out of faux leather to install the snaps comfortably.
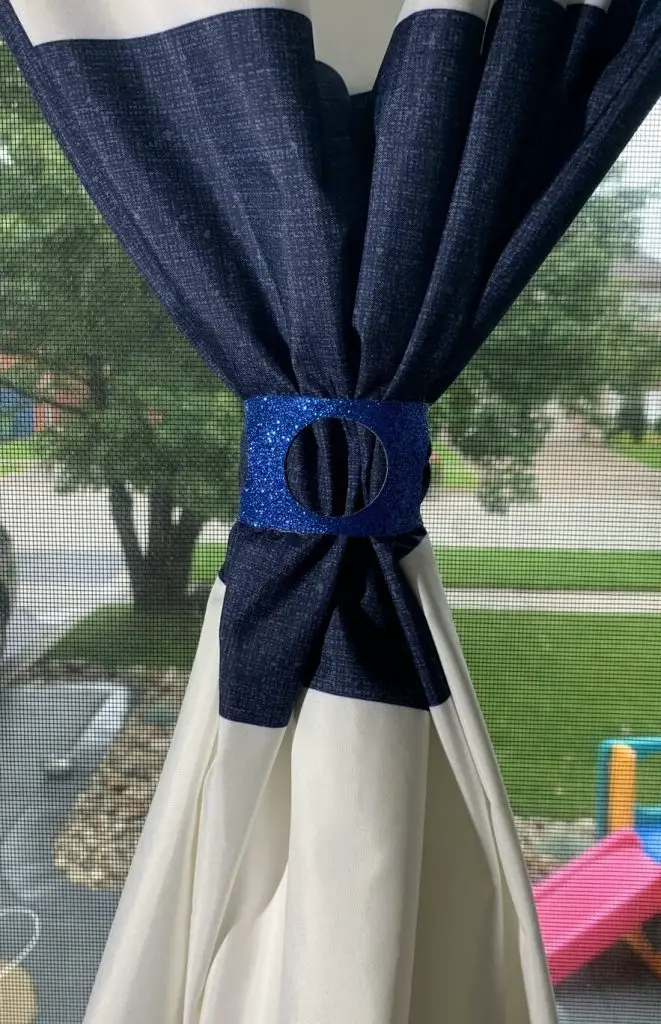
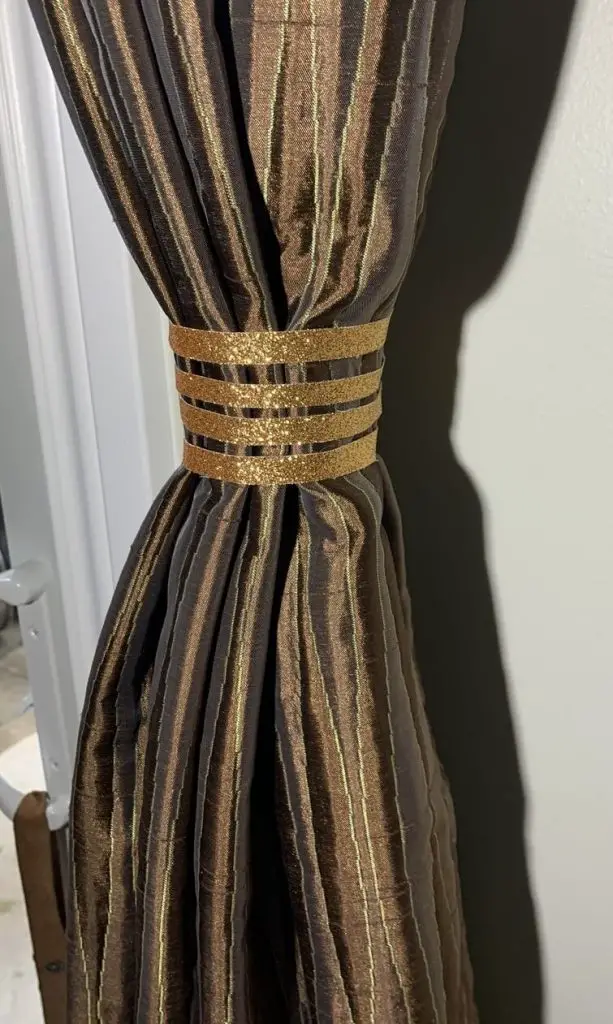
Design the Curtain Strap
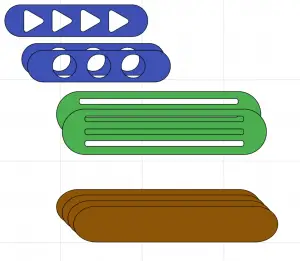
These straps or curtain collars, as I like to call them, are simple to design. All you need is a rectangle with some rounded edges to make it look nice. You can create intricate designs if you have time. Or, you can get my free designs by signing up for my newsletter.
Get your Free Curtain Strap Cut File Here! Just sign up for my newsletter, and I’ll send you a copy!
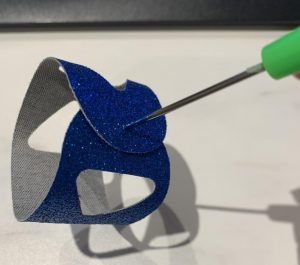
Cut Your Design
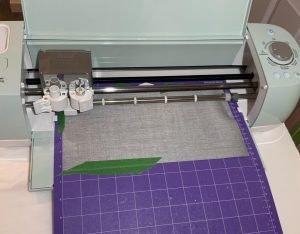
I used my Cricut Explore Air 2 to cut through the faux leather. The settings that I use are as follows:
Material: Sueded
Pressure: More
Cut: 2 times without removing. Simply hit the Cricut C to recut without unloading. This will ensure that the next cut is in the exact same spot.
I place my material face down. I find this works better for cutting and keeps my blade sharper longer.
Do you need a cutting machine to make curtain straps?
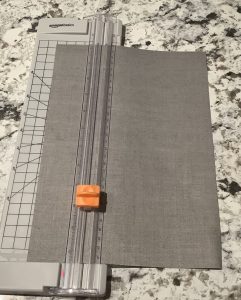
No you don’t need a cutting machine to make these curtain collars. For the first ones I made, I used my paper cutter to get a nice straight edge. For more intricate designs, a cutting machine works better. However, if you are skilled with a knife, you can make it work also.
Installation of Snaps
I bought these snaps a while ago, and I have to say, they are the best thing I have purchased in a long time. They come in handy for everything, and these curtain tiebacks are one of them. And the fact that the set contains every color I could ever need is a bonus.
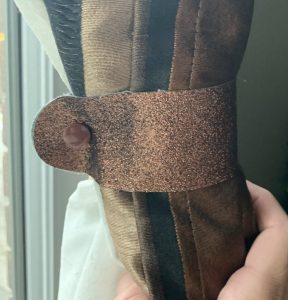
Each curtain strap will require 1 male end, 1 female end, and 2 backing pieces. When installing the snaps, you don’t want to be too close to the edge, so hopefully, you listened above when I said to cut the straps larger than you needed to simply go around the curtain.
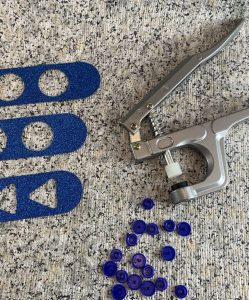
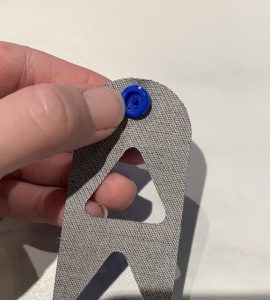
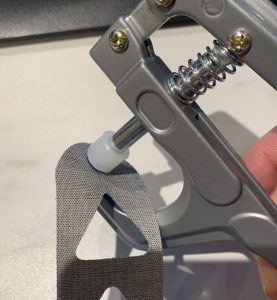
Also, make sure you are applying the snaps in the right direction. My faux leather doesn’t have color on the backside, so this side will face into the curtain. The snaps need to align so that the male and female ends join with one piece on the colored side and one on the uncolored side, as shown here.
Optional – Install An Extra Snap On Your Curtain
My curtains aren’t always open. I like to keep them closed sometimes. So, I installed a snap on the curtain so that the strap can attach to the backside of the curtain and stay there safely until I need it next time. This way, the tieback strap always has a place to stay and not get lost.

That’s it! You’re Done! You have Fabulous Curtain Straps/Curtain Tie-backs!
Things I learned While Making and Installing Curtain Straps/Curtain Tie-backs
Like with all projects, I made some mistakes, and I learned several things along the way. It was no different this time while learning how to make these curtain straps/curtain tie-backs. So, in no particular order:
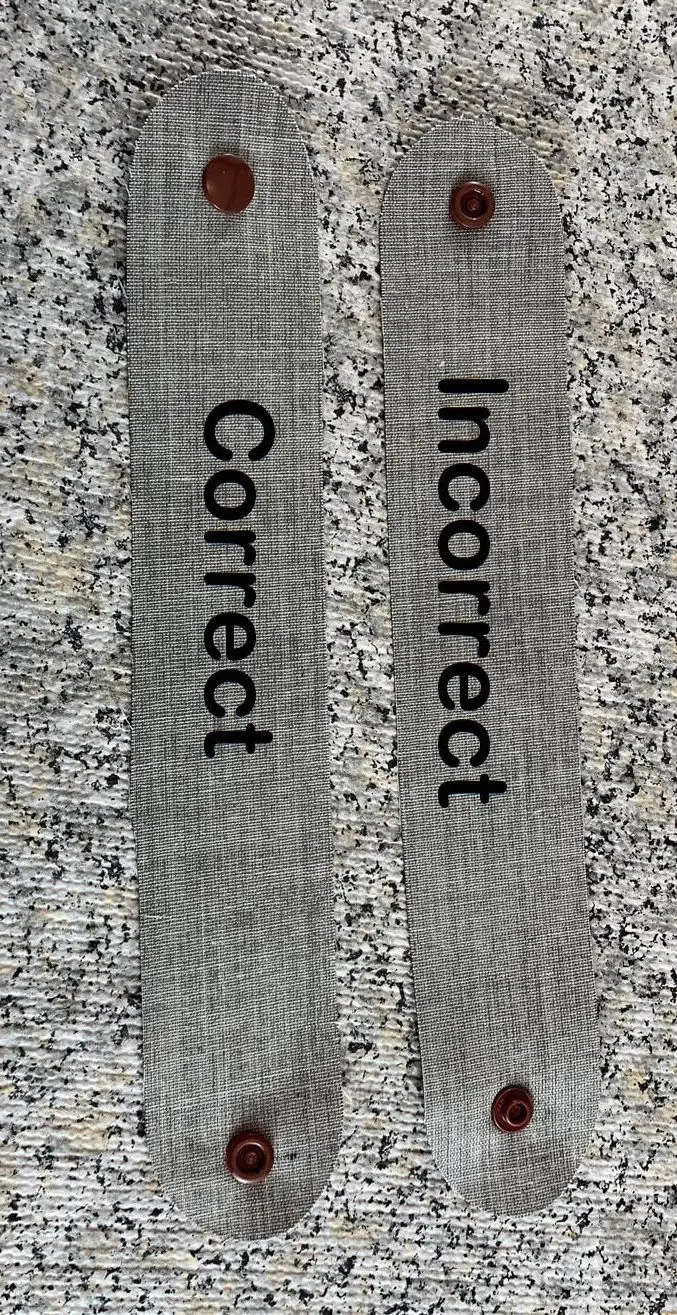
- Install the snaps the same way on all curtains. This will save you from fumbling and trying to figure out which side to attach. Trust me, when you have many curtains, this comes in handy.
- Make sure you pay attention when you are installing your snaps. If you do it backward, you will lose curtain tieback space and do not look great.
- Designs with lots of space/gaps need to have a backing piece to keep their form. Either by using more faux leather glued to the back of the design piece, stiff fabric, or even vinyl. If not, the curtain strap will either slide together hiding the whole design or pop in weird places making the design look off.
- It is really nice that these are quick and easy to make. If you get tired of the design or color, you can just make a new set in no time or switch up the design each season.
- If you have curtains in your kids’ rooms, you can always practice on their curtains first. My kids love the original prototypes that are in their rooms still.
Did you find this tutorial on how to make curtain straps/curtain tie-backs helpful?
Did you find this tutorial on how to make curtain straps/curtain tie-backs helpful? Find other faux leather crafts similar to it here.
Let me know if you tried this out, and let me know how it went!
Get your Free Curtain Strap Cut File Here! Just sign up for my news letter and I’ll send you a copy!