I have never been a fan of getting flowers as a gift. Something about them dying and having to deal with cleaning up the mess. But when I learned about paper flowers, I thought it was a really neat idea because they never die. They do collect dust, but that can be shaken off. While out for a walk the other day, I saw some really pretty black-eyed Susan’s. And I thought they would look nice in a paper bouquet. So, I set off to design and make some black-eyed Susan paper flowers.
Supplies needed to make black-eyed Susan’s
All paper flowers are different, and they all need a little something different. So, let’s look at the supplies we need to make black-eyed Susan paper flowers:
- Black-eyed Susan Paper Flower file – you can get my file in my shop here.
- Card stock – 8.5” x 11” is what I use, but 12”x12” is also good.
- Dark Yellow Card stock – I use the dark yellow from the card stock set found here
- Dark Green card stock- I use the dark green from this card stock set.
- Brown card stock – I use the brown found here.
- Metal Flower Stem – You can buy metal flower stems covered in green paper. You can find some here, or you can also find them at most dollar stores. You want ones that are 2 gauge wire wrapped in green paper, as these will fit my design.
- Glue – I use this craft glue, but you can also use a glue gun for this craft. The hot glue will dry faster, but if you do not have high-quality glue, it may leave stings or may dry white.
- Cutting machine – I use my Cricut Explore Air 2 to cut out the file, but any Cricut Machine or Silhouette will work.
- Cutting Mat – this is required for most Cricut machines, but not all brands of cutting machines need cutting mats.
- Optional – Quilling tool or 1/8″ dowel.
Let’s Make a Paper Black-Eyed Susan
You can get my paper Black-Eyed Susan file here at my shop. There are two different versions of the file. One has fewer details, while the other has more. So, I’ll quickly walk you through what you need to do with both files to use them.
Detailed Black-Eyed Susan SVG File
Once you have uploaded the file into Cricut Design Space, you need to make a few modifications.
- Adjust the file size – you want the design to be 7″ wide. Sometimes, when files are uploaded into Cricut Design Space the size is incorrect. Also, make sure your dimensions are locked before adjusting the dimensions.
- Ungroup the whole file after you have adjusted the size.
- Each flower petal arrangement and each leaf have lines on them. These need to be changed to score lines.
- With the leaf – you can simply select the line on it and change it to a score line.
- The petals – there are lots of lines on the petals. I recommend you select the whole flower on your layers menu on the right side of your screen and change it all to score lines. Then, scroll down in the layers menu and select only the flower outline. Change it to Basic Cut.
- Attach the flower to the score lines, and the leaf to the score lines so they cut and score in the correct places.
That’s it. You’re ready to cut your black-eyed Susan paper flowers. This file is only for one flower, but you can increase the number either on your canvas or once you are arranging items on your cutting mats.
Simple Black-Eyed Susan SVG File
With the simple Black-Eyed Susan SVG file, there is only one thing that needs to be done:
- Adjust the file size – you want the design to be 7″ wide. Sometimes, when files are uploaded into Cricut Design Space the size is incorrect. Also, make sure your dimensions are locked before adjusting the dimensions.
That’s it! You’re ready to cut your black-eyed Susan paper flowers. This file is only for one flower, but you can increase the number either on your canvas or once you are arranging items on your cutting mats.
How to Assemble a Black-Eyed Susan Paper Flowers
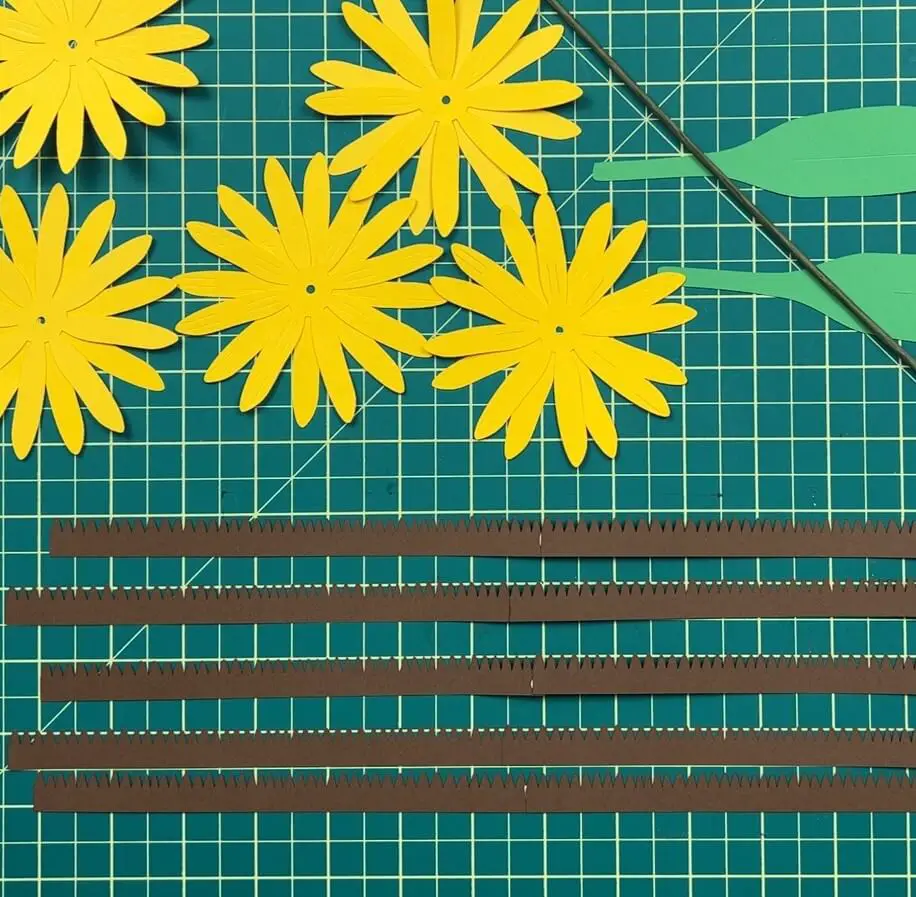
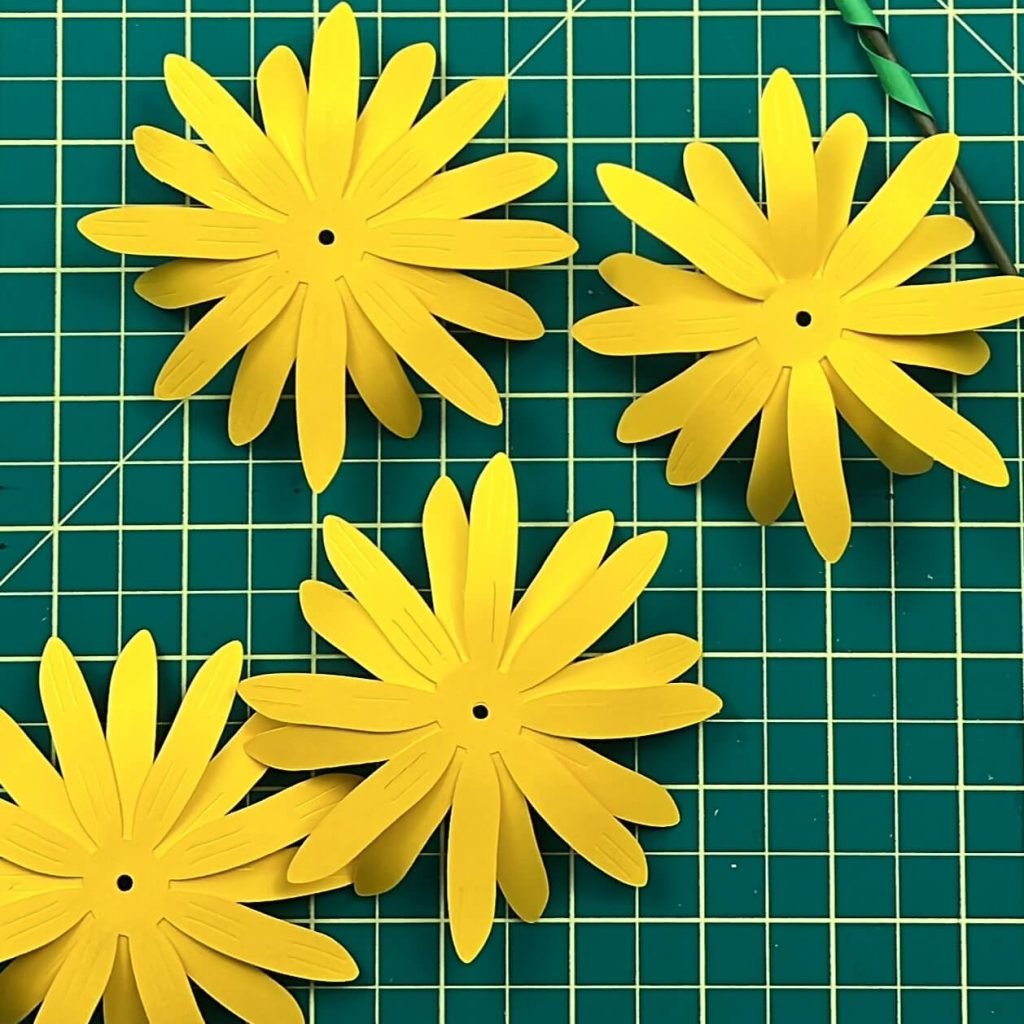
Once all of your pieces are cut out, you should have the following cut-out piece for each flower:
- 2 dark yellow petal arrangements
- 2 green leafs
- 2 brown flower center pieces – currently look like rectangles with teeth on one side
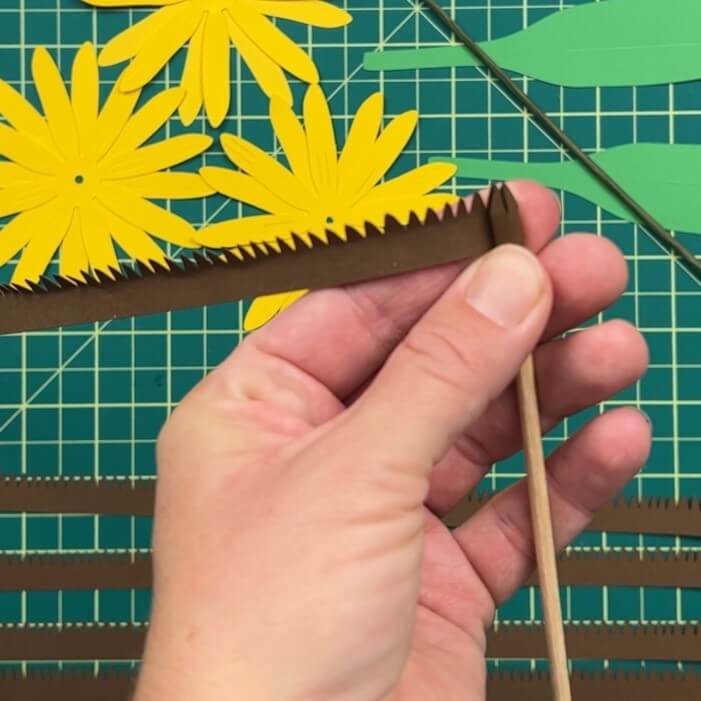
Assembling the flower center
Take the two brown rectangle-like pieces and place them next to each other length-wise. You will need to glue them together – overlapping on the teeth.
Once the glue has dried enough to handle the paper, bend all the teeth in one direction.
I recommend using a 1/8″ dowel for this, as this will leave a perfect size whole when assembling the flower onto the metal stem.
Using a quilling tool or a 1/8″ dowel wrap the brown center around. I like to use a dab of glue at the start to help hold the flower center together, but this is not needed. When wrapping the flower center, you want to have the bent teeth pointing inwards. Try to keep it flat on the bottom the best you can.
Once you have come to the end, use some glue to glue the center closed.
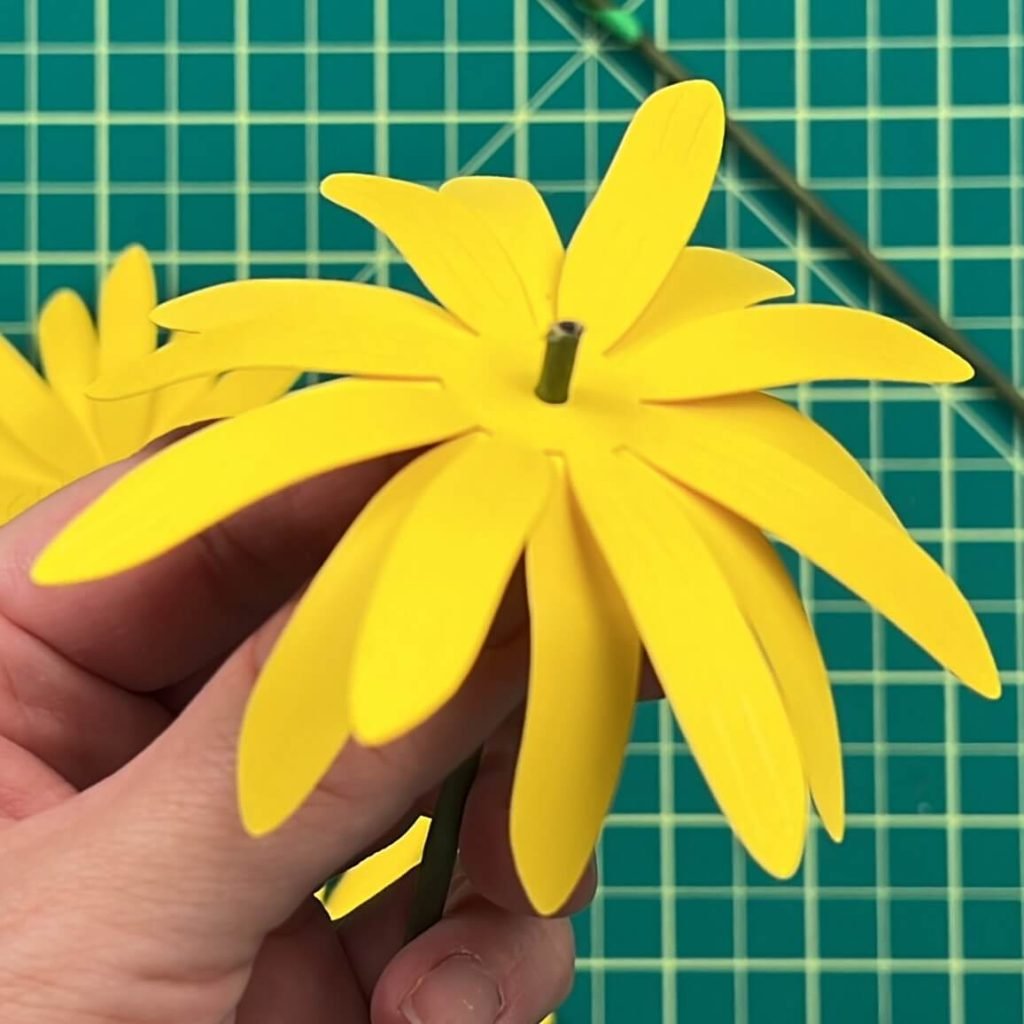
Assemble the Flower Petals
You have 2 dark yellow petal sections. Apply glue to the top center of one and place the second one on top. You want the petals of the top flower to cover the gaps of the bottom flower petals. You can space them evenly or slightly askew. Keep the hole in the center of both flower assemblies lined up.
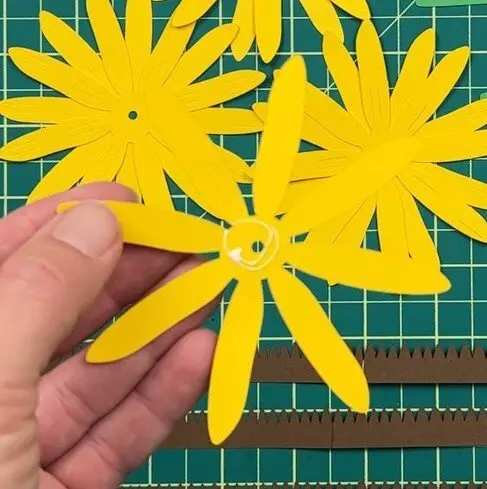
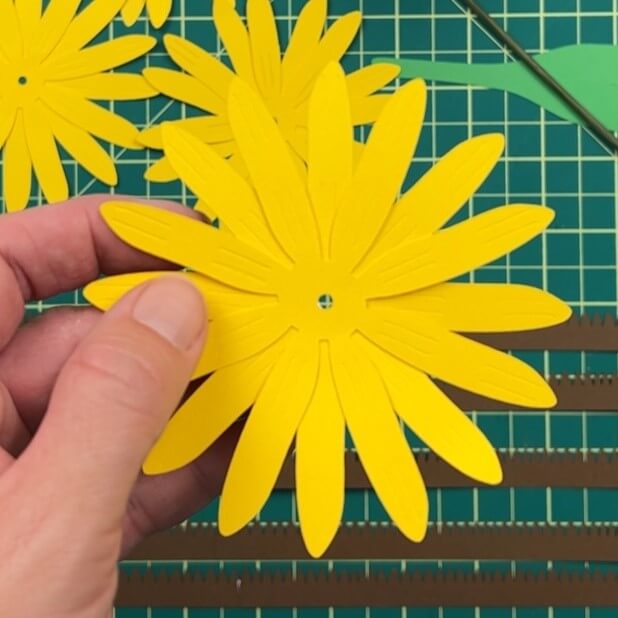
Once the glue has dried, you will want to delicately curl the petals down using your fingers. They only need a slight curl.
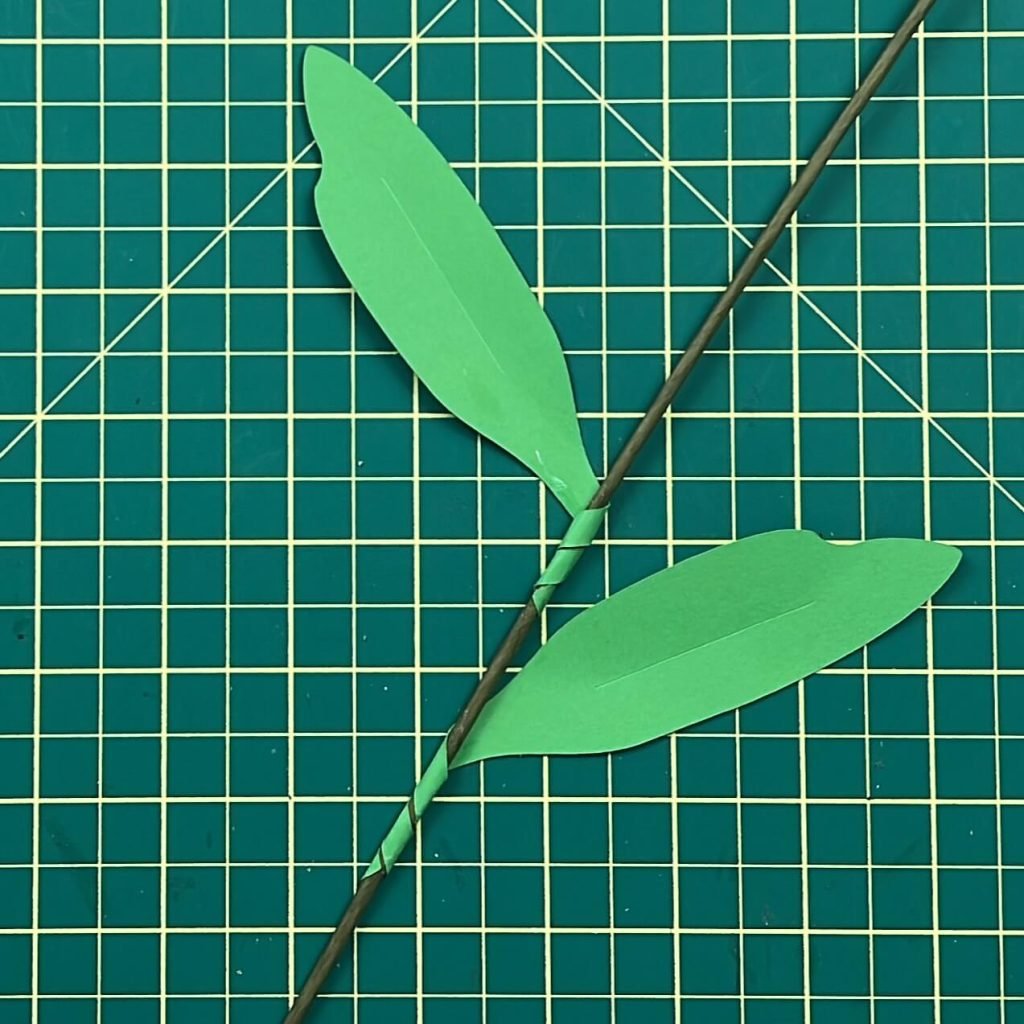
Assemble the Flower Leaves
You can crease the leaf or roll it a bit to give it some personality. Or you can leave it flat.
The stem on the flower leaf is long. This is so that you can wrap the stem of the leaf around the metal stem of the flower. Apply some glue to the stem of the leaf, and wrap it around the stem. Repeat for the second leaf.
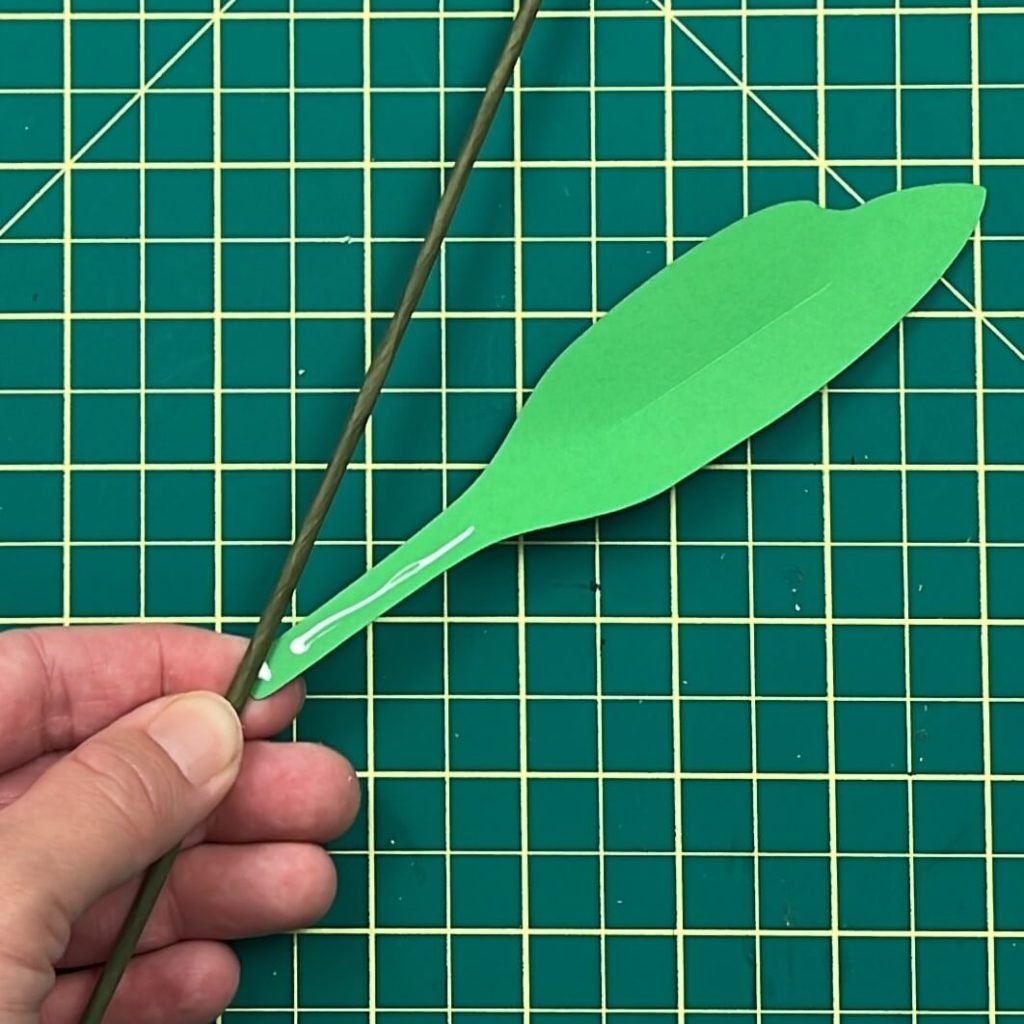
I like to have my leaves lined up so they are on opposite sides of each other. This lets me place the stem on my tabletop to allow it to dry. You can arrange your leaves however you like to give them more personality.
Assemble your Black-Eyed Susan Paper Flowers
Now, it is time to put all the pieces together.
Once the stem with the leaves has dried, slide the flower onto the stem. It should be a tight squeeze. Make sure that the curl of the petals is facing downwards. You only want to push it down about 1/8″-1/4″ down on the stem.
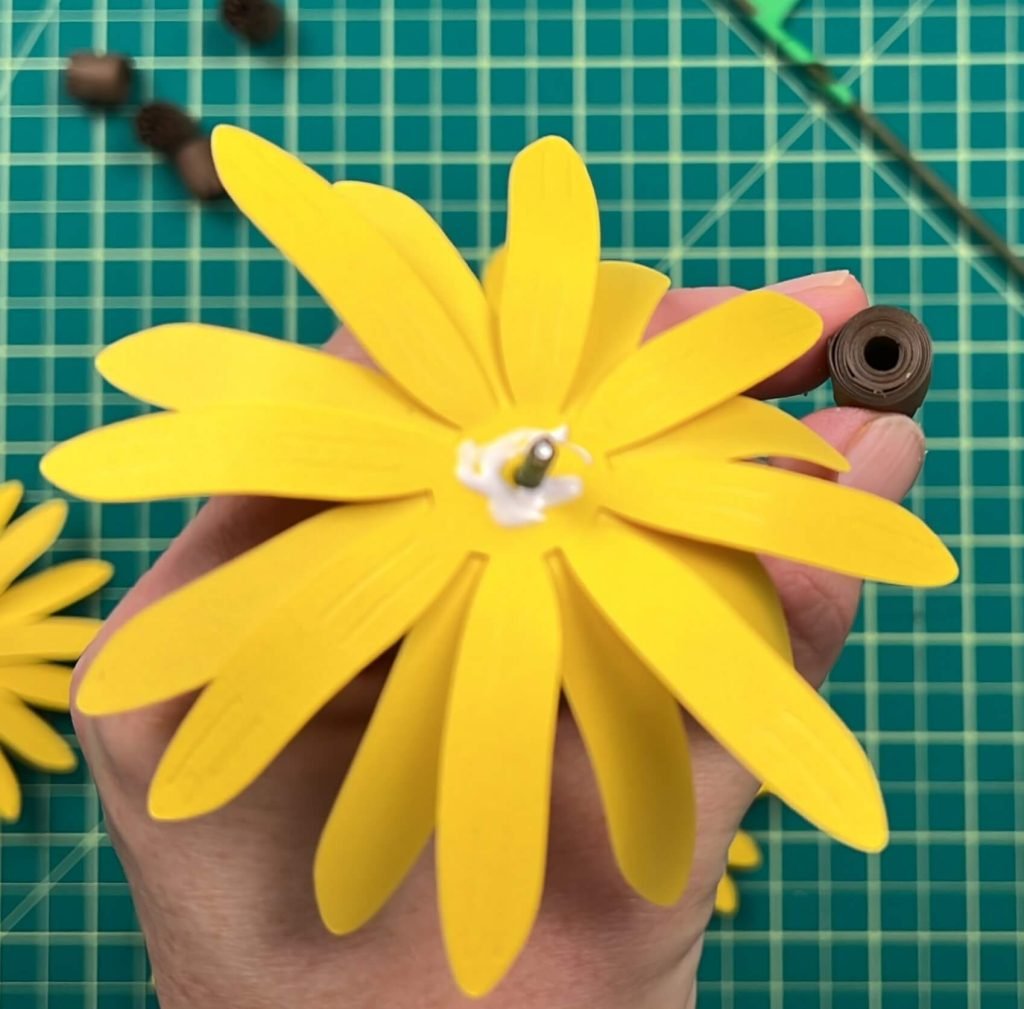
Generously apply glue around the top center of the flower and onto the metal stem. Place the brown flower center onto the flower. The gap in the center of the flower center should be large enough to allow the flower stem to slide right into it.
Let the flower dry. I find it best to let the flower dry in a vase standing up.
Once the flower is dry, you can add more curl to the flower petals and the leaves and rough up the flower center a bit.
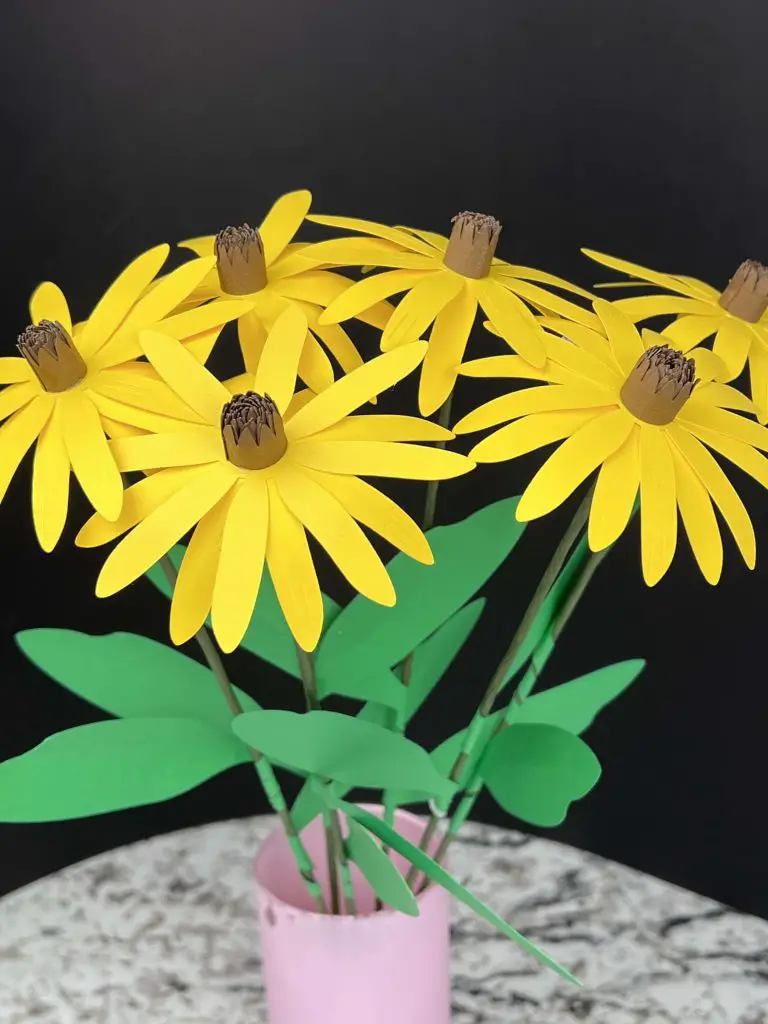
And that’s it! You’re done! Your Black-Eyed Susan Paper Flowers are Complete!
Frequently Asked Questions about making Paper Flower
- Can I use a glue gun for making paper flowers? Yes, you can! I opted for using my craft glue instead because my current hot glue does not dry clear and is a bit stringy. But if you use high-quality hot glue, you can use a hot glue gun with no problem.
- How long does it take to make black-eyed Susan paper flowers? File setup takes about 5 minutes, and depending on how many you are cutting out, it can take 5 minutes to an hour to cut. But to assemble 1 black-eyed Susan paper flower takes less than 5 minutes. If you are making multiples at the same time it can be done faster as your glue is drying while you are working on other pieces.
- How long do paper flowers last? Paper flowers can last for years. The main issues with paper flowers are that over time, they will collect dust and they can fade in sunlight. But if you dust them regularly, keep them out of direct sunlight, and keep them dry, they should last at least 2-3 years looking beautiful.
Things I learned About Making Black-Eyed Susan Paper Flower
So, I have made a few paper flowers in my time but have only designed and made a few of my own. So, there is always something to learn and here’s my latest learning:
- You need more than one! These paper flowers need to be in a bunch. So you need at least 5-20. They look beautiful individually, but I think they look much better in a group.
- The flowers from the detailed file with all the score lines look more realistic. They have more character and just a bit more shape. The only problem is that cutting them out takes a lot longer.
- If your machine has been used a lot, your scoring stylus might pop out after a while. So, you need to keep an eye on that. Otherwise, you are better off just using the basic file and adding score lines afterwards.
- The metal stems I have are a shade of green that doesn’t match any of my card stock. I wasn’t in the mood to wrap the whole stem in the same shade of green as my flower leaves, but you can do that to make the flower color look more symmetric.
Did you enjoy this tutorial?
Did you enjoy this tutorial? Let me know in the comments below! Did you make these black-eyed Susan paper flowers? Let me know how they turned out!
If you enjoyed this paper flower tutorial, check out my paper hydrangea tutorial here.
If you like paper crafts, be sure to check out my other paper crafts here.