I love decorating for the holidays. And although Valentine’s Day isn’t really a holiday, it is nice to make the house a bit more colorful, especially in the dead of winter. That is how I went about making DIY Valentine’s Day Wall Decorations.
As an Amazon Associate, I earn from qualifying purchases. This post contains affiliate links. I may receive a commission if you purchase an item from one of my links. This will not change the price you pay.
Supplies needed to make DIY Valentine’s Day Wall Decorations
The supplies for this project are simple, as usual, I will walk you through them.
- Cardstock – you will need lots of pink, red, white cardstock. I used several different shades of red and pink.
- Ribbon – I like using ribbon, but if you want to use string or yarn that will also work. As I made many of these Valentine’s Day wall decoration strands, I used several shades of pink and red as well.
- Glue – I used regular crafting glue to glue the hearts together, and I used my hot glue and glue gun to attach the hearts to the ribbon.
- Scissors – Used for cutting ribbons and hearts if you want.
- Cutting machine (optional) – I used my Cricut Explore Air 2 to cut all the hearts. I did this because I didn’t want to spend all day cutting hearts out by hand. The nice thing about this craft is you do not need to cut the design out with a cutting machine, you can do it by hand. It will just take a bit longer.
- Cutting mats – you will need cutting mats if using a cutting machine.
- This project took a few hours from start to finish.
Ok, now that we have all our supplies, it is time to get this project started!
Making the Hearts for your DIY Valentine’s Day Wall Decorations
I don’t like cutting things out with scissors, especially if I have to cut out a lot. And for this project, I need a lot of hearts. So I quickly jump over to my Cricut and Design Space and make a bunch of hearts, by selecting the Shapes Menu and clicking on a heart.
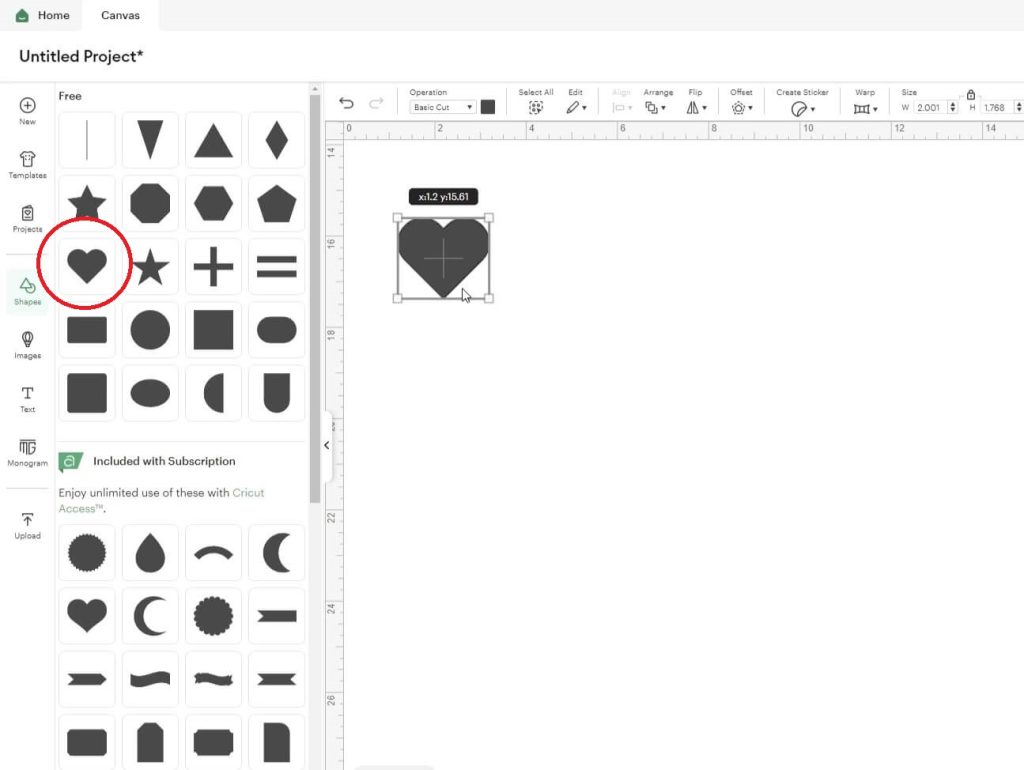
Once the heart was on my canvas, I selected it and adjusted the size to be 3″ in height.
Then, I duplicated the heart with the duplicate button and adjusted the size to 2″ in height.
Again I did the same thing, but reduced the size to 1.5″ in height.
Now, I have 3 hearts in 3 different sizes. These will be nested on each other for my wall decorations.
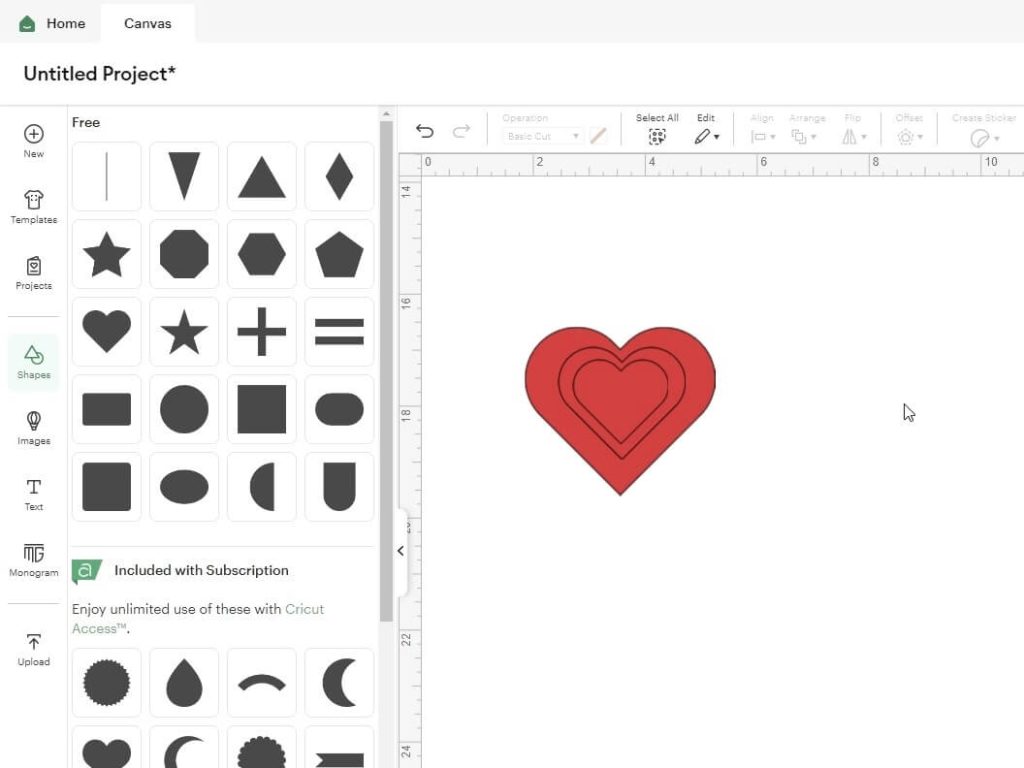
Now, my design is almost ready to cut. Other than figuring out how many we need.
Cricut Design Space Hack for quick cutting
So, I’m not sure how many hearts I will need for this project, but I know I will need a lot.
I want to share a quick hack using Cricut Design Space so you can cut out lots of the same thing without worrying about the system crashing.
I selected all 3 hearts and duplicated them 6 or 7 times.
Then, selecting the Shapes Menu, I selected a square. Then, I adjusted the size of the square to be the same size as my cardstock. In my case 8.5″ x 11″. If using a different size cardstock, you can change the size to that instead.
For this project, I needed 2 rectangles, so I duplicated it so there would be 2 identical ones.
Selecting them one at a time, click the Arrange drop-down menu and then Send to back. This will force the rectangle behind the hearts.
Now, it is time to spend 3-5 minutes arranging the hearts on the rectangle. You want to make sure you place as many hearts as you can in the space, but make sure to stay within the shape. Continue this until you have both sheets filled with hearts. If you run out of hearts to fill the space, make a few more duplicates of all 3 hearts and place them on the sheet.
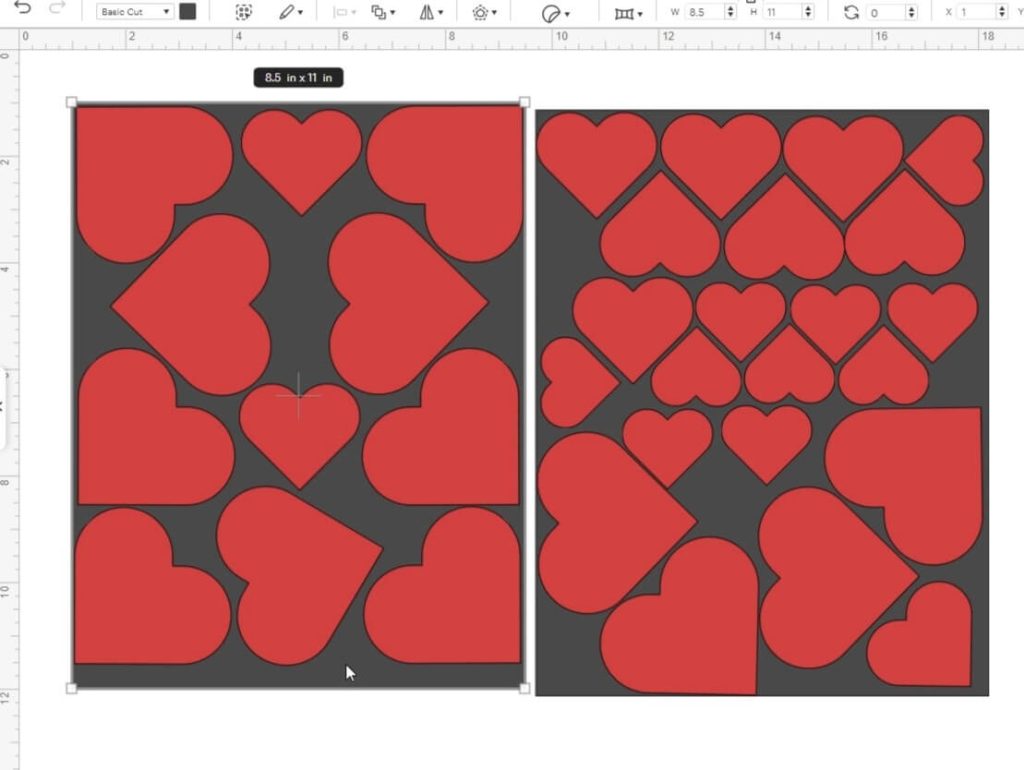
Next, click the rectangles and delete them. Now, select each group of hearts from one sheet and Attach them together. Do the same for the second set.
Now you have 2 sheets of hearts ready to cut. This will maximize your cut space on paper and allow you to cut as many as you need.
Next, click Make and get ready to cut these out.
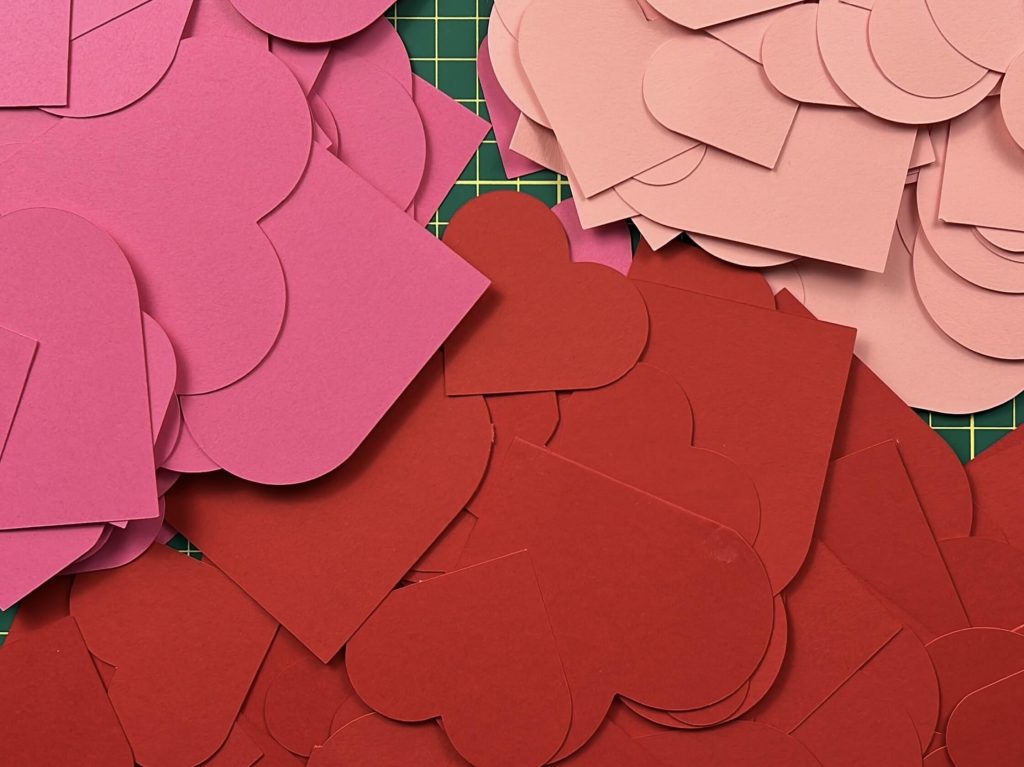
You can change the number of copies on the top left side of your screen, or you can recut each set of 2 sheets. I do the second option as it allows me to switch colors as I need to. I used 3 different colors for every 2 pages. This allowed me to stop and restart when needed to take a break and not lose my place.
Assemble the DIY Valentine’s Day Wall Decorations
Organize the Hearts
To make the final assembly faster, I like to organize things before starting.
This involves laying out the 3″ hearts first, then placing the 2″ heart on top (ideally of a different color) and then placing the 1.5″ heart on top of that.
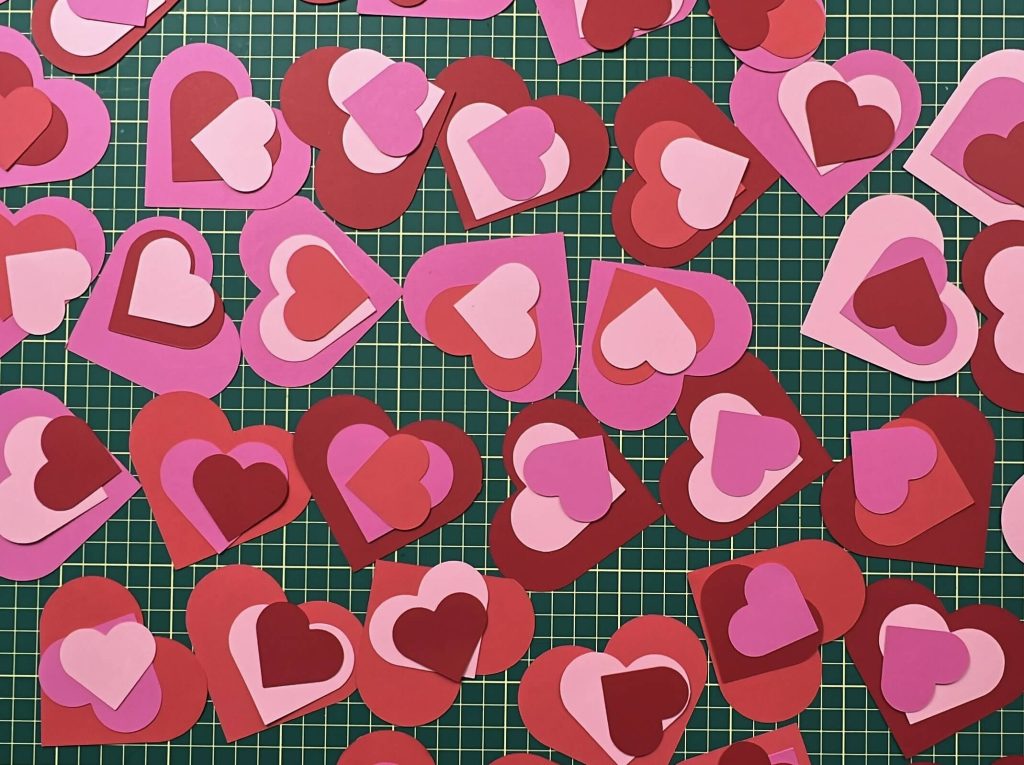
I cut my hearts out in 3 colors, and as I cut the same number of sheets in each color, I have the exact number needed for each size in each color. So, I was able to place my hearts on each other without having the same color in any heart. Meaning that the bottom, middle and top hearts were 3 different shades of pink/red.
Glue the hearts together
This part is self-explanatory, but just in case – run glue down the middle of the top heart and place it on the middle heart. Then repeat for the middle and bottom heart.
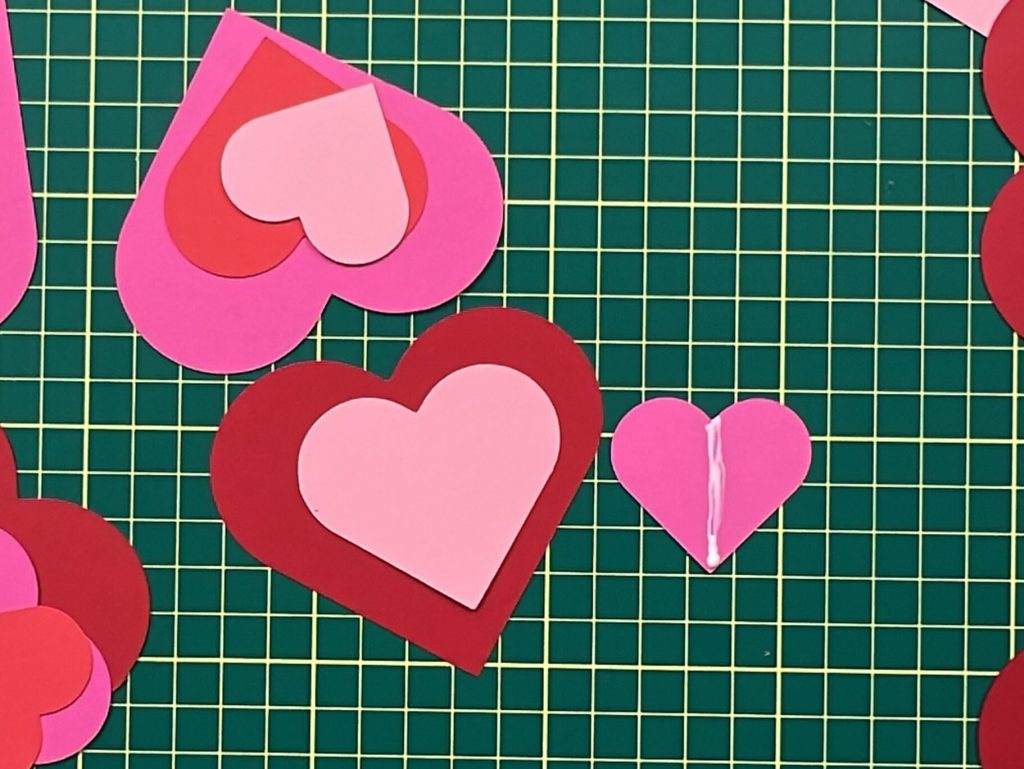
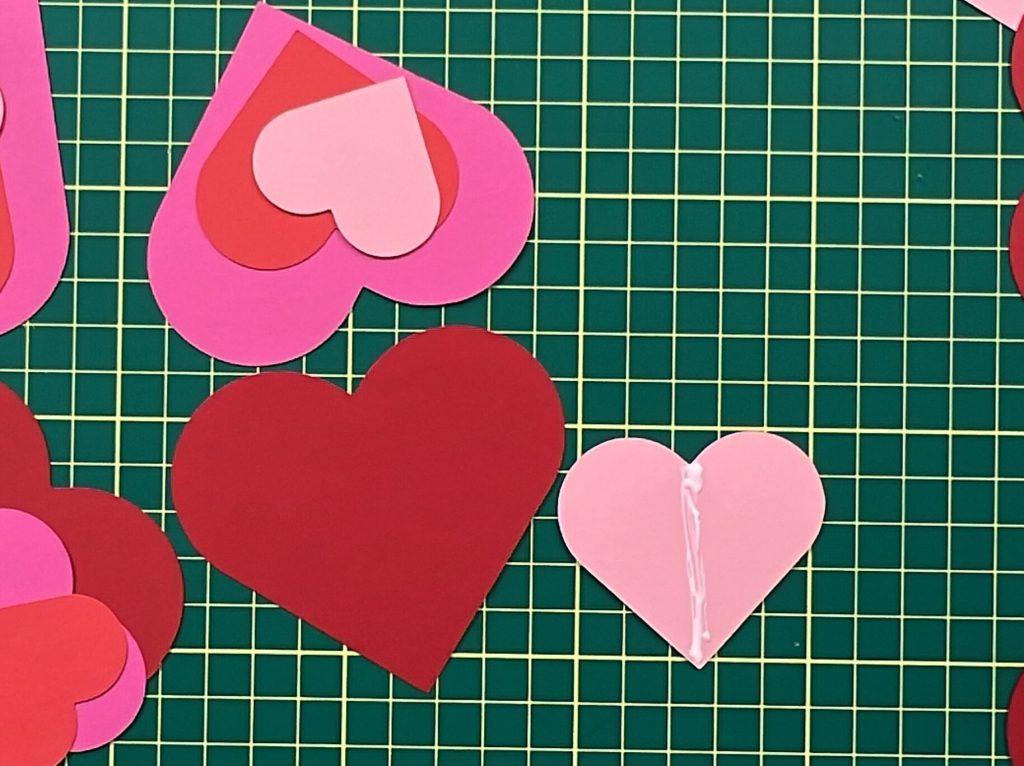
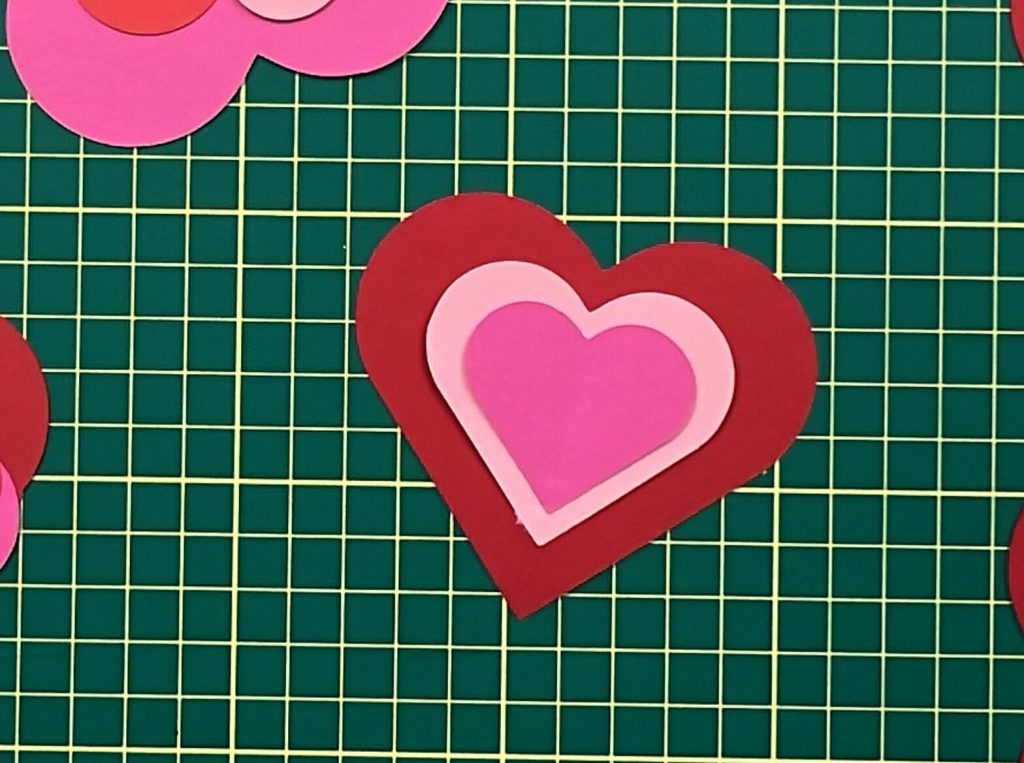
I keep a bin handy, so once the hearts were glued, I dropped them into a bin to stay out of my way.
Roll the hearts for a 3D effect
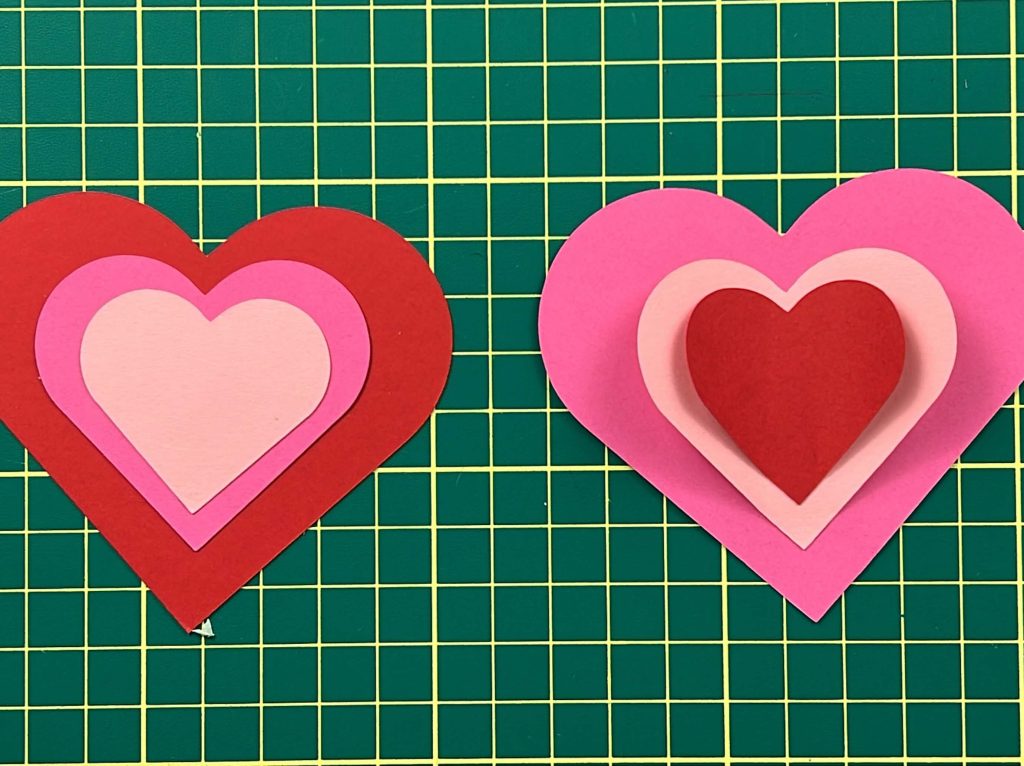
Once I was done gluing all the hearts, I took them out of my bin and rolled the edges of the small and middle hearts. This gave the hearts a more full and 3D effect.
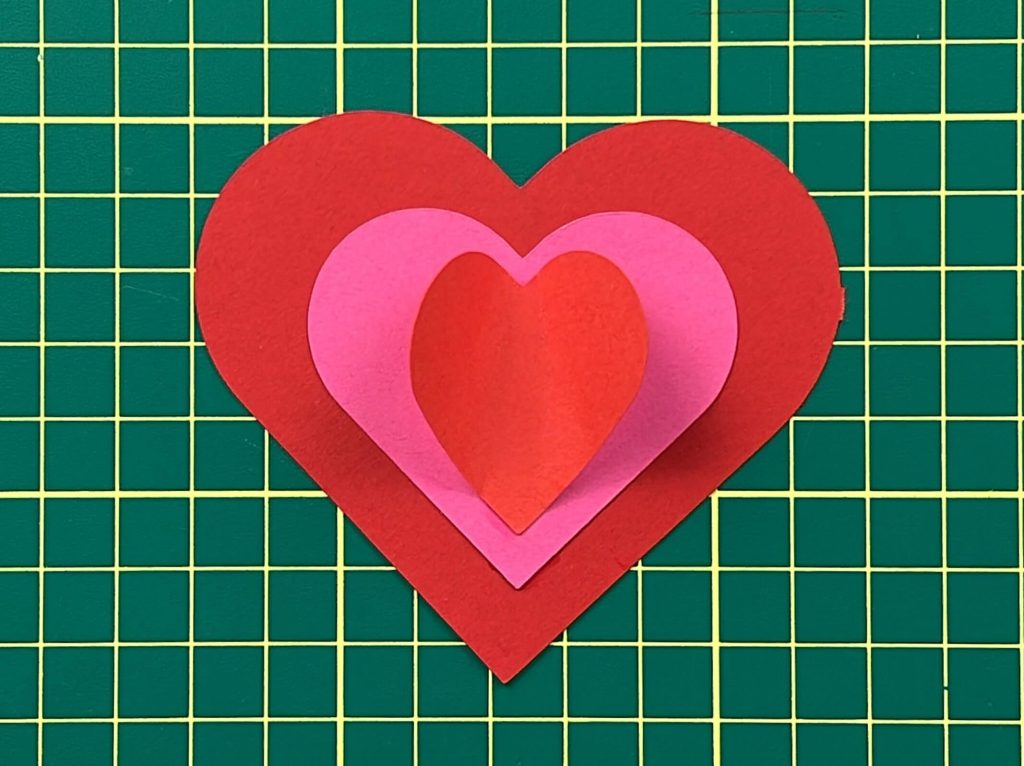
I want to point out that this part is optional. You can roll the heart’s edges or not. It is entirely up to you. I wanted my hearts to be fuller so I rolled them all.
Also, you can do this before or after you glue. I opted to do it after gluing as it was all together and easy to work with for me.
Attaching the Hearts to Ribbon
Now that the hearts are ready, it is time to attach them to our ribbon.
This is where I used my hot glue and glue gun. I find that hot glue works better with a ribbon and cardstock, as compared to craft glue. It sticks better and it dries faster.
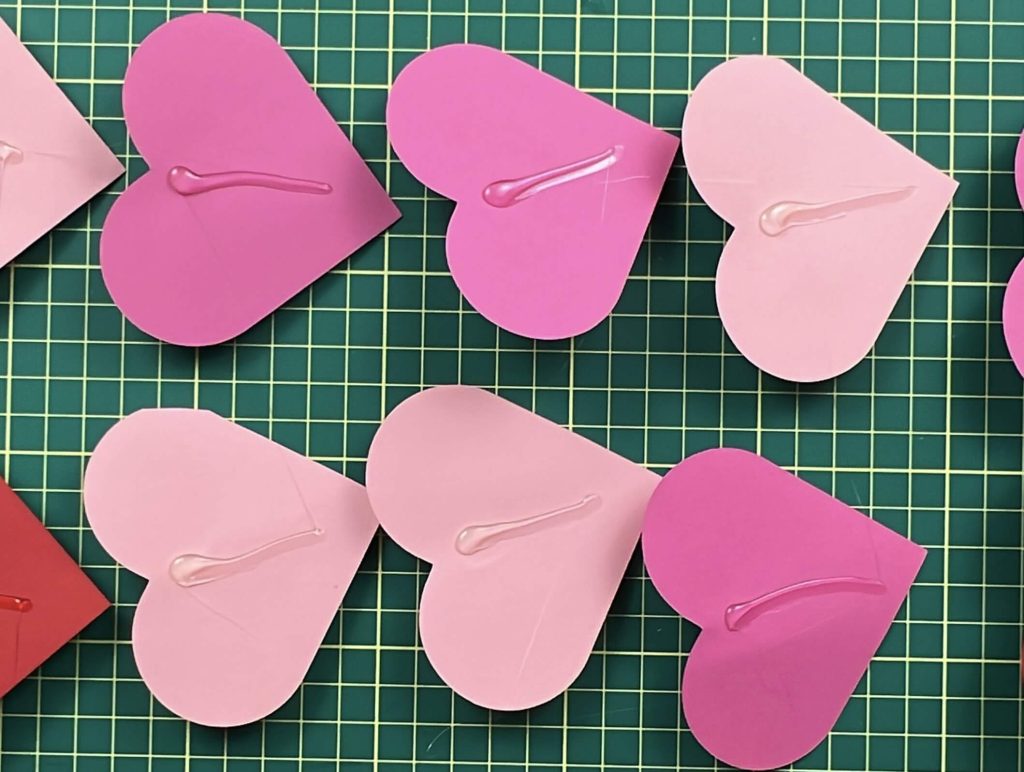
I need my ribbons to be about 7 feet in length. So, I measured and cut a bunch of 7′-length ribbons and was ready to start.
I arranged several hearts on my workstation, applied glue to the back, and then placed the ribbon on top. I spaced the hearts about 1/3 of a foot apart from each other.
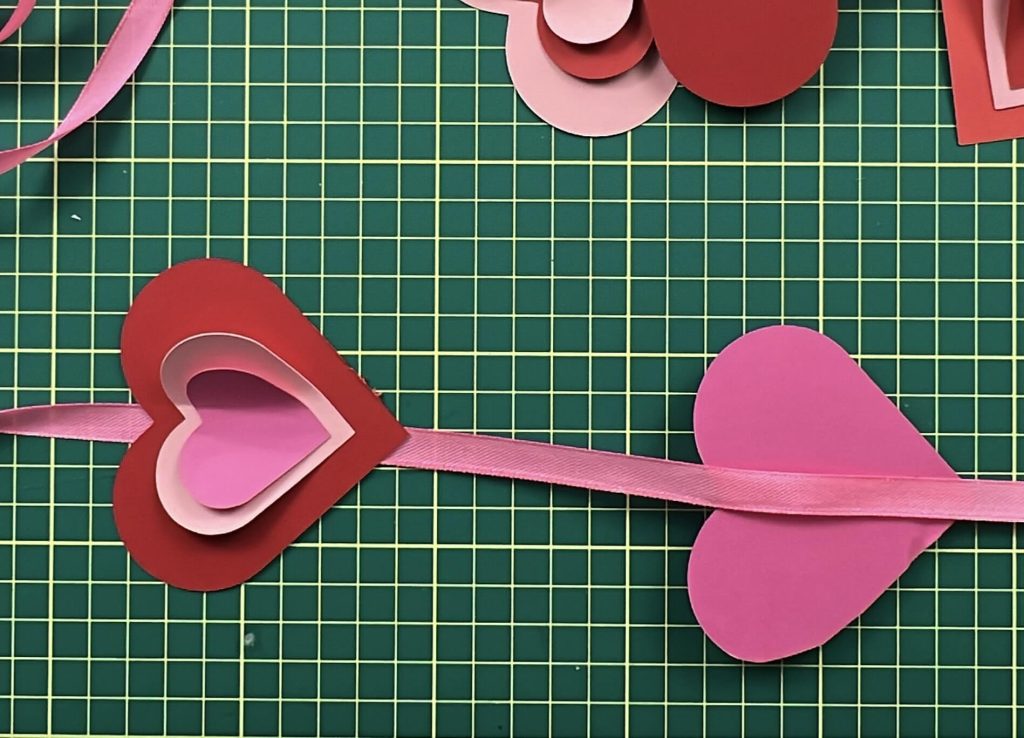
Also, check that the hearts are all facing up, with 2 bumps on top and one point down. You don’t want upside-down hearts.
Hanging your DIY Valentine’s Day Wall Decorations
Now, all that is left is to hang your Valentine’s Day Wall Decorations!
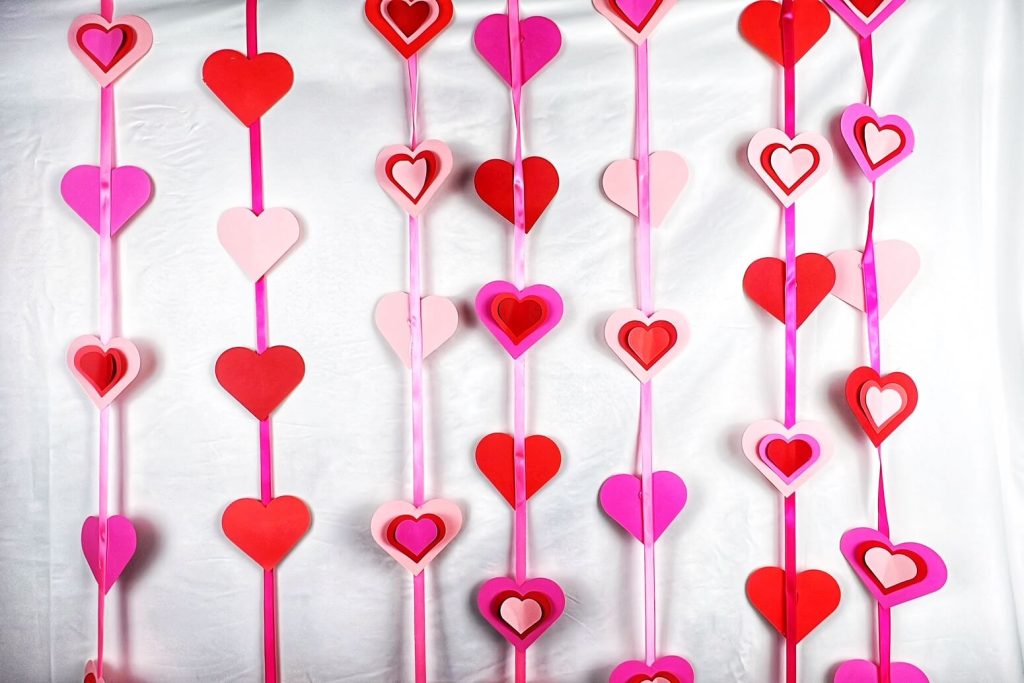
I like to hang this type of DIY Wall Decorations in doorways, but hanging them against walls, backdrops, windows, or mantels will work. Really, you can hang these anywhere your heart desires!
And that’s it! Your DIY Valentine’s Day Wall Decorations are Complete!
Things I learned while making these DIY Valentine’s Day Wall Decorations
- One thing I could have done when working in Cricut Design Space is to add a score line down the center of the heart to help align the hearts while gluing and to help with rolling the edges. I didn’t do this. It would have added time to the cutting process, but I managed fine without the score line.
- I opted to roll the hearts after they were glued. Sometimes, this proved a bit tricky as the glue was smudged on some hearts, and they couldn’t come up as much as I wanted, but I think they still turned out great. If I had rolled the hearts beforehand, this might have allowed each heart to glue better to each size, but I’m happy with how it turned out.
- After rolling the hearts, the hearts took up much more space. I mentioned that I used a bin to hold the hearts. After gluing them, they only filled my bin about 1/3 of the way. After rolling them, they filled a bin and a half. So, if you want to save space for storing this, keeping them flat may be the way to go.
- Rolling the edges of the hearts didn’t take much time. I probably spent about 1/2 an hour (or maybe more) doing it. If you are tight on time, skipping this step will help.
- For this project, I opted to switch the direction of the hearts. Meaning they were not all facing the same way when hanging. I put these in door frames so the hearts are facing in and out of the door. But if you place them against a wall, you can have them all facing the same direction.
- I know this post is similar to some of my other decoration posts. However, sometimes we forget that we can make great things in different shapes and colors. So, if you are looking for other similar projects to this, but for Christmas or birthdays, you can read my snowflake curtains here, and my birthday wall decorations here.
Frequently Asked Questions about making DIY Valentine’s Day Wall Decorations
Do you need a cutting machine to make Valentine’s Day Wall Decorations?
No, you do not need a cutting machine to make this project. You can make this using scissors and paper and it will look amazing!
Do you need a Cricut to make Valentine’s Day Wall Decorations?
No, you do not need a Cricut or cutting machine to make this project. I use a Cricut because that is the cutting machine that I have, but any cutting machine will work! Also, you can make this project by using scissors and paper, and it will look amazing!
How long does it take to make Valentine’s Day Wall Decorations?
This project took significantly longer than I thought it would. From start to finish, it took me about 3 hours. Keep in mind, I made about 250 hearts, and 20 strands to hang.
Can you make simple Valentine’s Day Wall Decorations?
I like to go overboard when making some crafts, as I did with this one. The project could be simplified by using only one heart instead of 3 glued together.
How many hearts do you need to make Valentine’s Day Wall Decorations?
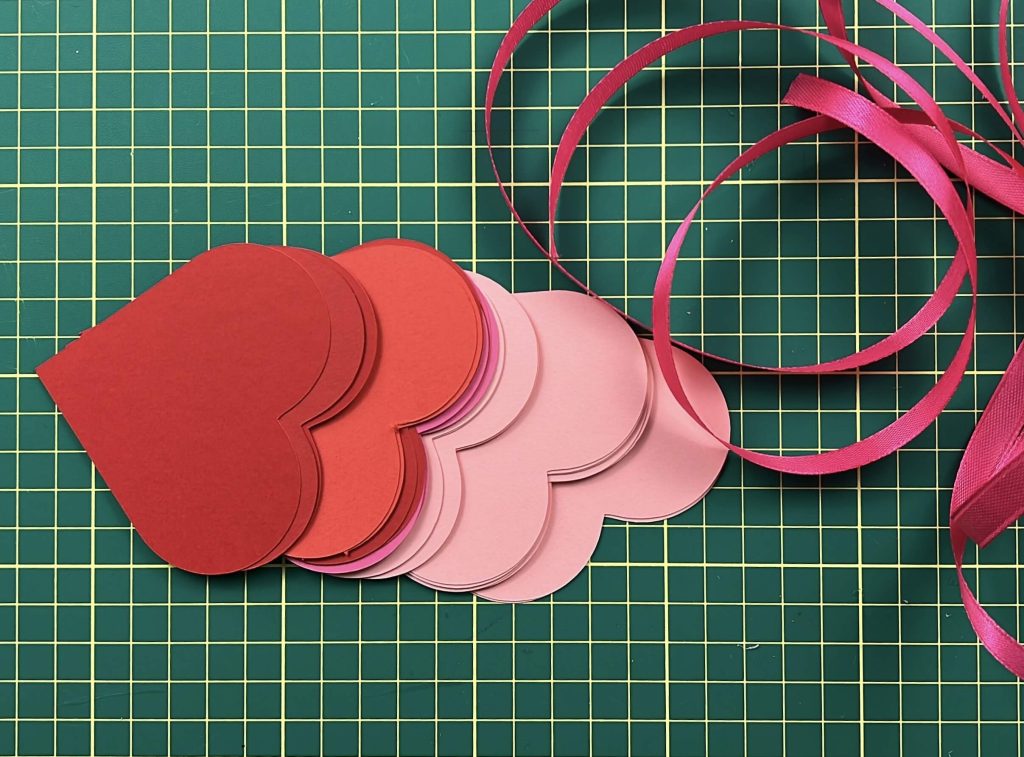
This is a trick question! This all depends on how many wall decorations you want to have! Based on what I did, using a 7ft piece of ribbon, having the hearts about 1/3ft apart, and making 20 strands, I have about 250 hearts. It will be up to you to decide. But I found that 10-12 hearts per stand was more than enough.
Can you use tissue paper to make Valentine’s Day Wall Decorations?
You can make hearts out of tissue paper, but they might be a bit harder to cut. You can make tissue paper flowers and attach them to the ribbon to have the same effect. Learn how to make tissue paper flowers here.
Where can you hang Valentine’s Day Wall Decorations?
The cool thing about these DIY Valentine’s Day Wall Decorations is that you can hang them wherever you want! The options are limitless! Some examples of places you can hang these:
- doorways,
- windows,
- walls,
- make a backdrop with a sheet and place them there
- over the mantle
- across the table
- hanging from the table
- under a loft bed,
- over curtains
Did you enjoy learning how to make DIY Valentine’s Day Wall Decorations?
Did you enjoy this post and learning how to make DIY Valentine’s Day Wall Decorations? If so, let me know in the comments below. If you tried it out, let me know how it went! And, as always, if you have any suggestions on how to make this project better be sure to let me know!
If you enjoyed this Valentine’s Day Project, be sure to check out my other Valentine’s Day Project here.
If you enjoy making paper crafts and want to make more, check out my Paper Projects here.