For several years now, I have been making countdown calendars for my kids, and for the adults. And they are always a great hit at the house, everyone loves them. This year is no different than any other, so it is time to get the countdown calendars started! I’m going to start this countdown calendar season off on a different note, and make one countdown calendar for the whole family, this is a family activity holiday countdown calendar. This time, instead of getting a treat each day, the family does an activity together.
As an Amazon Associate, I earn from qualifying purchases. This post contains affiliate links. I may receive a commission if you purchase an item from one of my links. This will not change the price you pay.
Supplies Needed to Make the Family Activity Holiday Countdown Calendar
The supplies you need for this craft are as follows:
- Calendar Design – I have created a design for this entire calendar, the candy canes, the notes, and the numbers. You can get a copy of it all here.
- Two sheets of 12×12 Christmas themed cardstock
- 1 sheet 8.5″x11″ matching color cardstock – preferably not shiny.
- Cutting machine – I used my Cricut Explore Air 2, but a Maker will work and so will a Silhouette machine.
- Pen – I used my Cricut Marker for this, but if you don’t have one, you can check out this hack to see what other pens you can use in your machine.
- Glue – I use my Bearly Art Craft Glue.
- Hot Glue and Glue Gun – This is optional, but I find hot glue works best for gluing ribbon to paper.
- Ribbon – You can have 1 or two colors, preferably matching your Christmas-themed cardstock.
- 3-5 sheets of white printer paper.
- 3-4 Wooden Dowels – I used 3/16″ thickness, but you could use 1/4″ if you have that handy.
Ok, now that we have all our bits and pieces, it is time to get this project started!
Using the Family Activity Holiday Countdown Calendar Design Files
I have created a whole design for this project. The design, with all the pieces, can be picked up here at my shop.
This design comes as a zip file with 3 sets of files inside.
- Candy Canes
- Countdown Numbers
- List of 50+ activities, formatted for easy cutting.
You will need to unzip the file after you have saved it to your computer.
To unzip the file:
- Right-click on the file with your mouse and select Unzip.
- Select a location where you want the file to be saved.
- Hit Enter and your file will be unzipped and saved.
Let’s quickly walk through how to use the files.
How to use the Candy Cane File for the Countdown Calendar
Once you have the file unzipped on your computer, follow the below steps to import the file into Cricut Design Space:
- Upload the file to Cricut Design Space.
- Select the Upload Icon on the left side of your screen.
- Select the Upload Image button.
- Select the File from the location where the file was saved from above.
- Select the file from your DS Recently Uploaded documents. There should be a green rectangle around it.
- Hit the Add to Canvas button.
The file consists of 24 candy canes facing right, and 24 facing left. While the whole design is still grouped as one item (it should be when you upload it to DS):
- Verify the lock dimensions are on.
- Change the height of the grouped candy canes to 18″. This will make each candy cane about 4″ tall.
- Select the top 2 rows of candy canes (each row consists of candy canes facing up and down), and Attach them together.
- Select the bottom 2 rows of candy (each row consists of candy canes facing up and down), and Attach them together.
- By attaching the rows together, you will have the same number of left and right candy canes on each sheet of 12″x12″ cardstock. I like to have the left and right candy canes on different paper to help with assembly.
- Hit Make and on a cardstock setting.

How to use the Candy Cane File for the Countdown Calendar
Once you have the file unzipped on your computer, follow the below steps to import the file into Cricut Design Space:
- Select the Upload Icon on the left side of your screen.
- Select the Upload Image button.
- Select the File from the location where the file was saved from above.
- Select the file from your DS Recently Uploaded documents. There should be a green rectangle around it.
- Hit the Add to Canvas button.
This file consists of stars, Christmas bulbs and bows, each numbered from 1 through 24.
When these are imported into DS, the whole design will be very small. You will need to increase the whole size. I recommend you set the height to 4.25″. This will make each of the elements about 0.9″ in height, which is ideal for the candy canes we sized above.
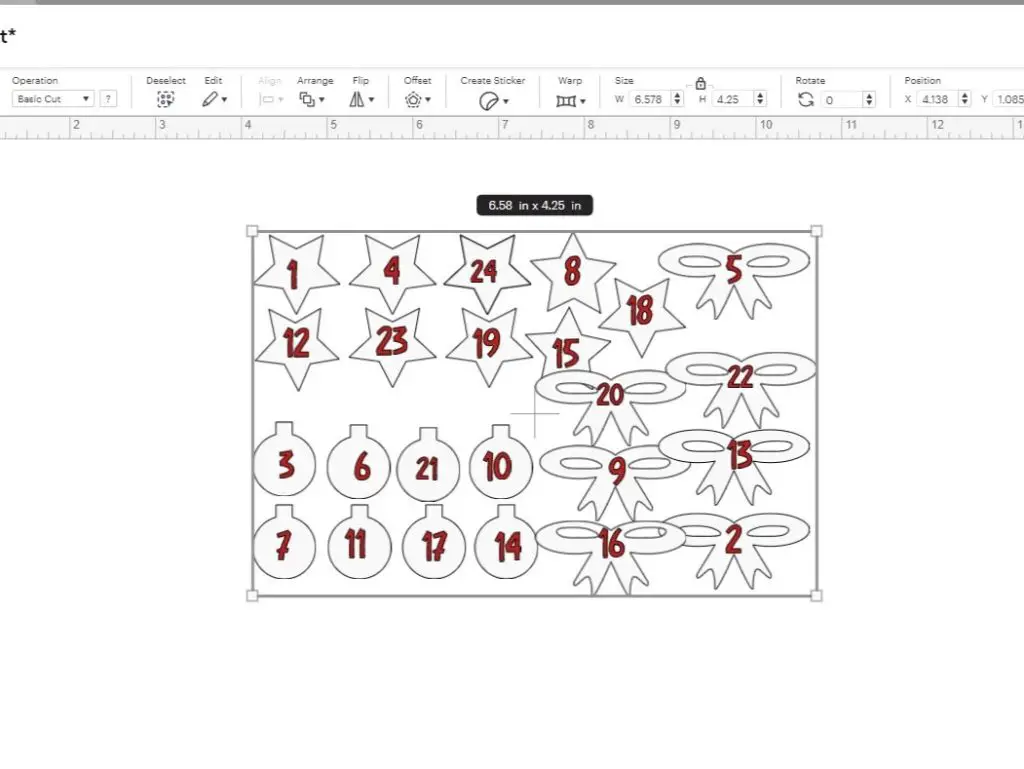
Next, you need to select the numbers, either one at a time or by holding down the CTRL key and clicking on the numbers with your mouse on the layers panel on the right side of your screen. Once selected, change the Operation from Basic Cut to Draw Pen, on the Operation Drop-Down Menu.
Finally, you will need to Attach each number to each element, either star, bulb or ribbon. You will need to do this individually for each number. Select the number and the element and select Attach. Once you are done, you are ready to hit Make and send this to your machine to cut out.
Don’t forget to put your pen into your machine so that it will write the numbers. If you don’t have a Cricut pen, you can read this article on other pens that work with the Cricut.
How to use the PDF File of Family Activities
I have created and formatted 50+ family activities to print nicely on your home printer. This also includes a few blank rectangles to add your own activities.
Print the file and run the pages through a paper cutter. The pages are all formatted the same way, so you can cut all 5 pages at a time.
The list of activities that I have included ranges from simple activities to seasonal snowy activities and much more. Once you have printed the pages off, I recommend you review the list and see which ones you like. You only need 24. I have provided a whole range of activities because not everyone has snow, and not everyone likes marshmallows. So there are many different ones to choose from. I have also provided several blank rectangles of the same size where you can add more items.
Assembling the Family Activity Holiday Countdown Calendar
Ok, now it’s time to assemble this awesome Family Activity Holiday Countdown Calendar! Now that we have all the pieces cut out, we are well on our way.
Preparing the candy canes
The first thing you want to do is organize your candy canes. You can either have a pile of left and right pieces or you can have 24 piles of one left and one right.
Each candy cane will have a right and left candy cane. The design side will be facing out.
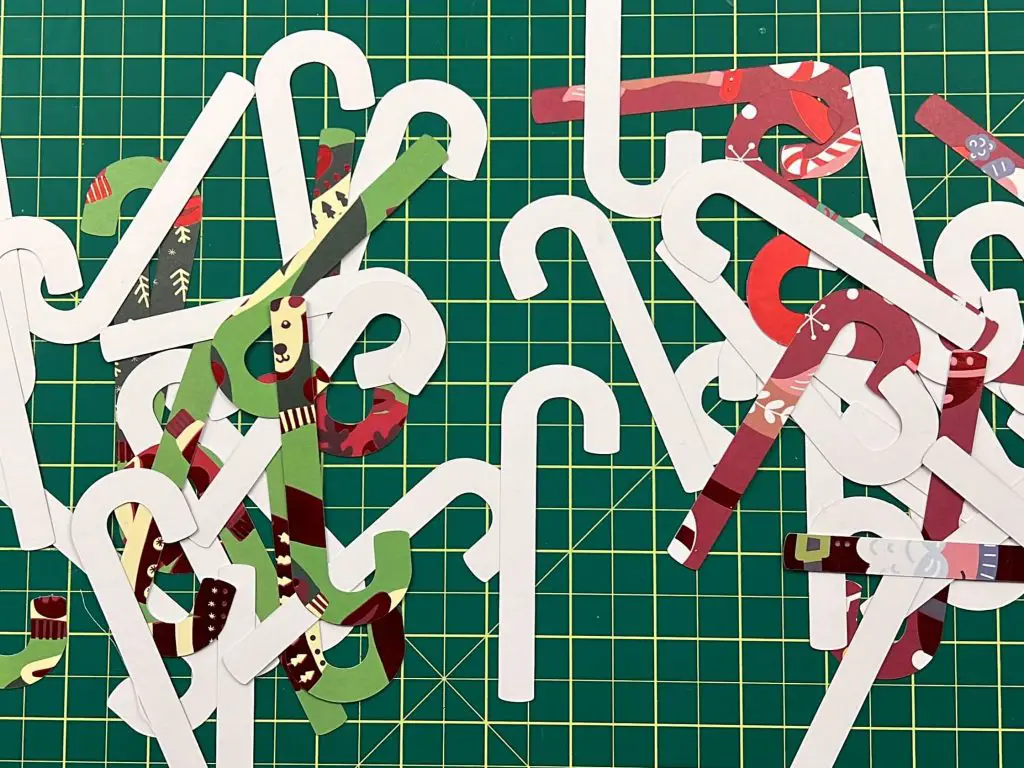
Preparing the activity sheet
Preparing the activity sheets takes some time. So, it might be good to set up in front of the TV while doing this part.
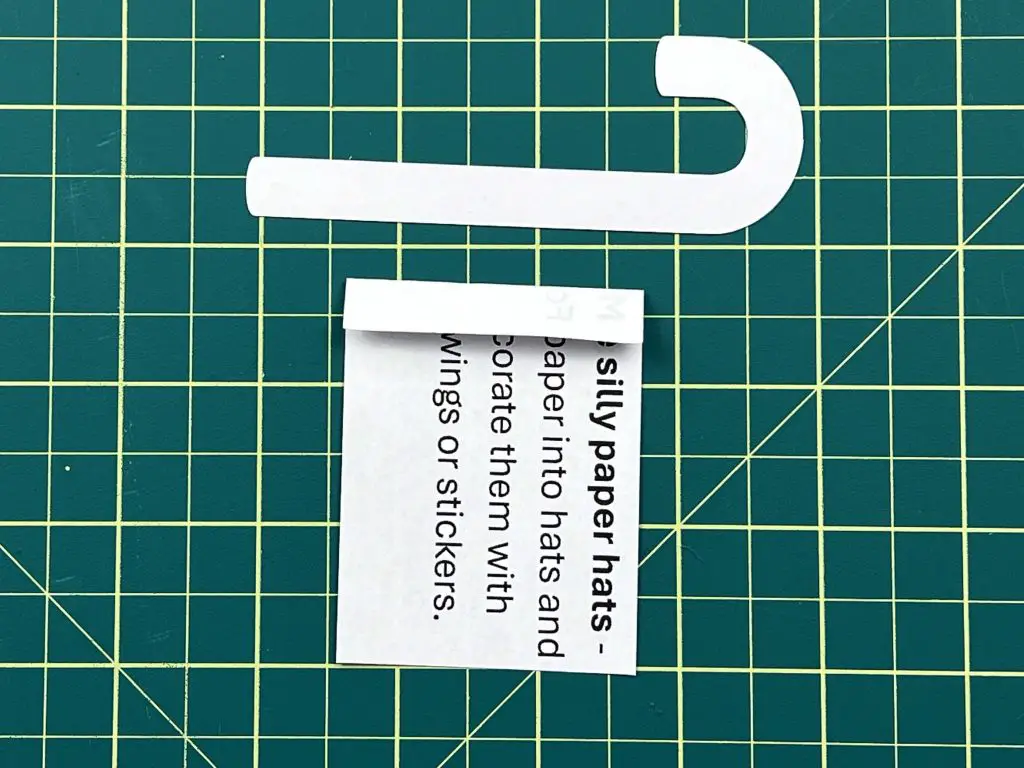
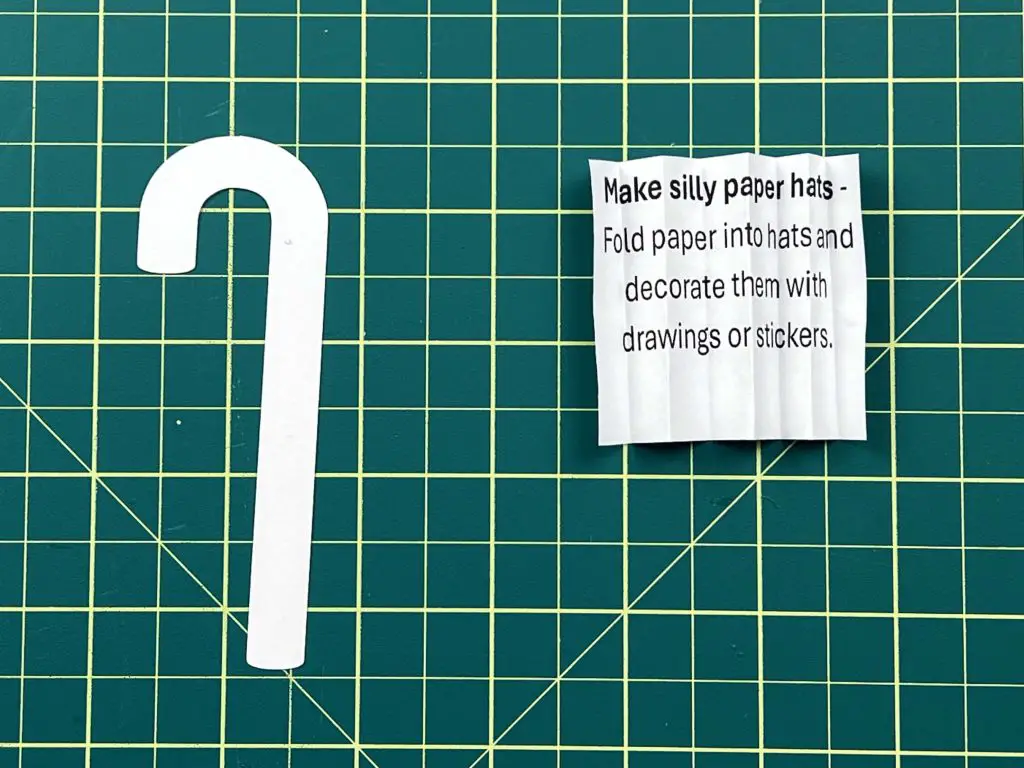
Each activity sheet will need to be folded like an accordion. You will need to measure the first fold to be slightly smaller than the width of the candy cane. The first fold should be inwards toward the printed side. The last folds have to have white printer paper on the outside of the fold. This will ensure you have space to glue the activity paper onto the candy cane without hiding the activity details.
Assembling the candy canes
Once all of your activity sheets are folded it is time to assemble the candy canes. This part doesn’t take too long, but if you are already watching TV… you might as well stay there…
You want to apply glue to the outer side of the first folded panel (white side of the paper). Next, place it on the white side of the candy cane. Also, make sure your note is flipped upwards so that you do not end up with an upside-down note. Try to be careful with the glue so that it does not seep or ooze off the paper. You need to be able to open and read these later.
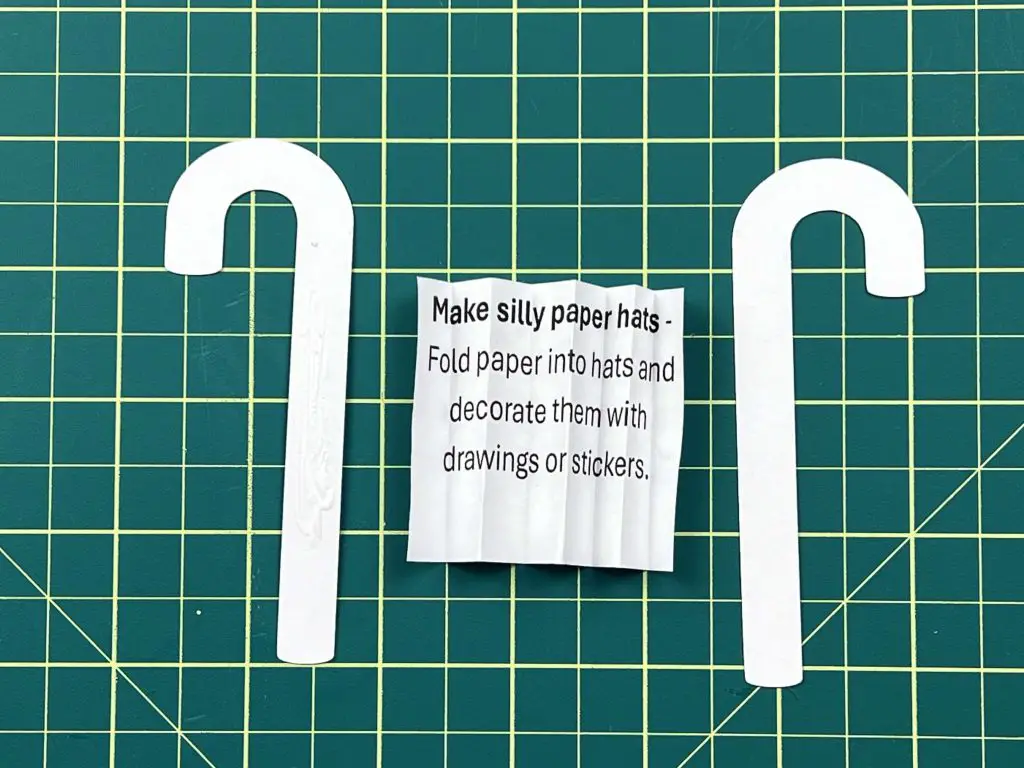
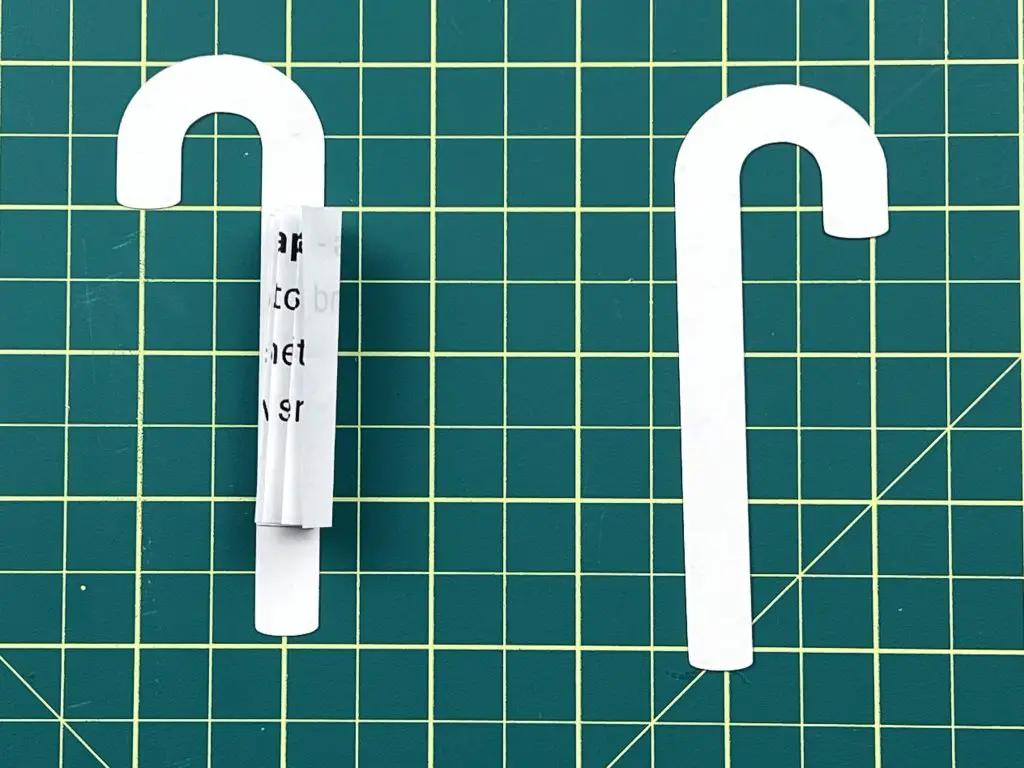
Next, you will again apply glue to the note paper and place the second candy cane on top. Again, be careful with the glue so that you do not glue the note and candy cane shut.
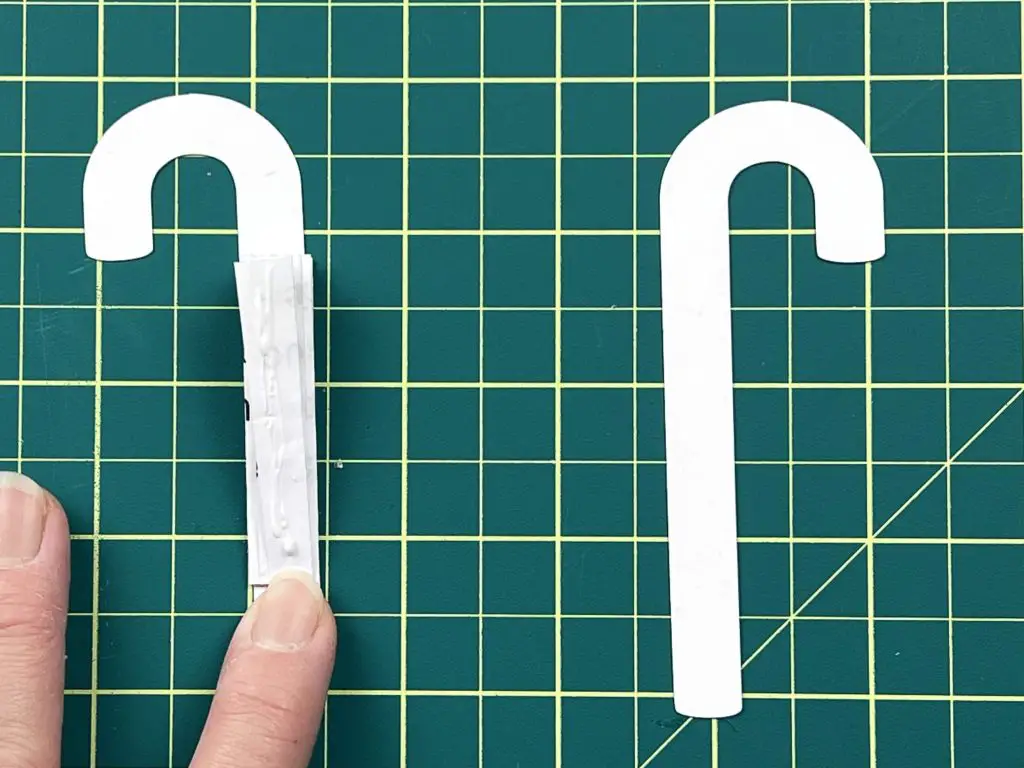
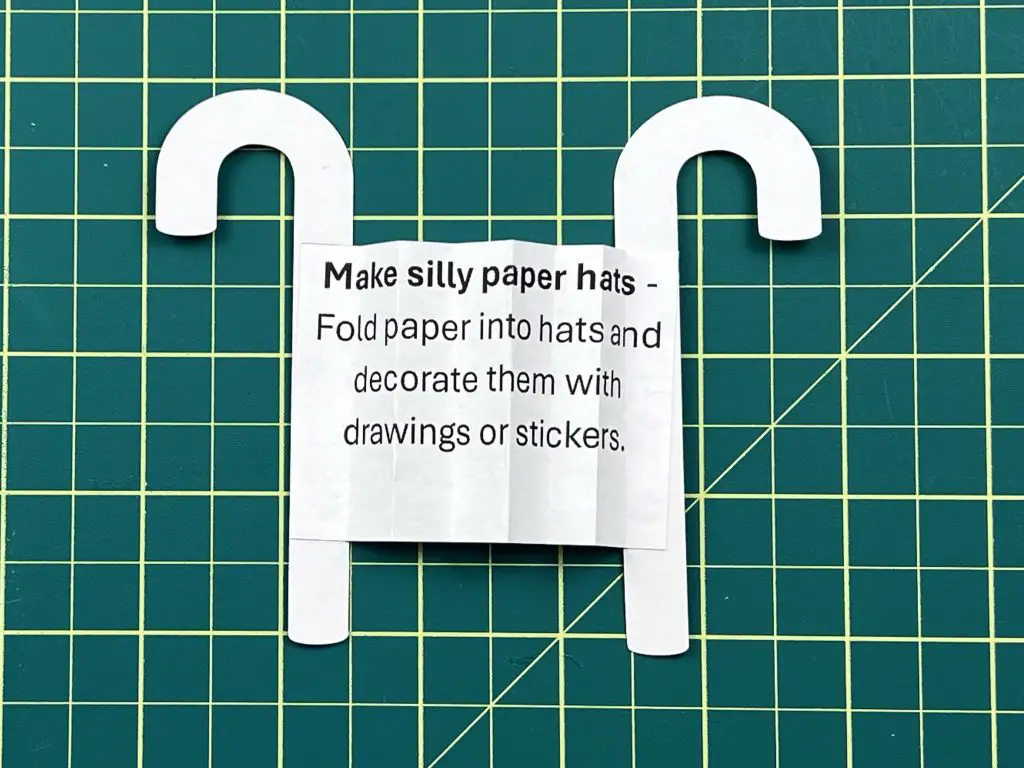
Continue this for all 24 candy canes. Do not worry that the candy canes now look like little accordions that do not close.
Wrapping the candy canes
There are many ways to wrap the candy canes. I recommend, simple is best.
Bear with me, but you want to be able to open these notes easily, right? You don’t want to make it a challenge to open them every day. This will get tedious and take away from the magic.
So, what I did… I made a simple knot with ribbon. The ribbon only went around the candy cane one time and I left it slightly loose so that I could pull the ribbon down the candy cane each day. I did not glue the ribbon into place or anything. Simple. Remember that.
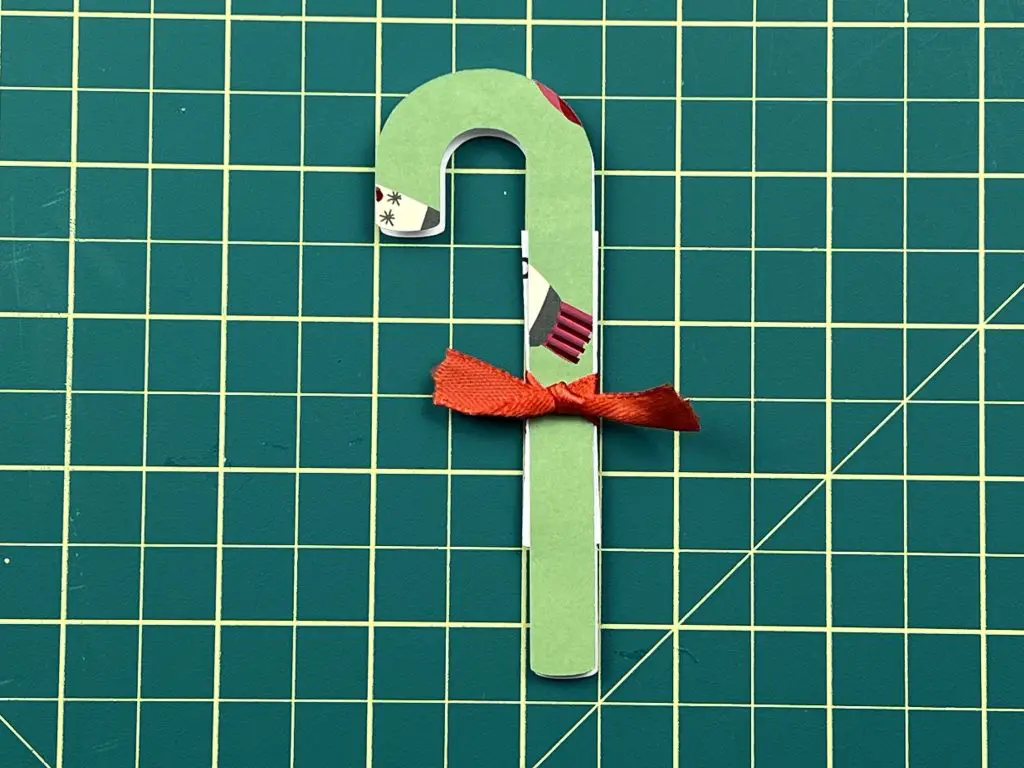
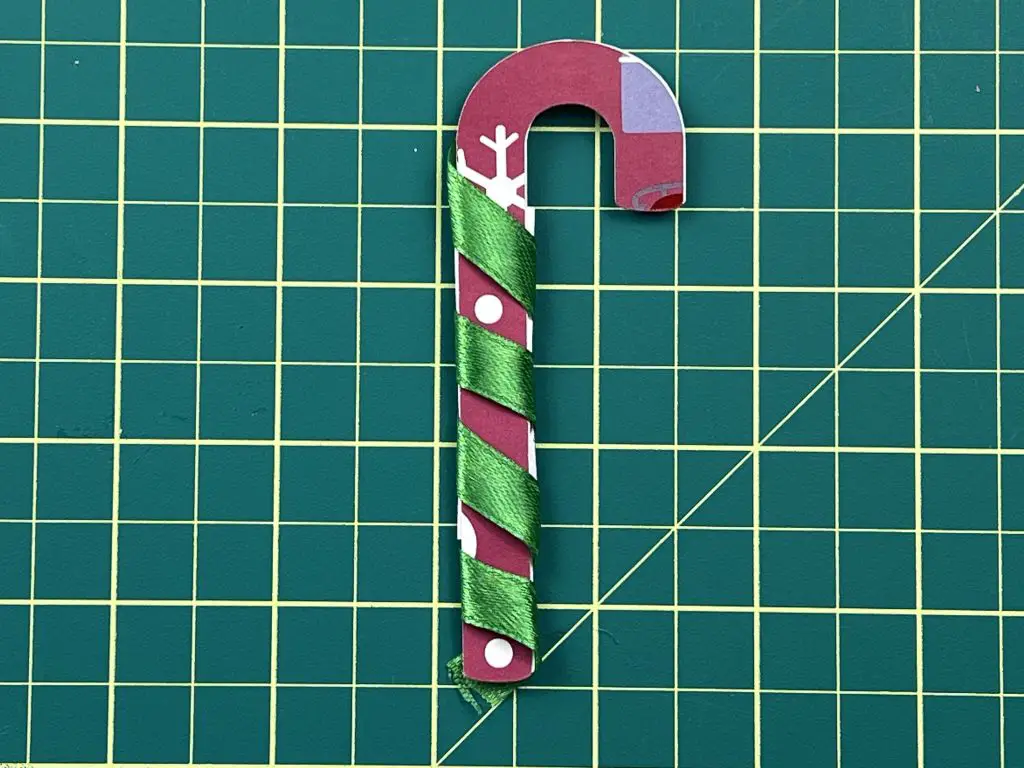
If you want to make it fancy, you are more than welcome to. One option would be to wrap the ribbon around the candy cane to make it resemble a real candy cane. This would look cute, but think about how much time this will take to assemble, and how much frustration you will have afterwards. So I leave this up to you.
I used 2 different colors of ribbon, but you can use one color or as many as you like.
Adding numbers to the candy canes
Ok, we are making great progress here. It is time to add the numbers to the candy canes.
Apply glue to the back of a number and place it onto the candy cane.
You can glue it onto the ribbon if you’d like. This can cover the simple knot we did earlier, or you can glue it onto the candy cane. But I want to point out, that if you glue the number onto the ribbon, be sure to only apply glue to the ribbon and not glue the ribbon to the candy cane. If you are gluing the number onto the candy cane itself, you want to glue it above the ribbon for easy ribbon removal.
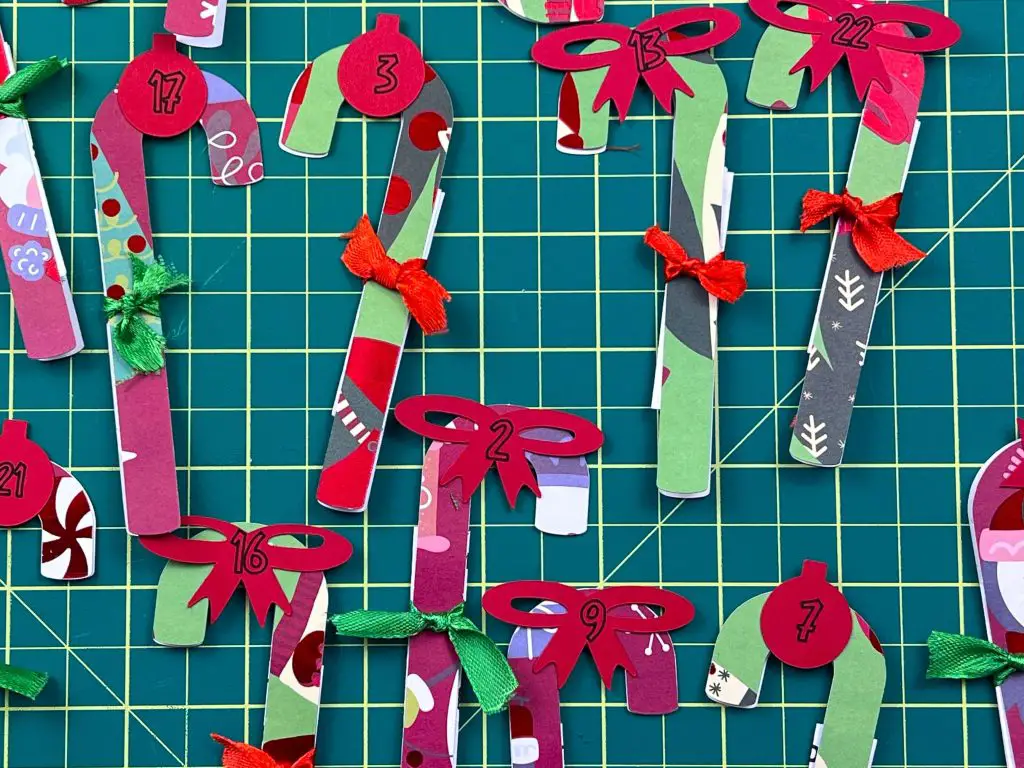
Repeat for all 24 candy canes.
Attaching the Candy Canes to the Calendar
This step requires a bit of space, so prepare yourself.
You want to arrange the candy canes under a dowel and place them so you can fit about 8 per row. Arrange all 24 candy canes under the 3-4 dowels. The more candy canes you can fit under each dowel, the fewer dowels you will need.
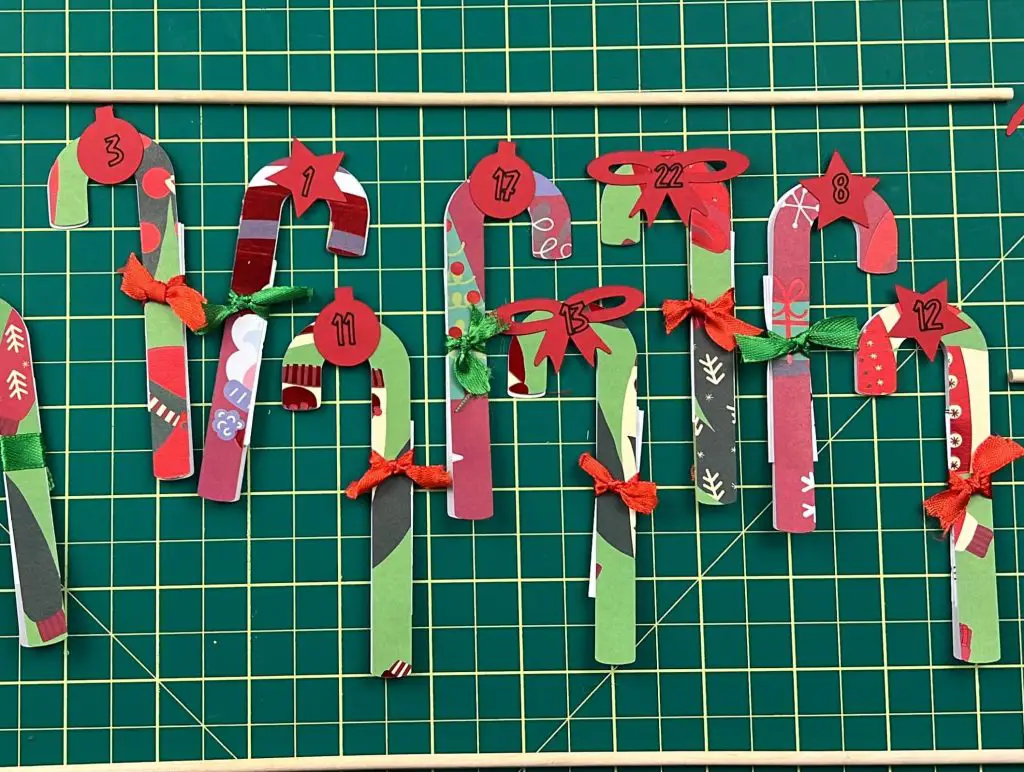
I was able to fit all the candy canes under 3 dowels. If I had more wall space, and longer dowels, I would have tried to make 1 long calendar.
Now, once you are happy with the placement, using ribbon and hot glue, glue a piece of ribbon to the back of the candy cane. Pull the ribbon long enough to reach over and around the dowel and leave enough room to tie a knot with the ribbon to hold the candy cane in place.
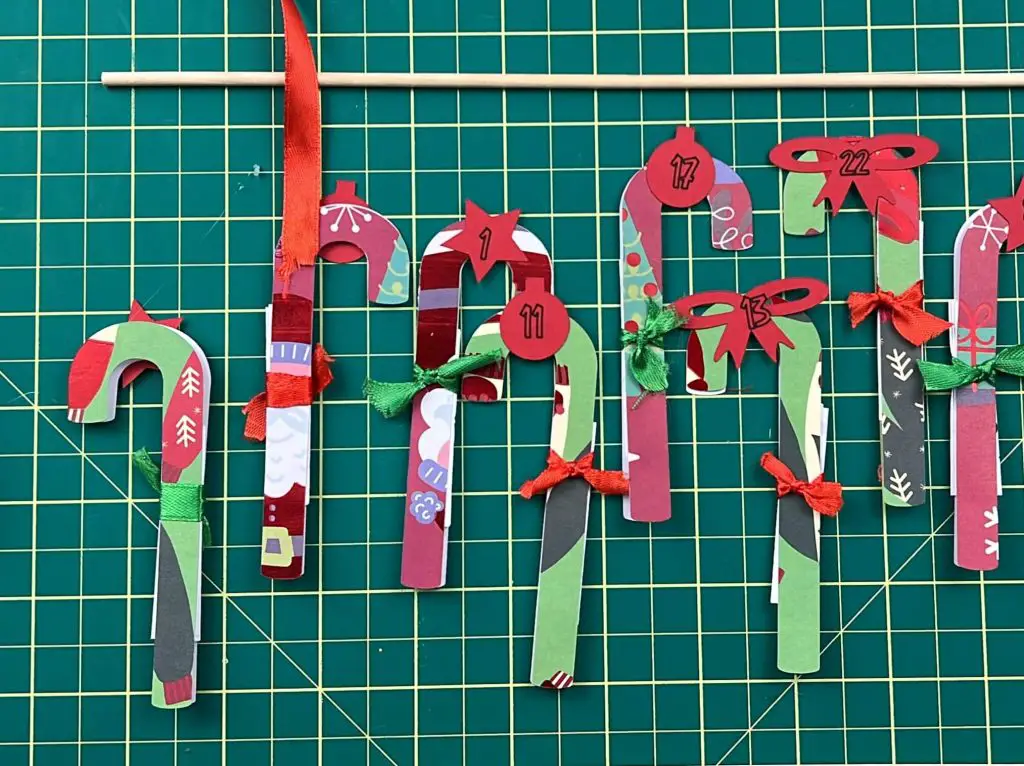
Cut the ribbon and repeat this for all 24 candy canes. I used a matching ribbon for this. So where my candy cane was tied shut with green, I used green ribbon to attach it to the dowel, and similar with red ribbon.
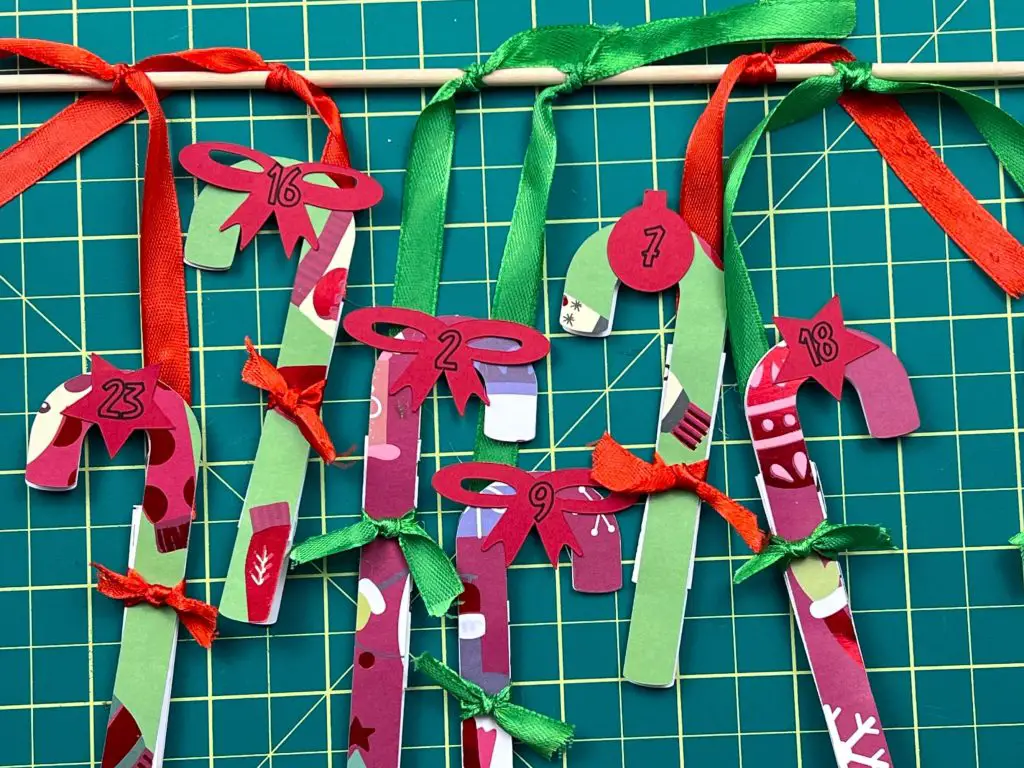
I again used a simple knot to hold the candy canes in place. If you are skilled at making nice bows, I recommend you do this to add some more flare to the calendar. I’m no good at that, so plain knots it is.
And finally, cut off any surplus ribbon so you don’t have all that extra ribbon flopping around.
Combining the Dowels together to complete the Family Activity Holiday Countdown Calendar
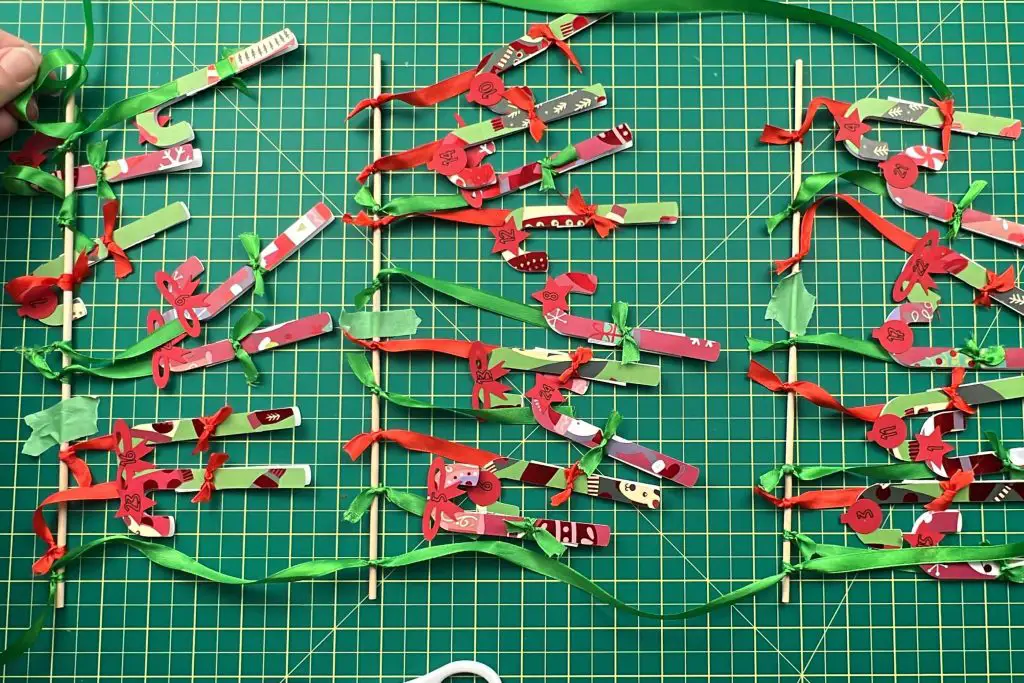
Now that all of our candy canes are attached to the dowels we need to attach the dowels to each other. I arranged the 3 sets of hung candy canes on my work table to be one above the other (or left to right as I have more space this way).
Using ribbon, I tied the 3 dowels together. I maintained the spacing I had set up on my work table, by taping the dowels to my workstation to stop things from moving around.
I also left a surplus ribbon at the top of each side. This was used to tie the two sides together for hanging.
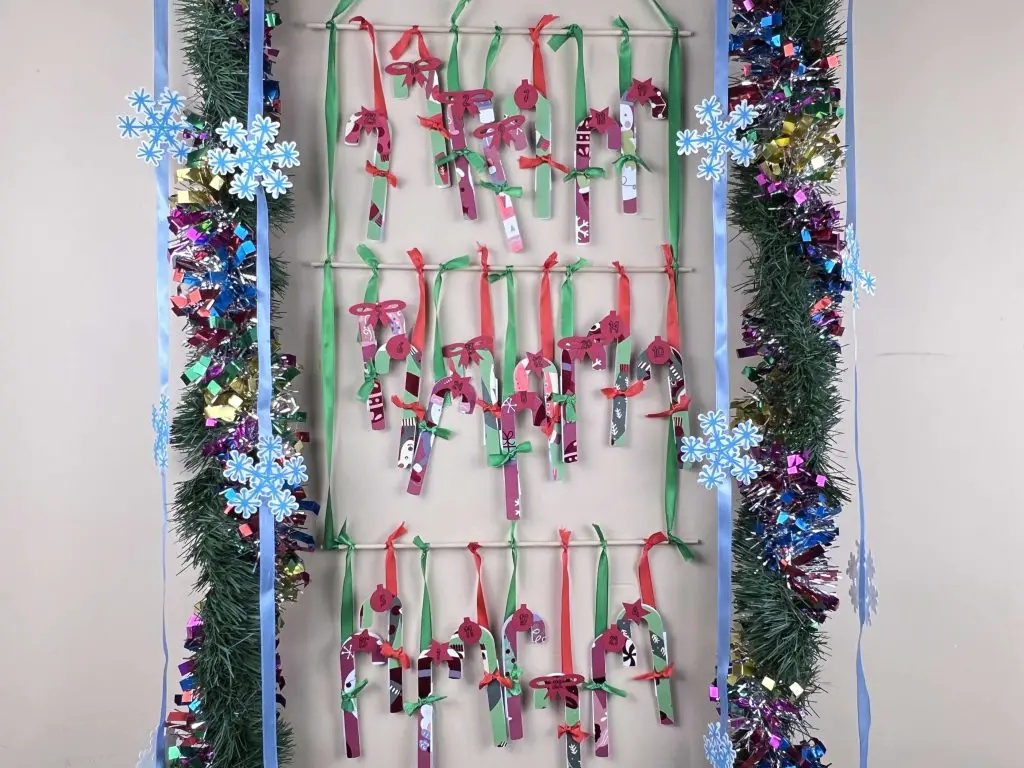
Now, all that is left is to hang this cute family activity holiday countdown calendar on the wall and wait for December 1st to start the activities!
And there you have it! Your Family Activity Holiday Countdown Calendar is Complete!
Tips and Tricks about making this Family activity holiday countdown calendar
While making this calendar, I had some thoughts, and other options of things you could do, instead of what I have done, so I wanted to share those with you, just in case you needed more options.
- When I made this, I envisioned it hanging on the wall. But these candy canes would look great on a Christmas tree. Sadly, my tree doesn’t go up until mid-December, so I would miss out on several days of fun. But if you get your tree up for December 1st, this would easily hide in the Christmas tree.
- I am not good at making pretty bows. Maybe one day I will work on that, but for now, I will settle with a hap-hazard knot. I liked making a simple knot on these candy canes. It makes for easy removal of the ribbon from the candy cane. But I could have made a fancy bow or a neat design with the ribbon on the candy cane. The only thing I will point out is if you are going for a fancy design with the ribbon, be sure to have a plan for opening or cutting the ribbon without ruining the note inside.
- Several of the activities that I have planned require a bit of forethought. For example, making marshmallow structures is a fun activity. However, if you don’t have marshmallows in your panty at all times, it will become a disaster if they are not there on the day you pull that activity. So, I highly recommend you review the notes before you tie them up and know what activities you need to be prepared for. You can have them on certain days, ie: day 5, so that you know to buy the items, or prepare them. Or, you can have a list of all the items you need ready and be prepared all month long. You can pick your poison.
- When gluing the notes to the candy canes, be careful with the glue. You do not want to glue these shut. I recommend opening them up right after you have applied the glue and they are mostly dry. If you wait too long, you may have to rip some open. Trust me on this one…. The last thing you want to do is not check beforehand and have an unopenable and unreadable note during the countdown days.
- I set this countdown calendar up with family activities. But you could make notes for gratitude, workouts, or whatever your heart desires.
Did you enjoy making this Family Activity Holiday Countdown Calendar?
Did you enjoy making this Family Activity Holiday Countdown Calendar? Let me know if you tried it and how it turned out! If you have any suggestions on how to make this better be sure to share them with me also!
If you enjoy making countdown calendars, check out some of my favorite countdown calendars below:


What a great idea! I wish I had thought of this when I had small kids. I love how real you are in all that you do. I bet your kids must love holidays!!
Thanks! That’s very kind of you! I hope my kids enjoy this one! They always like the candy filled ones… So I thought I would try something different this time around 🙂