Holiday Countdown calendars are a big thing at our house every year. And this year, everyone needed their very own designed calendar. So, it was a mad dash to get several designs done in time for December 1st. And I am happy to say the final design of the season, the hanging star holiday countdown calendar is done. So, let’s jump in!
As an Amazon Associate, I earn from qualifying purchases. This post contains affiliate links. I may receive a commission if you purchase an item from one of my links. This will not change the price you pay.
Supplies needed to make a hanging star holiday countdown calendar
This supply list is a bit weird, but when you have to think outside the box, that is what you get. So, the supplies needed for this craft are as follows:
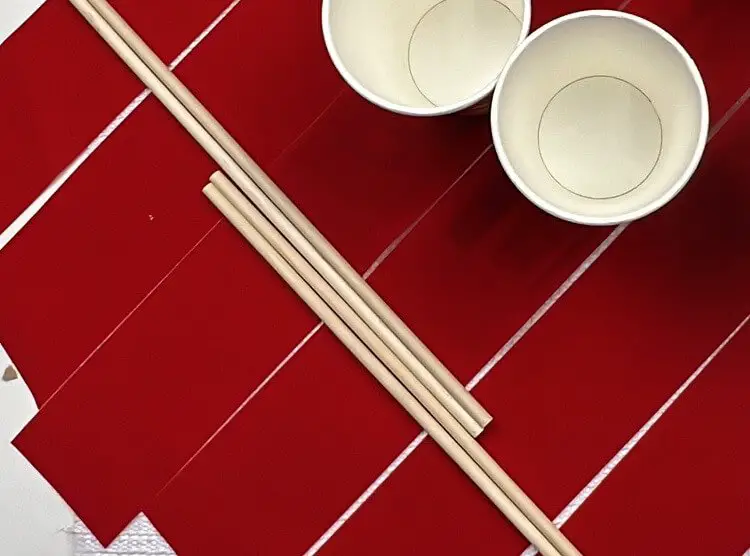
- 24 Christmas-themed paper cups – you do not want them to be too big. I do NOT recommend using Solo cups, as this will make the calendar gigantic. I bought them at the dollar store.
- Ribbon – it will need to be 2-3” thick. It needs to be wide enough to fit the full bottom of the cup on it.
- Wooden dowel – This is for hanging the final calendar up. I used 4, but if you have a larger one, you can use just one.
- Glue – you will need lots of glue. I recommend a glue gun and hot glue.
- Cardstock – this is for the stars. Depending on the size of your cups, these stars may need to be big, so you may need 5-9 sheets of 12”x12”. You can use Christmas-Themed paper or solid colors.
- Cutting Machine/Scissors – I used my Cricut to design the stars and cut them out. I found this was faster than me trying to cut them out by hand. But if you do not have a cutting machine, scissors will work as well.
- Candy/Treats/Gifts – generally items needed for filling the countdown calendar. I use candy from Halloween, but any treats will do.
- You will need about 3 hours for this whole craft, which includes prep time for cutting out all the stars.
Let’s begin making our hanging star holiday countdown calendar
Create the Design for the Hanging Star Countdown Calendar
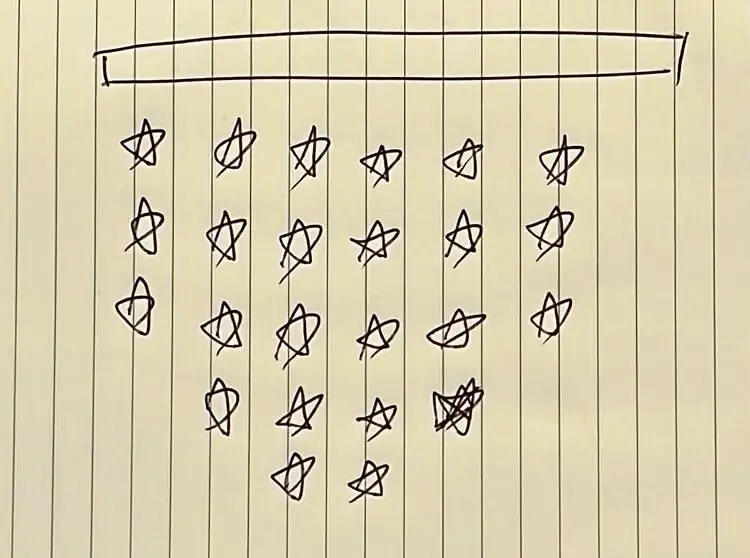
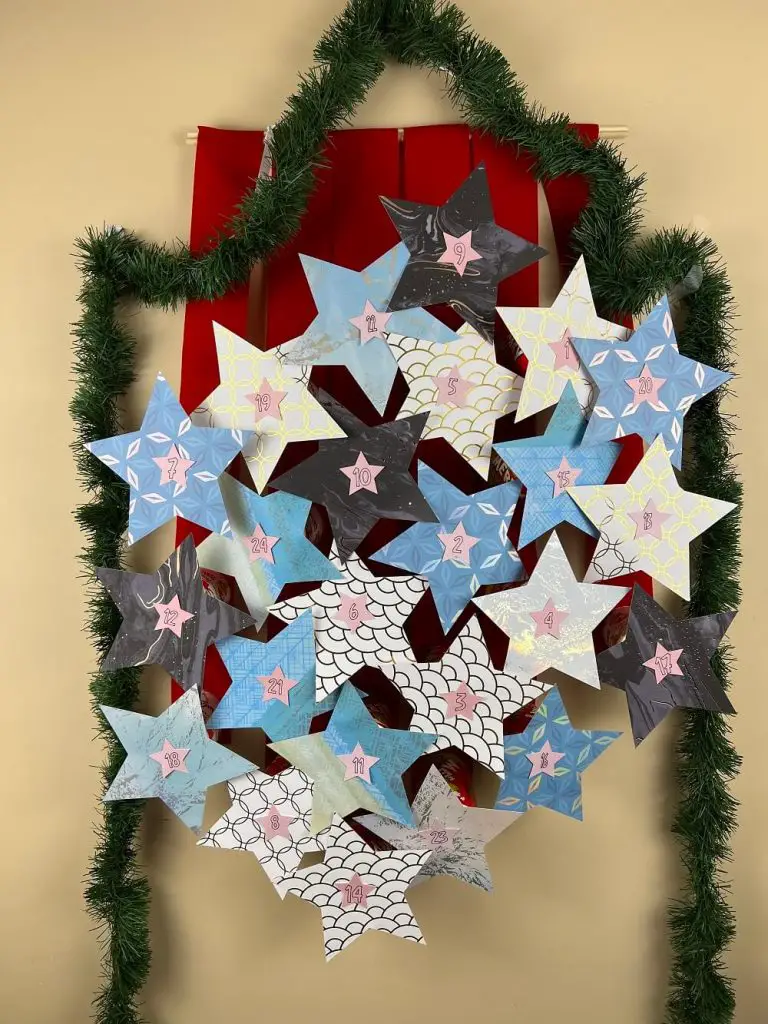
For this calendar, my idea was to use stars. At first, I thought of making a large star, but that seemed too cumbersome, so I opted to make hanging stars. Trying to make my design symmetric, I sketched 24 hanging stars in a small-ish space.
Design and cut out the stars
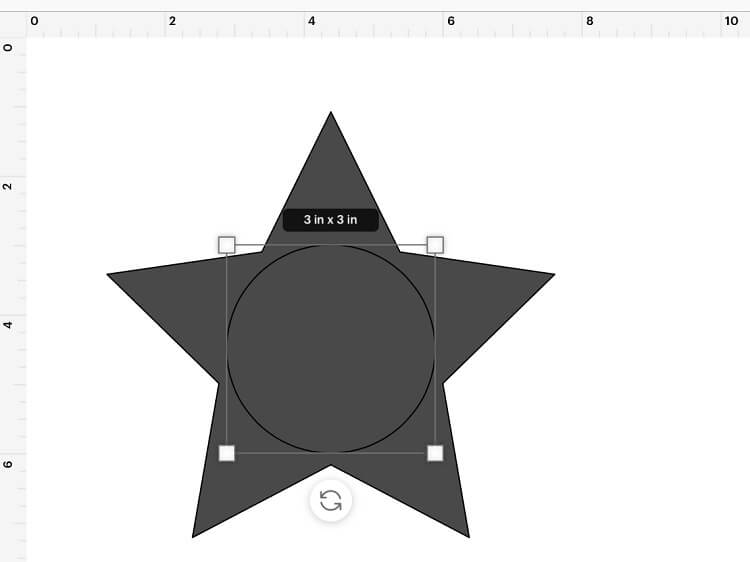
I used Design Space and my Cricut to design and cut out the stars. I found this to be the fastest route. The one important thing to remember when designing the stars is that they need to cover the top of the cup. In my case, the top of the cup was 3” in diameter. So my star needed to have the inner section be able to hide a full 3” circle inside. Once I had a bit of extra space around the 3” circle, I knew my star was large enough. So they were ready to be cut with my Cricut. I then cut 24 of these.
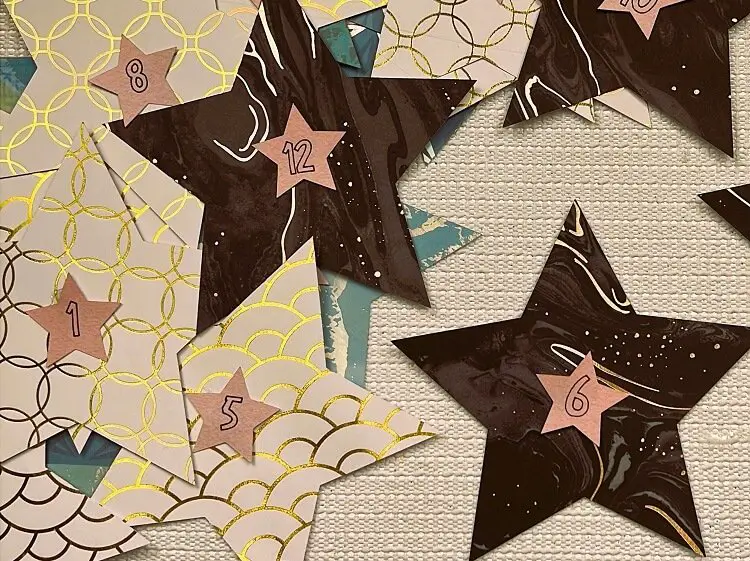
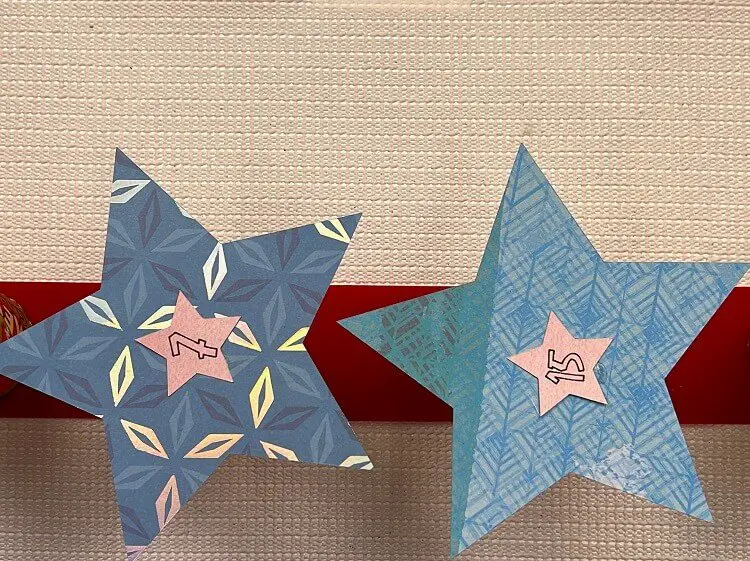
I also made smaller stars – about 1.5″ in height and added numbers onto them. The numbers were changed to be written and not cut on the small stars. I made numbers from 1-24, attached them to the stars, and they were ready for cutting.
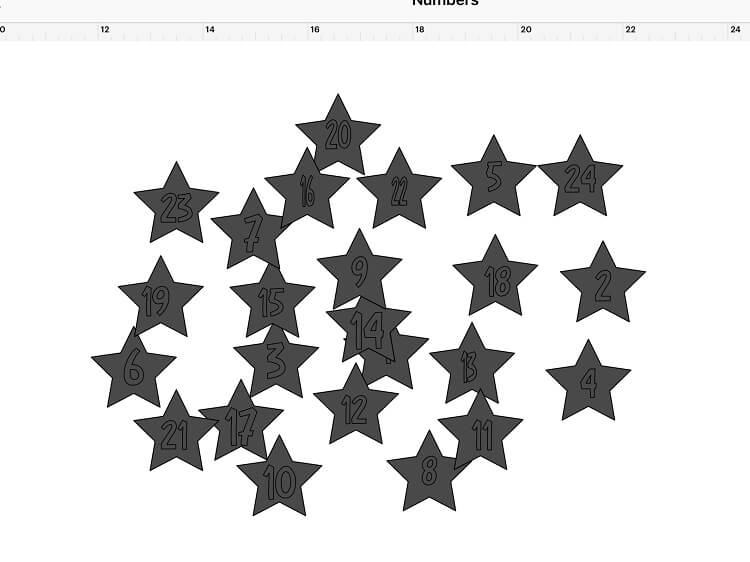
The reason I made separate stars with numbers is that for the large stars, I was using shiny cardstock, and I find that pens do not work well on this type of paper. If my paper had been mat, I could have put the numbers onto the large stars and saved this step.
Once the large and numbered stars were cut out, I glued the small ones onto the center of the large ones.
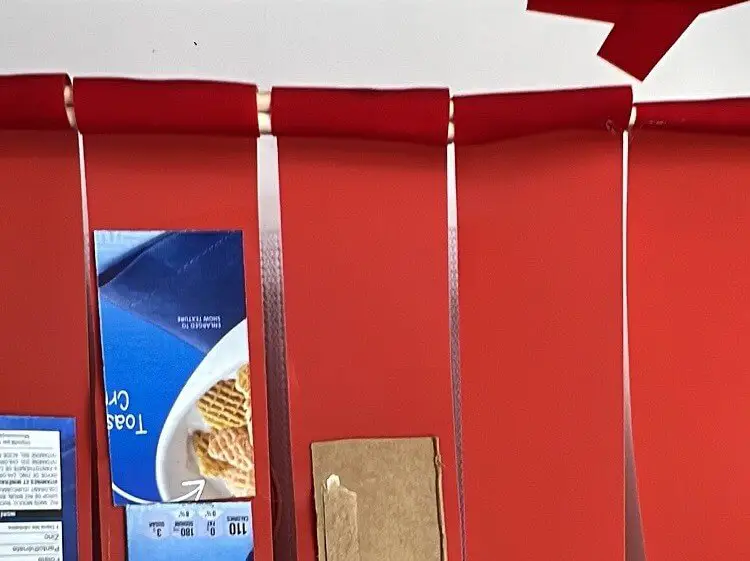
Assemble the frame of the hanging star countdown calendar
The frame of the countdown calendar is what holds everything together. Based on my design above, I need six strips of ribbon with an increasing number of cups, from 3-5 and then from 5-3.
I started by pulling out a length of ribbon, but not cutting it. At the bottom, I placed the first cup and glued it down. I glued the bottom of the cup down, not the open face. I then used my stars to measure the rough distance apart needed to allow the stars some space between each other. Once happy with that gap, I glued the next cup on. I continued this for the full length of 5 cups.
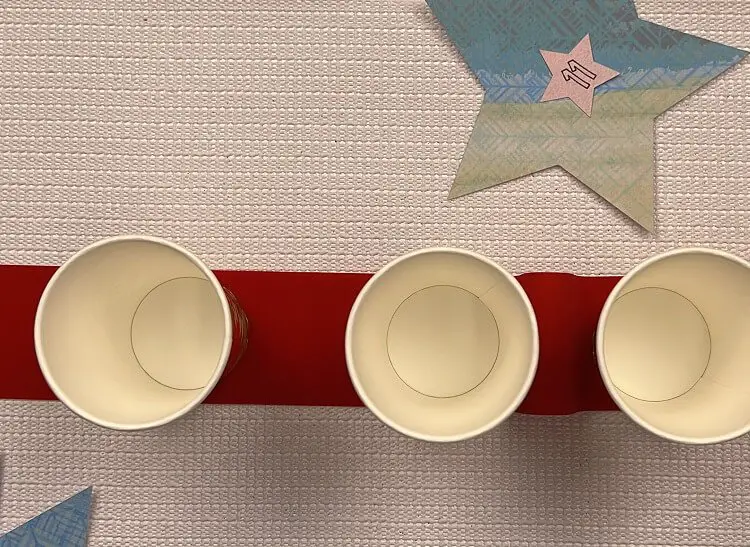
Before cutting the ribbon and moving to the next ribbon section, I left several inches of surplus ribbon above the top cup to allow for attaching to the dowels later.
I then moved on to the 4-cup ribbon. This time I glued the cups down so they fit into the gaps of the 5-cup row. And then I did the same thing for the 3-cup row against the 4-cup row. This was to reduce the space needed for the whole calendar.

Once I completed one side, I repeated the above steps stated in the 5-cup row. However, this time I glued the cups in line with the existing 5-cup row.
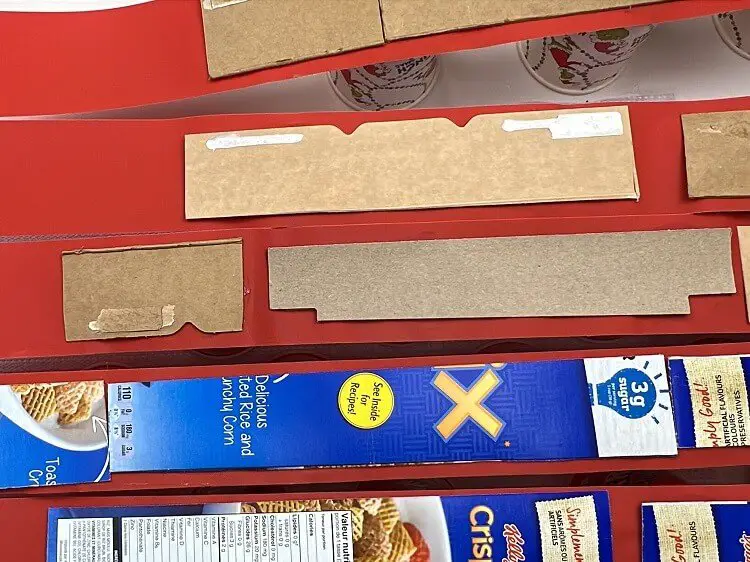
Optional Support on Back of Ribbons
As the cups will be pulled down by gravity, I glued on strips of cardboard onto the back of the ribbon. I used cereal boxes. This will help the ribbon and cups stay flush to the wall.
It is best if the design from the box is facing away from the ribbon as it may come through the front.
Attach Ribbons to the dowel for hanging
Now that the frame has all 6 ribbons and 24 cups glued together, it is time to attach the whole set to the wooden dowel.
The dowels I had were not long enough to span all 6 lengths of ribbon. So, I glued 2 sets of 2 dowels together to allow for extra support and then offset them and glued them together. This provided additional support and gave me the length I needed to span all 6 ribbons.
Gluing the dowel on the back side of the ribbon and winding backwards a few times to cover the dowel up. I ran one final bead of glue on the backside of the ribbon to hold it in place.
Insert treats and goodies into your countdown calendar
Now it is time to insert the treats and goodies into the cups. Simply place your treats into each cup.
I like to use candy that I pull aside from Halloween for my countdown calendar. If you don’t have leftovers, you can get bulk candy at the bulk barn or small goodies and treats from the dollar store. Anything will do.

I also like to place a few larger treats every few days to keep things exciting for the kids, but that is my preference.
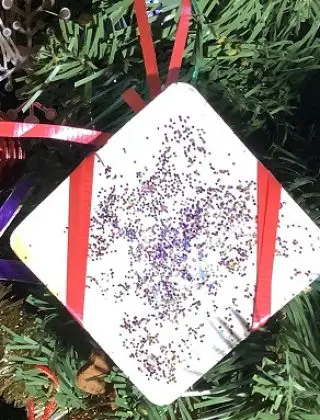
Glue on the stars
Once the treats are all in, you are ready to start sealing up your calendar. Run a bead of glue around the top rim of the cup and place your star on top. I like to start with the number 24, as that day always has a special treat, and then randomly place numbers on cups. But you can place the numbers in order or randomly. The choice is yours.
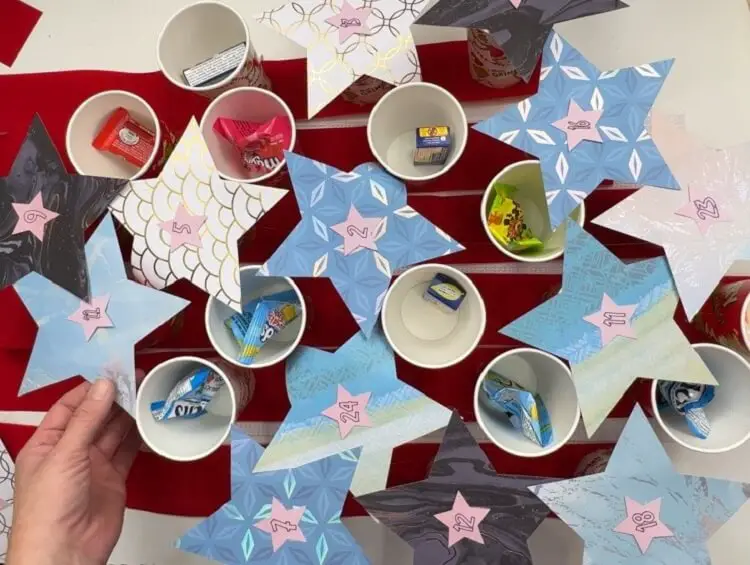
You will need to make sure that the points of other stars don’t get caught in the glue of new stars, as it may get congested once you add more stars.
Keep gluing until all the cups are covered and all your number stars are gone.
Hanging Ribbon
The final step is attaching the ribbon to the dowel to hang the hanging star countdown calendar on the wall.
I cut a length of ribbon that was slightly longer than the dowel and tied it onto the dowel inside the first ribbon. I didn’t want to have too much slack on this ribbon as the calendar is already quite large and I didn’t want to make it larger. You can add longer or shorter ribbons.
And that’s it! Your Hanging Star Holiday Countdown Calendar is Complete!
Frequently Asked Questions about the Hanging Star Countdown Calendar
Can the countdown calendar be smaller?
Based on the treats and goodies I wanted to include in the calendar, I needed cups that were a bit larger. If I were using smaller treats, I could have used toilet paper rolls or shot glass-size solo cups. This would have made the whole calendar significantly smaller.
How long does a hanging start holiday countdown calendar take to make?
From start to finish, this calendar took 3 hours to make.
How many slots does a countdown calendar need?
I like to make my countdown calendars with 24 slots so that the last day to open one is the 24th. But if you want a treat on the 25th, you can have 25.
This can also be used as a New Year’s Countdown calendar, at which point you would need to adjust the design to have 31 slots.
Did you enjoy this tutorial on making a Hanging Star Holiday Countdown Calendar?
Did you enjoy this tutorial on making a hanging star holiday countdown calendar? Let me know in the comments below!
If you like this post, be sure to check out other countdown calendars I have designs as well:
- Craft Beer Countdown Calendar
- Toilet Paper Roll Tree Countdown Calendar
- Snowman Holiday Countdown Calendar
- Holiday Wine Countdown Calendar