Every year, I set out to make 3 holiday countdown calendars. One for each of my kids. In years past, I have made three of the same kind, but now, for some reason, I have lost my marbles and make 3 different ones each year. And to make matters worse, I make 3 new ones each year…. So, we are now onto our second one, the Holiday Wreath Countdown Calendar. So, let’s jump in and make this season awesome!
As an Amazon Associate, I earn from qualifying purchases. This post contains affiliate links. I may receive a commission if you purchase an item from one of my links. This will not change the price you pay.
Supplies needed to make Holiday Wreath Countdown Calendar
This countdown calendar falls back onto my old ways of using empty cereal boxes and simple supplies, so here is what I used to make this Holiday Wreath Countdown Calendar:
- Cardboard – I used the cardboard from an empty cereal box. I find it rigid enough to stay straight but not too thick to make it look cheap and bulky. Also, I like to use cereal boxes because you can cut it with your Cricut.
- Cutting Machine – I used my Cricut Explore Air 2, but any cutting machine will work.
- Ribbon – You will need a bit of ribbon to tie each treat and then a bit for hanging. I chose green.
- Craft paper – I used green Crayola craft paper. It is a bit thinner than cardstock and also less expensive. As it will only be used to hide the cardboard and not be the showcase, I thought it was best.
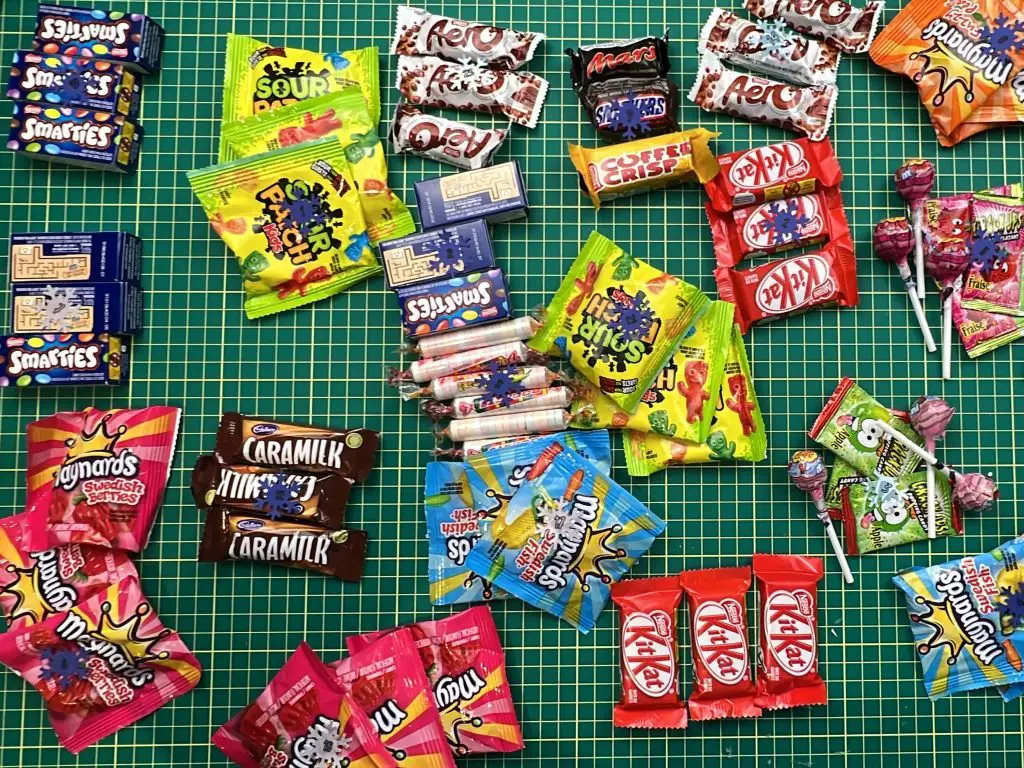
- Countdown Calendar Treats – after Halloween each year, I pull aside candies for the countdown calendar so that I do not need to buy more. But you do not have to use candy. You can use any treat you prefer.
- Tissue paper -I used green tissue paper to resemble a wreath. But you can use any color you would like. I typically buy my tissue paper at the dollar store, but you can buy some here.
- Glue – You will need glue for several things in this craft. I used both my craft glue and my glue gun with hot glue.
- Christmas wreath file – I have created an SVG file for this Christmas wreath. You can get it from my resource library by signing up for my newsletter below.
- Countdown number file – I previously created an SVG for my countdown calendars. You can access it in my resource library by signing up for my newsletter below.
Let’s make a Holiday Wreath Countdown Calendar
Select your countdown calendar treats
Every year after Halloween, I pull aside 25 candies from my kids’ takings. This gets put aside until I make the countdown calendars so they have something for each day.
This also helps limit how much they get to eat in the month of November, and I do not need to spend extra money buying things to put into the calendar.
Just some pointers – if you are making more than one calendar for your kids, for example, it is a good idea to give the same treat to each child on any given day. I like to sort my candies and place them with numbers next to them, and then I take a picture to make sure I remember what goes where.
Prepare your treat numbers
As I make 3 calendars a year, I need to make sure each candy is in a specific spot, number-wise, so before I wrap anything, I prepare some numbers for my countdown calendar.
I have created numbers for my countdown calendars, and you can get a copy by signing up for my newsletter below. You will get access to the numbers I have created.
Once you have downloaded the file, upload it to Cricut Design Space.
You will need to make a few modifications to the file, as follows:
- Ungroup the design.
- Select each number individually and change it from Basic Cut to Pen.
- Each number and shape (star, bow, bulb) will individually need to be selected and Attached together so they are drawn and cut together.
- Resize the shapes to fit your preference. I adjusted mine to be 1.5″ high.
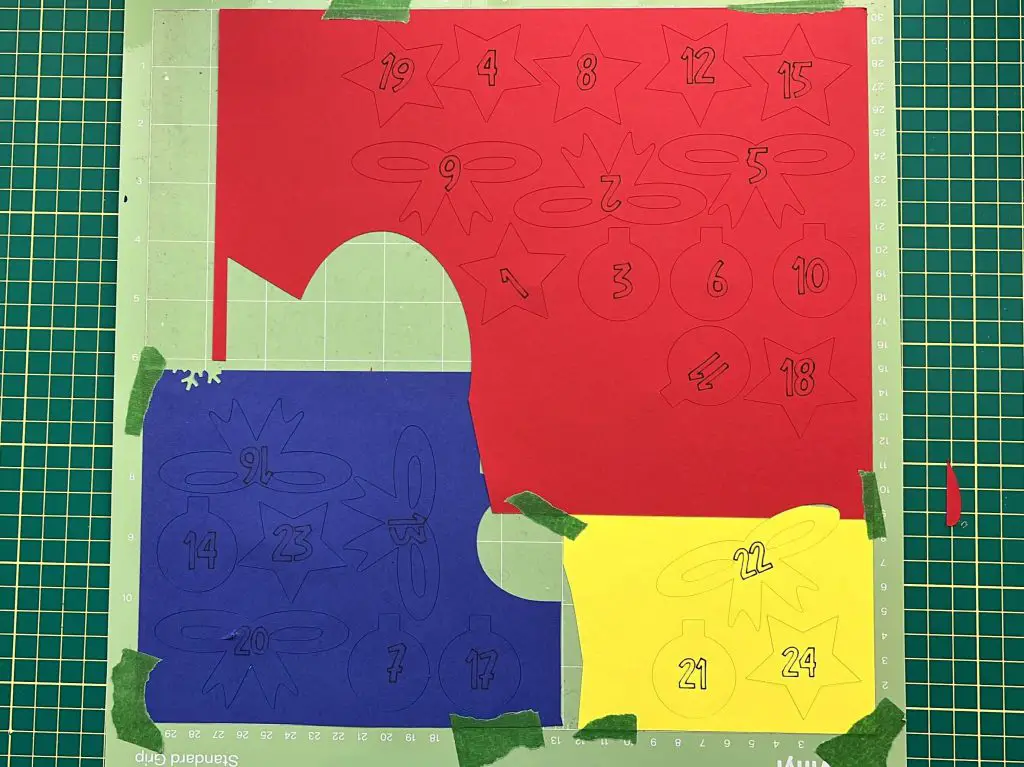
I selected several different colors of cardstock to cut these numbers with. You can choose 1 color or many colors.
Wrap your Countdown Treats
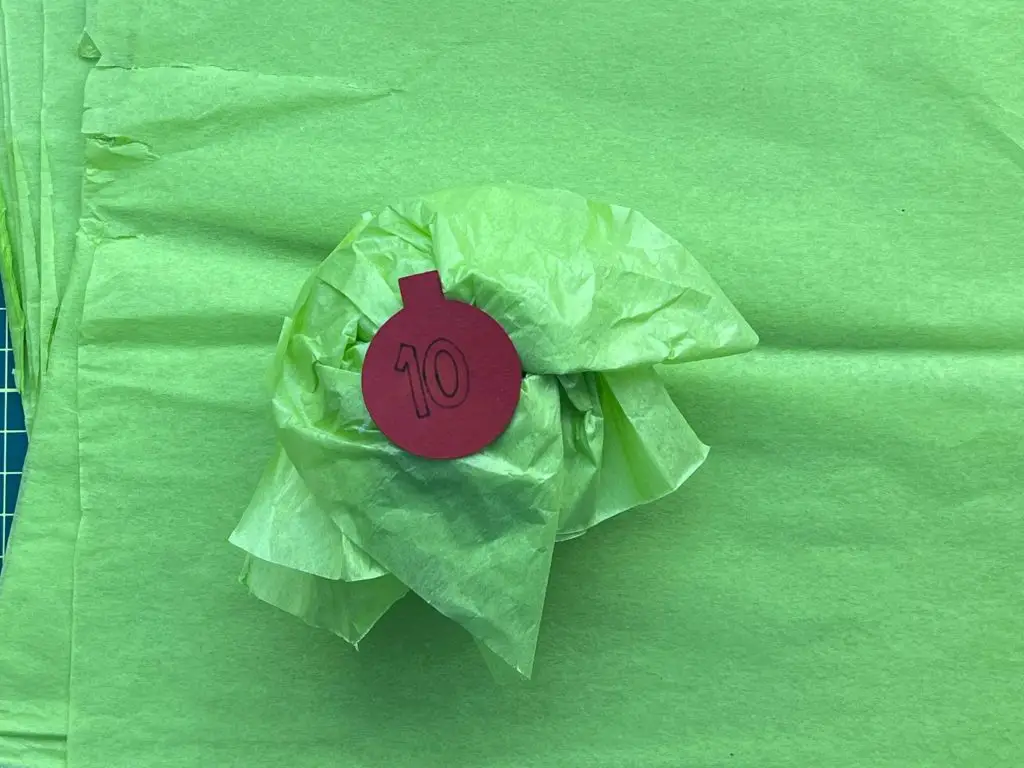
As this countdown calendar is a wreath, we will focus on keeping it green. And in that light, I pulled out some green tissue paper to wrap each treat.
I cut out squares that are about 8″x8″ of tissue paper. I used 2-3 pieces of tissue paper per treat so that the treat would not be visible through the paper. Pulling all 4 corners up, I tied a green ribbon around the tissue paper to make.
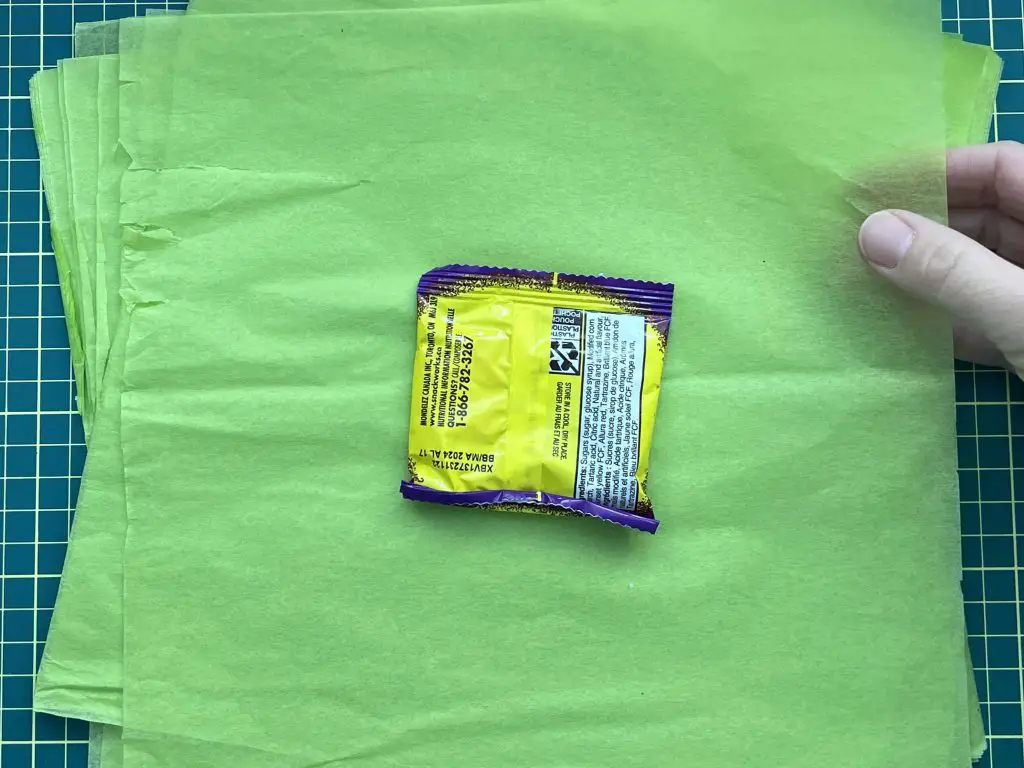
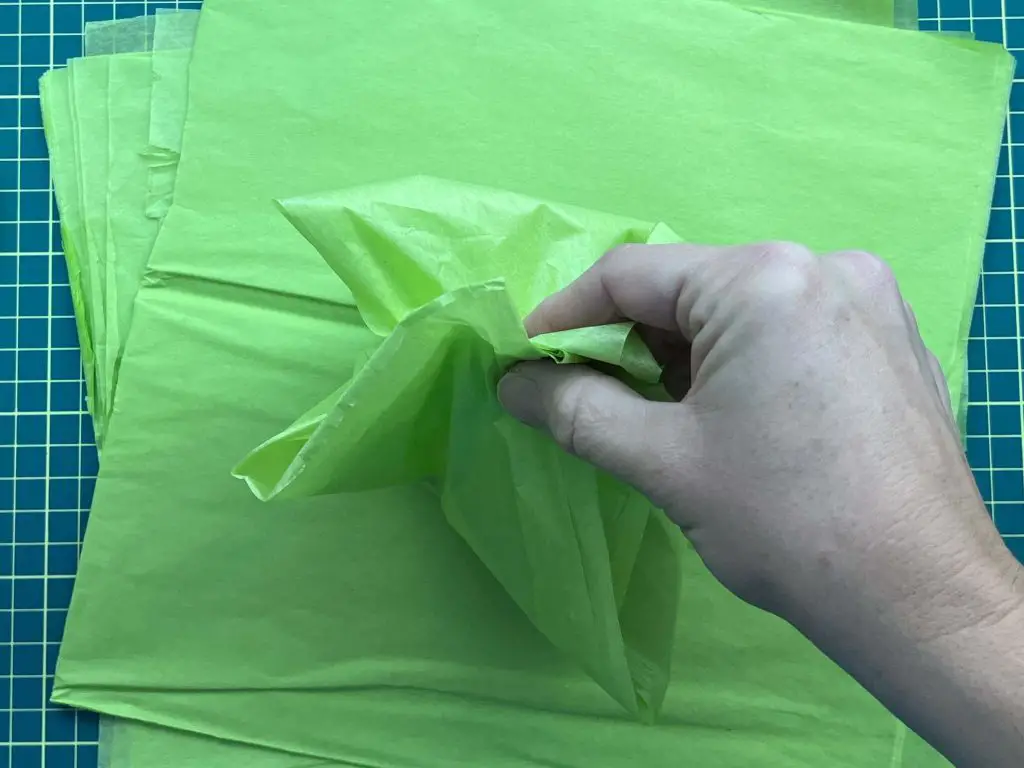
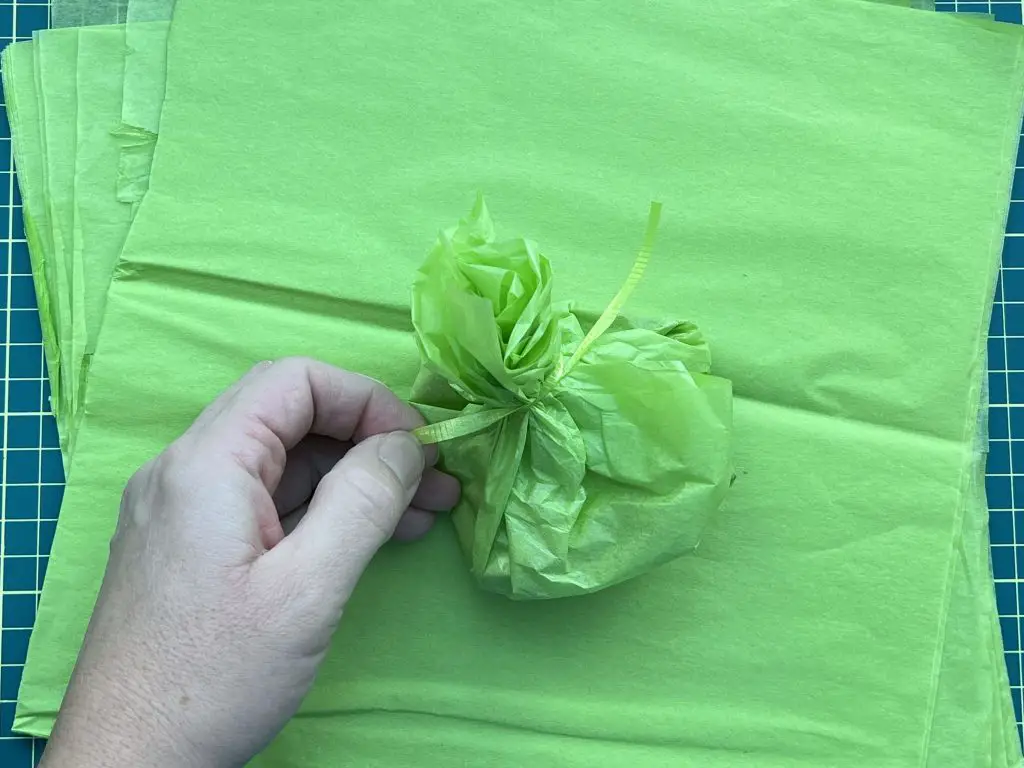
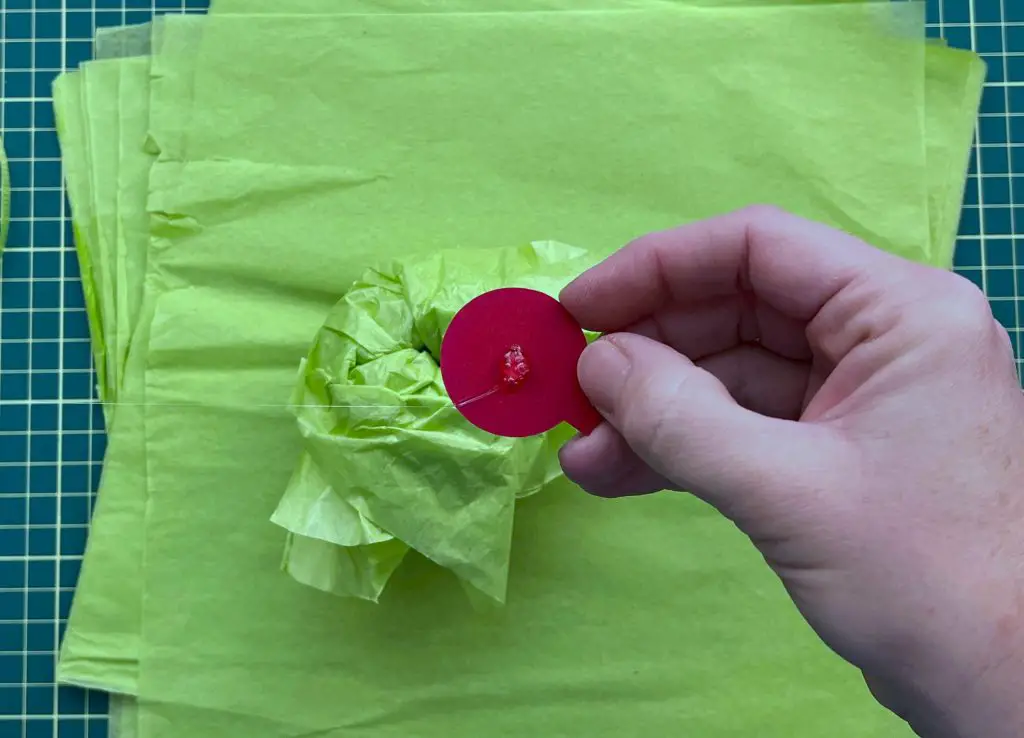
Once you have tied up one treat, push open the top that was tied up to make it look almost like a flower. I recommend gluing the number onto the wrapped treat at this point.
Continue this until all of the treats are wrapped.
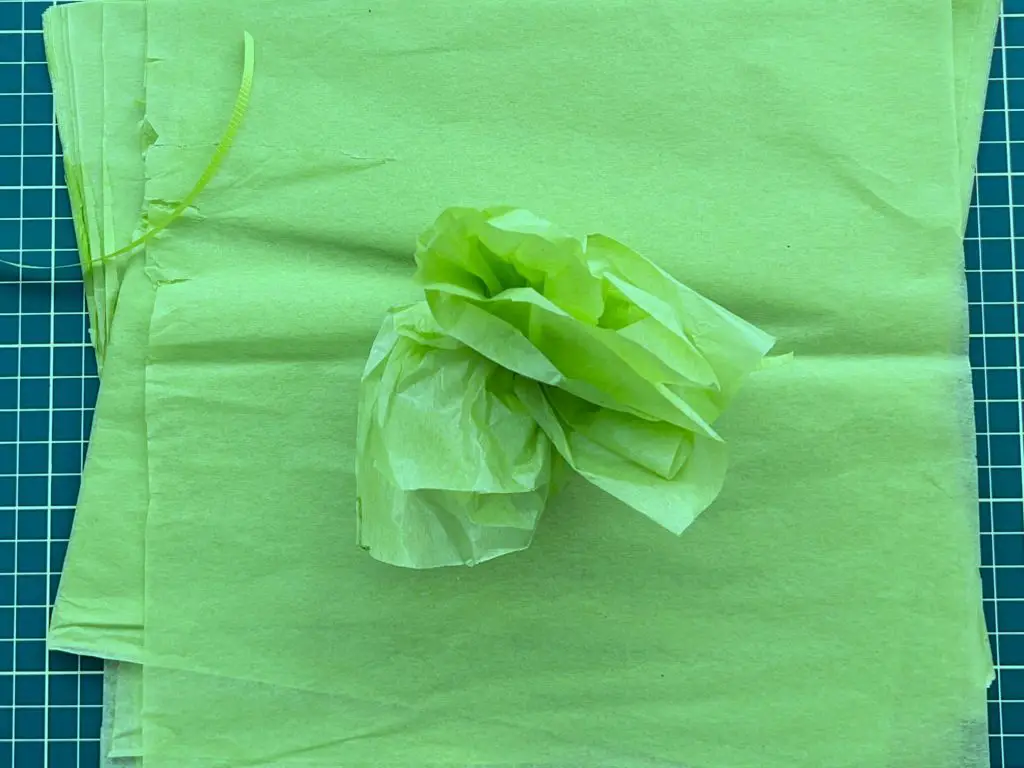
Since the treats are all different sizes, I trimmed the surplus tissue paper off the wrapped treats. I attempted to make them all look symmetrical and circular.
Make the Wreath
I have created a wreath SVG file for this project. You can access it by signing up for my newsletter below.
Once you have downloaded the file, upload it into Cricut Design Space.
This file consists of 3 different rings:
- one solid ring
- one ring cut in half
- one ring cut in quarters
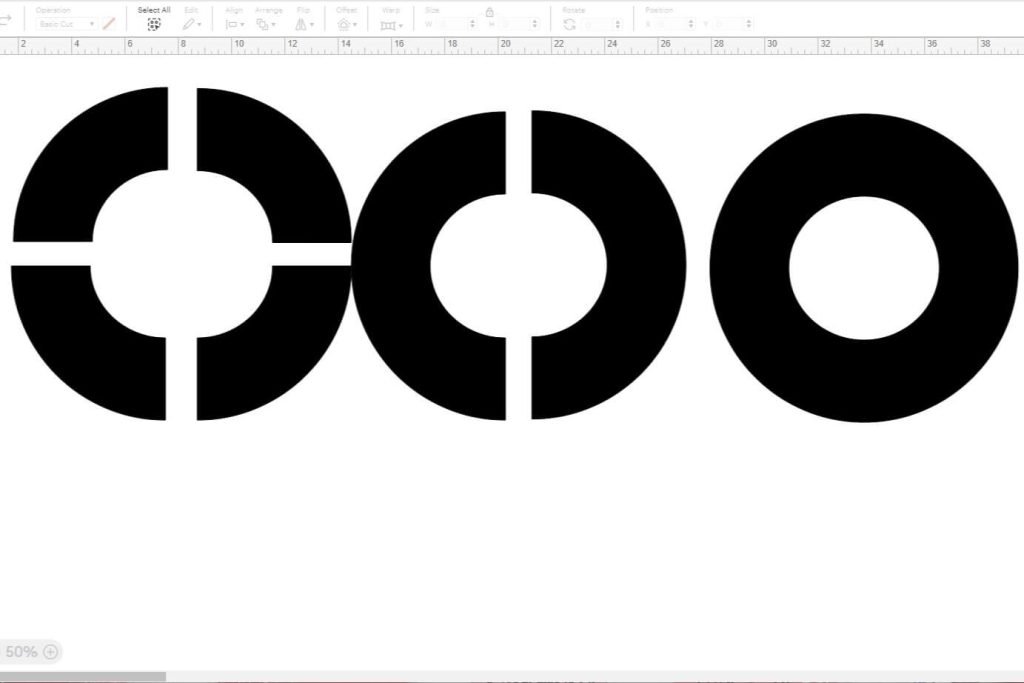
I have created the file with a way, so you can cut larger wreaths with the multi-cut pieces and smaller wreaths with the solid ring.
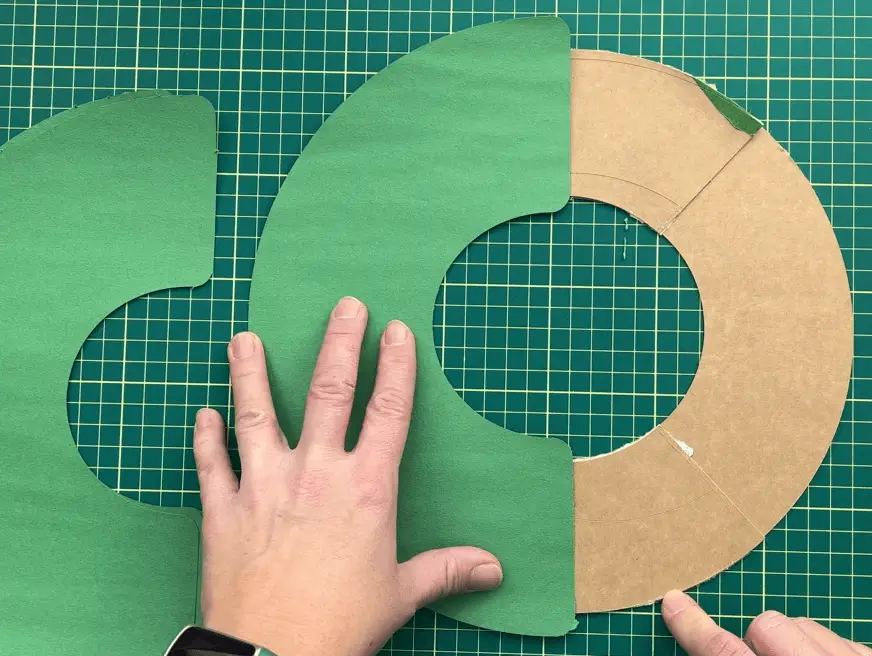
Ungroup the design and delete the two rings you do not want to use. In my case, I kept the 2 piece ring.
You will need to verify or modify the size of the ring you have selected. I set the height of my ring to 10.5 inches. You can cut out 1 half ring or the whole ring in scrap paper to see if your treats will fit on the wreath. This is done by placing them on the test ring to see if they will fit. I was able to make a 10.5″ diameter ring work. If you are using other treats, you may need bigger or smaller ones.
Once happy with the size, I selected one-half and created an offset of it. I duplicated this 3 times to have 4 halves. These offsets will be cut out of green cardstock to cover the cardboard.
Additionally, I made 1 duplicate of the one half to have 3 halves in total. The third half will later be cut in half and used to hold the 2 halves together. If using the 4-piece ring, I recommend cutting out 2 full rings to allow overlap on all joints.
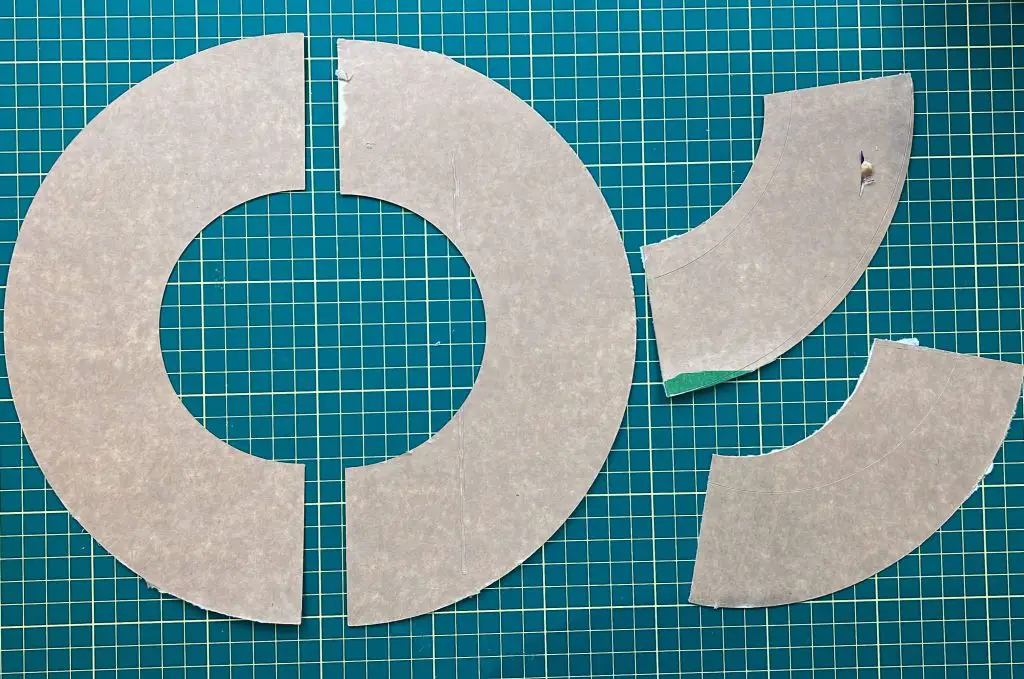
I sent this to my Cricut to cut. I used Custom-Cardboard to cut the cereal boxes and I cut the 4 offset circles in green craft paper with a standard setting for cardstock
Assemble the Holiday Wreath Countdown Calendar
Once you have cut out your wreath, it is time to assemble it.
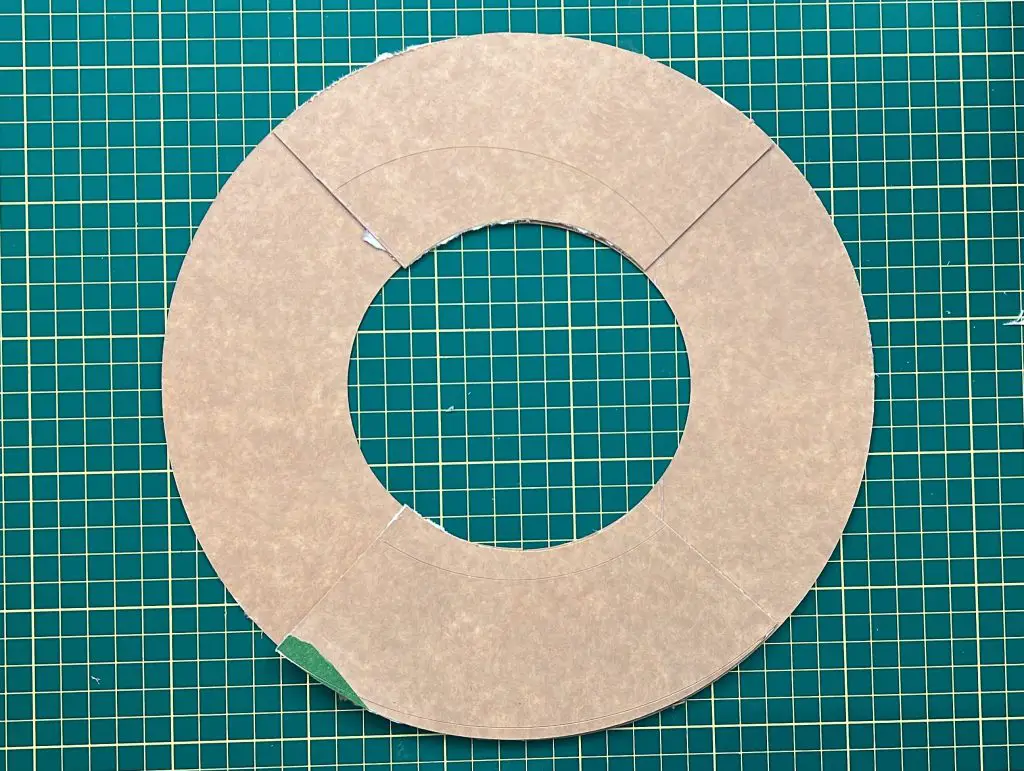
Align the 2 ring halves on your workstation. Cut the third half in two. Apply glue to one side of it and place it over the seam of the 2 halves. Repeat this for the second seam. Now the inner cardboard ring is complete.
Next, with the 4 green offset ring halves, apply glue to each half, one at a time, and glue 2 pieces onto the front and 2 onto the back. This allowed for the full inner ring made of cereal box to be covered in green.
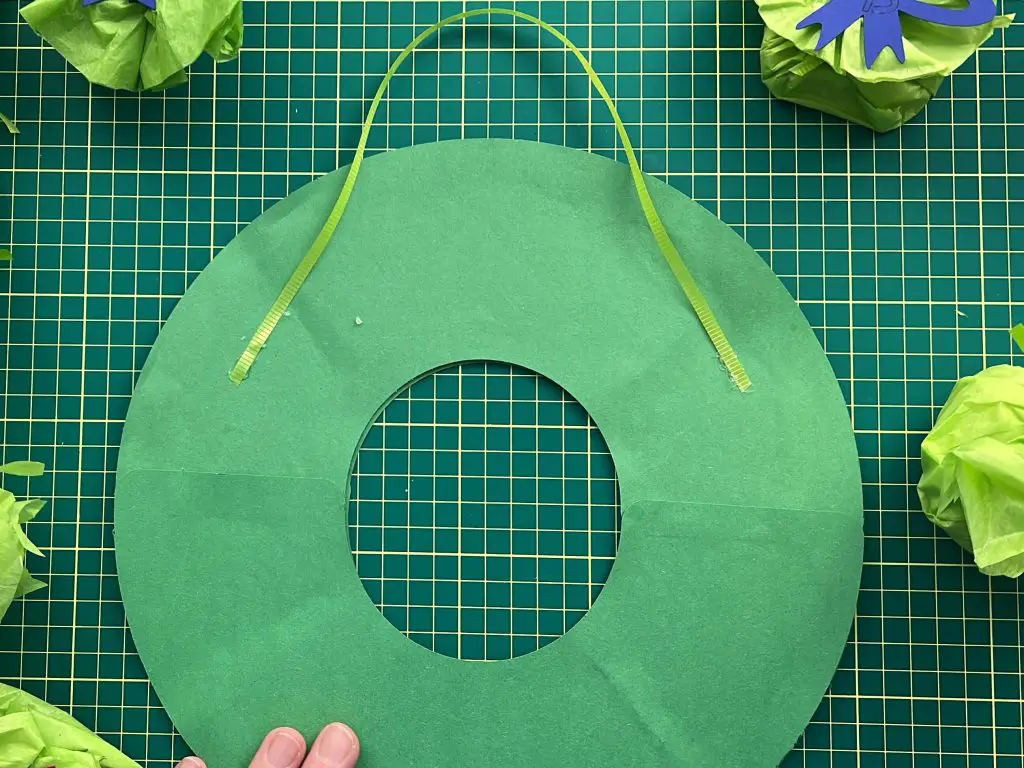
As the green craft paper is slightly bigger than the cardboard, you will have a bit of overhang inside and outside the ring. This is okay. You can cut notches into the paper and fold it over or leave it as it is. I just left it. You will want to make sure that you apply glue generously to the green craft paper so that it sticks to the cardboard very well, as it will need to support the weight of the holiday countdown treats.
Once the glue has dried, glue a ribbon onto one side of the wrath for hanging afterward. It is best to do this before the treats are on the wreath.
Attach the Countdown treats to the wreath
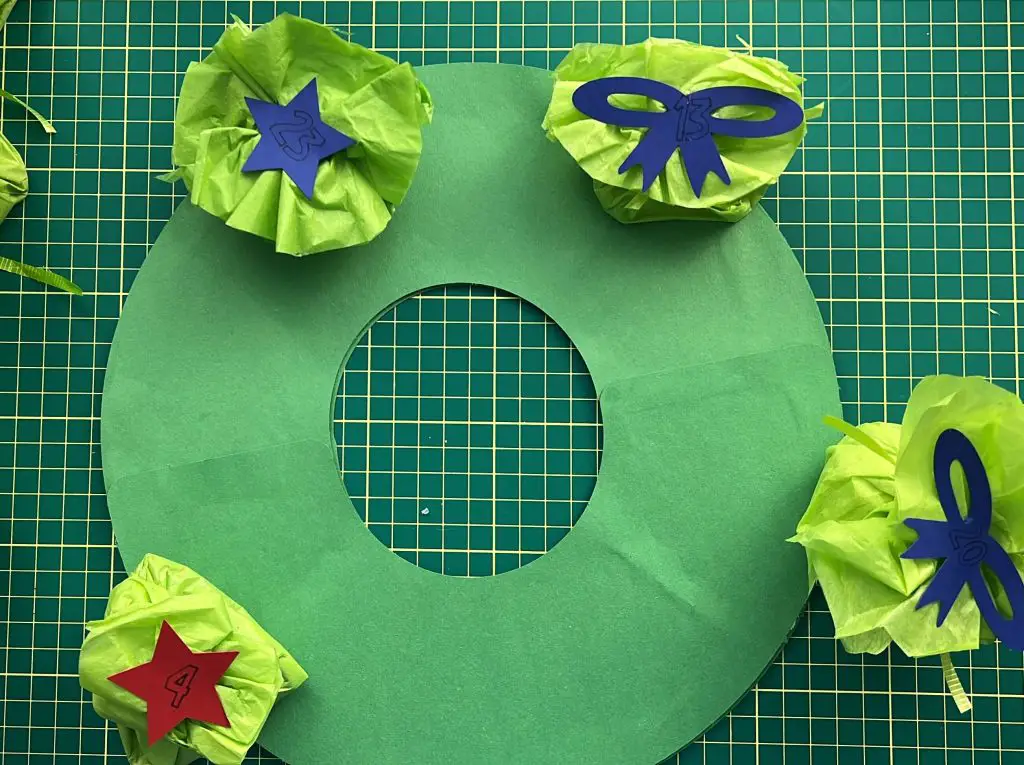
Before you start gluing your treats onto the wreath, I strongly recommend placing the treats on top of the green circle we created to make sure all the treats will fit, one last time. You may need to move them around and squish some together, but if you made the ring too small, you do not want to get half done to realize your mistake.
Once you are happy that the treats will fit, apply a small dab of glue with your glue gun onto the back of a treat and glue it onto the paper wreath. Place the treats in any order you wish, either sequential or random. Keep gluing them on until they are all on.
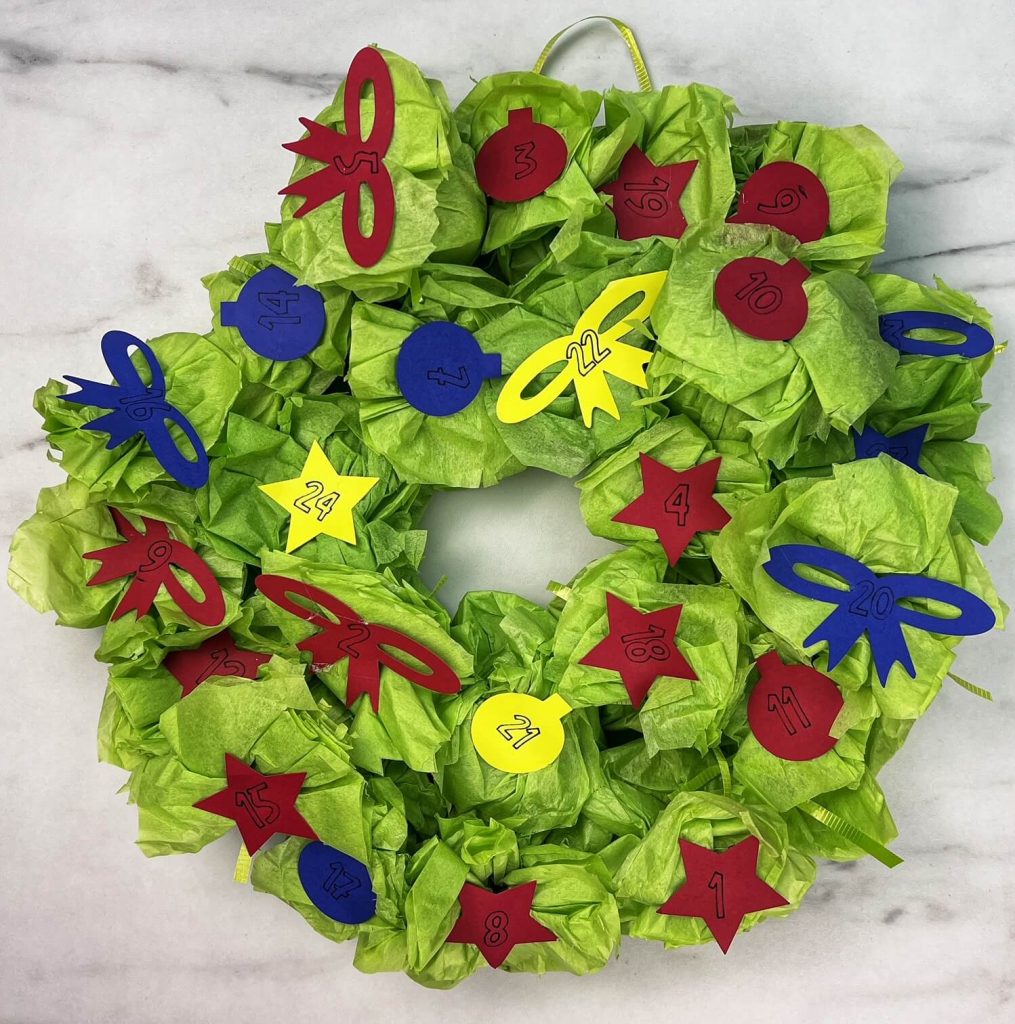
You can fluff up the tissue paper or cut some surplus off to make the wreath look symmetric.
Finally, it is time to hang it on the wall and wait for the countdown to begin!
And there you have it! Your Holiday Wreath Countdown Calendar is complete!
Things I learned while making this Holiday Wreath Countdown Calendar
I was hopeful to get 3 countdown calendars done this year, and so far, I think I am doing okay. But this one was harder than I thought it would be! So, here is what I learned:
- Tissue paper is harder to work with than you think! It rips very easily, both when tying up the treats and when gluing them onto the wreath.
- I measured my ring several times while making this countdown calendar and again at the end before my final gluing. It was a bit of a tight squeeze at the end as there was much more tissue paper around the treats than I had envisioned. Although I made mine work, it could have been a redo if I needed to add 1-2 more treats. So make sure you are happy with the size.
- I was happy with how quickly this countdown calendar came together. Total assembly time was about an hour and a half, so that was nice.
Did you enjoy this Holiday Wreath Countdown Calendar?
Did you enjoy making this Holiday Wreath Countdown Calendar? Let me know in the comments below!
If you enjoy Christmas Crafts, check out my other Christmas Crafts here:
If you enjoy Countdown Calendars, check out my other designs:
- Christmas Bulb Holiday Countdown Calendar
- Hanging Star Holiday Countdown Calendar
- Toilet Paper Roll Countdown Calendar Christmas Tree
- Snowman Christmas Countdown Calendar
- Christmas Tree Countdown Calendar – DIY
- Wine Advent Calendar
- Beer Advent Calendar
Don’t forget to sign up for my newsletters! You’ll get inside tips on upcoming posts and additional behind the scenes details about what’s happening on the site!