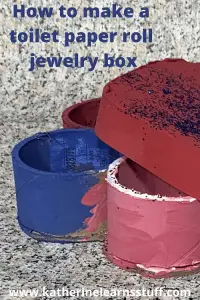
When you craft a lot, you acquire lots of toilet paper rolls and cardboard tubes of various shapes and sizes. And as a crafter, it is always a shame to throw things out that might be useable for another unknown project. I have more cardboard rolls than I need and more than most sane people can imagine, but I have kids, and I also craft, I can somehow justify it. So, one of my latest projects is a Jewelry box from toilet paper rolls. So let’s dive right in.
As an Amazon Associate, I earn from qualifying purchases. This post contains affiliate links. I may receive a commission if you purchase an item from one of my links. This will not change the price you pay.
Supplies needed for a Toilet Paper Roll Jewelry Box
- Cardboard tubes of varying sizes – toilet paper rolls, paper towel rolls, wrapping paper rolls, tin.
- Cardboard – for top and bottom
- Old cereal box – one side
- Glue Gun & Hot Glue – lots of glue
- Paint – I use Craft Smart Acrylic Paint
- Optional glitter, gemstones, embellishments to make the jewelry box more beautiful.
- Saw & cutting jig
- About 2 hours of time
Let’s Get Started making our Jewelry Box from Toilet Paper Rolls
Cutting the toilet paper roll
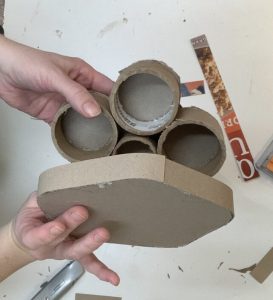
The first item we need to sort out is the cardboard roll. I used a large cardboard roll, that originated from a Costco-sized cellophane roll, instead of a toilet paper roll. I found that this worked better for reaching in to grab small necklaces and rings. The standard toilet paper or paper towel rolls were too small for my fingers to reach in.
Cut the cardboard roll into 1.5″ thick sections. I used a hand-saw and a cutting jig since the cardboard is hard. It is almost impossible to cut through with a craft knife or scissors.
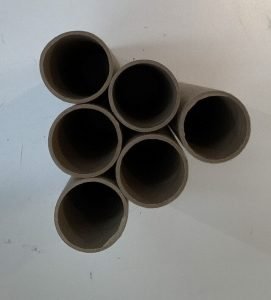
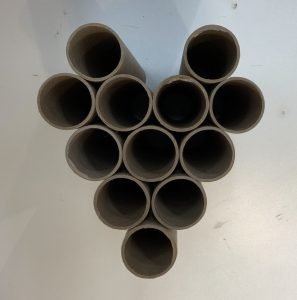
Your design will dictate how many pieces you need. But you will need several.

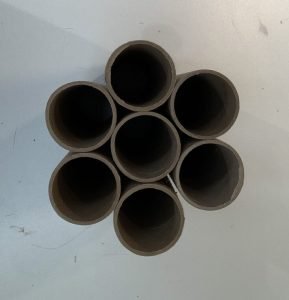
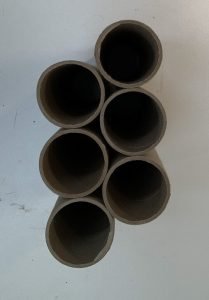
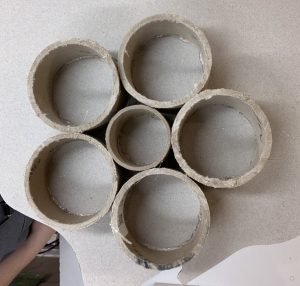
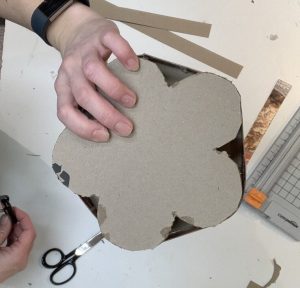
We decided to go for a flower shape, so we needed larger 5 pieces for the peddles, and 1 smaller piece for the inside of the flower. So, 6 pieces in total.
There are countless shapes and arrangements that can be made with these rolls. You can make hearts, triangles, flowers, diamonds, basically anything your heart desires. Some designs will need more cardboard tubes cut out. But your options are limitless.
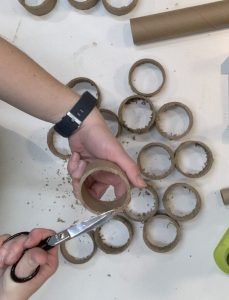
Cleaning Cut Cardboard Roll Edges
Once all of the pieces are cut out, you will notice that the edges of the cut tubes are all frayed and ugly-looking. With scissors or a sharp blade, trim off the loose cardboard to give the cut pieces a smooth finish.
Base of the Jewelry Box
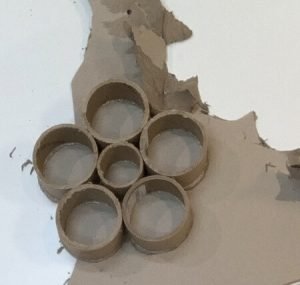
Once your shape is selected, it is time to glue it onto the cardboard base. I found that gluing the cardboard rolls onto the cardboard base before cutting it out worked best. This will allow for extra material to be accounted for before you cut. The glue will move the pieces around a bit and require more space.
Once the shape is glued onto the cardboard, it is time to cut out the base.
I used old cardboard that I had from some clothes purchases. It was about the same thickness as the cardboard rolls, so it would help keep the jewelry box rigid.
Using a crafting knife or Exacto knife, start cutting out the base of the box. This is harder than it seems. Be sure to do it slowly and do not pull the cardboard off, as it you inevitably peel the cardboard off of areas that you need.
Keep cutting until the whole base is cut away from the cardboard sheet.
Some shapes are easier to cut than others. We picked a flower, and this proved to be tricky with all the inner corners. Simple shapes like diamonds and triangles are much easier to cut.
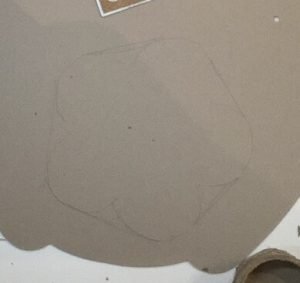
Jewelry Box Lid
Now that the base is cut out, simply trace the base on more cardboard to make the lid. This will allow a little bit of space on the top where there is no glue, and it will be easier to put the top on and off.
I modified the shape of the lid slightly and deviated away from the flower shape as it was hard to cut on the base. I simply made a hexagon with rounded edges. Again, take your time with this and do not pull the cardboard, as it will tear in the direction you do not want.
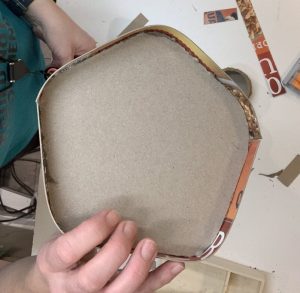
Once the lid is cut out, you will need to make an edge around the lid to keep it in place.
I used an old cereal box and cut a strip about 1/2″ wide.
Using some hot glue, I glued the cereal box strips (design side facing inwards), to the outer edge of the lid. Do not glue the strips onto the face of the lid. This will take away some of the space you need for the lid to fit. You want to make sure the strips are being glued to the edge.

Once the lid is complete, check to make sure it fits the jewelry box. Depending on your cutting and gluing skills, you may need to rotate the lid until you find the exact spot where it fits. There should be more than one way it fits, but it might not fit in all directions. That is ok.
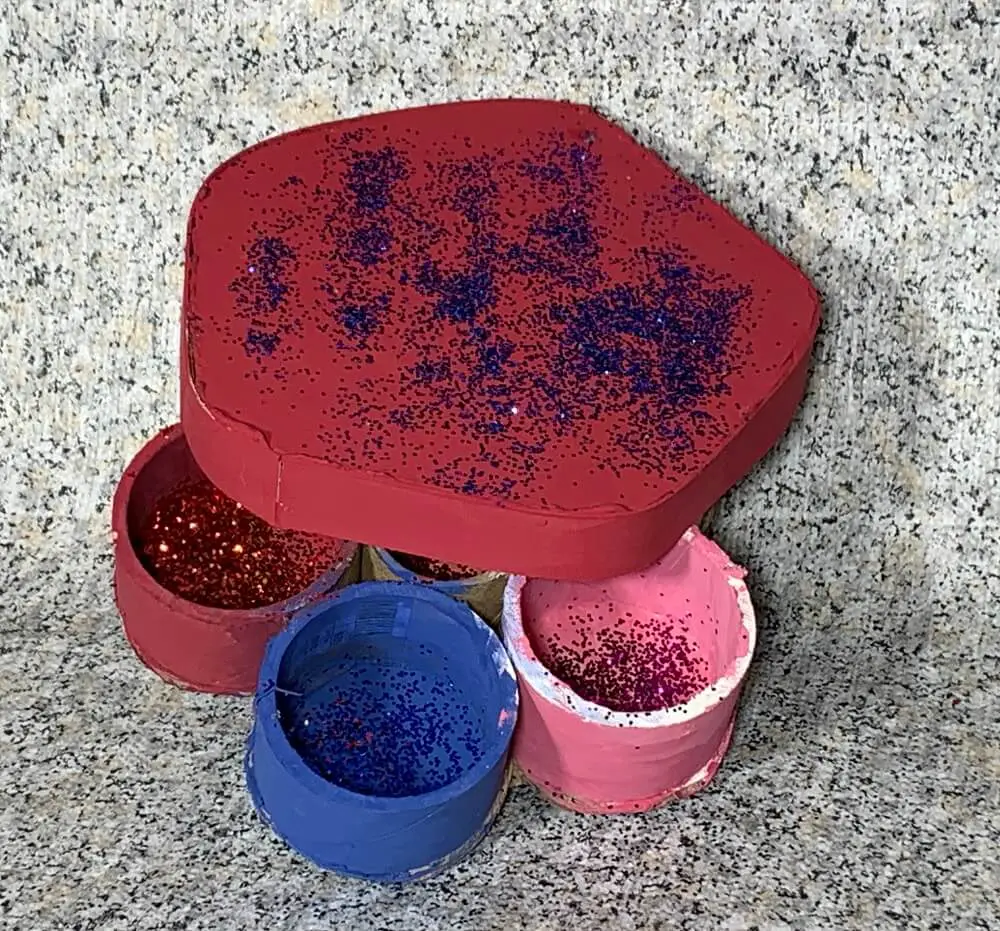
Paint and Decorate the Jewelry box
As no one likes the look of plain cardboard and glue, it is time to paint the jewelry box. Using simple acrylic paints, my kids went to town painting.
As always, you can add glitter or sticker bling and rhinestones, or you can leave it simply painted.
And that’s it! You’re Done! Your Jewelry Box from Toilet Paper Rolls is complete!
Don’t want to Read? Watch the YouTube Video Instead!
Frequently Asked Questions:
Do i need to use toilet paper rolls for this project?
No, you do not. You can use any number of cardboard rolls. I found that toilet paper rolls were just a bit too flimsy for my liking, although they were much easier to cut.
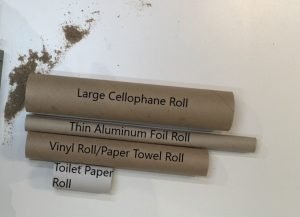
Where can I get cardboard tubes from?
If you are looking for cardboard tubes, look no further. They are everyone, you just need to see them. Starting from the easiest to find to the more complex
- Toilet Paper Roll
- Paper Towel Roll
- Wrapping Paper rolls
- Aluminum Foil Roll
- Vinyl Roll
- Cellophane Roll
- Ribbon Rolls
- Tape Rolls
Can you use all cardboard tubes for the same projects?
Not all tubes are made equal. Toilet paper and paper towel rolls are by far the flimsiest. They will bend, bucket and rip easily.
Aluminum Foils and Vinyl Rolls are very sturdy, but the aluminum rolls tend to be very narrow.
If you buy an industrial roll of cellophane or aluminum foil from Costco, it has a large diameter and is very sturdy.
Tape rolls, like duct tape or packing tape, and ribbon rolls, are strong and do not require cutting to a smaller size.
Things I learned along the way, making a cardboard roll jewelry box
- As always, I have grand visions of crafts before I start them, and I plan them out for my kids to help with, and they never seem to turn out how I envisioned, but that is ok. Crafting, especially when kids are involved, is for fun, not for perfection. Maybe, we will make more jewelry boxes in the future and make them fancier.
- Cardboard rolls and tubes are hard to cut. Even with a sharp saw, it was quite the workout cutting 6 pieces. And I made 3 jewelry boxes, so I worked up quite the sweat. Using a mitre saw might have been easier, but I was too lazy to access it at the back of the garage.
- I love working with cardboard of any variety because you can easily paint over it and make it a work of art. Cereal boxes, tissue boxes and cardboard rolls are my favorite.
Did you find this tutorial Helpful?
Did you find this Jewelry Box from Toilet Paper Rolls helpful? Let me know in the comments below!
If you liked this tutorial, check out others here: