Halloween is just around the corner, and it is time to get all the Halloween costumes started, finished and ready to wear. This year, we have moved on from witches and wizards to cats. So, we are piecing together a cat costume. As such, we will learn how to make a cat tail, a simple addition to your Halloween costume.
As an Amazon Associate, I earn from qualifying purchases. This post contains affiliate links. I may receive a commission if you purchase an item from one of my links. This will not change the price you pay.
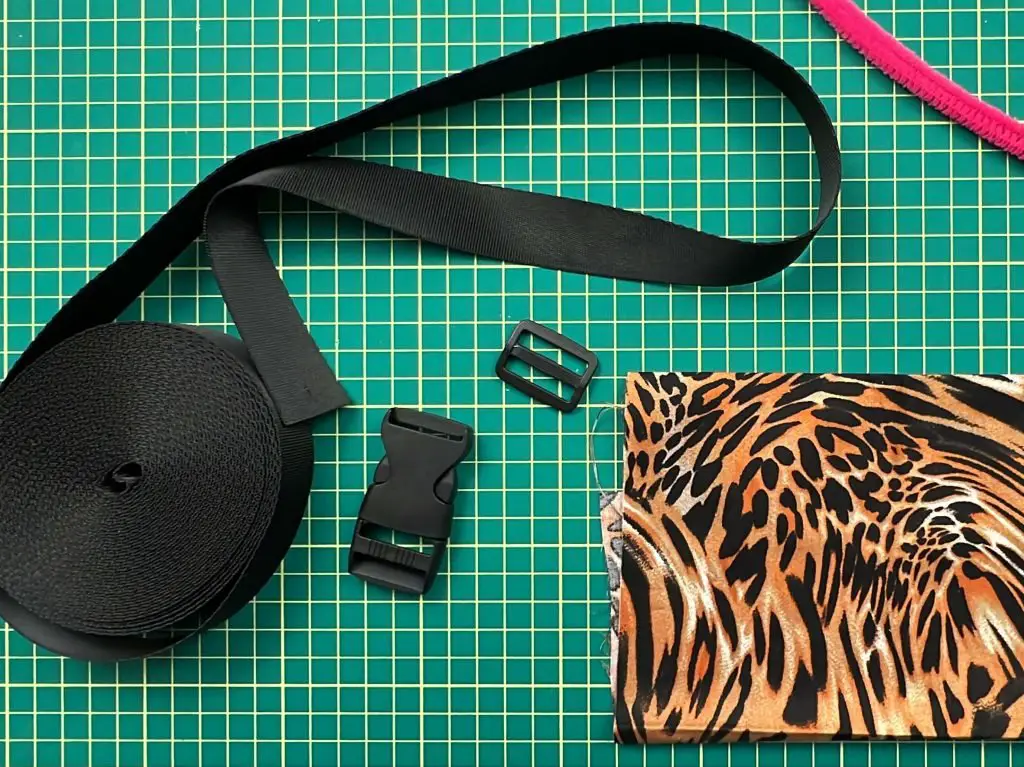
What you need to make a simple cat tail
This project doesn’t need many things, so let’s get them assembled:
- Fabric – ideally in the color or print of your cat costume,
- 1” webbing – this is for the waistband
- 1” bucket and tri-glide slide.
- Thread – to match the webbing
- Needle or sewing machine -either will work. If you have neither, hot glue will work in a pinch.
- Stuffing – I use polyester stuffing
- Wooden dowel – optional
How to make a cat tail for your halloween costume
Sewing the cat tail, stuffing the cat tail
First, we must figure out how long and thick we want the tail to be. The length of the cat’s tail depends on the height of the person wearing it. As mine is for a child, I made it 25” in length. We wanted the cat tail to have a bit of shape, so we opted for 4” in width.
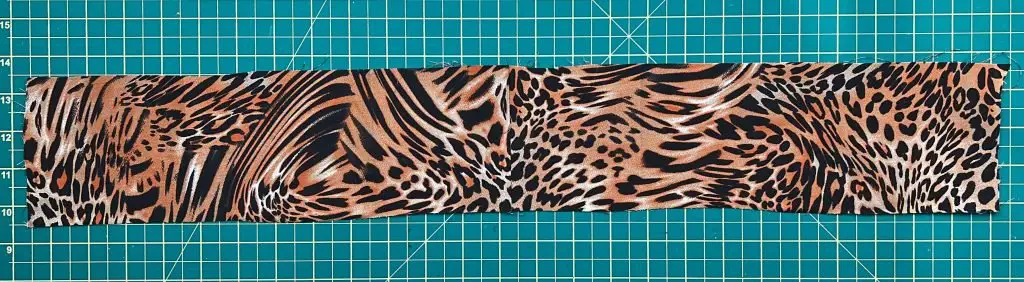
If you make the width larger, it will make for a fatter tail. If you make it smaller, it will be a thinner tail. However, the thinner the tail, the harder it is to stuff it later.
Fold the fabric in half lengthwise. We want to sew the length of the fabric. However, at the one end, start about 1-2 inches from the end, and on the opposite end, you want to sew in a semi-circle to give the end of the tail a less boxy look.
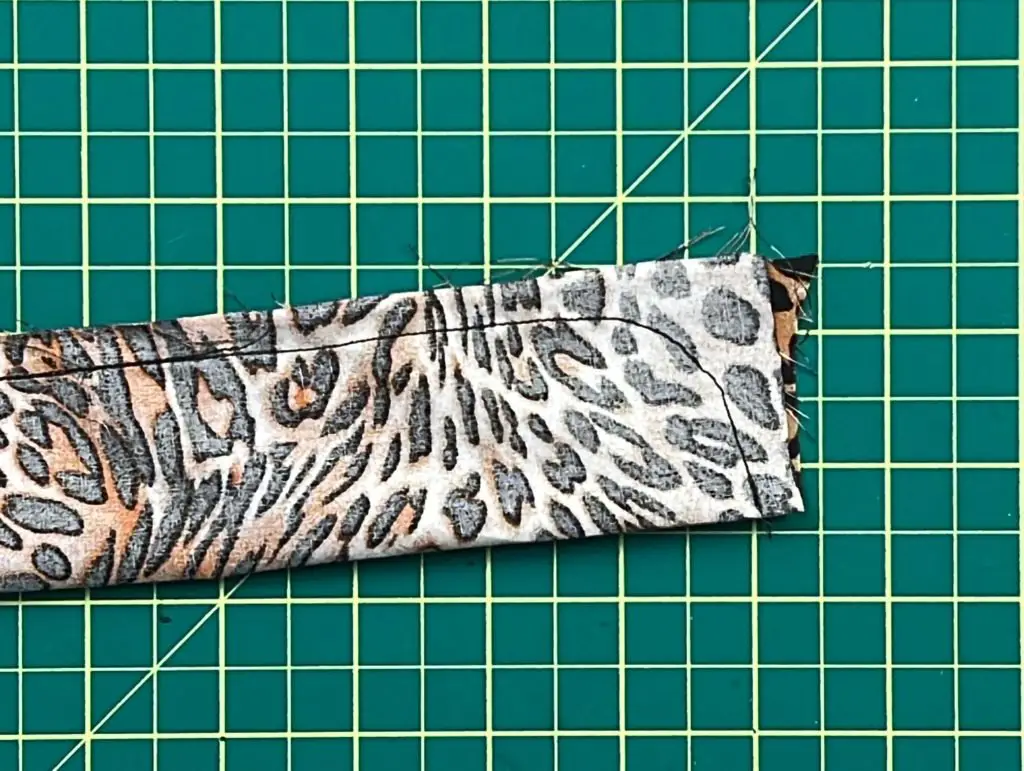
Once the tail is sewn, flip it right side out. This may take a while depending on how long you made the tail. Keep working on it until it is all flipped and the end of the tail is visible.
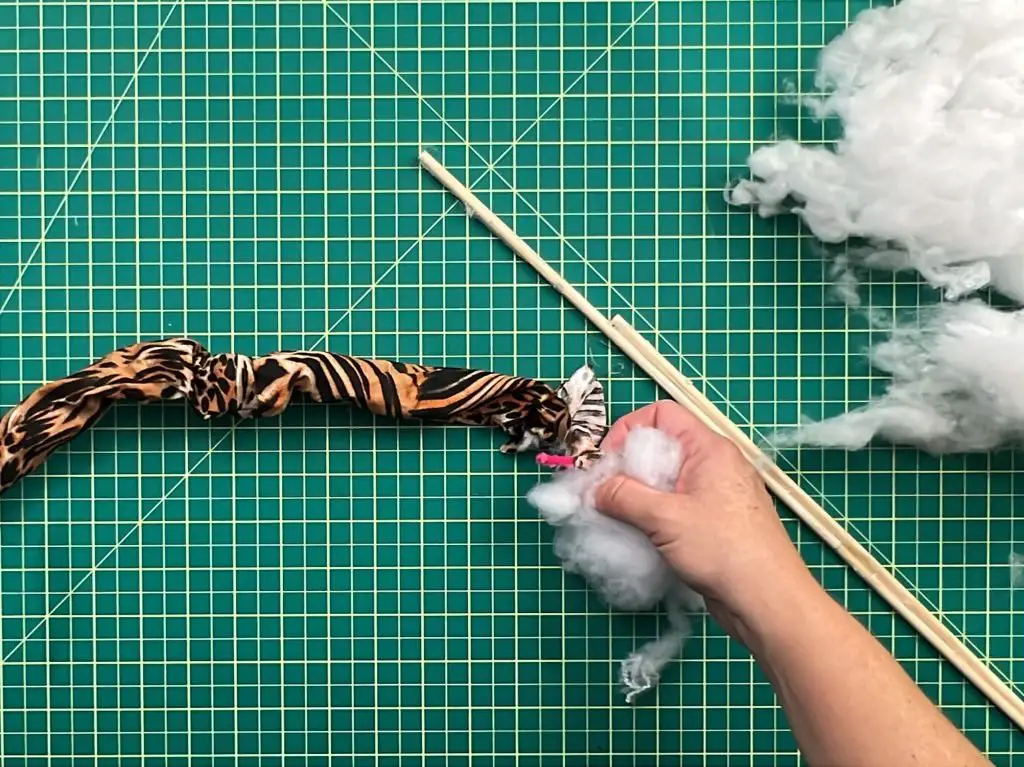
Now, it is time to stuff the tail with stuff. I used large pieces at a time and pushed them to the end with a long dowel. You can keep adding more stuffing in and pushing also. The more stuffing you put into the tail, the more rigid it will be. If you put in less, it will be looser. The choice is yours. For mine, I added a lot of stuffing at the tip of the tail and less near the top, where it will be attached to the webbing.
Measure the belt
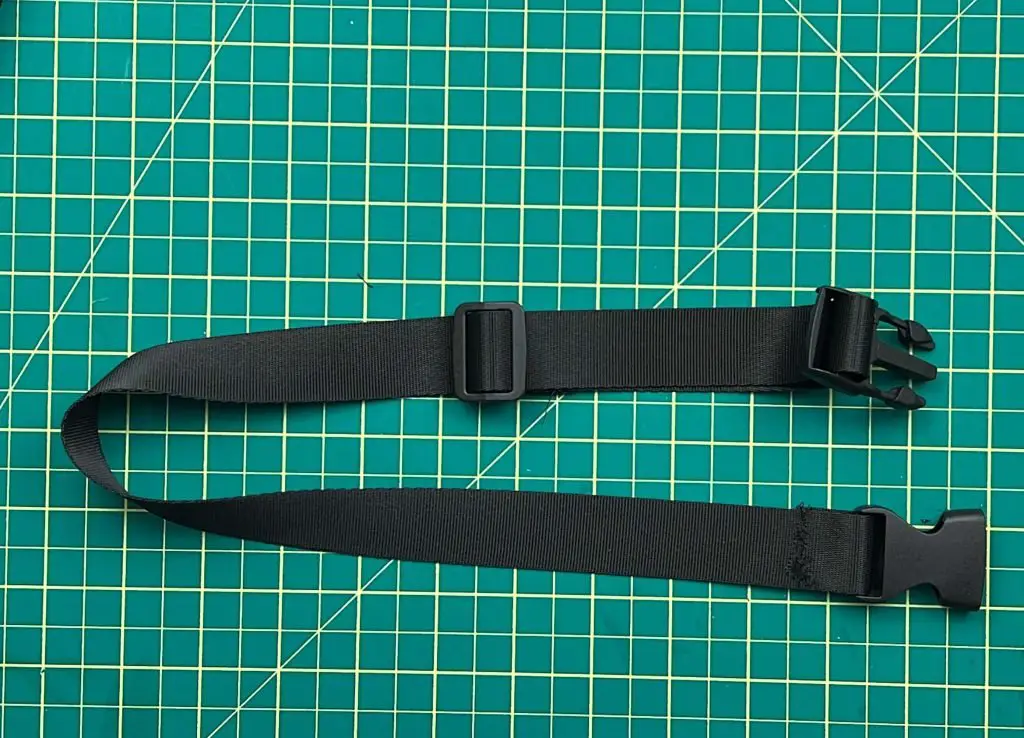
The cat’s tail needs to be attached to something so that it can be worn. I have opted to make a belt out of 1″ black webbing. This way, it can be put on, taken off, or worn over a winter coat in case it is cold outside.
As we live in a colder climate, I will be making this belt so it can be worn inside at school and outside over a winter coat. So there will be 2 buckle pieces and a tri-glide. If you only need one size, you can simply use the two buckle pieces.
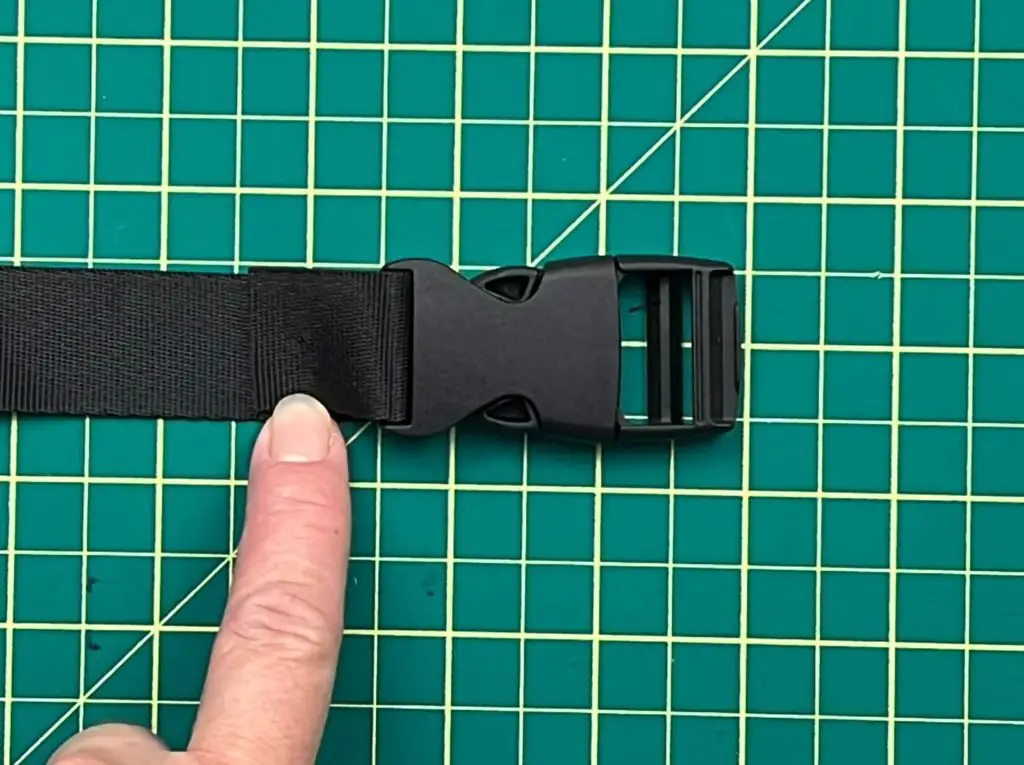
The first thing we need to do is to measure the waist of the wearer. My daughter currently has a 23″ waist with her costume on and a 29″ waist with her winter coat on. Each end of the webbing will require 1″ of surplus to sew shut. So I will need about 31″ of webbing cut.
Insert the webbing into one side of the buckle. You will want to have about 1″ of surplus webbing. You need enough space to run the webbing with buckle through your sewing machine. If you are doing this by hand or with glue, you can have less webbing. Sew the webbing shut.
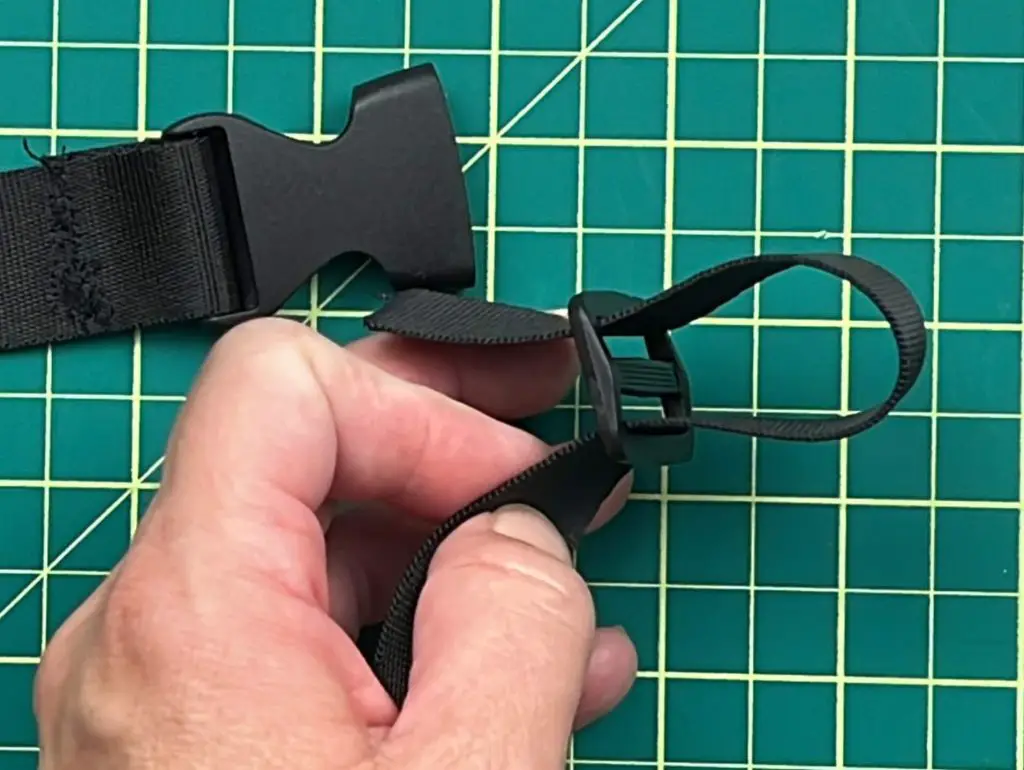
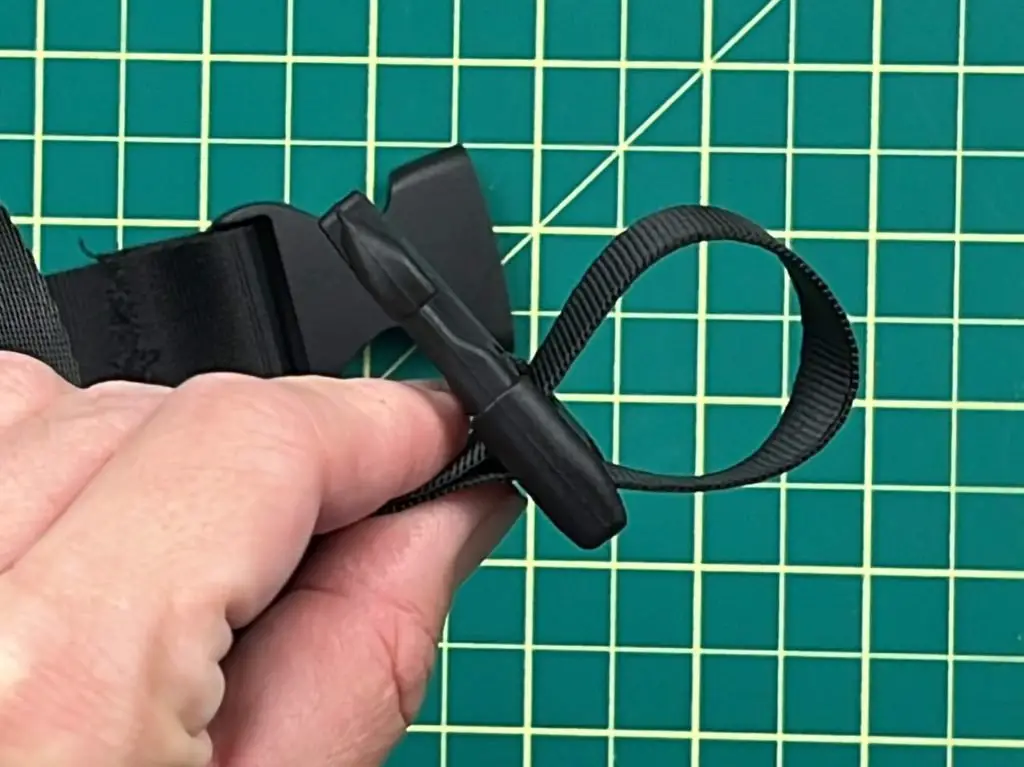
The second buckle piece will require a bit of work as it needs to use the tri-glide slide, as well. First, run the webbing through the tri-glide slide – go under one side, and over the other. Then thread the webbing through the buckle piece – from the bottom up and back down. Finally, return to the tri-glide slide and go under and through the middle bar of the tri-glide slide, under the webbing that is already in place. You will want to have 1″ of surplus at the end of the tri-glide slide. Before you sew it shut, you can clip the webbing with a pin and check to see if the size of the belt, fully expanded and fully retracted, will fit. Once happy with the size, sew the webbing closed at the tri-glide slide.
Attach the cat tail to the webbing belt
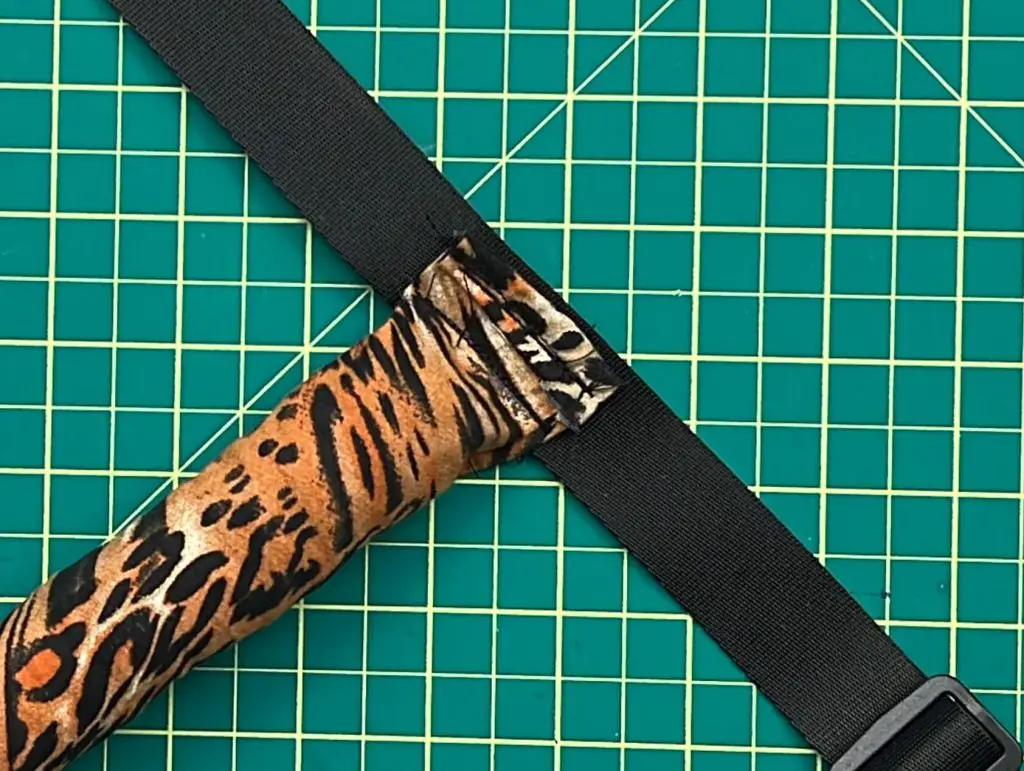
The last step of our adventure requires us to attach the cat tail to the belt. The way I recommend attaching the tail is as follows.
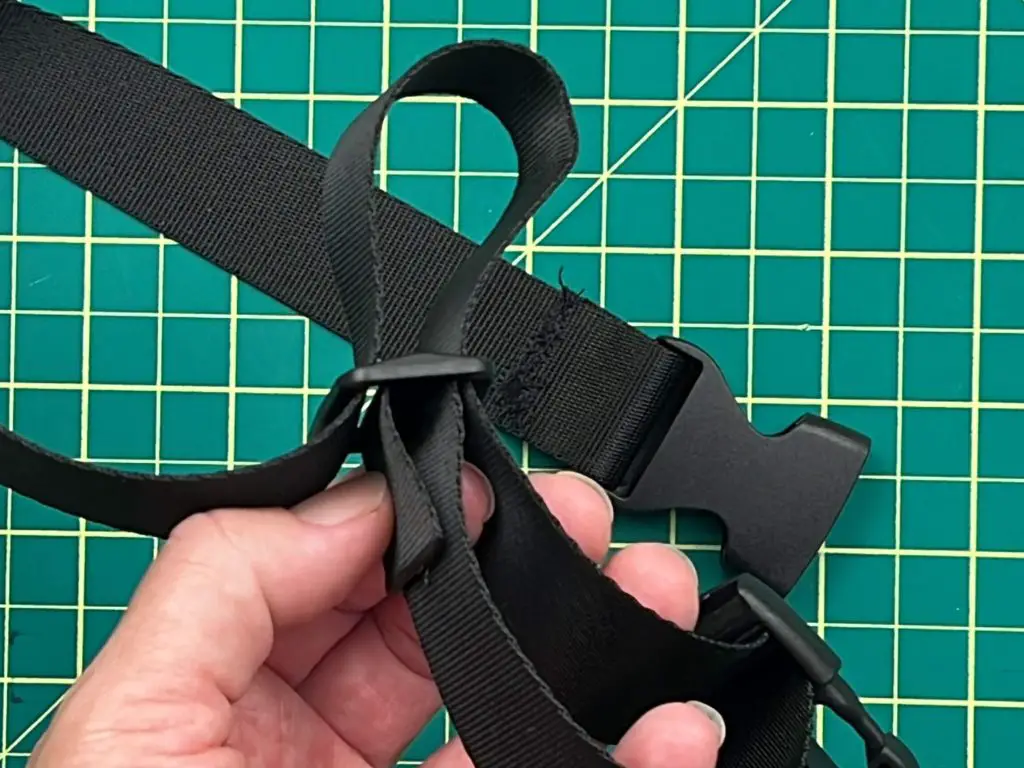
Adjust the belt to be the smallest size. Once you have that adjusted, place the buckle in the front. Mark with chalk the center of the back. With the sizes I have used, the back will not be covered by the tri-glide slide. If you have a larger coat and the tri-glide is over the center back, simply move the buckle to the side until the webbing has a section without two layers of webbing. This will make the buckle at the side but that’s no big deal.
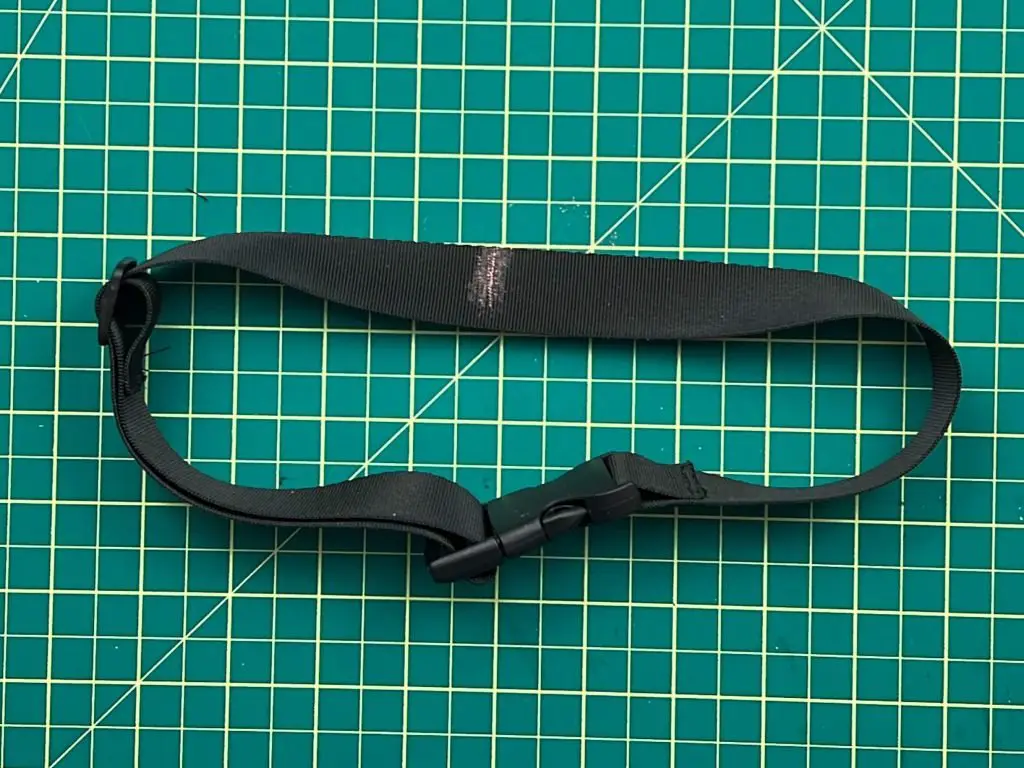
Once you have marked the webbing, sew the tail onto the center marking. My tail has less stuffing at the top, so it is easy to sew. But you want to sew it in two places. Place the tail over the webbing, and sew at the top edge and the bottom edge. And that’s it! It is ready to wear!
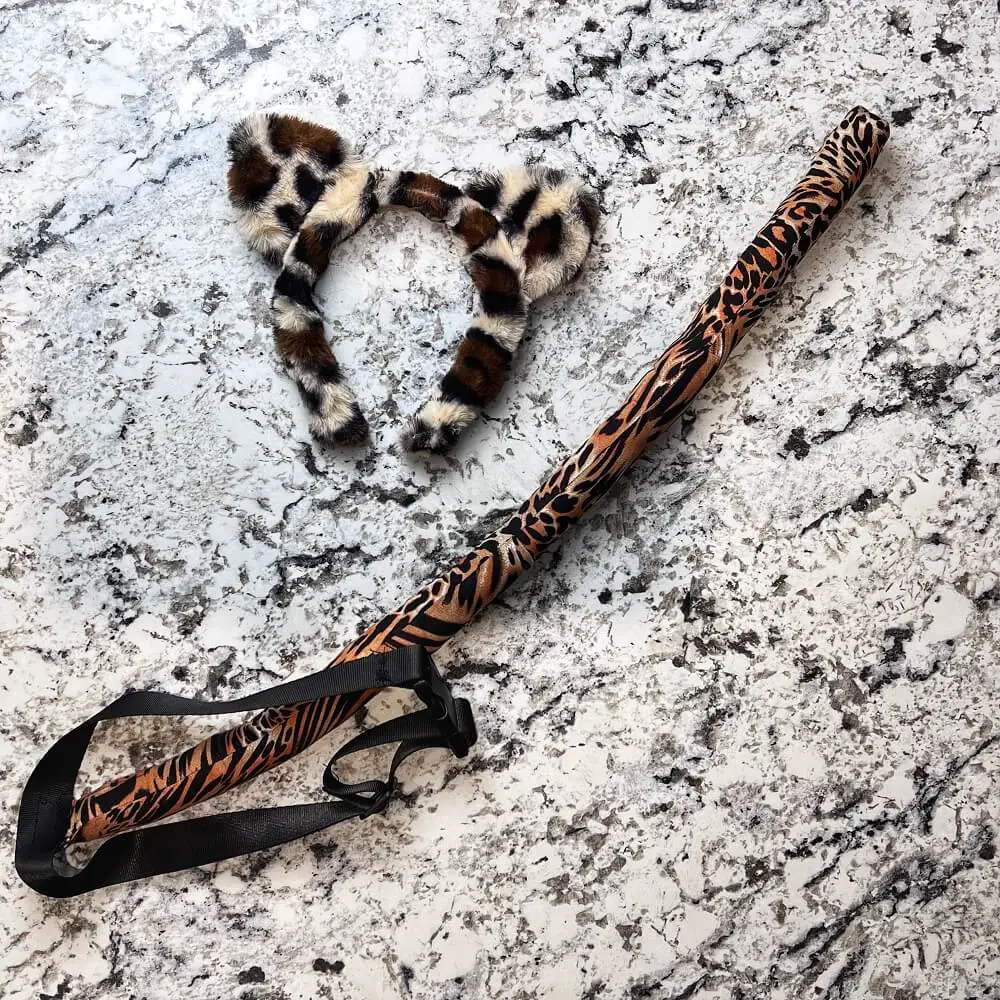
And that’s it! Your Halloween Cat Tail is complete!
Things I learned while Making a Cat Tail
I always find sewing fun. It’s still a challenge, so I always mess up and always learn something new. So, let’s jump into the learning experiences:
- When measuring the webbing, count for 1 inch of surplus webbing on each side. Don’t think you can get away with 1″ for both sides. With the looping back and forth, and needing space to sew, 1″ is a very tight tolerance.
- If you put too much stuffing into the tail, it will be very rigid and kind of awkward. So, try not to over stuff. I overstuffed the beginning of the tail, but since I had space left at the end, I was able to massage the stuffing back up a bit and make the bottom of the cat tail less rigid.
- In the past, I have tried using wire coat hangers in sewing projects to allow for bending and shaping. I found it was too hard to work with and would rip through the fabric. So, I thought I would try using pipe cleaners this time. That didn’t work either. Pipe cleaners are too soft and get caught in the stuffing when pushing it down. So, after about 5 minutes of struggling with the stuffing, I gave up on the pipe cleaners. Maybe I can use something different next time? We’ll see.
- I sewed the tail upside down, per se. This hope was that this would hide the stitching. The one downfall with this is that it pulls the top of the belt/webbing down a bit. So that gives it a bit of a pulled look at the tail. And no one wants to wear it upside down.
Frequently Asked Questions about Making Cat Tails
How long does it take to make a cat tail?
The whole project took me about an hour to complete. The hardest and longest part was stuffing the tail with stuffing. I didn’t have a very thick tail, so the opening for the stuffing was rather small.
How Do you make the belt of the cat’s tail match the tail?
I used black webbing because that is readily available, but black doesn’t always match. But I could have made a small sleeve for the belt to fit into, with the same fabric I had used to make the tail. This would allow the whole tail and belt to match. But in all honestly, I also ran out of leopard print fabric, so this is the best I could do.
Can you make Halloween cat tails adjustable?
Yes, you can! I made this tail adjustable so that it can be worn inside during the day, and outside with a winter coat at night. The only extra supplies needed is a tri-glide buckle and you are set.
Is there a way to make the cat tail rigid or movable?
Yes, there is! In the past, I have tried using wire coat hangers in sewing projects to allow for bending and shaping. I found it was hard to work with, and would rip through the fabric. For this project, I tried using pipe cleaners. That didn’t work either. Pipe cleaners are too soft and get caught in the stuffing when pushing it down. But if I had sewn the pipe cleaners into the fabric, into their own slot, it would have stayed put and allowed me to bend the tail. Also, I could have used flower stems. They are not as rigid as wire coat hangers but more rigid than pipe cleaners. For the next costume that I make which requires shaping, I will try that out.
Did you enjoy this Halloween Project?
Did you enjoy this Halloween Costume Project? Leave me a comment below! Have you tried it out? Let me know how it turned out!
If you enjoyed this Halloween project, be sure to check out my other Halloween projects here:
If you are looking for some simple sewing projects to help make Halloween costumes, check out some of my favorites:
- How to Make a Maleficent Cape
- How to Make a Wizards Cloak
- How to Make a Wizards Wand Holder
- DIY Simple Dragon Wings

thank you