
Every year, we change up the motif at our house for Halloween. The general theme is always scary, but the how and what are always different. This year we decided to make a giant Halloween ghoul standing in front of a giant cauldron.
As an Amazon Associate, I earn from qualifying purchases. This post contains affiliate links. I may receive a commission if you purchase an item from one of my links. This will not change the price you pay.
Supplies Needed for a Giant Halloween Ghoul
The supplies list for this project is a mix match of random odds and ends, and not much of my normal crafty bits and pieces, so, let’s start pulling out our components. We need:
- Wood – You will need wood. I used a leftover 2”x4” and other odds and ends of wood bits to add support and shape.
- Zip Ties – No Halloween project is complete without zip ties.
- Duct Tape – We didn’t want this baby falling over, so we enhanced the zip ties with duct tape.
- Support Base – We used a bunch of odds and ends for our base, and this included
- 3 large planters (one filled with rocks, and 2 filled with dirt),
- 1 moving dolly
- Drill and screws – lots of screws
- Fabric – we used a bunch of old sheets and Halloween fabric that we had from previous projects
- Creepy Halloween Mask – We found a scary-looking pumpkin head, our piece-de-resistance.
- Staple Gun and staples
- This project took a few days to build. In total, we probably spend about 6 hours putting this together while running around after the kids.
Ok, now that we have all the pieces we need, let’s get the project started!
How to make a Giant halloween Ghoul
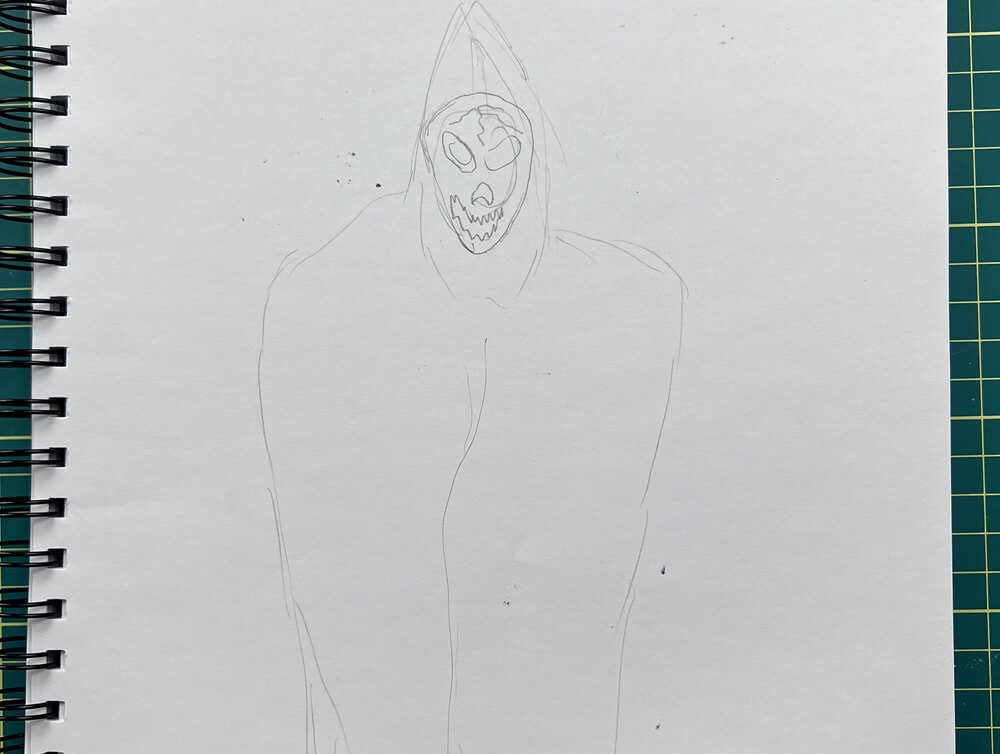
Make a sketch of the giant Halloween Ghoul project
We are planners, and we like to sketch things out so that we have an idea of what is going on. So, the first thing we did was make a rough sketch of what we would make. And remember, sketches don’t need to be great. They only need an idea to help.
Building the frame of the ghoul
Now that we have our idea sketched, it is time to start building this project.
Our whole idea for this was for the ghoul to be very large and menacing, so we wanted the head to be high.
As it happened, we had a spare 2”x4” beam that was 8 feet tall lying around from another project. That was going to be the body and height of our ghoul.
While standing on a ladder we did some checks to see how high we wanted the mask on the beam. We decided almost to the top. This way it could still be seen from the street, and be very tall from close up.
We made a few sketch marks on the beam to help us later.
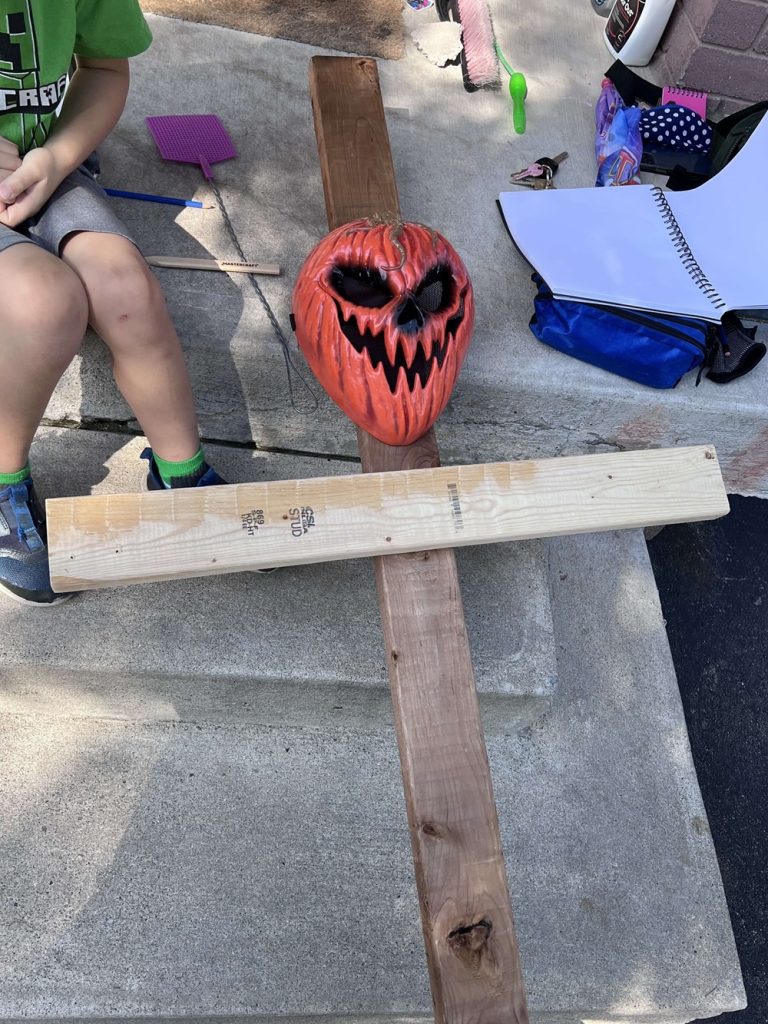
Then, we needed to add shoulders to our ghoul. For this we used another spare piece of 2”x4”, this piece was about 2.5-3 ft long. We drilled it into the main 2×4 beam below the location we marked off for the head.
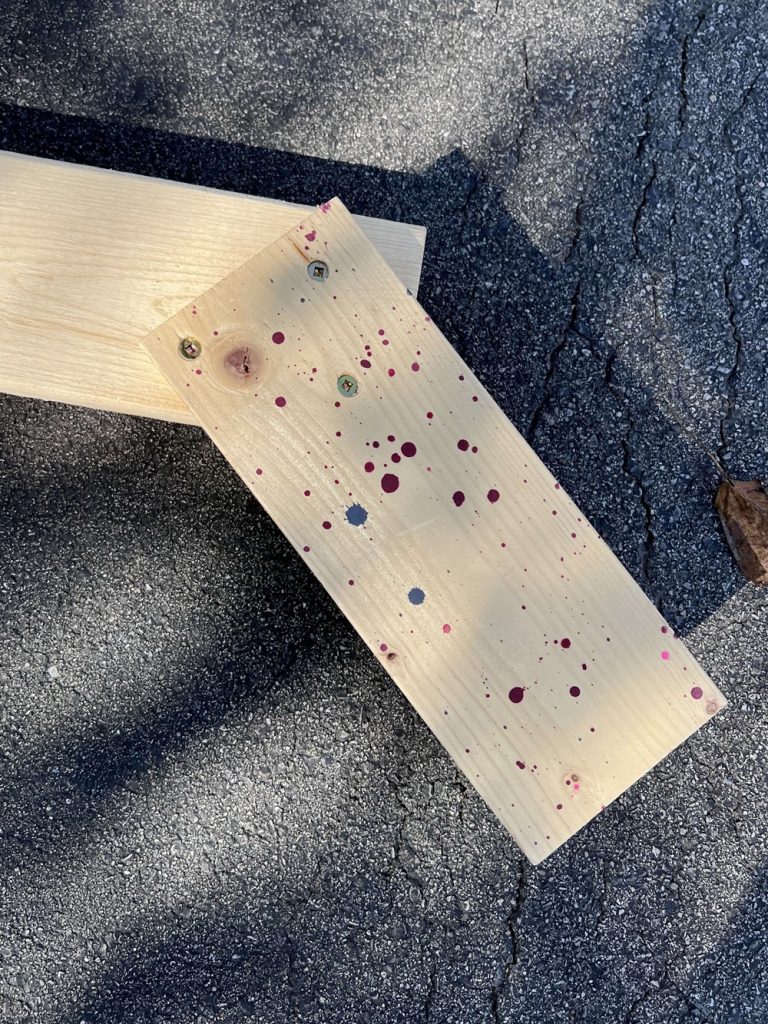
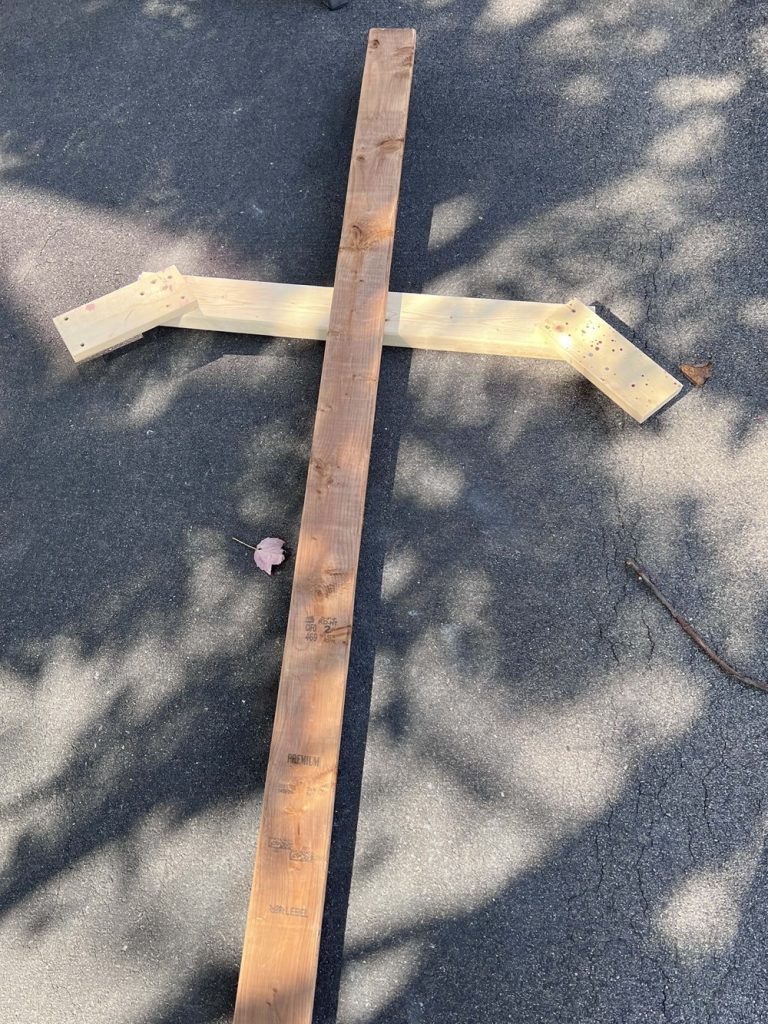
Next, we drilled 2 smaller pieces, one on each side of the shoulders to give the ghoul a bit more reach.
Now, the frame of our ghoul was done.
Supporting the Ghoul in a standing position
This was a tricky part of us as we could not stake the ghoul into the ground as he was over concrete, and I have to be honest, what we did feels a bit red-neck, but it worked, so we’ll take it as a win.
I will tell you what we did, but I want to point out a few things when you are making one of these yourself. You want to support the ghoul so it does not tip in any direction. So it needs support on 4 sides.
What we did… well, like I said, a bit red-neck, but here we go.
We have some broken large planters. We placed one on each side of the ghoul (left and right). Then, we made an additional support that would attach to the ghoul frame, sit on the top of the planters and stick into the planters.
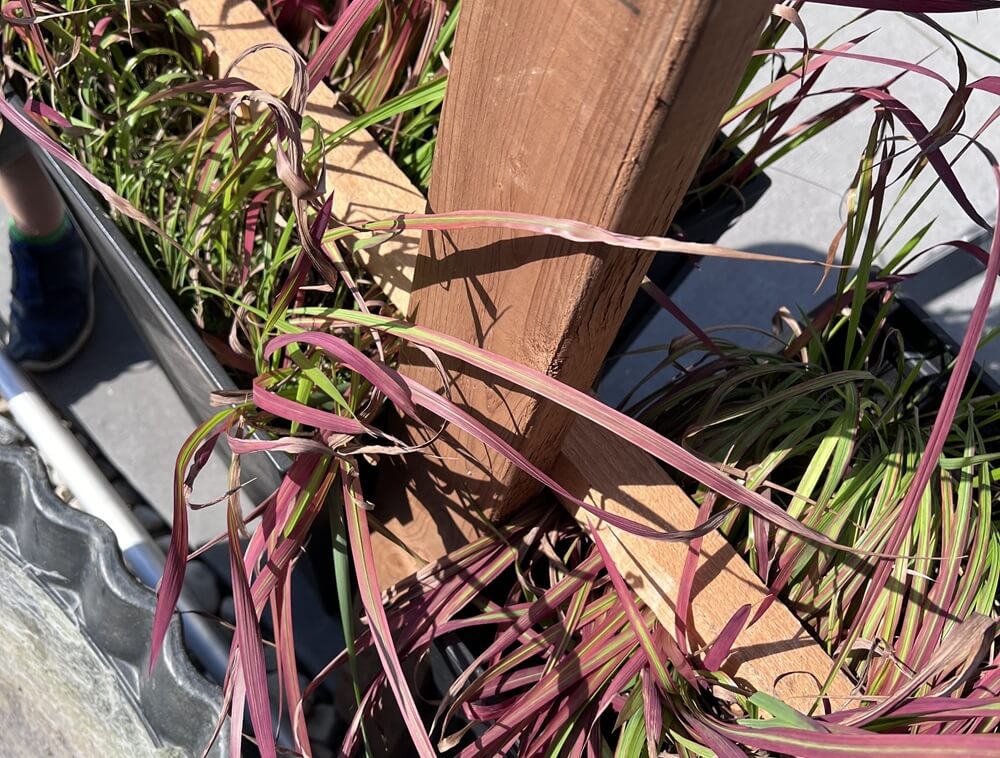
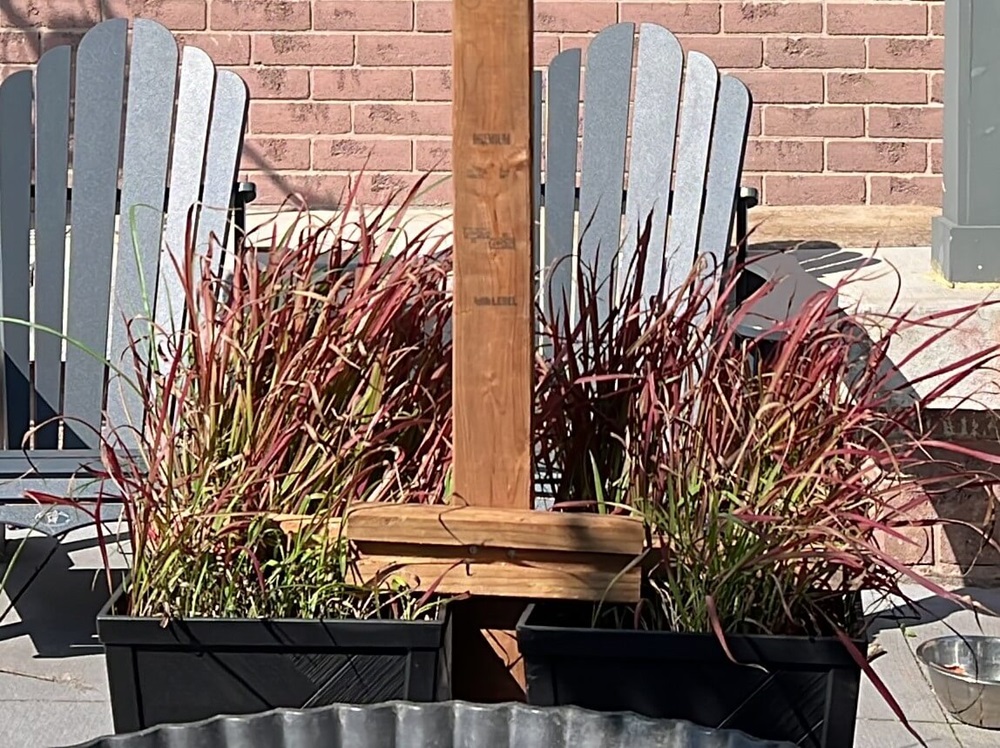
This provided minimal support. It helped with swaying left and right, but this provided no support on the front or back. To help keep the ghoul in place and not fall forwards or backwards, we pulled out a moving dolly, secured it under a planter, and duct taped the dolly to the planter. And we zip-tied the frame to the dolly. We would have used duct tape for this also but the space was too small to pull the tape through.
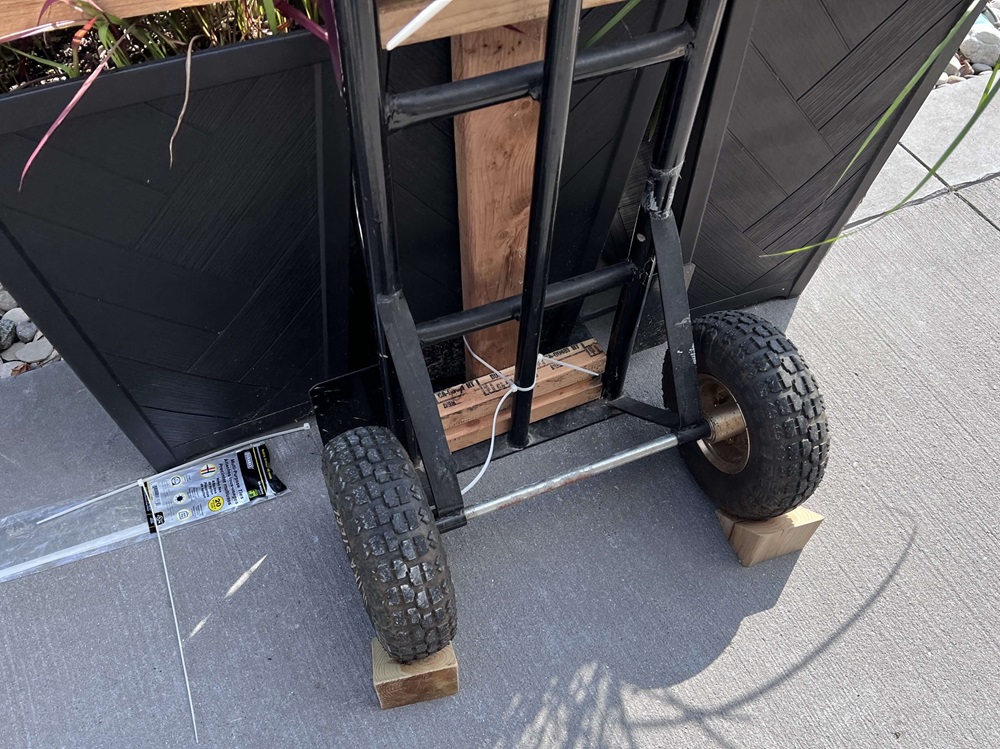
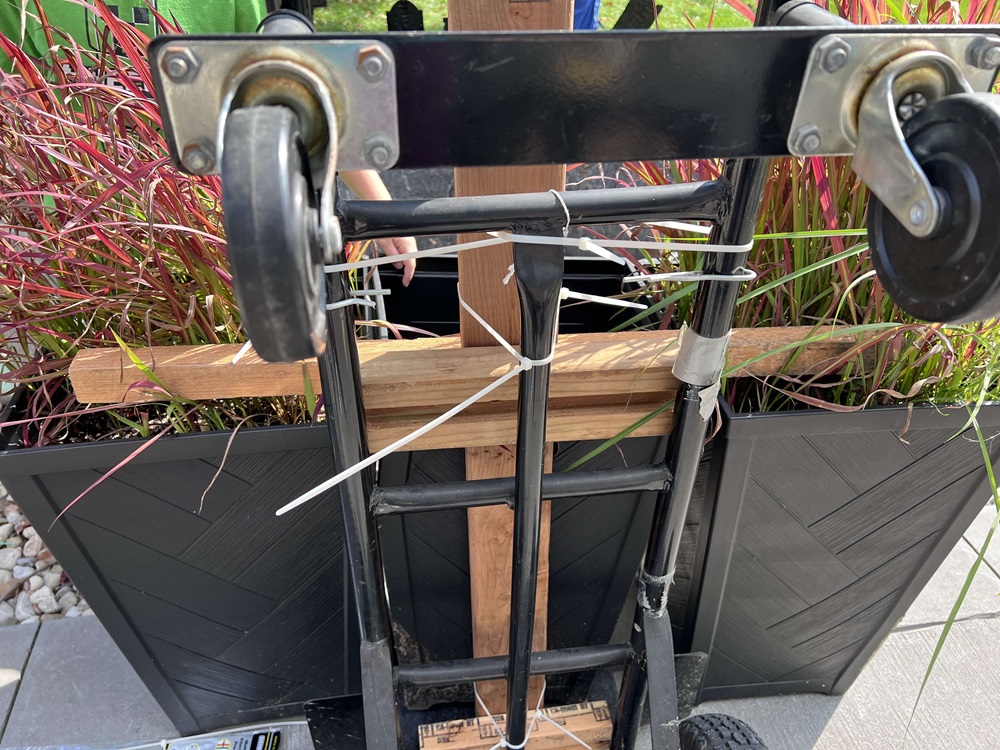
Once we had this setup, we pulled and pushed in all directions to ensure it was secure and not toppling over. The last thing we want is this to fall over on Halloween.
Fortunately, we have had several very windy days since the ghoul went up, and our support job has held him up.
Dressing the Ghoul
This may sound weird, but we wanted the ghoul to look more lifelike. We didn’t want him to seem like a bunch of wood draped in fabric. So, we did some fancy work.
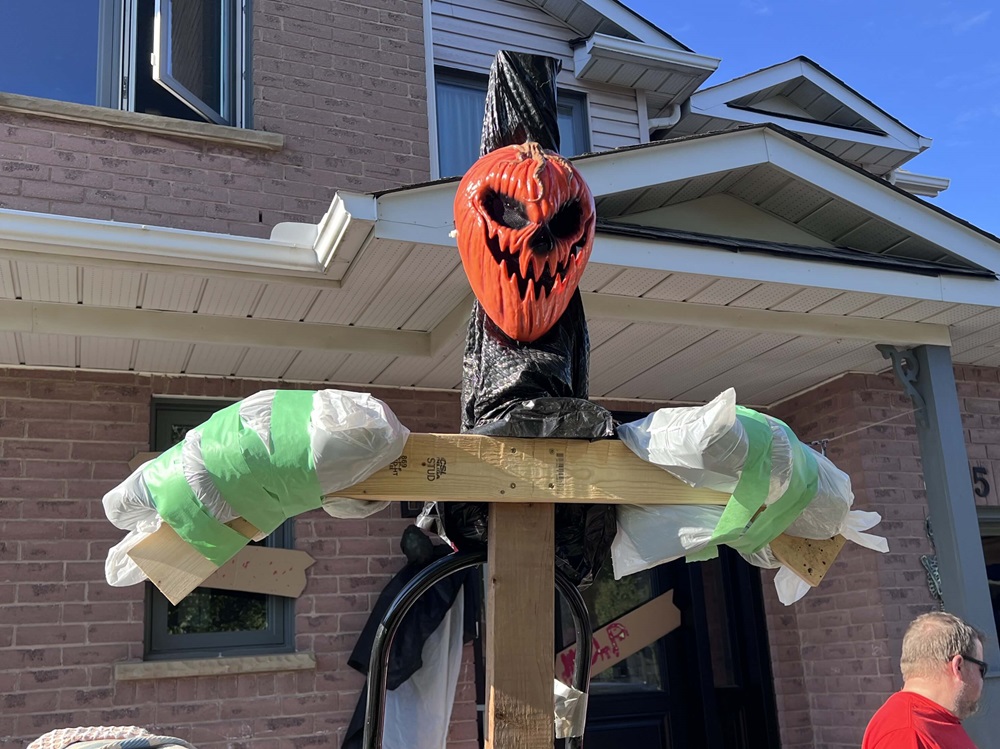
We grabbed a few pieces of old fabric, (old blankets and sheets) and put them over the edges of the arms/shoulders. This was to help give shape to the ghoul. Then we taped the fabric to the wood to keep it in place.
We draped several layers of old sheets over the ghoul. One of the underlayers was white so that it would glow in the black light. Each layer of fabric was adjusted to our liking and stapled to the frame.
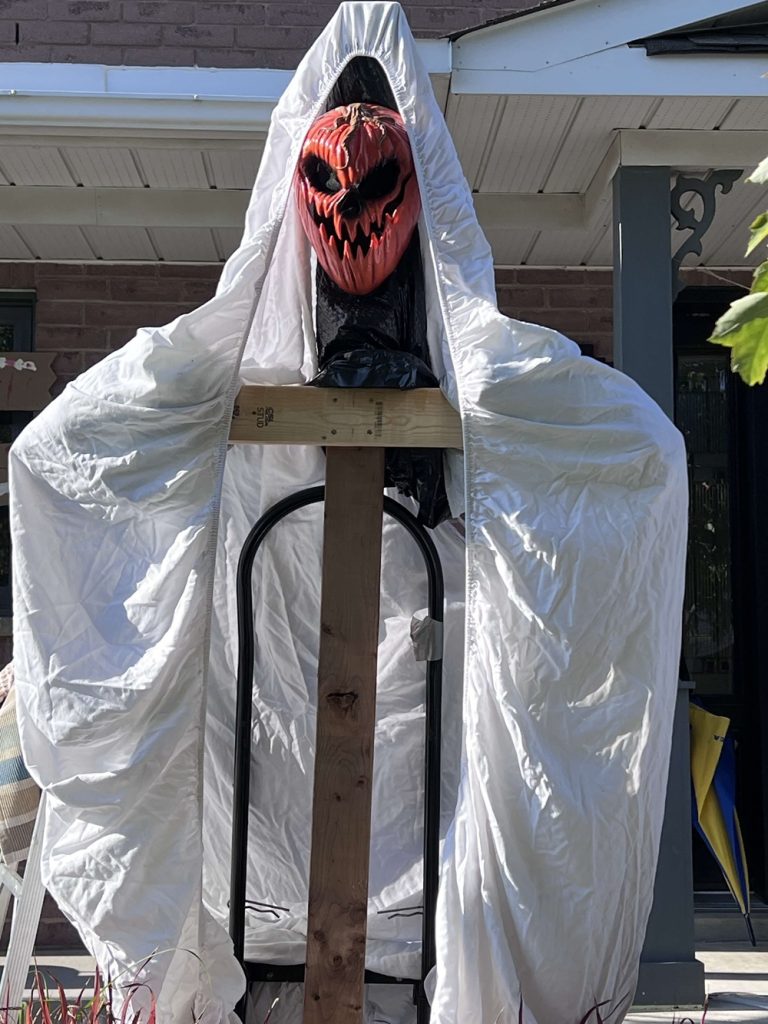

We worked on the ghoul’s robe from the shoulders down, leaving surplus fabric to cover the head.
Once we had enough fabric around the body, it was time to move up toward the head and get that secured.
Attaching the Ghoul’s Head
When we initially planned our ghoul, we envisioned the head leaning forward and looking down. So we drilled a small 2×4 square onto our frame. But once we had started dressing the ghoul, and getting ready to attach the head, we realized that the head was not forwards enough.
So, we pulled out a shelf hanging bracket, drilled it onto the frame, and then attached the mask to the bracket. We used zip ties to secure the mask to the frame. We also drilled in an extra screw at the back to attach the zip ties.
Finally, we filled the inside of the mask with a garbage bag. The mask we are using has black mesh over the eyes. We filled the head with black garbage bags but then realized you couldn’t see this eye in the black light, so we changed it to white garbage bags to help the eye pop at night.

Making the ghoul’s hood look realistic
Now that we were happy with the placement of the mask, it was time to cover up the head with a hood. Don’t forget. we left surplus fabric for the hood when draping all the pieces together.
Initially, when the hood was pulled over the frame, you could very visibly see that there was a 2″ x 4″ beam holding the hood up. We didn’t like this look. So, we pulled out a plastic bowl and placed it on top of the beam. Then we draped all the layers of the hood over the head and adjusted the hood to lay on the mask the way we liked.
Head with a 2″x4″ beam only
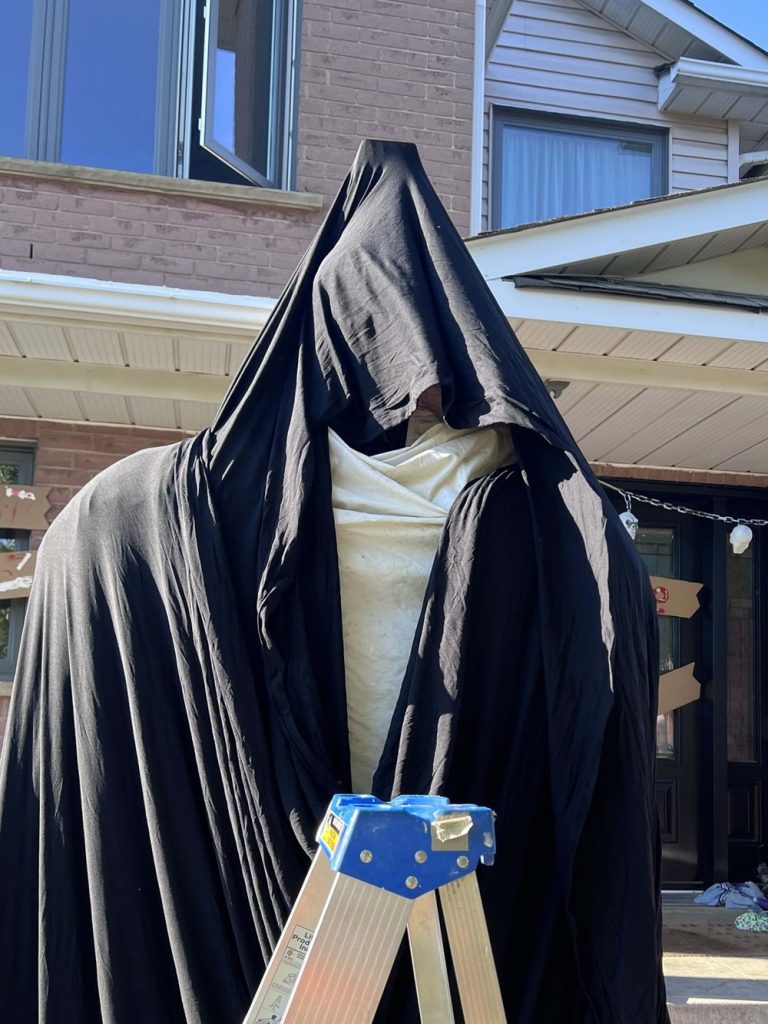
Head with a bowl inside
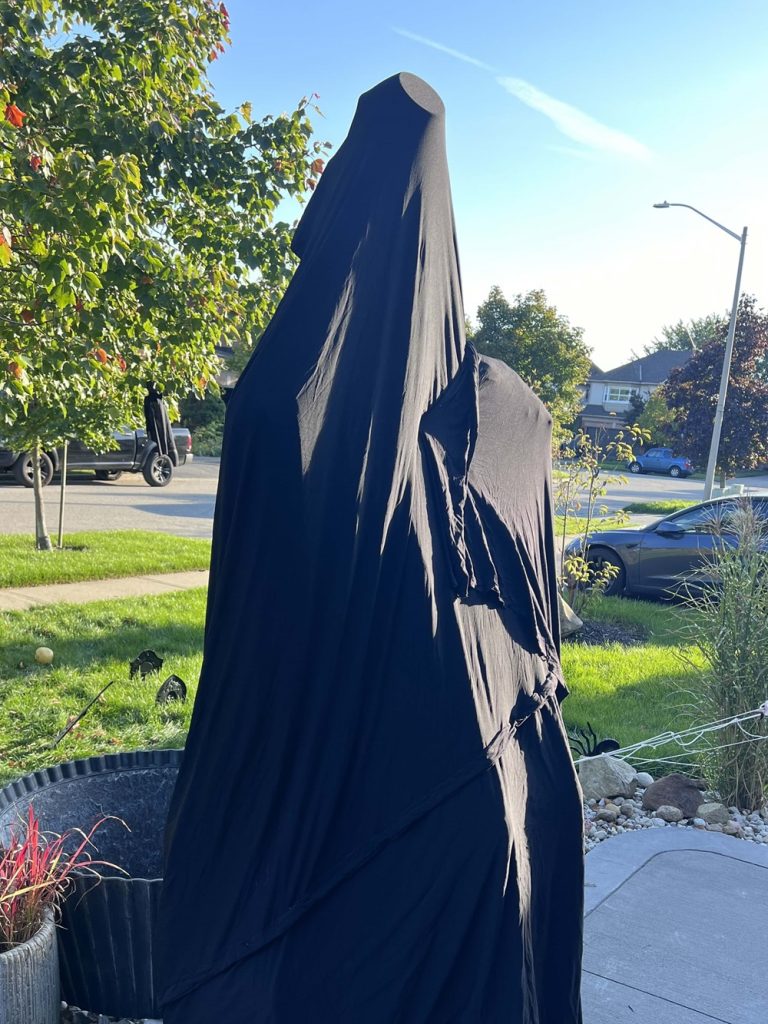
We used a lot of staples to keep the fabric in place.
Adding a Cauldron to your Giant Halloween Ghoul
When we started planning this project, we always planned on making the cauldron from scratch. But someone was throwing away a massive outdoor heater with a lampshade. So we just used that. (And I know it looks like a giant Reece’s Pieces peanut butter cup… but it was free and did the trick)

We dropped in a black light facing up to light up the ghoul.
We also dropped in our smoke machine to act like steam coming from the cauldron.
Then we placed some arms and legs in the cauldron for added effect.
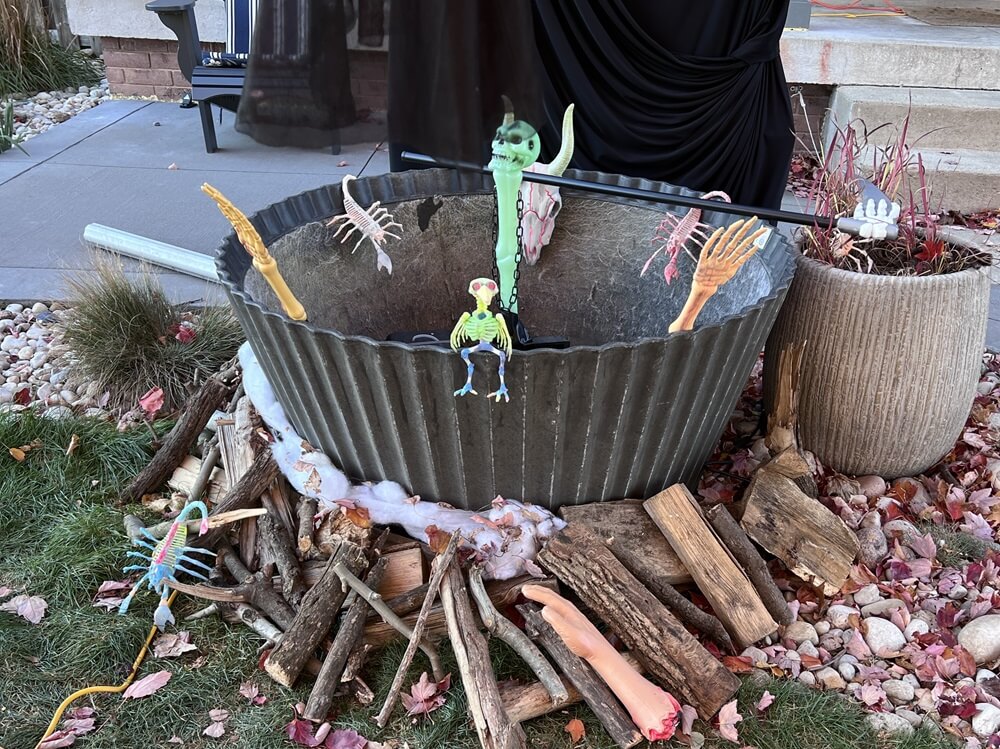
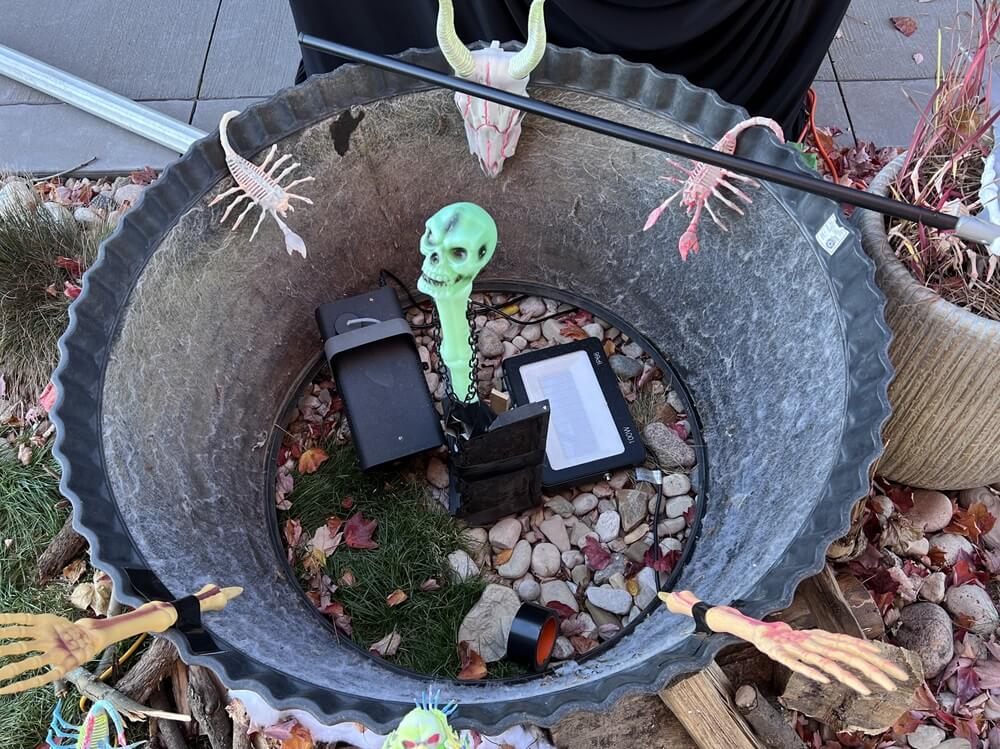
And there you have it! Your Giant Halloween Ghoul is complete!

Things we learned while making a giant Halloween ghoul
This project has been in our head since last year. And we were thinking about this on and off as the year went on. So we had lots of time to think. Which helped, but as usual, there were things to learn. So, here we go:
- Making sure the ghoul was secure and supported was a bit of a pain. We really wanted it to stand up and not fall. It’s a good thing we covered the whole ghoul and all his parts under the fabric because it is a bit of a mess underneath. But it has held together through some rough weather and it is still ready for Halloween.
- We initially planned on making a crazy fancy cauldron with this ghoul. We were lucky to find a large heater/lampshade that did the trick and saved us a lot of extra work.
- We happen to have a lot of black fabric from previous years. And after Halloween, that will be removed and saved for future Halloween projects. The amount of fabric that we use is quite significant and can be costly, so we keep it year after year.
- Attaching the mask to the frame was a lot more work than we had anticipated. We were hopeful that having a small ledge for the mask would suffice, but it just didn’t give us the look we wanted. Although I quickly detailed how we made it work, achieving the final result took more time than expected.
Did you Enjoy learning how to make a Giant Halloween Ghoul?
Did you enjoy learning how to make a giant Halloween ghoul? Let me know in the comments below. If you tried making your own, let me know how it worked out!
If you enjoyed this Halloween post, be sure to check out my other Halloween posts here.
Maybe you are looking for more scary Halloween decorations, then you should check out there ones below:
- How to make window barricades – Halloween Decor
- How to make a Giant Spider Web
- Gates to Hell Zombie Pit


Awesome! It looks fantastic. Thank you for sharing how you made it and the thought process.