If you have a sewing machine, a stash of scrap fabric, and a mild obsession with not buying new supplies when you definitely don’t need to, welcome. You are in exactly the right place.
I wanted to make some cute bookmarks without heading to the craft store, so I pulled out my scrap pile, fired up my sewing machine, and tried three different bookmark designs. Some turned out great. Some… less so. But honestly, that’s kind of the point around here, we learn together, even when it gets a little chaotic.
Let’s get into it.
🎥 I also made a video for this blog post in case you prefer to watch – watch it here 🎥
Supplies Needed
As an Amazon Associate, I earn from qualifying purchases. This post contains affiliate links. I may receive a commission if you purchase an item from one of my links. This will not change the price you pay.
Before we dive into the bookmarks themselves, here’s what you’ll need to have on hand. The good news is that most of this you probably already have if you sew at all.
- Scrap fabric (aim for pieces roughly 2½ inches wide and 6 inches long per bookmark)
- Sewing machine
- Thread (matching or contrasting, your choice!)
- Interfacing – either iron-on or sew-in works
- Scissors or rotary cutter
- Pinking shears (for Bookmark #3)
- Pins or sewing clips
- Iron and ironing board
- A poking tool (chopstick, pencil, or a dedicated turning tool)
- Tassel or ribbon (optional, depending on which bookmark you make)
A quick note on interfacing: if you’re using iron-on interfacing, make sure it sits just inside your fabric edges so you have a clean seam allowance to sew through. If you’re using sew-in (like I did), it’s a little more forgiving.
Bookmark #1: Two-Fabric Bookmark with a Tassel
This is the most classic of the three, and honestly, the most satisfying to make. You’re working with two coordinating (or contrasting!) pieces of fabric, and you’ll add a tassel to the top for a little extra flair.
How to Sew It
Start by placing your two fabric pieces with the design sides facing inward – like they’re giving each other a little hug. Then place your interfacing on the back.
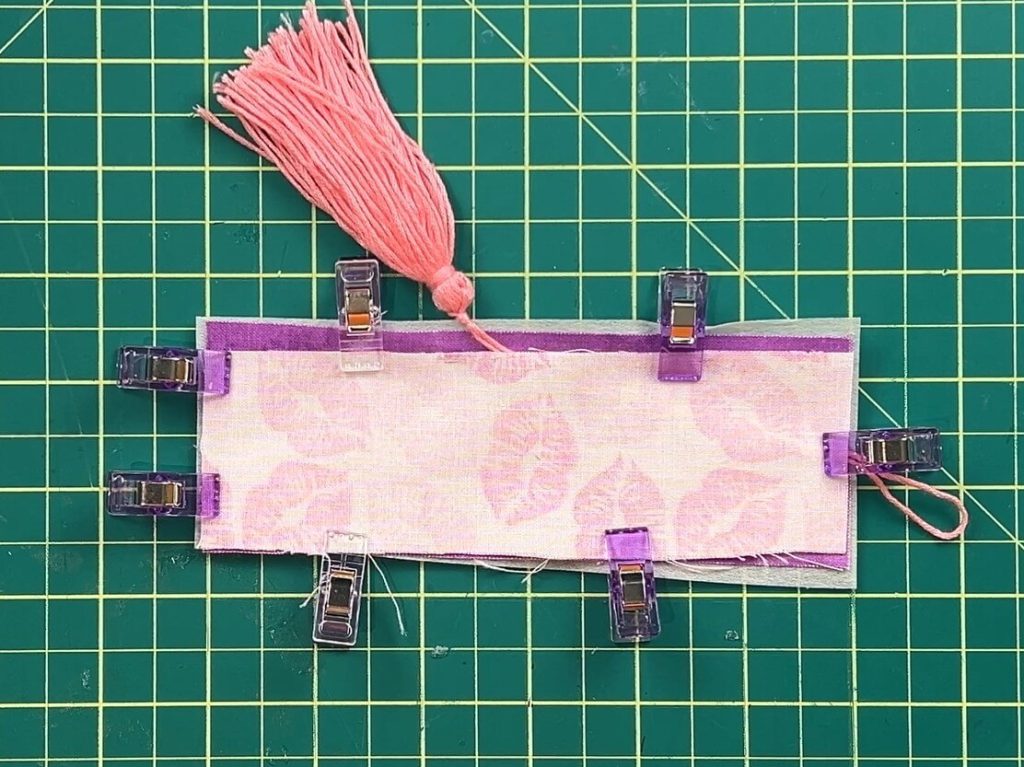
If you have a tassel ready, tuck the loop end in at the top of the bookmark now, making sure it’s pointing inward so it’ll flip out correctly. Pin or clip everything together.
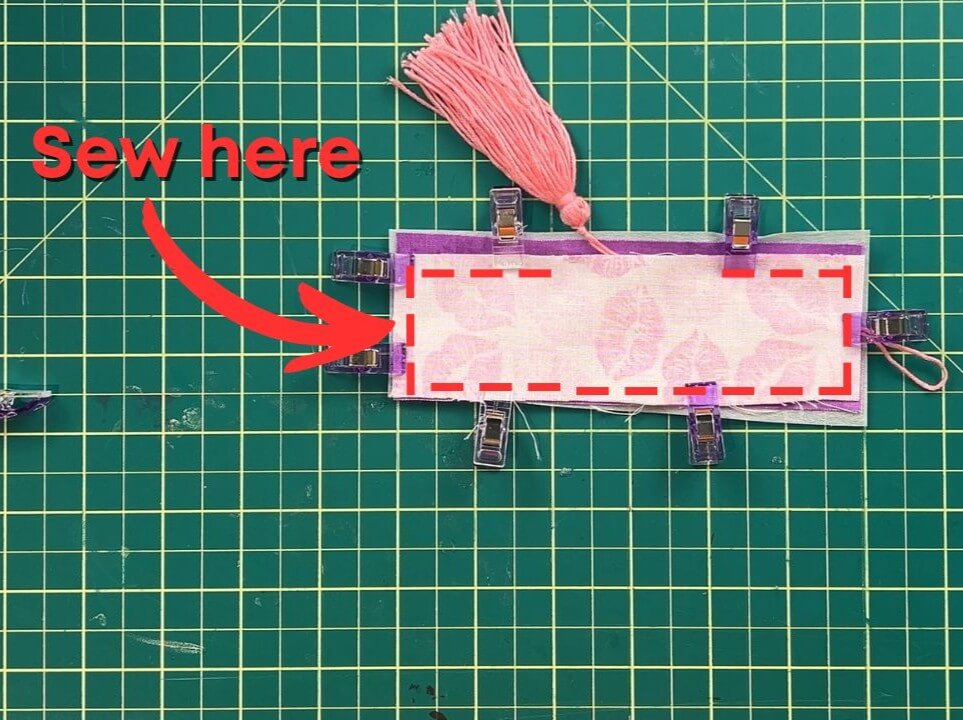
Sew all the way around the edges, leaving about a 1 – 2 inch gap on one side so you can flip it right-side out. Make sure you sew over the tassel loop a few extra times to keep it secure. Trim the corners on an angle (without cutting through your stitching!) to make flipping the corners cleaner and easier.
Flip the bookmark right-side out through your gap, using a pencil or chopstick to really push those corners out. Give it a good press with the iron, folding in the raw edges at your opening so everything looks neat. Then do one final topstitch all the way around the outside edge to close the gap and give the bookmark a crisp, finished look.

One tip: use a thread that matches your fabric if you can. I used high-contrast thread so it would show up in the video, but in real life, the matching thread will look much cleaner.
And if you want to make your own tassels instead of buying them, I have a whole separate video on that – You can read how to do it here, or you can watch a 🎥 video on it here 🎥
👉 Have you made a bookmark like this before? Drop a comment below – I’d love to know what fabric combos you’ve tried! 💬
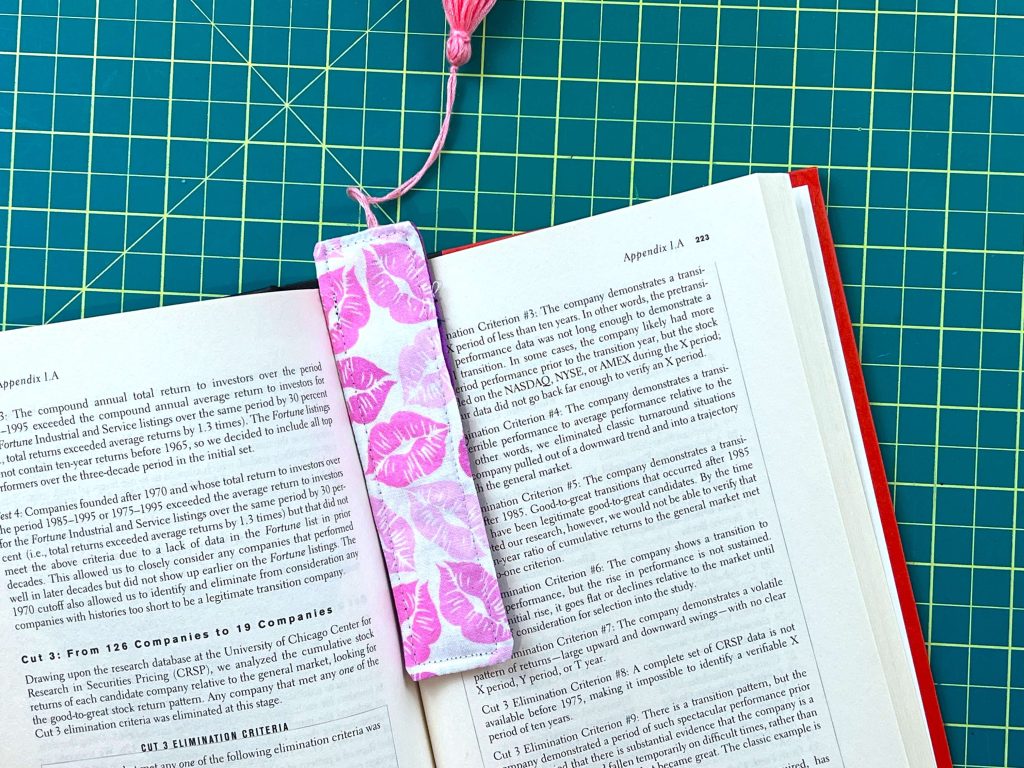
Bookmark #2: Patchwork Scrap Fabric Bookmark
This one was born out of having a pile of tiny leftover fabric swatches just sitting there, judging me. If you’ve got small scraps from a previous project, this is a great way to use them up and create something that looks intentional and kind of artsy.
How to Sew It
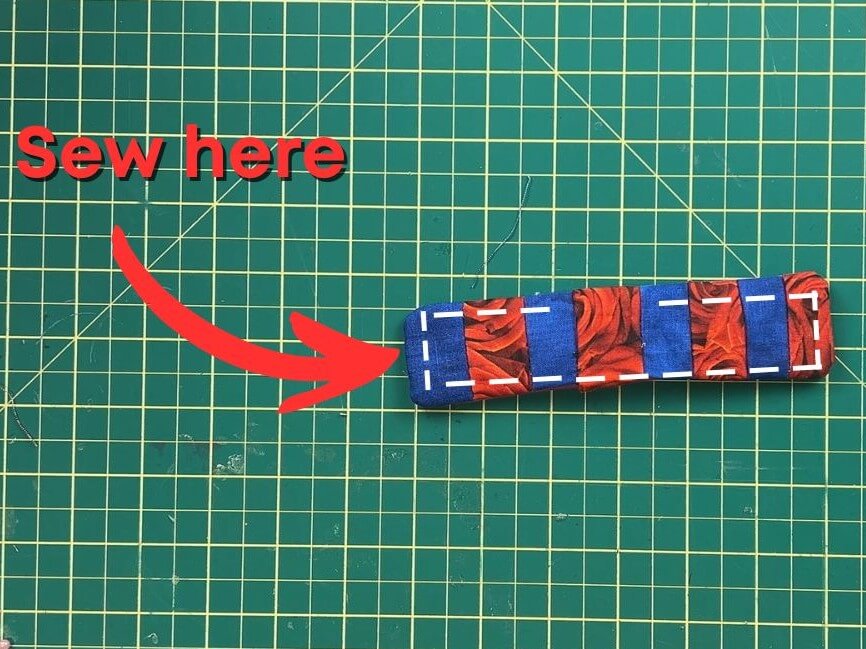
First, you’ll want to sew your fabric swatches together to make one long strip. I arranged mine in an alternating color pattern and sewed them back to front so all the seams land on one side. After sewing, press all your seams in the same direction so they lay flat – this matters more than you’d think when it comes time to assemble the bookmark.
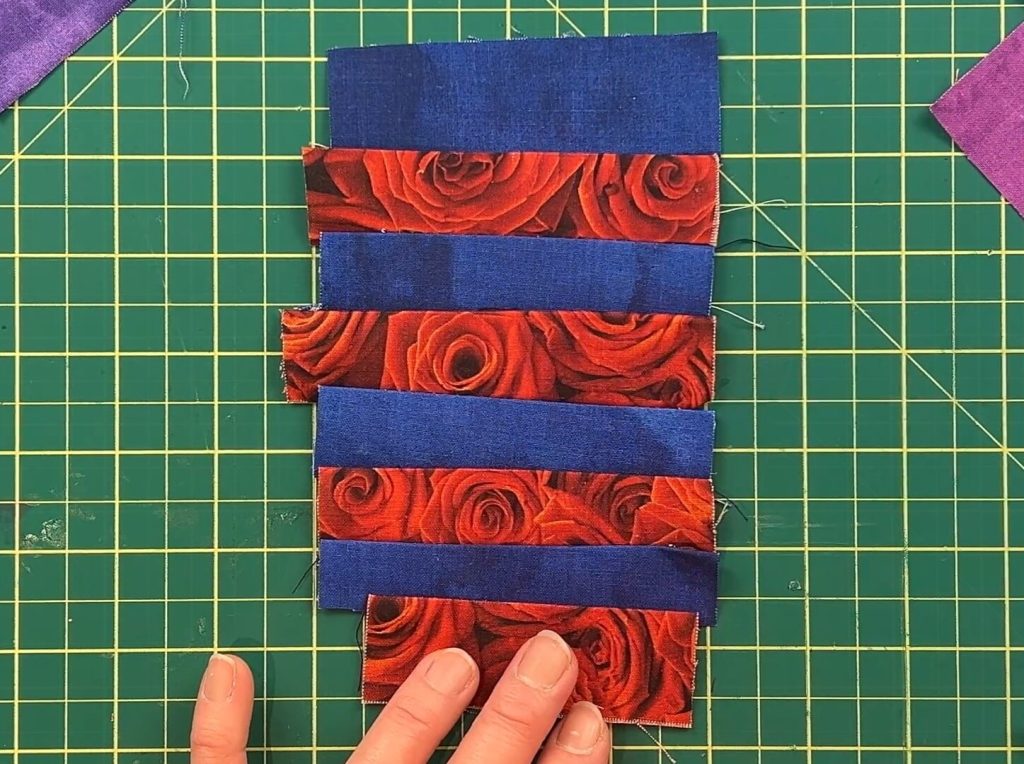
Once your patchwork panel is ready, place your two fabric pieces design-side in (facing each other), lay the interfacing on top, and clip everything together.
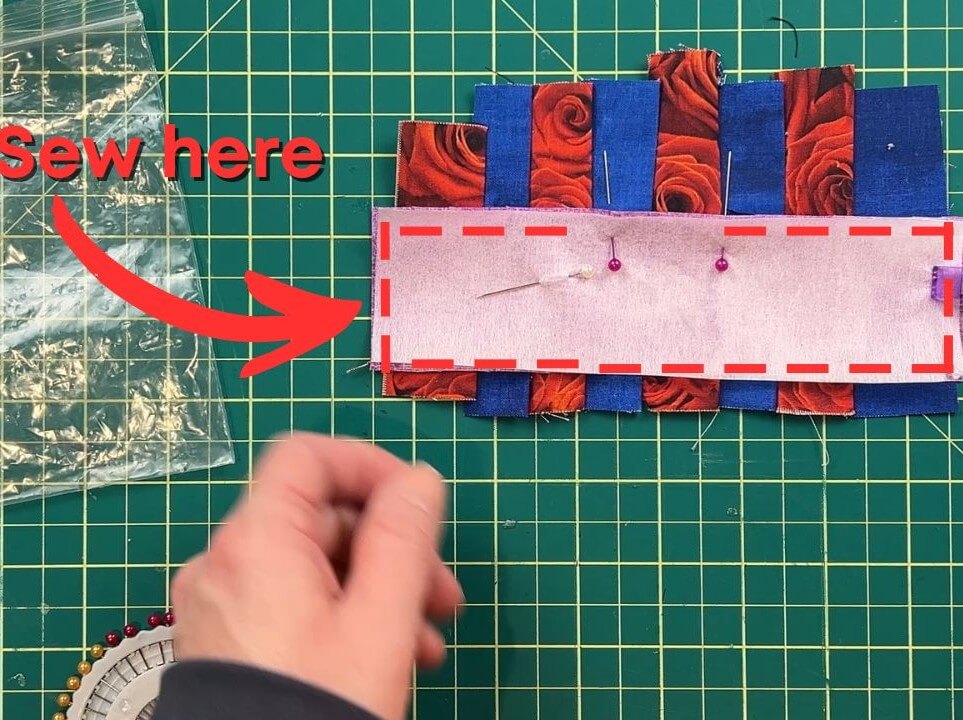
Sew all the way around the edges, leaving about a 1 – 2 inch gap on one side so you can flip it right-side out. Pop two pins at the opening so you remember exactly where not to sew past.
Trim the corners, flip it right-side out, iron it flat (folding in the opening edges), and do your final topstitch around the outside.
Honest Assessment
I’m going to be real with you: this one gave me trouble. The seams in the patchwork fabric started pulling apart during the flipping stage, and I had to stop and re-sew those edges before continuing. The fix? Double-stitch at the back of those seams from the start. Save yourself the frustration.
The finished result was still pretty cute – but it wasn’t perfect, and I probably wouldn’t call this method foolproof without a bit more troubleshooting. It’s definitely usable as a bookmark, though. Mine will 100% end up lost somewhere in my house.
👉 If you’ve tried the patchwork approach and have tips for keeping those seams intact during flipping, please share in the comments! We’re all figuring this out together. 💬

Bookmark #3: Simple Ribbon-Tassel Bookmark with Pinking Shears
This one is my favorite to make because it’s genuinely quick, the method is a little different from the others, and those pinking shears give it such a satisfying finish. No flipping required!
How to Sew It
For this one, you’ll place your fabric design-side out (both pieces facing outward), lay the interfacing on top, and then place your second fabric piece on top of that. Before you start sewing, cut a short length of ribbon for your tassel, burn the ends quickly so they don’t fray, and tuck it into the top of the bookmark sandwich, pinning it securely in place.
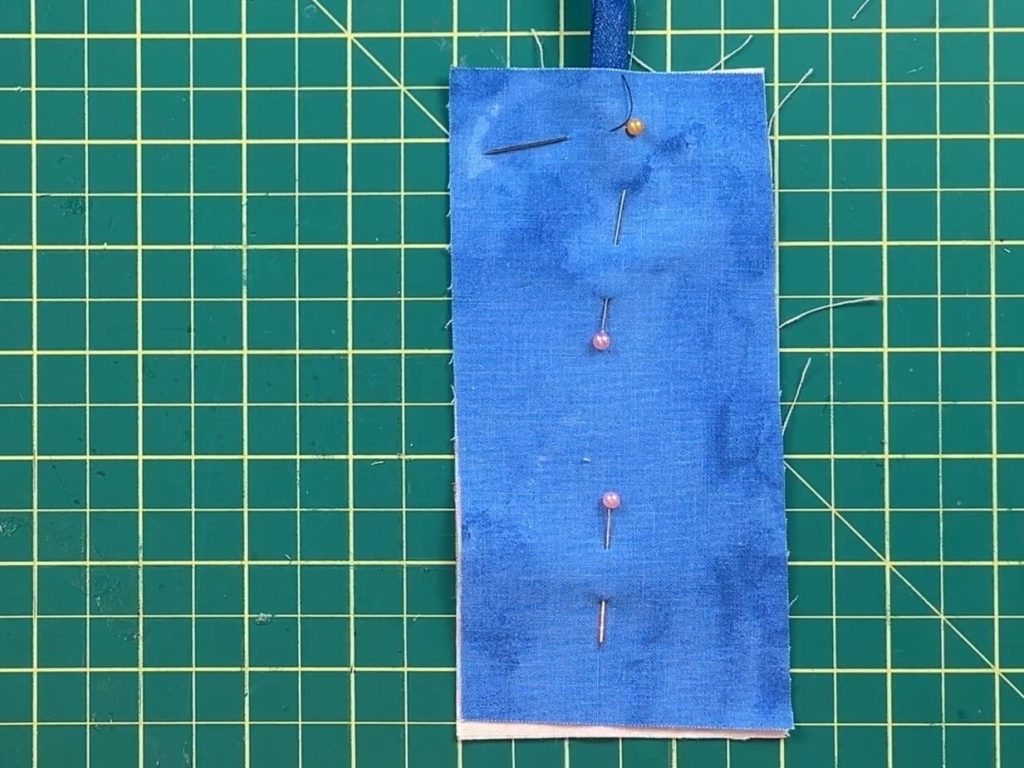
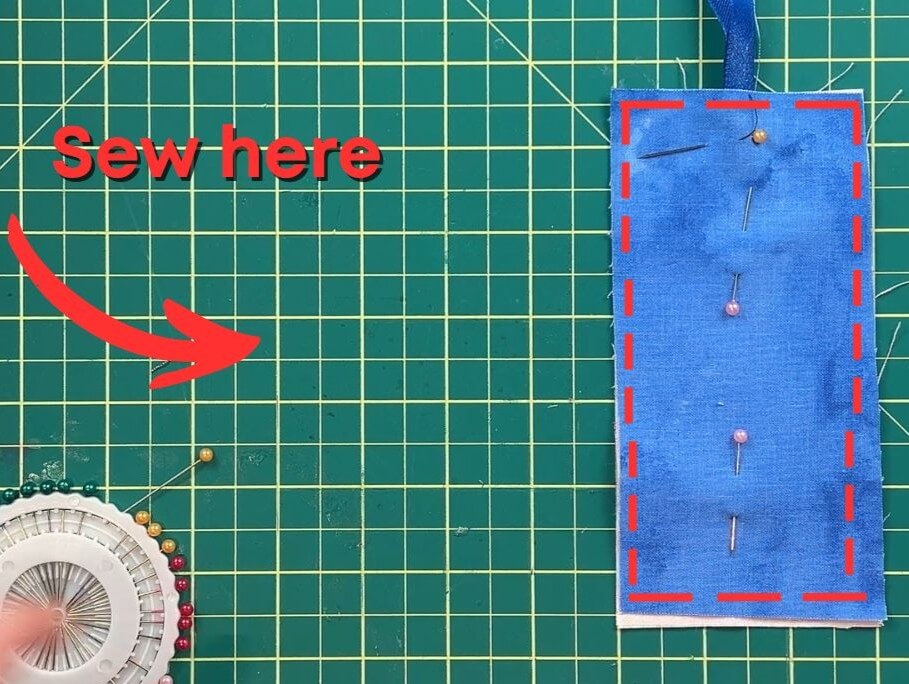
Sew all the way around the entire bookmark, no gap needed this time, catching the ribbon as you go and sewing over it a few extra times to really lock it in. You want to sew about a quarter inch in from the edge to catch the interfacing without going too far past it.
Once it’s sewn, grab your pinking shears and carefully cut around the outside of the bookmark for a decorative zigzag edge. Just be careful near the ribbon, go slowly and cut one layer at a time.
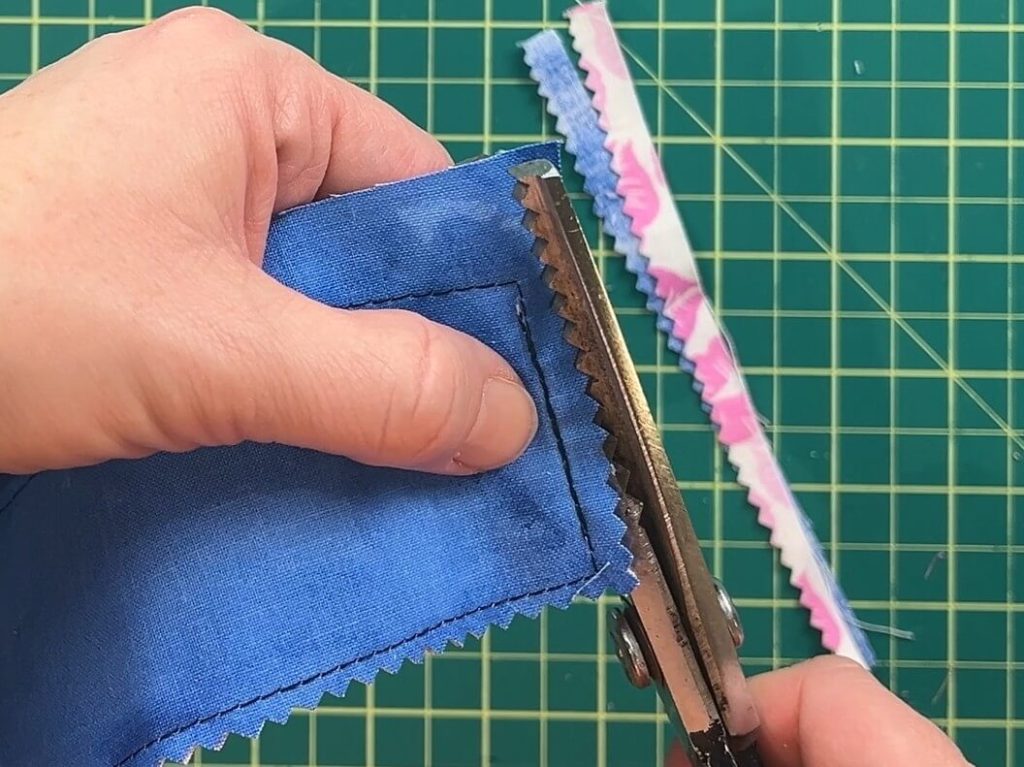
The pinking shears do a great job of hiding any slightly uneven lines in your sewing, so even if your stitch line isn’t perfectly straight, the cut edge kind of saves it. Which, speaking from experience, is very appreciated.

👉 Which of these three is your favorite design? Or have you got a variation I haven’t tried yet? Tell me in the comments! 💬
All 3 Bookmarks Together – The Finished Project
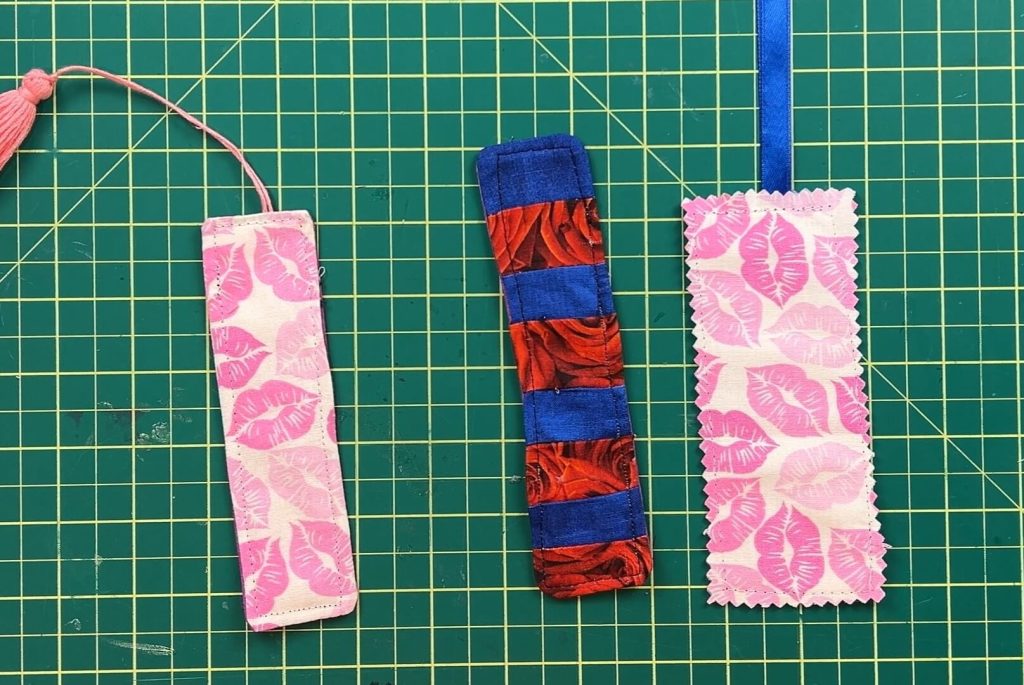
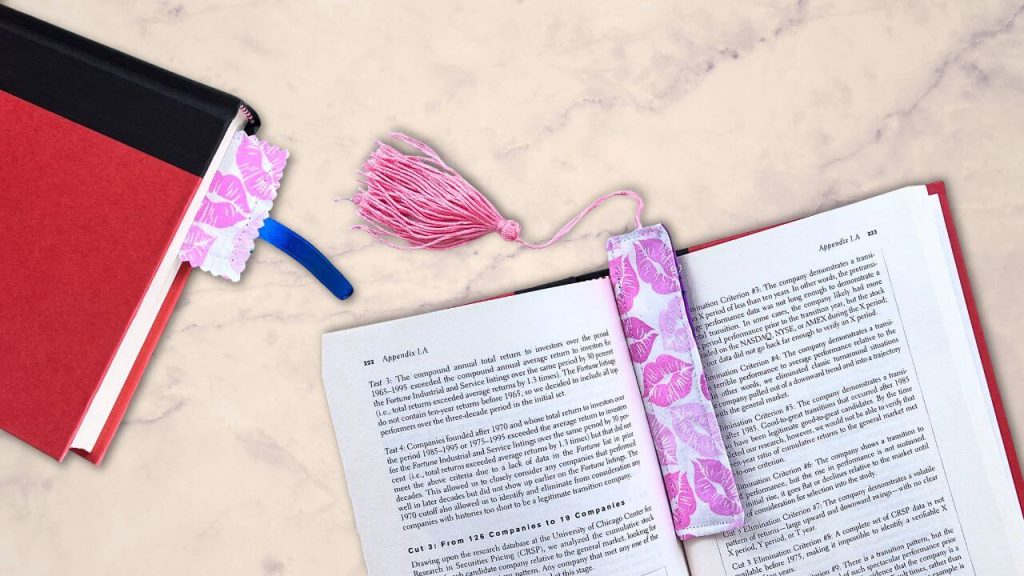
So here’s where we landed after all of that: three fabric bookmarks, each with its own personality.
Bookmark #1 (the two-fabric one with the tassel) came out clean and polished. This is the one I’d make again without hesitation. Bookmark #2 (the patchwork scrap version) is charming but humbling, it needs a bit more care during construction, especially at those patchwork seams. And Bookmark #3 (the ribbon-tassel one with pinking shears) is the fastest and arguably the most forgiving of the three.
Did they all turn out perfectly? No. Did we learn things? Absolutely. And that’s kind of what this whole space is about – making stuff, figuring it out as we go, and not taking it too seriously when it doesn’t go exactly to plan.
👉 How many did you make before you got them just right? Or are you a first-try-nailed-it kind of crafter? (Teach me your ways.) Drop a comment below! 💬
Ready to Give It a Try?
Grab your scrap fabric pile and give one (or all three!) of these a go. They make great gifts, great stash-busters, and genuinely useful little things to have around the house. If you make some, I’d love to see them, share in the comments or tag me so I can cheer you on.
Did you enjoy learning how to make fabric bookmarks?
Did you enjoy learning how to make fabric bookmarks? Let me know in the comments below if you enjoyed this tutorial!
If you did enjoy this project, be sure to check out my other sewing projects here.
🎥 I also made a video for this blog post in case you prefer to watch – watch it here 🎥
Happy crafting!