Birthdays are always fun. There are cakes and cupcakes and pizza and the works. But as a mom, there are always behind the scene preparations that no one sees. And every cake and cupcake needs a special decoration on top. I like to make my birthday decorations in bulk as we all have birthdays around the same time. I have made a bunch of birthday number cupcake toppers for the special birthday boys and girls to enjoy. So, let’s just in and learn how to make our very own!
As an Amazon Associate, I earn from qualifying purchases. This post contains affiliate links. I may receive a commission if you purchase an item from one of my links. This will not change the price you pay.
What you need to Birthday Number cupcake toppers with Cricut
This list is similar to all of my cupcake toppers supply lists. So, the items that we will need are:
- Access to Cricut Design Space
- Glitter Cardstock – The accent color and number on the cupcake topper is in glitter, but you can use standard cardstock. You can pick this up at a local craft store, dollar store, or here online.
- Standard Card Stock – any colors will work, but I have chosen black and white. I typically buy Recollections Paper from Amazon.
- Glue – I use Barely Art Precision Craft Glue. It dries quickly and does not leave creases on the paper when dried.
- Toothpicks – I like to use toothpicks, but you can also use cake-pop sticks, they are a bit thicker and more sturdy, but I find toothpicks work great.
- Cutting machine – I use my Cricut Explore Air 2, but any cutting machine will work.
- 30 minutes – 15 minutes to design and cut out, and 15 minutes to assemble.
how to Birthday Number cupcake toppers in Design Space
Create the design for your Birthday Number cupcake topper
Numbers are simple to make. I use the free text available in Cricut Design Space or from my System texts. Select the text you want, and type in the number you need for this year’s Birthday.

When creating the same number for all cupcake toppers, create one at the start and then at the end, we will duplicate it.
If you are creating multiple numbers at a time, make sure to have each number as its own text segment. This way, you can move them around individually.
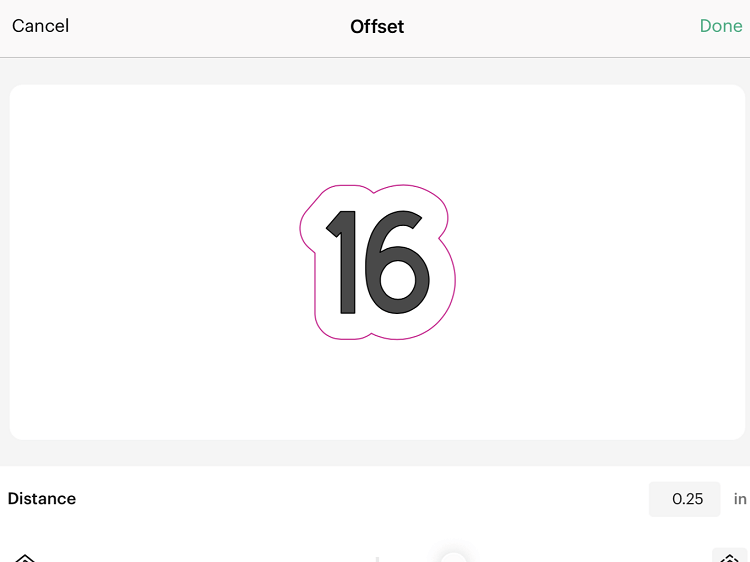
Once your number is typed up, select the offset button and make a offset around it. This will allow the number to pop out a bit more.
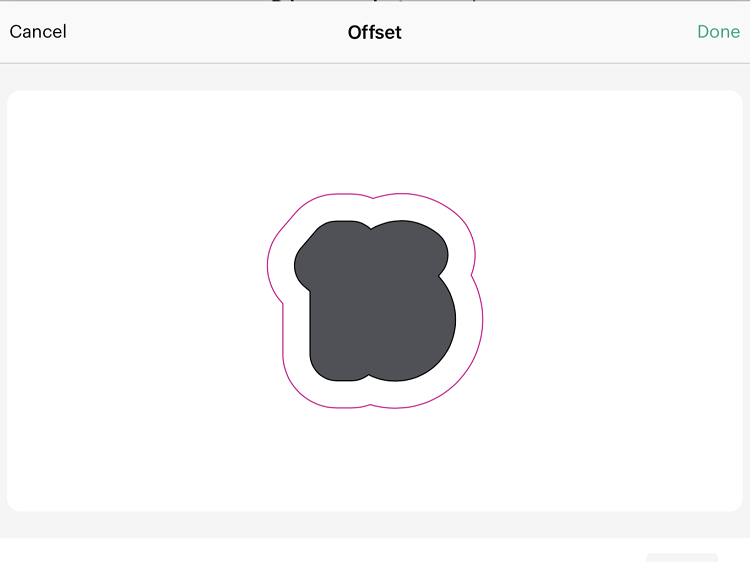
Then, select the offset that was just created and create a second offset around it. This will give your number more definition and make your cupcake topper deeper.
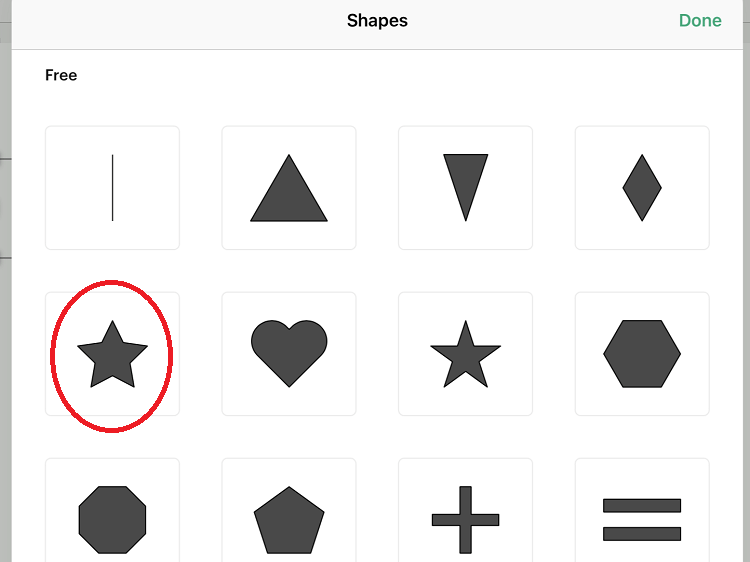
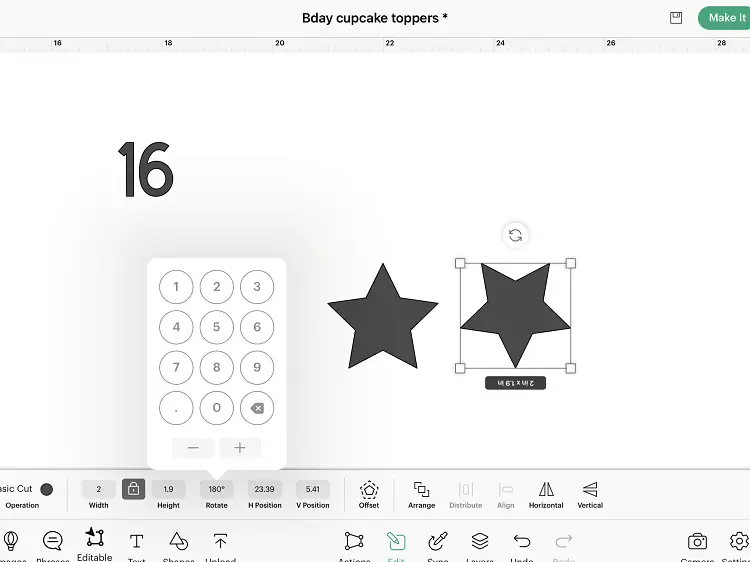
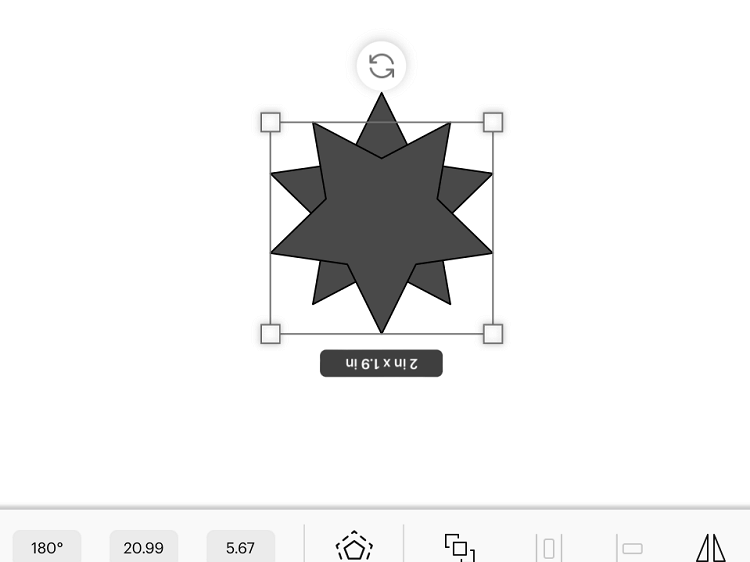
Next, we are going to select a thick 5-pointed star. We are going to duplicate it. The duplicated start needs to be rotated 180 degrees and then centered on top of the first star. This will make a 10-pointed star. Now you can weld the two stars together.
Now that all of the components of the design are complete, you need to select the colors you want the topper to be. This may take some time, but it is better to play with the color combinations in Design Space than waste too much paper. After some color manipulation, I have picked out this blue, white and black look.
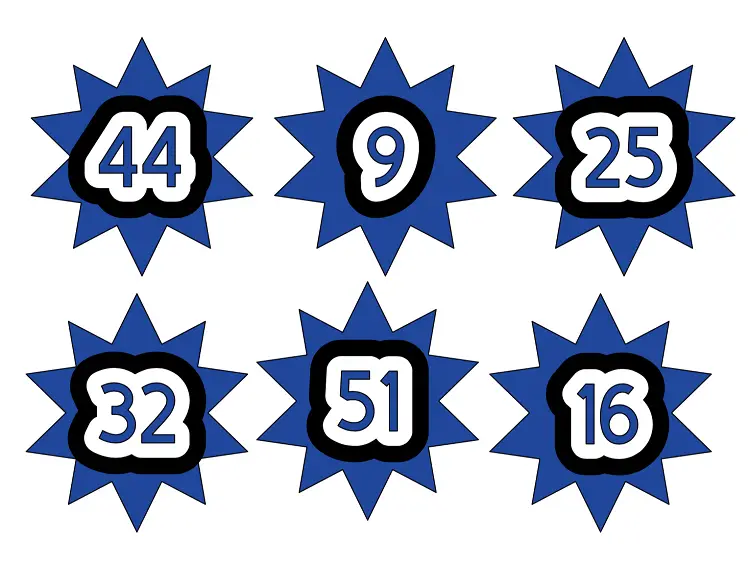
Once you are happy with the design, duplicate it to have one cupcake topper for each cupcake or guest.
Cupcake topper design is complete
Ok, so your design is complete. Now all that is left is to Make It.
Get all your cardstock ready, and cut out the design.
Assemble your Birthday Number cupcake toppers
Once all of the pieces have been cut out with your Cricut, there are only a few minor steps left. So let’s get started!
Organize your cupcake topper images
This may seem silly, but you need to have all the correct pieces grouped together. The offsets of the numbers may be hard to organize and decipher on the go, so it is best to get them all arranged and grouped together.
This is especially true when doing multiple different numbers.
Glue the Cupcake topper together
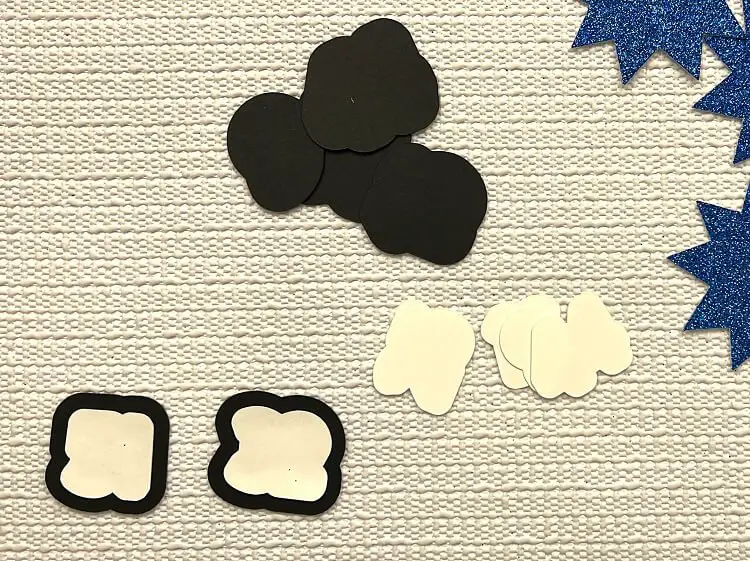
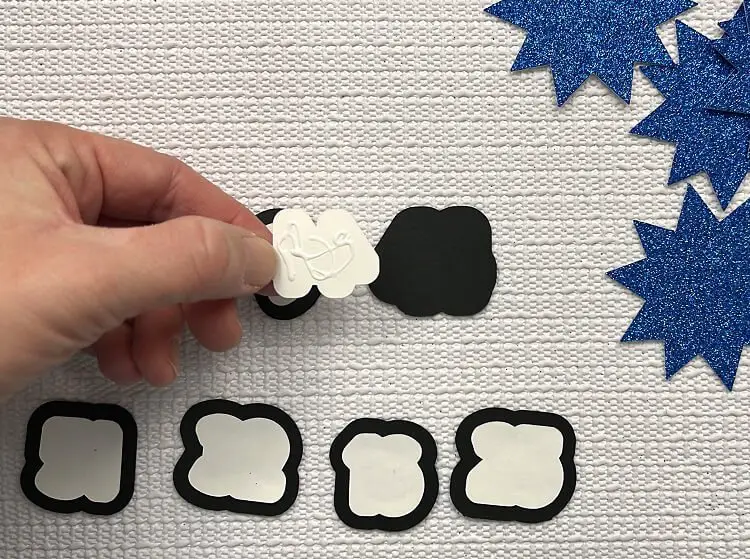
When working with Birthday number cupcake toppers, I like to work with all of the offsets and shapes first and leave the number until last.
So, glue the smaller offset onto the larger one for all the toppers.
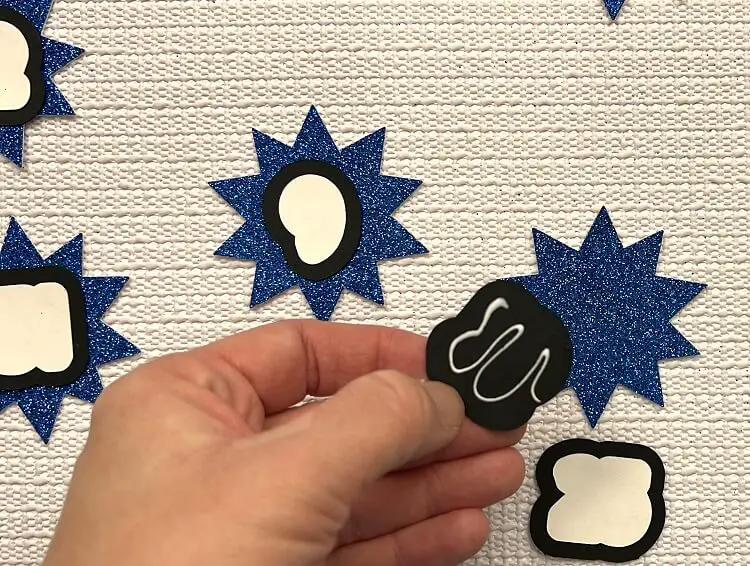
Once the glue has dried, glue that onto the star. My star is glitter cardstock, so a bit more glue is needed. Once the offset is on the star, I like to place a book on top of the toppers. This is to help the glue stick well onto the cardstock. It only takes a few moments for this glue to dry, so this does not take much time.
Apply the Cupcake numbers
Once the body of the cupcake topper is assembled and dry, you can glue the numbers on it.
There are 2 methods that you can do this. You can use transfer paper or tweezers.
If you are using transfer paper you need to make sure it is strong enough to deal with glitter card stock. Once the number is on the transfer sheet, you can apply the glue to the back and place it onto the cupcake topper. This will allow the numbers to be on straight.
I use tweezers because I do not have transfer paper that works well with glitter cardstock. Hold each number with the tweezers and apply a small bead of glue on the back. Then carefully place each number in the correct spot on the topper. Be careful to keep everything straight.

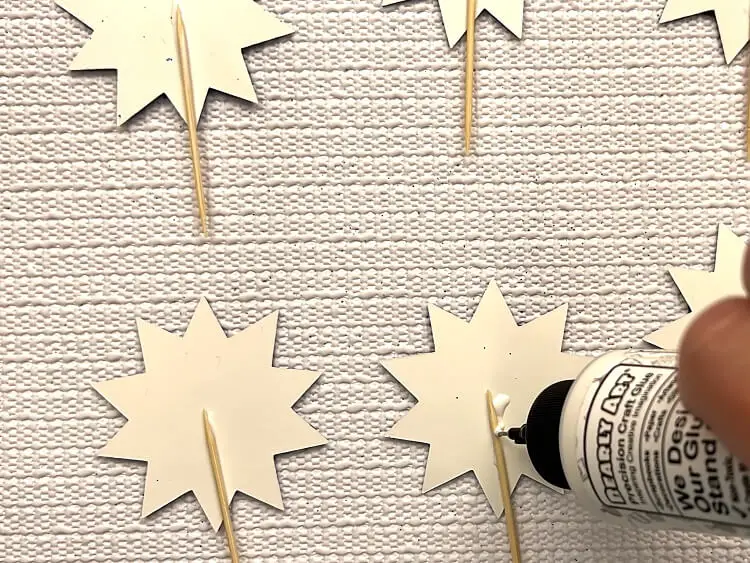
Glue on the toothpick
Once the toppers are dry, flip them over and glue on the toothpick. I use the same glue as above, as it works just fine. You can use a hot glue gun or other glue if you prefer. Let this glue dry as well.
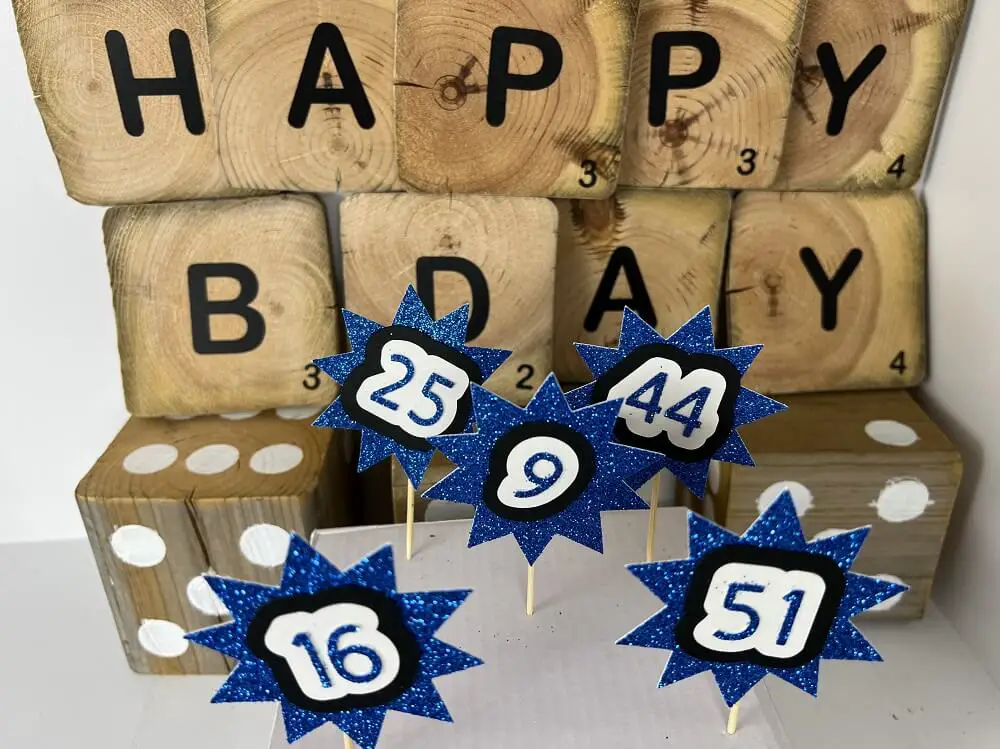
And that’s it! You’re done With your Birthday Number Cupcake Toppers!
Now it is time to put the birthday number cupcake toppers into the cupcakes and get ready to eat them!
Frequently asked questions about Birthday Cupcake Toppers
How long does it take to make Birthday cupcake toppers?
The whole process, from start to finish takes about 30 minutes. About 15 minutes to design and cut and about 15 minutes to glue all the pieces together. However, if you are making 20+ cupcake toppers, assembly and cutting will take longer.
Can you reuse Birthday cupcake toppers?
Yes, you can reuse them. You will need to collect them all after they have been removed and wipe off any cupcake or icing on the topper. But you will need to be mindful of kids licking them after use and germs, but I leave that up to you.
What other types of toppers can you make?
You can make cupcake toppers for any occasion, even just to decorate your cupcakes. I have created cupcake toppers for Halloween and Thanksgiving.
You can make cake toppers for any event as well.
Did you find this tutorial on Birthday Number Cupcake toppers helpful?
Did you find this tutorial on how to make Birthday Number Cupcake toppers helpful? Let me know in the below!
Did you try it out? How did it turn out! Do not forget to share!
If you liked this tutorial, check out my other paper crafts here.