It feels like I am going from one birthday to the next. Don’t get me wrong, birthdays are fun, but man! Can they be a lot of work! For my latest project, I have made a 70th Birthday Cake Topper. This is my first cake topper, as I have only dabbled in smaller cupcake toppers. And it was a bit of a doozy. So, if you are running low on time and need a cake topper, you can buy this design in my shop here, and I’ll walk you through the rest below.
So, let’s start making this 70th Birthday Cake Topper!
As an Amazon Associate, I earn from qualifying purchases. This post contains affiliate links. I may receive a commission if you purchase an item from one of my links. This will not change the price you pay.
Supplies needed to make a 70th Birthday Cake Topper
This craft does not require many supplies, but here is the list:
- 70th Birthday Cake Topper – I designed a cake topper, and you can get it from my shop here.
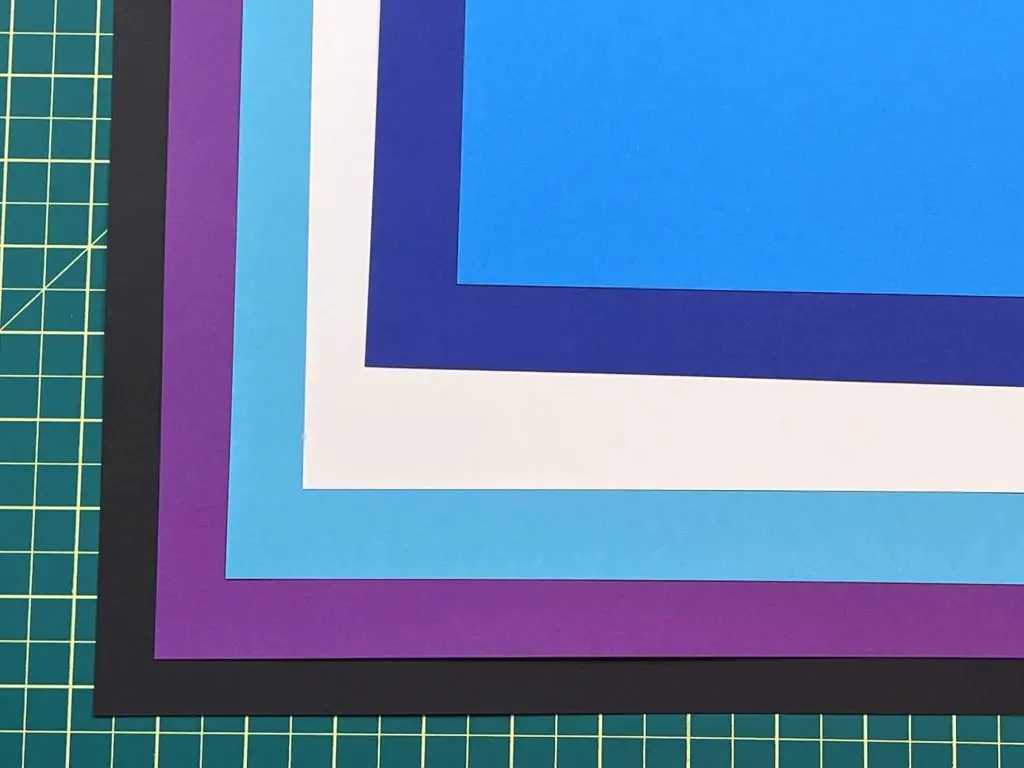
- Card stock – I use recollections card stock, but any 65lb card stock will do. For this project, I needed 6 pieces of card stock – all were based on 8.5″x11″ size:
- 1 black
- 1 dark purple
- 1 light blue
- 1 white
- 1 dark blue
- 1 medium blue
- Glue – I use Barely Art Craft glue – this is my favorite glue as it has excellent tip attachments and dries clear.
- Double-sided foam tape – I like to use this double-sided foam tape – it comes pre-cut in long strips, and the height of it is great for providing depth, but not too much.
- Wooden skewer – I used a wooden skewer for the back piece, but chopsticks also work. Or you can buy plastic ones on Amazon that are supposed to be designed for cake toppers.
- Cutting machine and cutting machine software – I use my Cricut Explore Air 2 for all my projects, but other cutting machines also work.
- Tweezers – optional – But I find using tweezers, or reverse tweezers, is very helpful when dealing with small cuts of cardstock or letters.
Let’s start making a 70th Birthday Cake Topper
Modify the cake topper in Design Space
The first thing that needs to be done is that the cake topper needs to be imported into Design Space, and the size needs to be modified. For some reason, my designs do not always get imported at the same size into DS, so you need to select the whole object and adjust the size.
This cake topper was for a big birthday, and I knew it would sit on a big cake, so I needed to make the cake topper large. I modified the dimensions so that the topper would be 8″ in height. Make sure to lock the dimensions so the whole topper stays proportionate.
Next, we need to ungroup the pieces. This will allow us to change the color scheme if we want. But also, we can Attach the letters together so they cut out as words and not letters. However, that is not necessary as they will be glued on individually.
And that’s it! You are ready to hit Make It in Design Space.
You can rearrange the items on your cutting mats to save space and paper. You also DO NOT need to mirror this.
70th Birthday Cake Topper Pieces
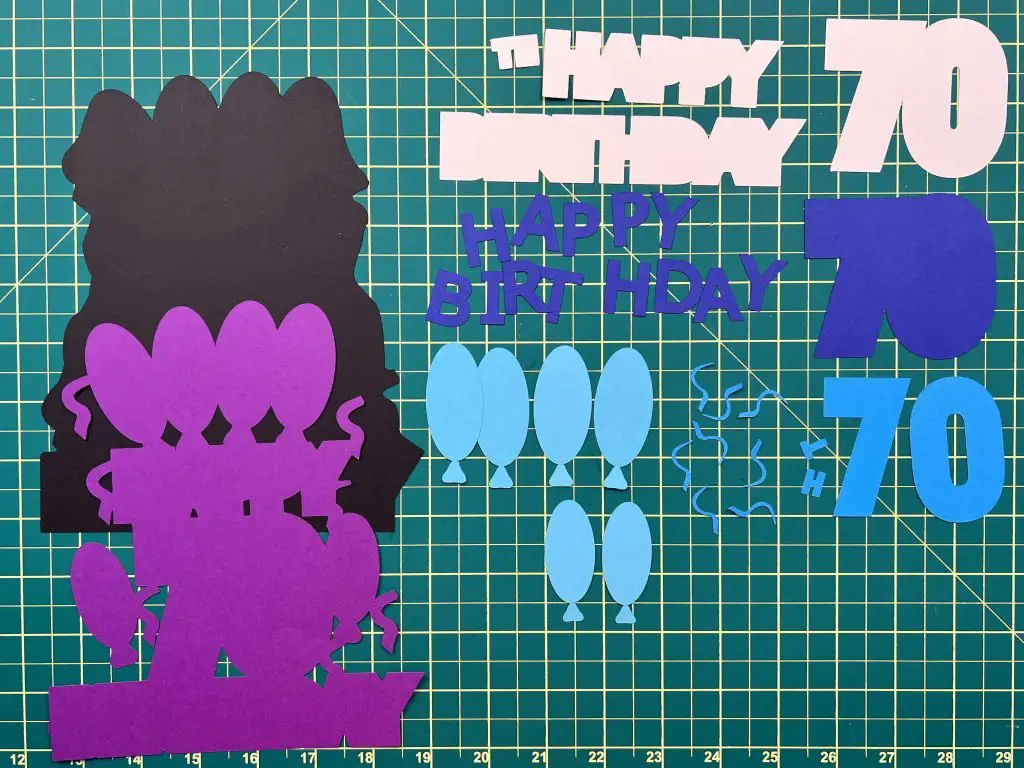
Ok, now that we have cut everything out, it is time to double-check that we have all the pieces. What we should have:
- Black cardstock – only one large backing piece
- Purple cardstock – only one large backing piece, but smaller than the black one
- White cardstock – a joined 70, the outline for HAPPY, BIRTHDAY and TH.
- Dark blue cardstock – outline for 70, letters for HAPPY and BIRTHDAY
- Medium blue cardstock – the number 70, the letters TH and 8 squiggly streamers
- Light blue – 4 larger balloons and 2 smaller balloons
Once you have double-checked that you have all the pieces, it is time to start putting this cake topper together!
Assembling the cake topper
This cake topper has a lot of pieces, so I tried to assemble it as individual pieces and segments and then put it all together. I found that was easier than trying to build it from the bottom up. So, let’s get started putting the cake topper pieces together.
Assemble the Happy Birthday Letters
Cardstock letters are my least favorite part of crafting, so I always start with those first.
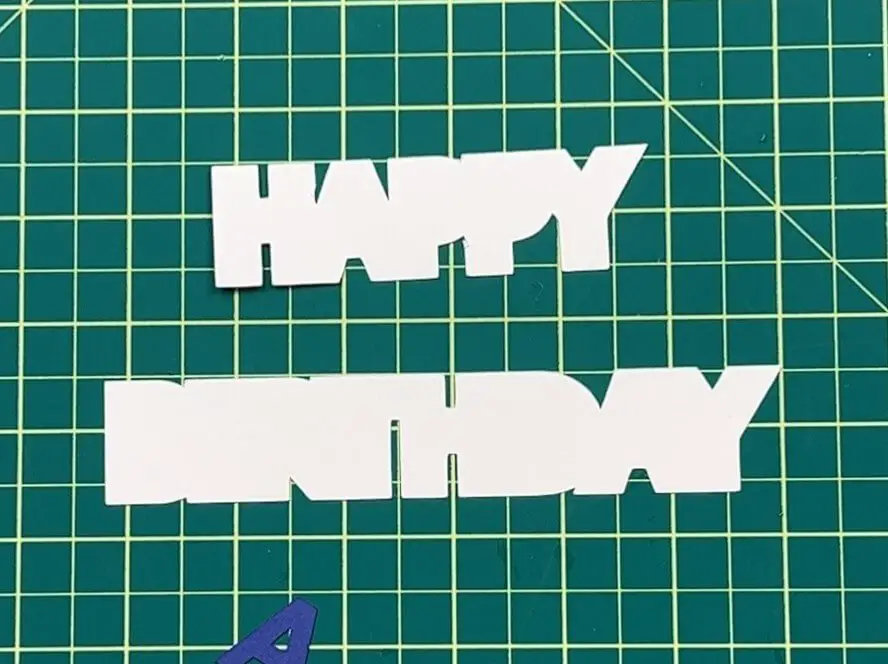
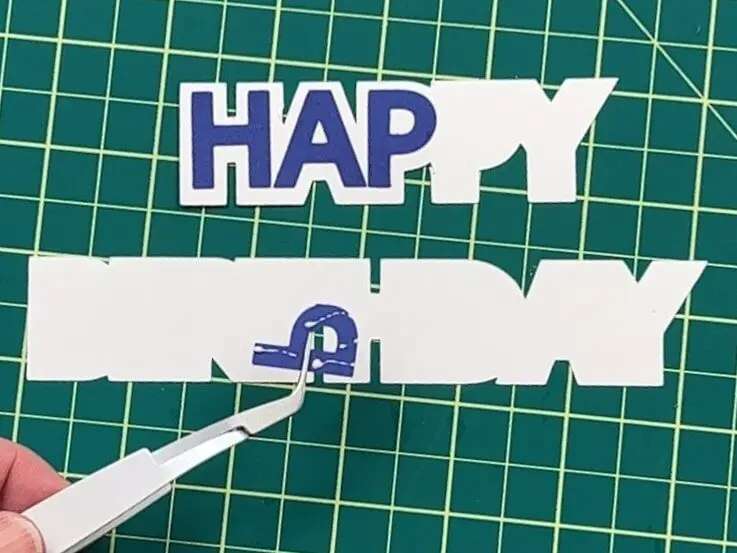
Place your white Happy Birthday Outline on your workspace. Using a fine point tip on your glue and tweezers for holding the letters, apply glue to the back of the dark blue letters and place them onto the white outline.
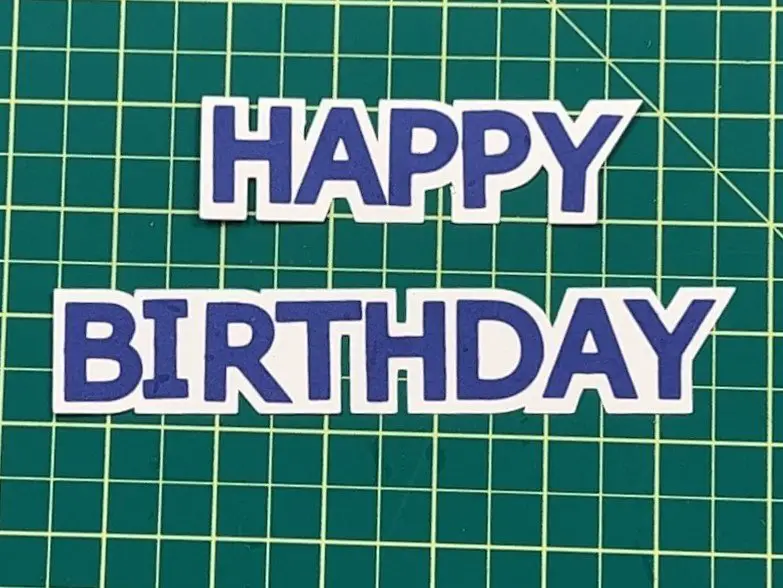
Once all the dark blue letters are on the white outline, place it to the side, as you are done with this part for now.
Assemble the TH
This is the same idea as with the letters above, simply use glue, your white TH background, and your medium blue TH, and glue the letters onto the white background.
Again, when done, place this to the side.
Assemble the 70
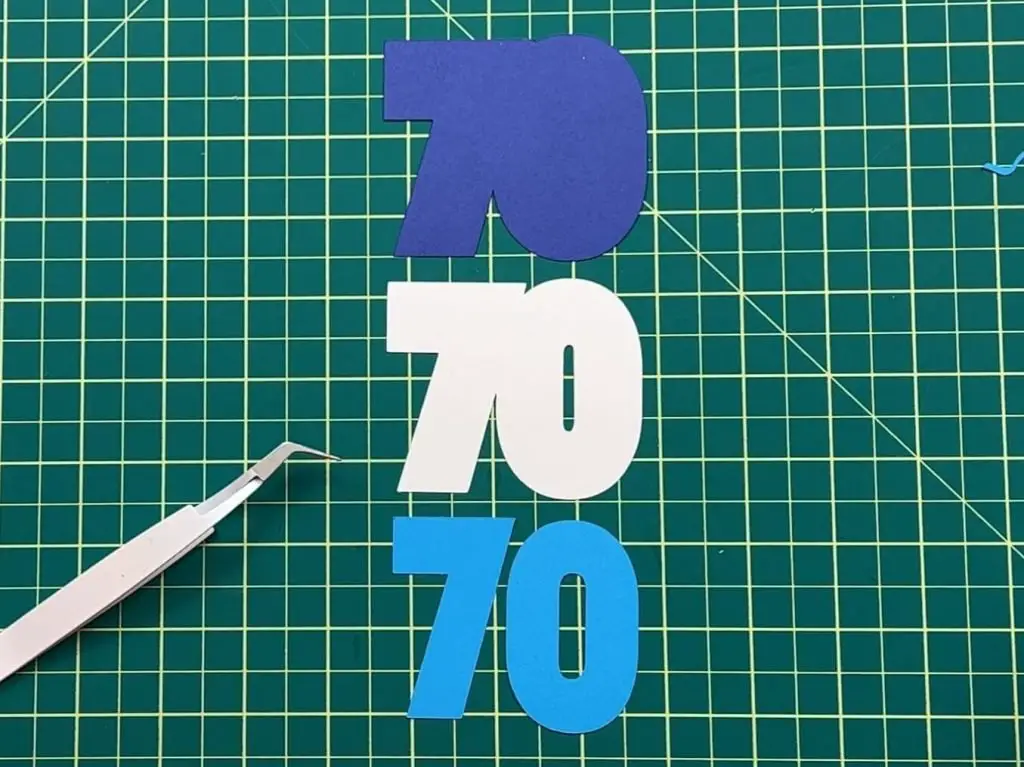
The number 70 has 3 parts – the dark blue outline, the white outline and the medium blue numbers.
The dark blue outline is the largest and goes on the bottom, the white in the middle, and the medium blue on top.
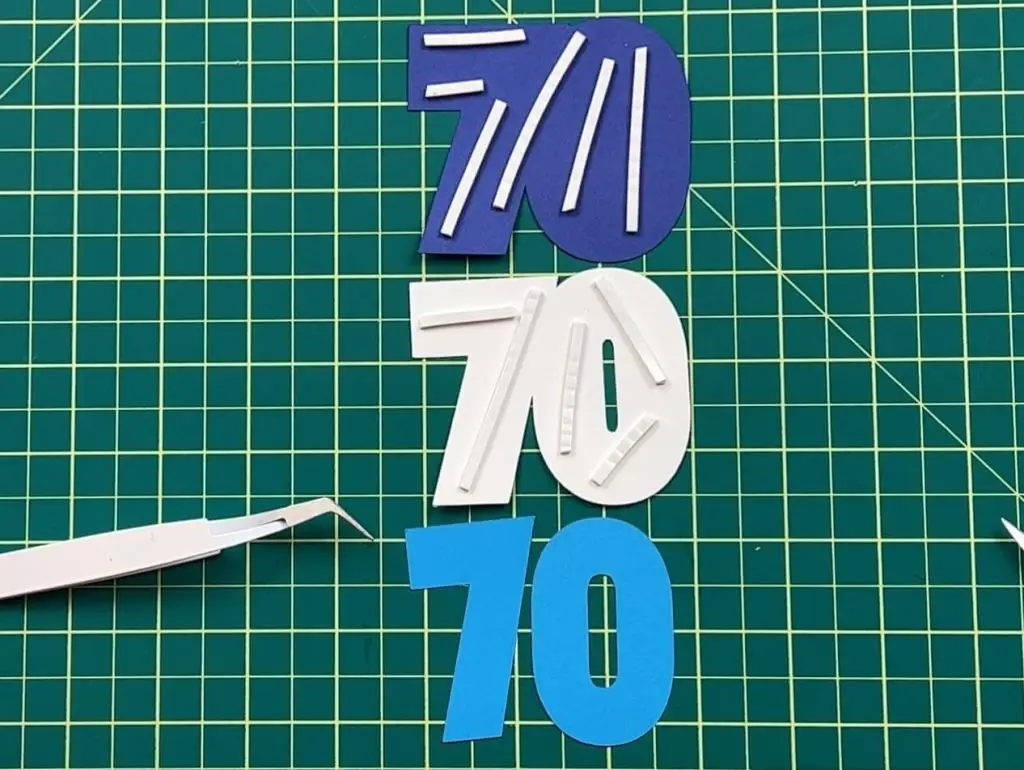
I wanted the number 70 to pop on the cake toppers, as the number is the important part. So, I placed all 3 number 70s down on my workspace, largest to smallest (but not on top of each other, just all on the workspace). I applied double-sided foam tape to the top of the dark 70 outline and the top of the white 70 outline. Then, I carefully placed the medium blue 7 and 0 onto the white backing so that they would be centered. Once completed, I placed the white outline with the medium blue 70 onto the dark blue 70 outline. Again, paying attention to keep them centered.
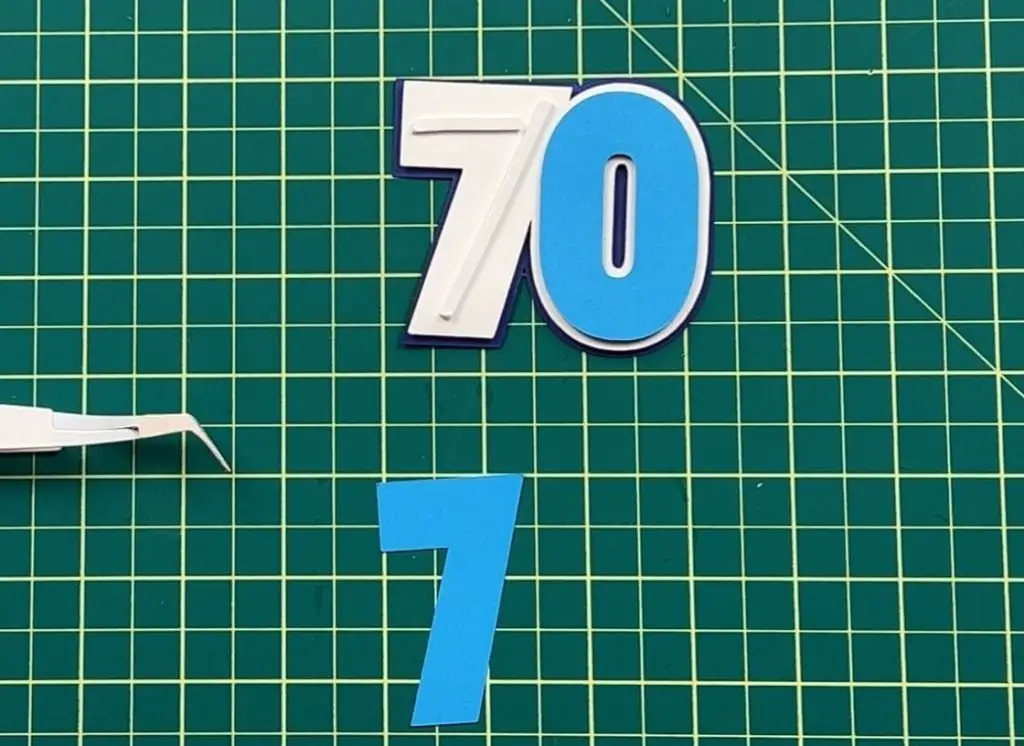
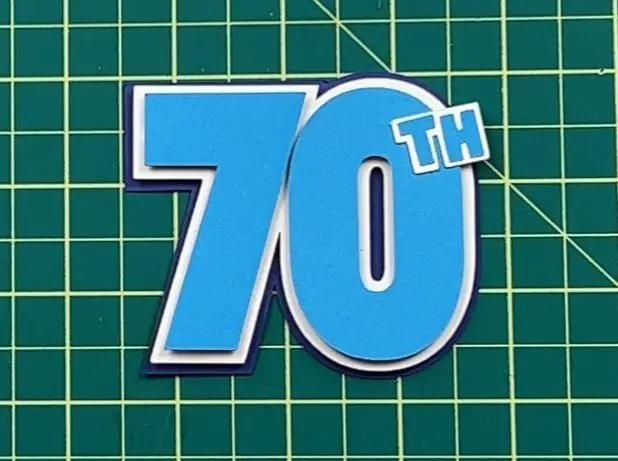
Finally, grab the completed TH from above, apply some glue to the back of the white TH outline, and glue it onto the top right edge of the 0 from the 70.
OK, that part is done, so it can be placed to the side.
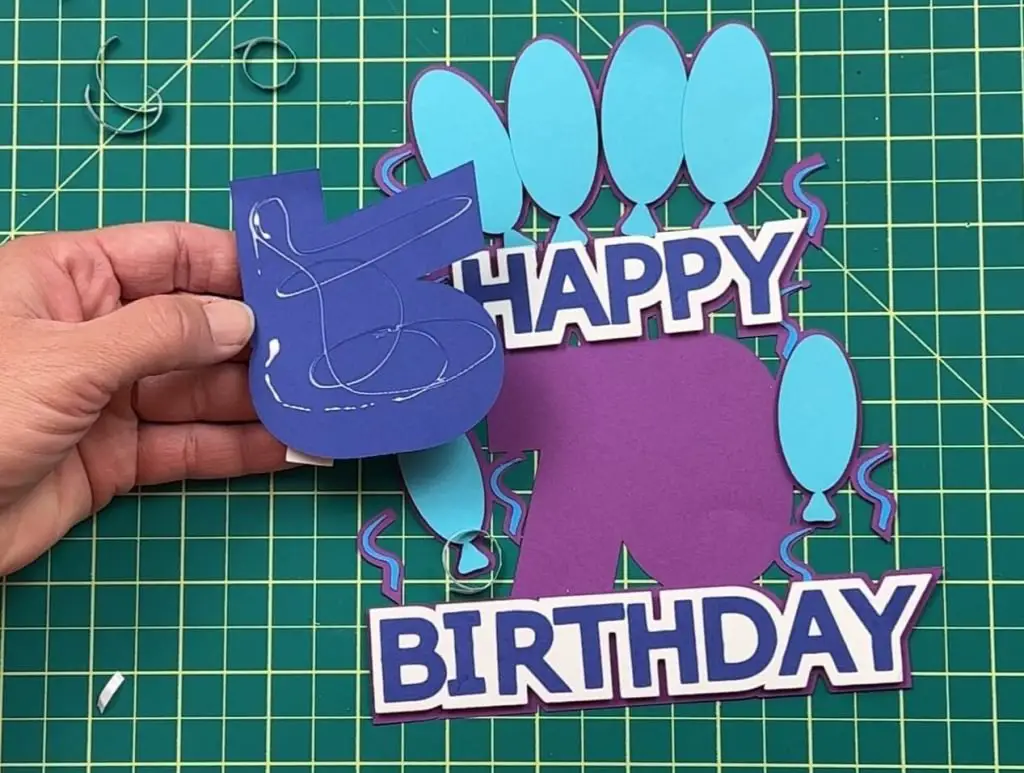
Assemble the purple backing, balloons and streamers
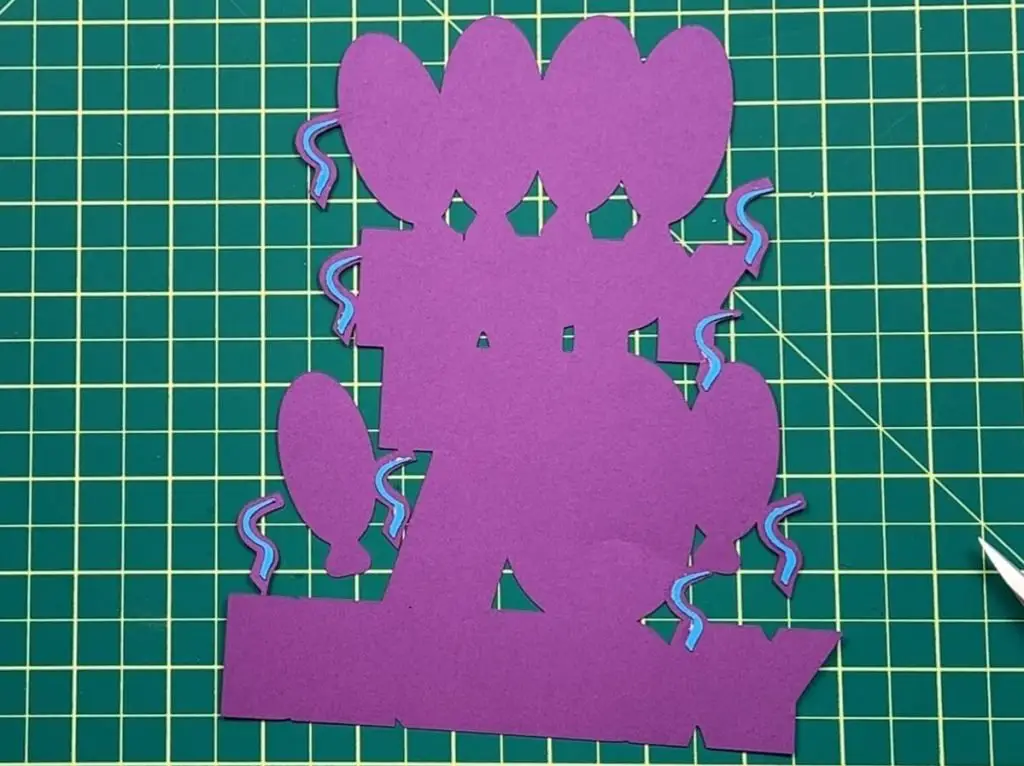
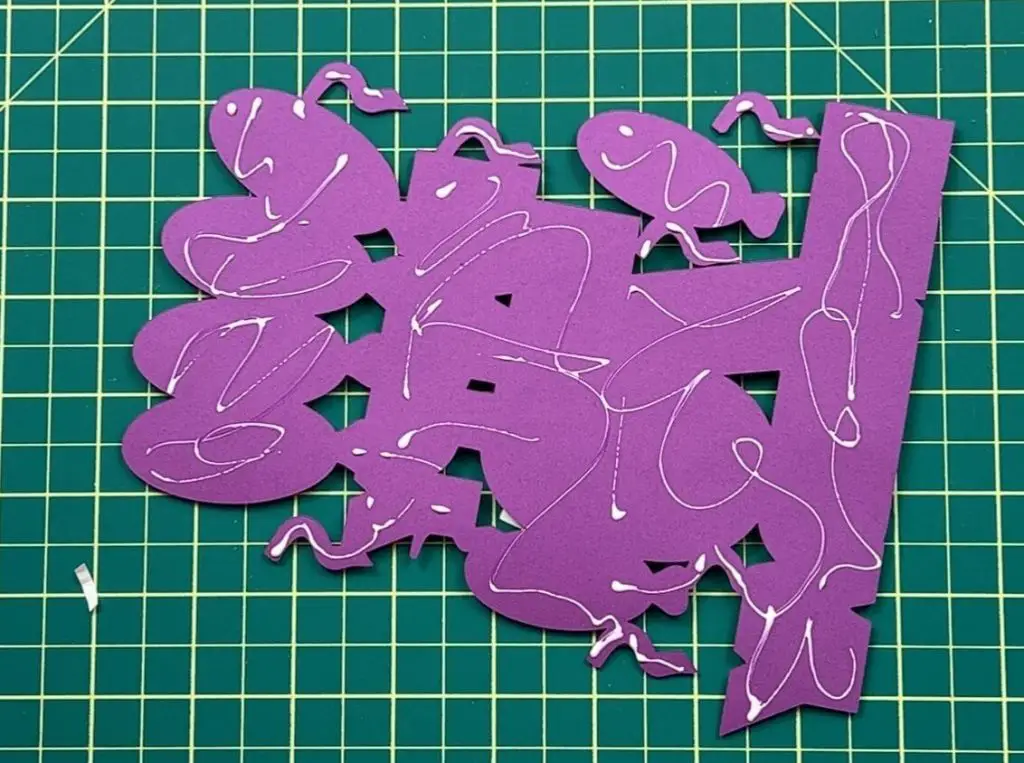
The purple backing was designed to have all the individual pieces assembled onto it. It has an outline of where all the pieces belong.
We are going to start off with the streamers. You want to organize the streamers onto the cake topper before you glue them down. The thin pointy part faces up and to the right. They all face in the same direction. There are 8 streamers in total, and each one has a home. Take a look at my image below for reference. Once you have found their spots, apply glue to the back of each one and place it in position. I did not use foam tape on these as they are very narrow and hard to work with.
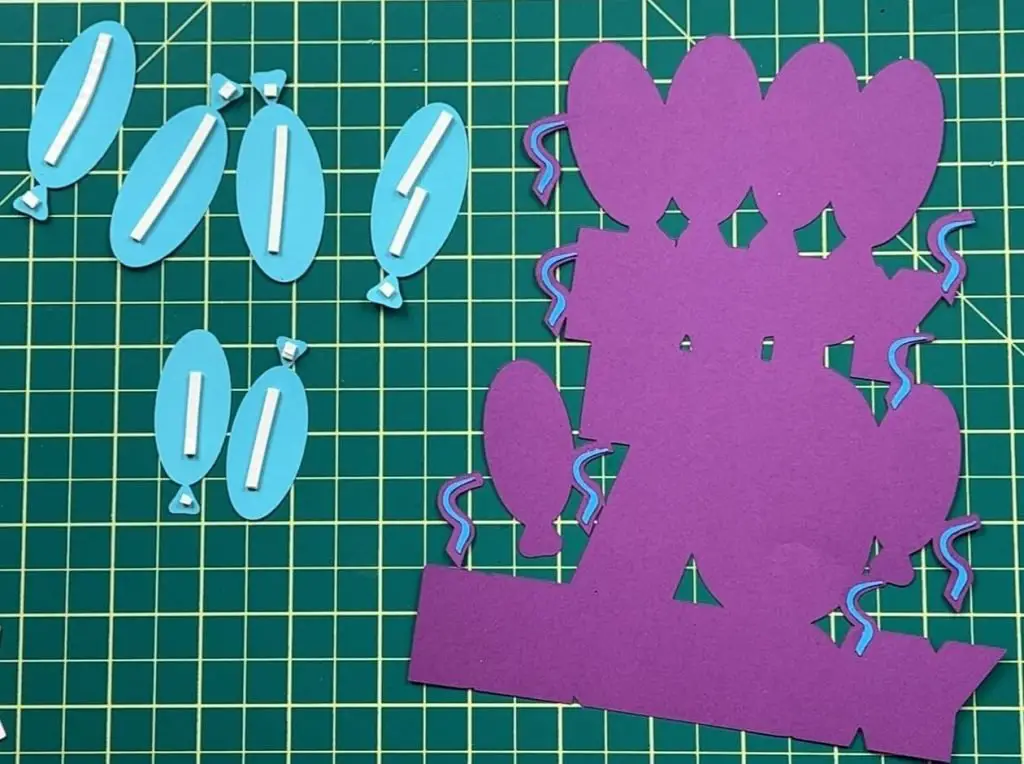
Next, you should organize your balloons – 4 larger and 2 smaller ones. The 4 larger ones all go together at the top of the cake topper, and the 2 smaller ones go on the left and right sides of the topper. They are all symmetric, so if you accidentally flipped them, that is okay. Place the balloon in their spots to see if you have them figured out.
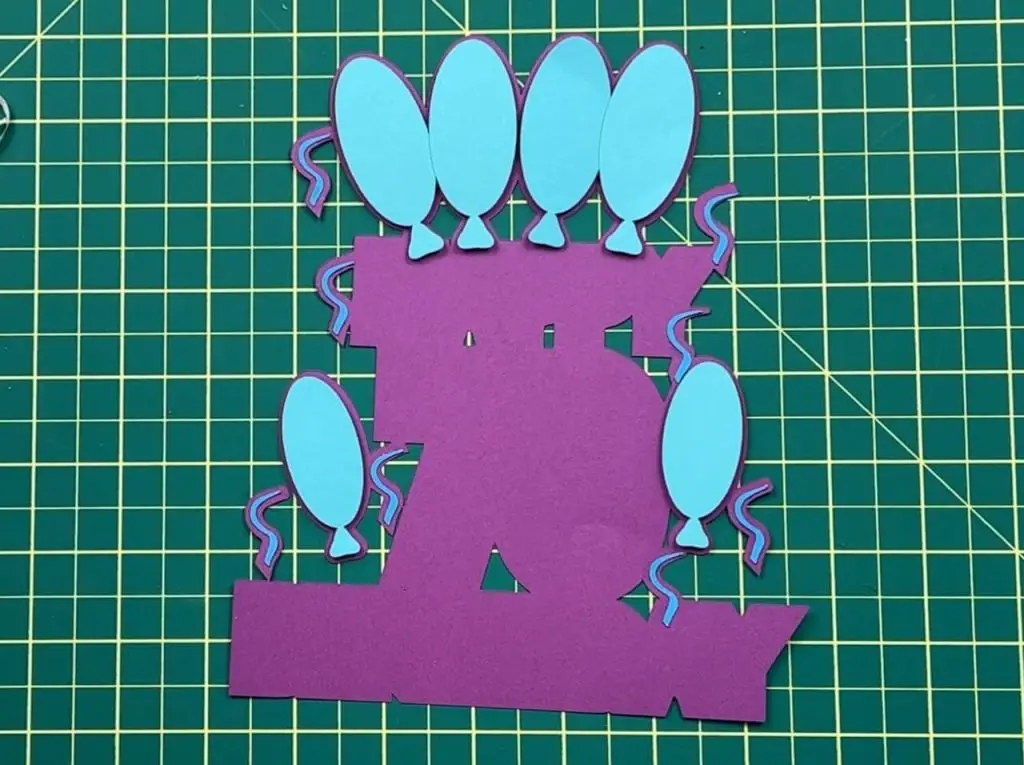
Once happy with their locations, add double-sided foam tape to the back of each balloon and adhere it to the purple backing.
Assemble the Happy 70th Birthday Phrase to the purple cake topper backing
OK, now it is time to pull out the 70th and the Happy Birthday from above.
Apply double-sided foam tape to the back of the Happy and Birthday, and place them under the top balloons and at the bottom of the purple backing, respectively.
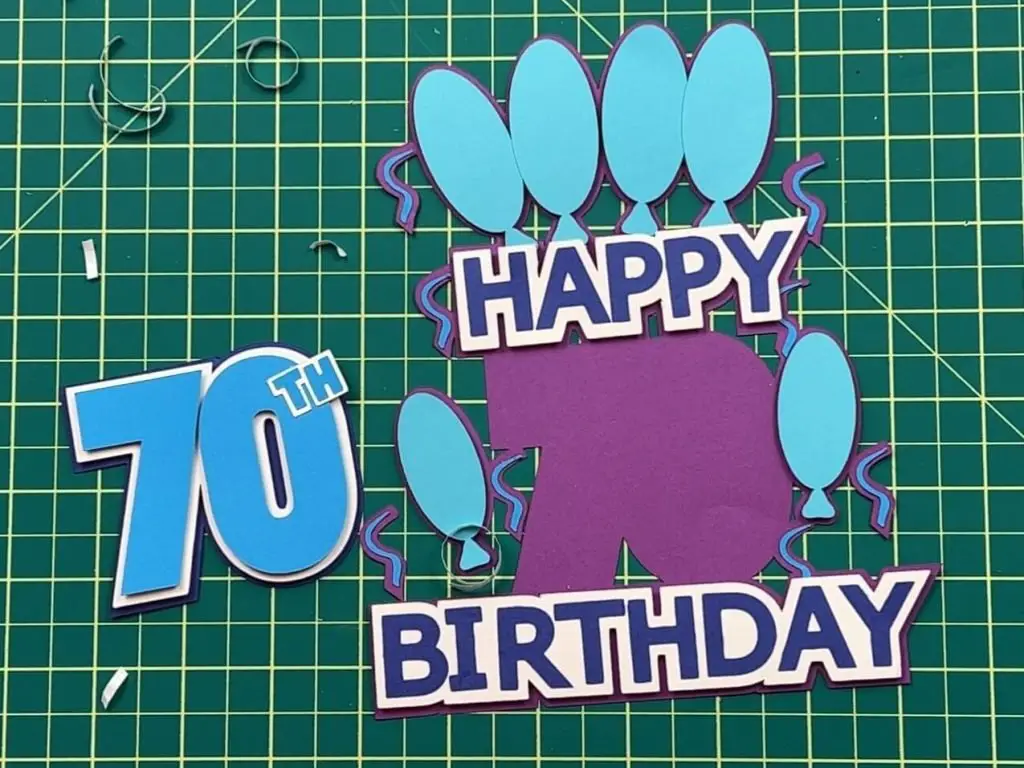
Next, apply glue to the back of the dark blue 70th outline, and place it between the Happy and Birthday.
Complete the Happy 70th Birthday Cake Topper Assembly
Now for the final touches.
Place the purple backing onto the black backing to make certain the black backing is facing the correct direction. Then, flip over the purple backing, apply glue to the back and place it onto the black backing.
Once this has dried, flip the cake topper over, and place your skewer or cake topper stick in the middle. Pour glue on and around the stick generously so that the glue is on it and the cardstock. I used my hot glue gun for this.
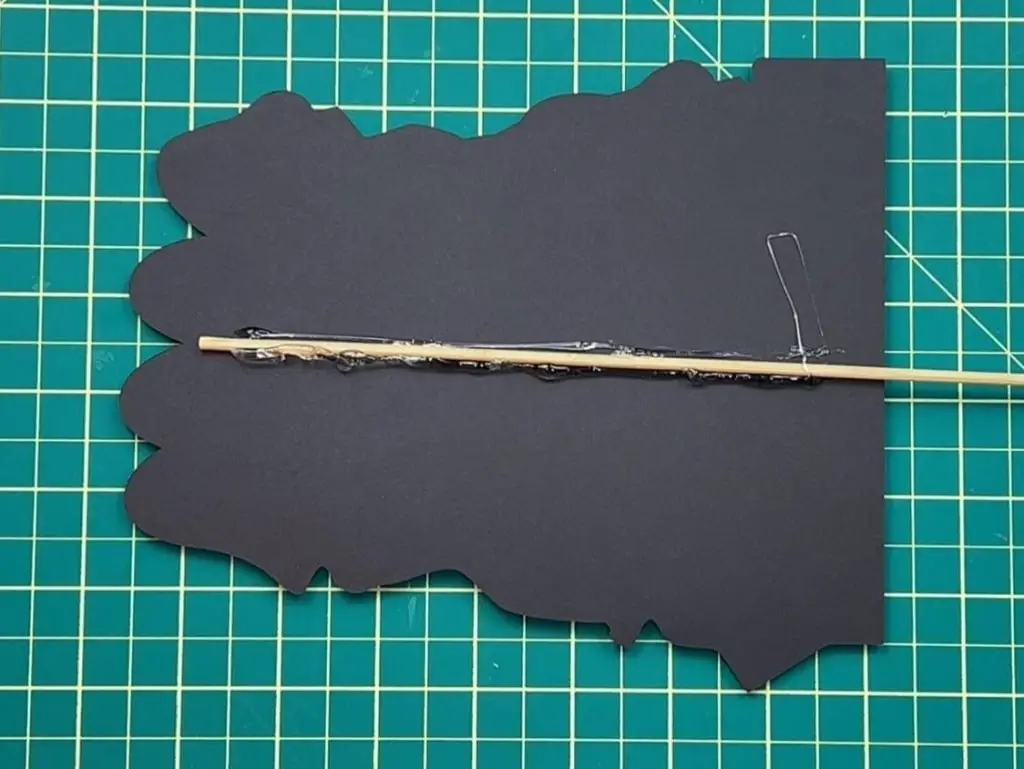
Now let it dry. I used my crafting glue for this, and it dries relatively quickly, but you want to give it about 15-20 minutes to completely dry.
And that’s it! Your Happy 70th Birthday Cake Topper is done!
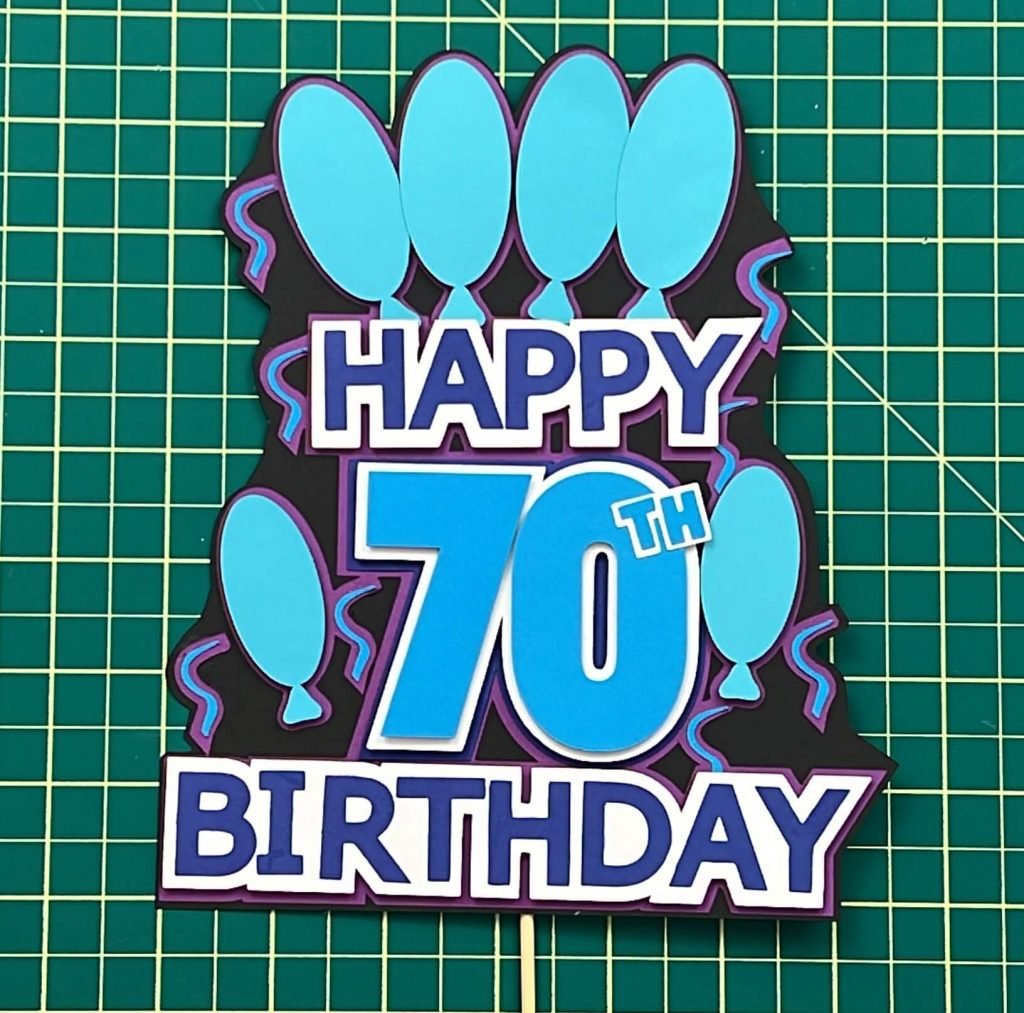
Now, all that is left is to put it on a cake!
Things I have learned along the way:
I have been going a lot of paper crafts recently, and I am learning lots of new things, so here are some of my latest and greatest learnings from this craft:
- I use glue for letters because it allows me to place them down and move them into position if they are not 100% perfect. I have tried using double-sided foam tape for letters, but I can never line them up properly, or too much foam tape comes out of the sides.
- When designing this cake topper, I do not know where my head was, but for some reason, I was not consistent with color combinations. I layered dark blue on white, light blue on white or blue on purple. When designing this cake topper, I should have stayed consistent with the layering color scheme. It would have made it easier to assemble, and I think it might have produced an even better final result. But I guess I’ll never know, as I am not redesigning the cake topper now.
- Paper crafts are fun, and they can be done really quickly. But they can get pricey if you are not paying attention to how much paper you buy. This craft took 6 pieces of cardstock, so it did not cost that much, but when I was making this cake topper, I ran out of blues and whites, so I needed to buy more. And of course, there was a sale on…. so instead of buying one pack of paper, I bought half the store…. so more paper crafts have to be on the way to justify all the new paper! So keep an eye out!
Did you enjoy making this cake topper?
Did you enjoy making this Happy 70th Birthday Cake topper with me? Let me know in the comments below! If you enjoyed this paper craft, why not check out other paper crafts here. If you are looking for other birthday ideas, check them out here.