My kids and their friends are at the age where Minecraft is everything. And if you recall, I recently had a Minecraft Birthday party, and we went overboard with Minecraft. You can check out some of those things here. But since everything is Minecraft, we can’t just do birthday parties. We have to do generic Minecraft things as well. So, we had a celebration recently, which was not a birthday, and we needed a Minecraft card to say congratulations. So, off I went to design a card.
Sign up for my newsletter and get this free design!
Supplies needed to Make a Minecraft card
This post is about making the card that I designed, so the things we need are as follows:
- Card design – you can get a copy of this card design by signing up for my newsletter above and below.
- Cutting machine – I use my Cricut Explore Air 2, but any cutting machine will work.
- Card stock – you will need one 8.5×11 of each of the following colors – dark green, bright green, white, and black. This, specifically, is what I use.
- Craft glue – I use my Barely Art Craft Glue, which I love because it does not leave any residue when it dries.
- Double-sided foam tape – I use this stuff, but you can buy thicker pieces if you like.
Let’s Start Making our Minecraft card
Import The Card Design Into Design Space
If you have downloaded my Minecraft Card File design file, you need to do a few things to get it up and running.
Import the file into Design Space by selecting the Upload button.
Then, select Browse Files.
In your files, you will have the downloaded Minecraft Card file. Select that file, name it, and save it in your design space.
Once you have saved it, it should automatically appear in your uploaded files. Select the file and add it to your Canvas.
Modify the Minecraft Card File
With the file I have created, a few minor adjustments are required to make it work in Cricut Design Space.
Once the file is on your canvas, select the image. The first thing to do is to adjust the width to 10.5”. When importing into DS, the file size does not always import the correct size.
Next, select the ungroup button to ungroup all of the pieces.
Select the card backing and the line in the middle of the card – this will still be grouped together. Select the line, either in the layers panel on the side, or ungroup the two items and select the line on the canvas. Change the line from a cut line to a score line.
Finally, select the card and the score line and attach them together.
Now you are ready to make the card!
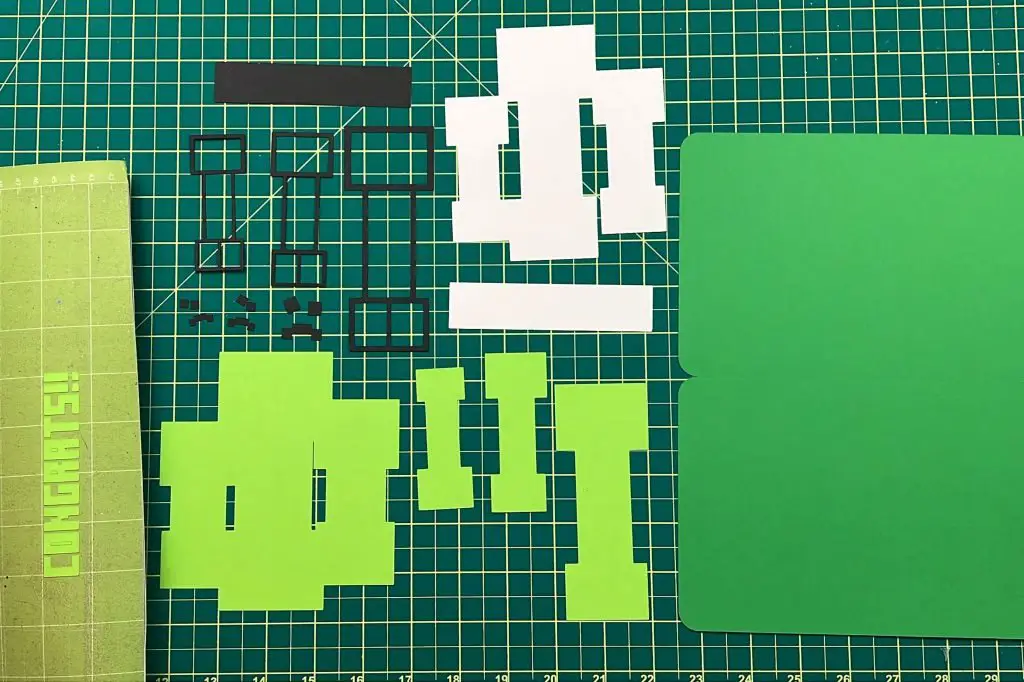
Minecraft card pieces
Once you have cut out your card pieces, you should have the following:
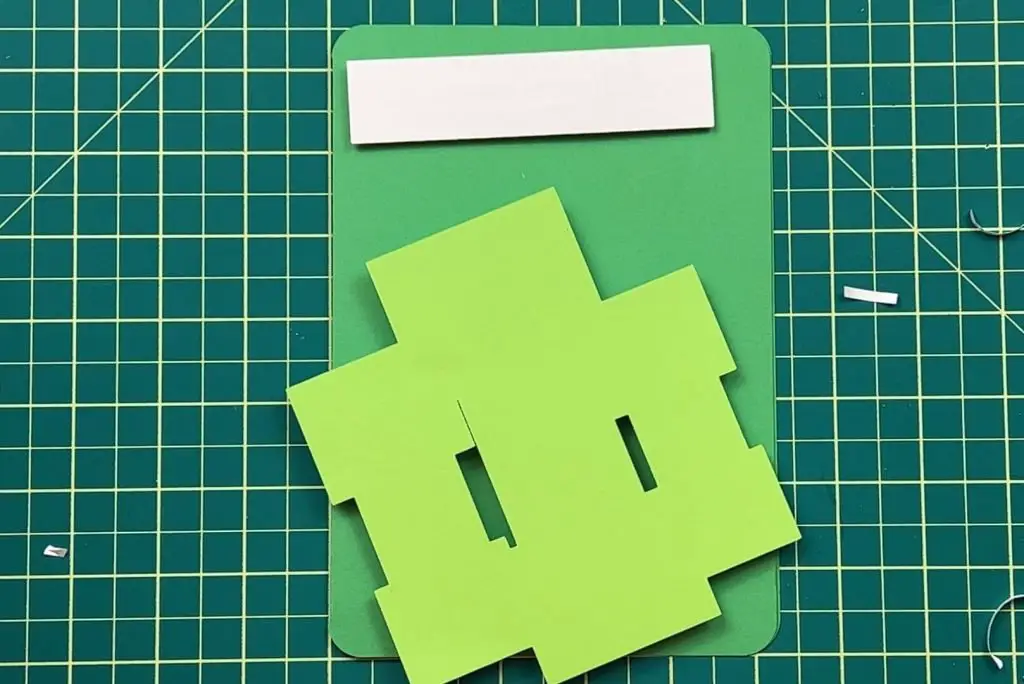
- Dark Green Card – this is the card itself, with a scoreline
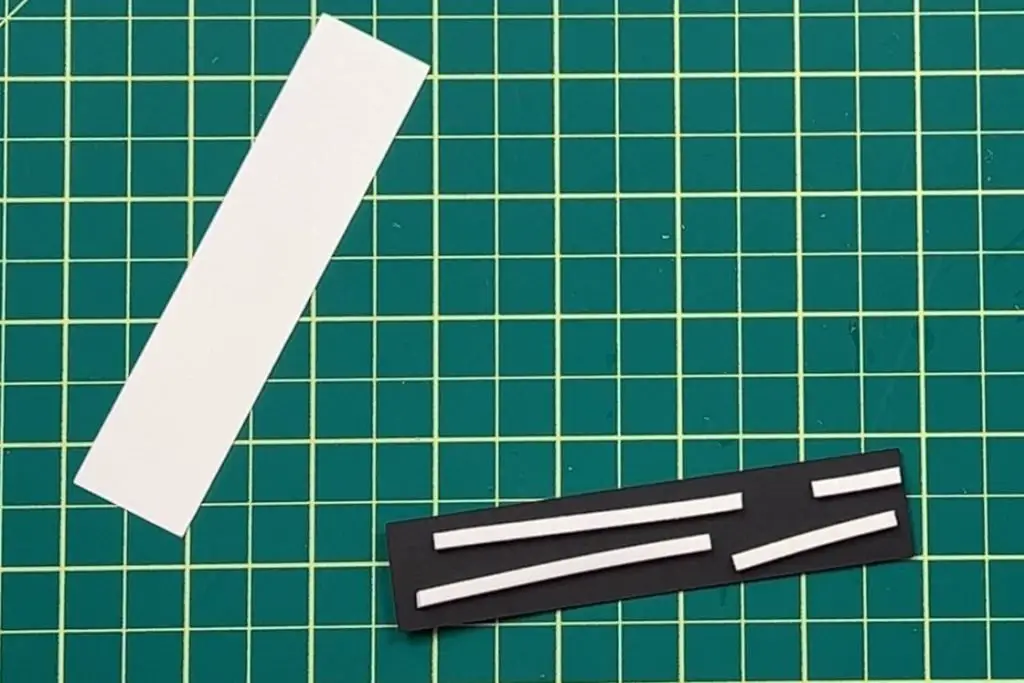
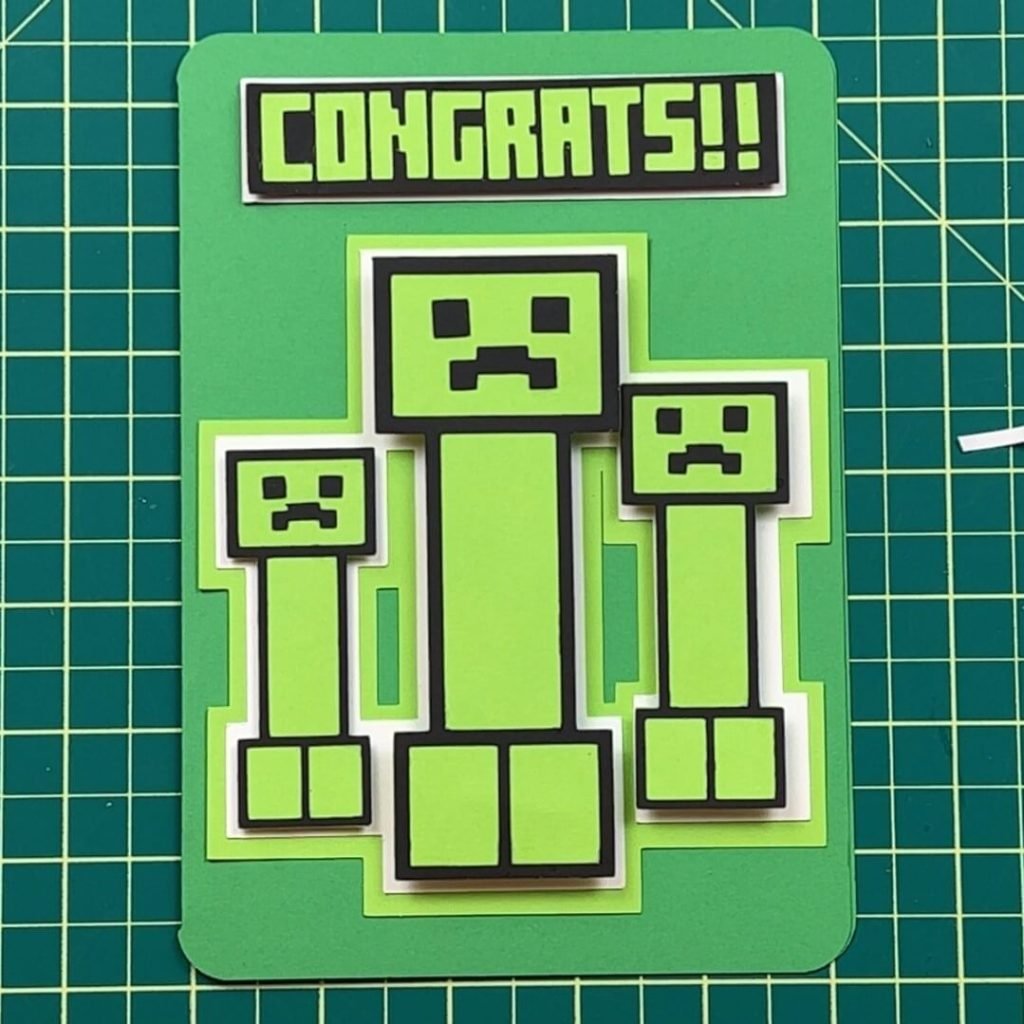
- Congrats Text – This consists of the letters “CONGRATS!!”. A black and white backing for the letters.
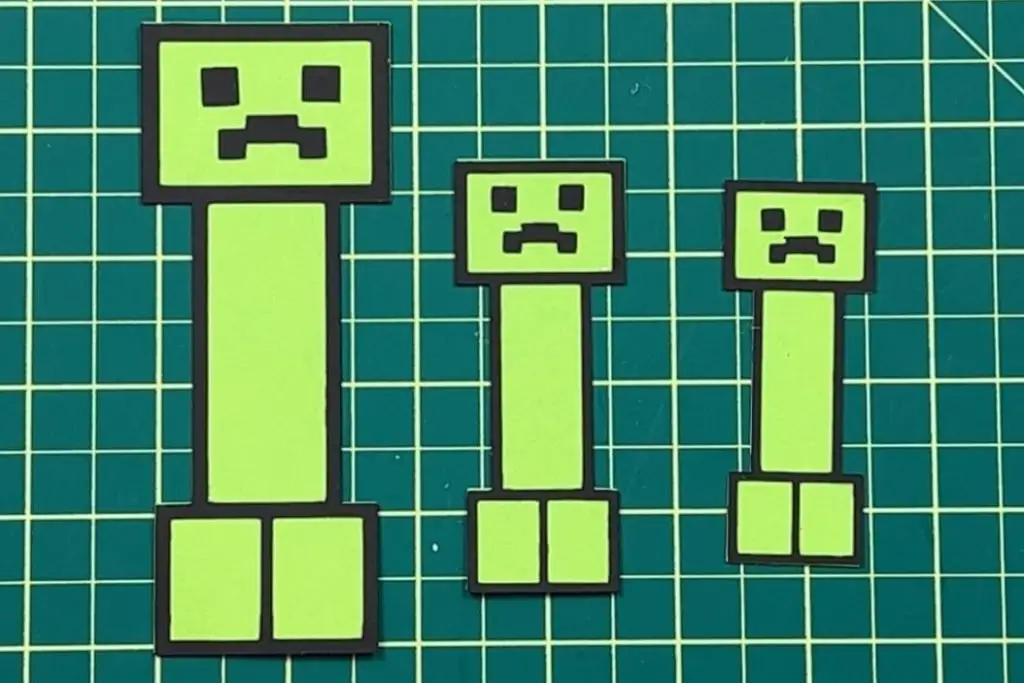
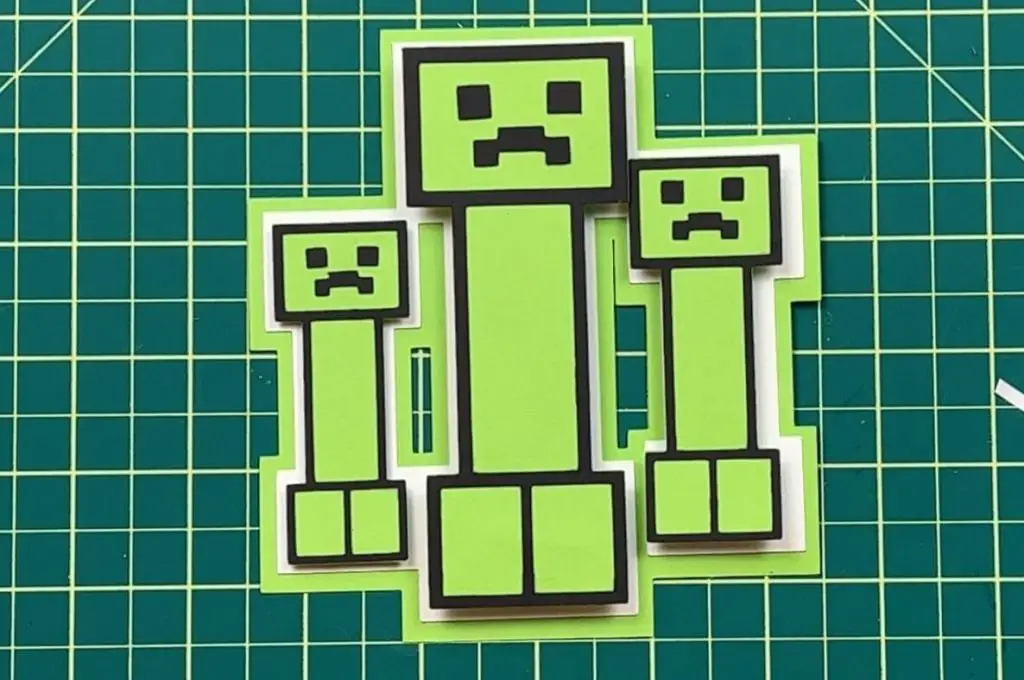
- 3 creepers – each creeper consists of 2 eyes, 1 mouth, 1 black outline, and 1 green body.
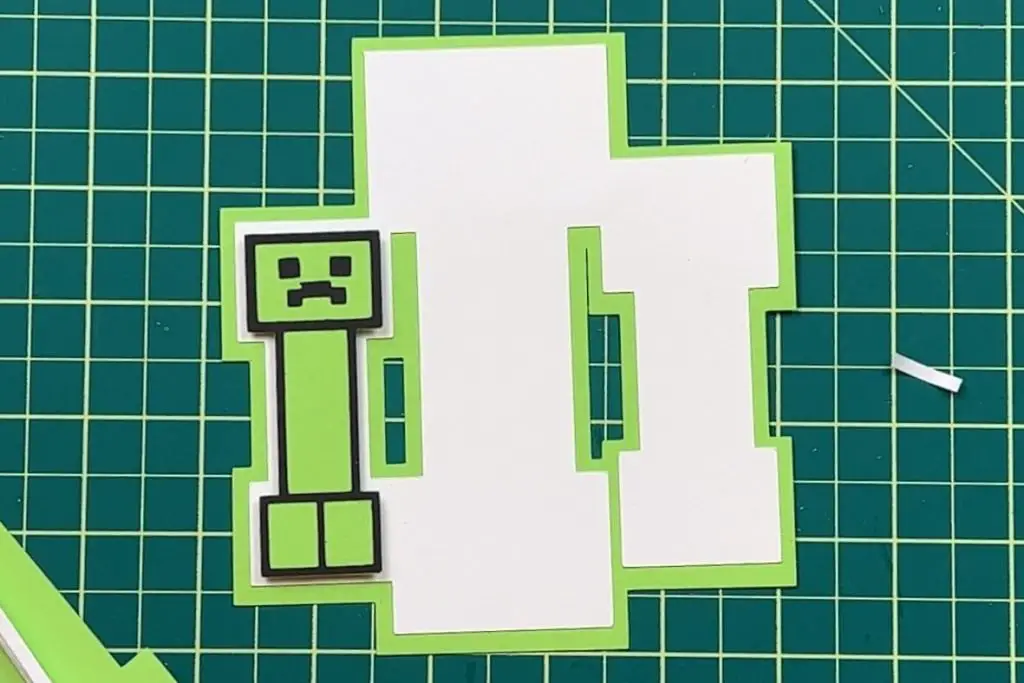
- Creeper outlines – one large white and one larger green outline that holds all 3 creepers.
Assemble your Creeper Text
The text is done in two parts, the letters and the backings. First, we will start with the letters, my least favorite.
Using glue and a fine point tip, apply glue to the back of the letters, and place them on the black backing. Place them close together, as there isn’t much room for letters to be spaced far apart. I found using tweezers to hold and place the letters helpful.
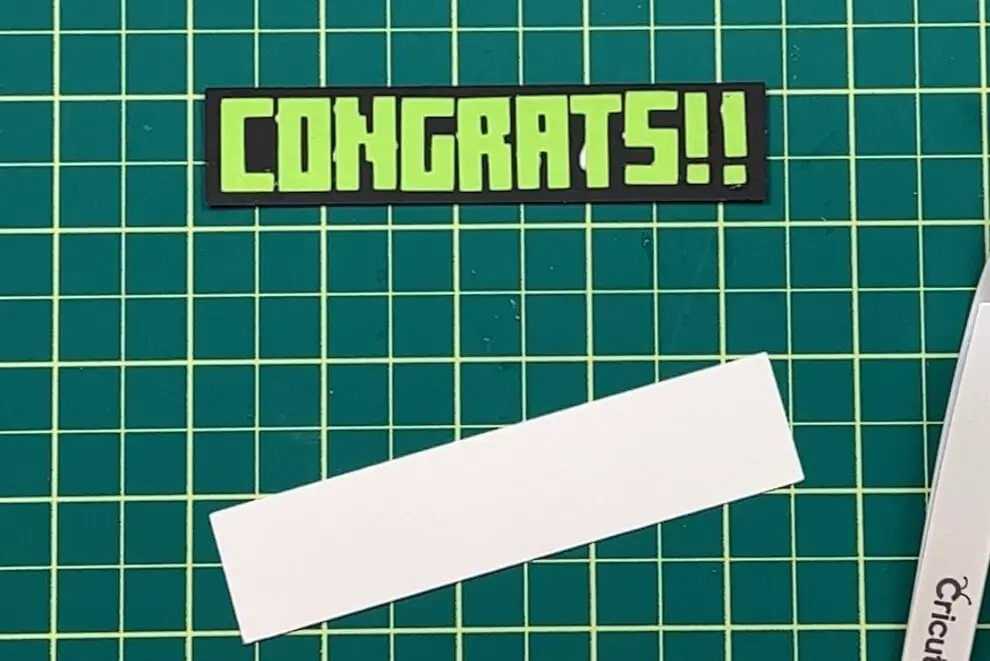
Once all of the letters are on the backing, using double-sided foam tape, apply the tape on the top of the white backing piece. Remove the second protective sheet from the tape and place the letters with the black backing onto the white.
Assemble each Creeper
For the assembly of the creepers, we need to use the bright green creeper body, black creeper outline, and black eyes and mouth. Before you start, organize your creepers and their parts into small, medium and large.
Starting with the black outline and the green creeper body, apply glue to all the sides of the black outline. Place it onto the creeper’s body. Then, similarly, apply the eyes and mouth onto the green body at the top, head area.
Repeat this process for all 3 creepers.
Assemble the Creeper Mob
The design of this card has the creepers set up with the large one in the middle, the small one on the left, and the medium on the right. Verify that the creeper backing is facing the correct direction. Place the creeper on the white backing to verify it is properly lined up.
The creepers are all different sizes to make it look like they are farther and closer to the front of the card. So the smallest creeper will only be elevated a bit, and the largest creeper will be elevated a lot.
Using double-sided foam tape, apply 1 layer of tape onto the smallest creeper. Apply 2 layers of double-sided foam tape onto the medium creeper and 3 layers onto the largest creeper.
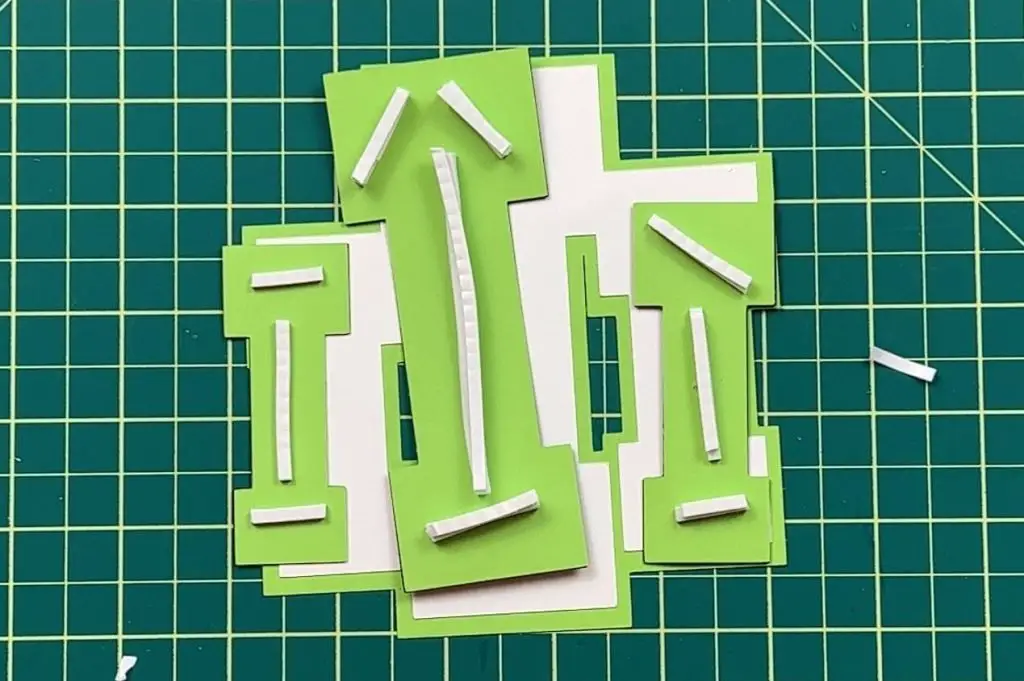
When applying additional layers of double-sided foam tape, you will need to remove the second layer of tape cover.
Once all the creepers have double-sided tape, remove the final tape cover. Starting with the smallest creeper, place it onto the left of the white backing. Then move to the medium and finally the large one.
Now all 3 creepers are on the backing and will look like the big one is closest, and the small one is furthest away.
Before this last step, verify the green backing is lined up in the same direction as the white one. Then, apply glue to the back of the white backing, and place it onto the green backing sheet.
Assembly the Minecraft Card
Now that all our pieces are done, it is time to put them together.
Starting with our card, it needs to be folded in half. But since we have a score line in the middle, folding it should be easy.
Before applying glue to the back of the text and creeper mob, place it on the card and make sure it fits. Once happy with the placement, I did the phrase on top, apply glue to the back, and glue them on. I suggest starting with the creeper mob first as it is larger and takes up more space.
Optional Sentiment card
Once the outside of the card is done, you can add a white sheet inside the card (included in my design) that is 4.5” x 7” inside the card. You can add a sentiment through DS or write it by hand.
And that’s it! You’re done your Minecraft Card!
Things I learned While Making this Creeper Card
I have been trying to design more paper crafts recently, and there have been a lot of things to learn.
- Using foam take on the back of individual letters is hard, and it’s even harder to keep them lined up and straight.
- This card design could have used more symmetry, so, for example, the text could have been on the same backing colors are the creepers. But I think it looks good like this either way.
Did you enjoy this project?
Did you enjoy this project? Let me know in the comments below. Let me know if you tried it and how it turned out!
If you enjoyed this project, check out my other Minecraft projects here:
Sign up for my newsletter and get this free design!