Staying on the Minecraft Birthday theme, I couldn’t stop at a Minecraft Birthday Banner. I needed to add some more Minecraft Birthday Decorations to the party, so I went ahead and made a DIY Minecraft Creeper. Because who doesn’t need an army of Minecraft creepers hanging around your living room?
As an Amazon Associate, I earn from qualifying purchases. This post contains affiliate links. I may receive a commission if you purchase an item from one of my links. This will not change the price you pay.
Supplies needed for a DIY Minecraft Creeper
Ok, this is mostly a simple craft, but it requires supplies we don’t always use, so let’s get started compiling our supplies:
- Cardboard boxes – You will need 3 boxes for each creeper. You want one box to be square and 2 boxes to be more rectangular. They don’t need to be perfect,
- Green Wrapping Paper – You will need enough to wrap all the boxes.
- Construction paper or craft paper – This is for adding pixels onto the creeper. You will need greens, browns, and black. I used 2 shades of green, 1 shade of brown, and black. I used craft paper as it costs less and looks great for kids’ events. However, if you want to use cardstock, you are more than welcome to.
- Glue – any craft glue will work. You do not need to use your expensive quick dry, clear dry stuff, but again, you can. But remember, you get what you pay for, so cheaper glue will result in a cheaper final product.
- Scissors or a paper cutter – For this project, I am not using my Cricut as I can cut squares faster with my paper cutter than I can with my Cricut.
- Tape – packing tape or duct tape will work.
- 60 minutes of time.
Let’s start making our DIY Minecraft Creeper!
Prepare your boxes
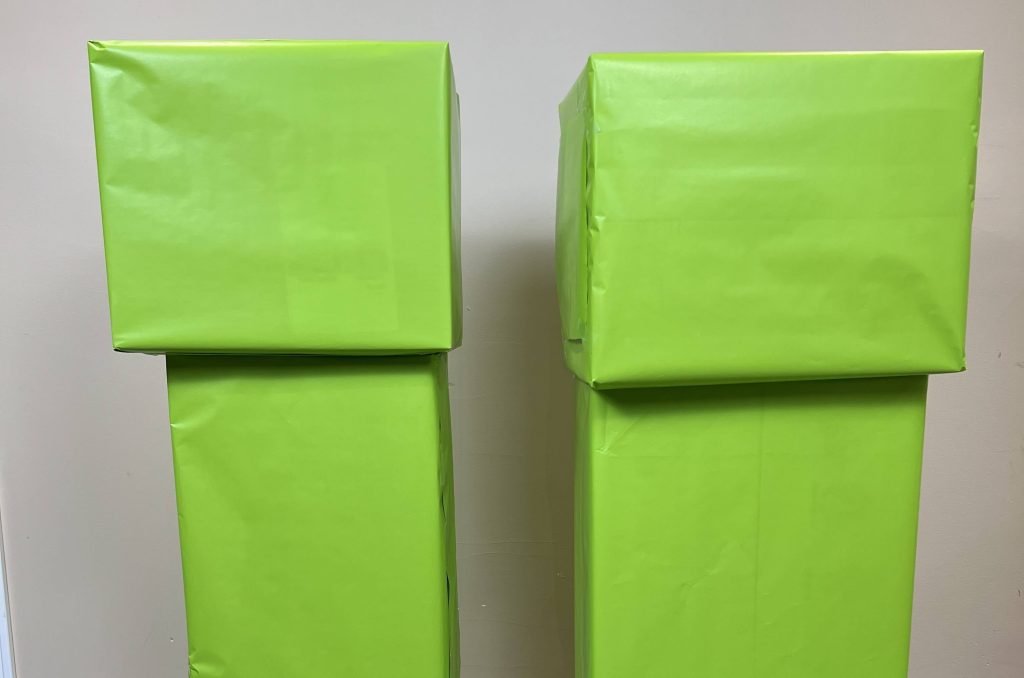
Preparing boxes is simple. It is just like Christmas or any other event where you wrap gifts because that is basically what we are doing. We are wrapping the boxes with green wrapping paper, just like we would with any gift.
Some pointers – when wrapping the box, try to hide the seams as much as possible. Also, on the 2 sides of the box where all of the final folds are, I like to cut out an extra piece of paper in the shape of the box and tape it on. This gives the box more of a Minecraft feel, instead of a gift box feel.
Once you have 3 boxes wrapped and taped, we are ready to move on to the next step!
Make the Creeper Feet
In Minecraft, creepers have 4 feet. As you may recall from my notes above, we have 3 boxes, so we must make some feet.
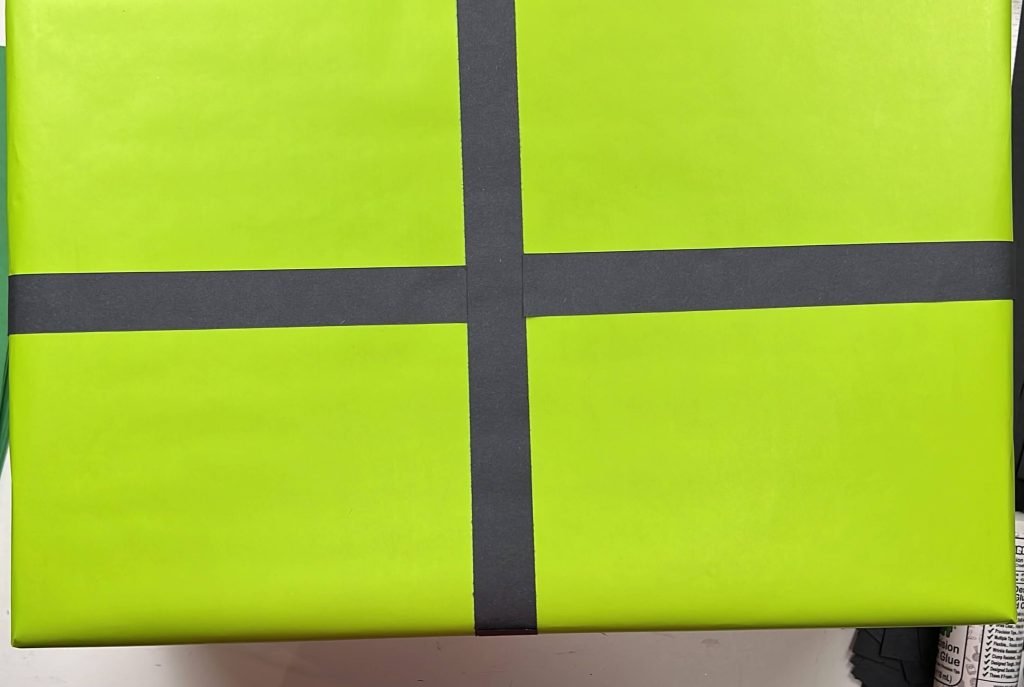
Simply cut out 1″ strips of your black craft paper. I used my paper cutter and cut 6 strips lengthwise on the paper.
Then, glue them onto the box, starting from the top middle, going out towards the middle of each side of the box and down the sides.
This will give you the contrast needed to make it look like you have 4 feet.
Add Pixels to your creepers
If you have played Minecraft, you know that everything is a pixel, with different shades of colors. So, for the DIY Minecraft creeper, we will cut out a bunch of squares to add to our boxes. Give it the Minecraft pixel look.
Using my paper cutter, I cut out a bunch of 3″ x 3″ squares in light green, dark green and brown craft paper. The paper I used was 9″ x 12″, so this worked out well for sizing.
Once I had a pile of each color, I glued several pixels of each color onto each side of the boxes, except the side of the head box where the face was going to go.
On the surfaces of the boxes where they are either on the ground or going to be attached to the other boxes, I didn’t put as many, but still glued on a few around the edges to give it more character.
There is no correct number of pixels to add to the creeper. This is all your preference.
Make your Creepers Face with Black Pixels
Now for the fun part, the creeper’s face.
Using your black craft paper and paper cutter, cut out 1.5″ x 1.5″ squares. You will need 16 per creeper. So if you are only making one creeper, you only need 16 squares. And one piece of paper will be enough.
Once you have your squares cut out, it is time to check out the sizing and location on the box to make sure they fit.
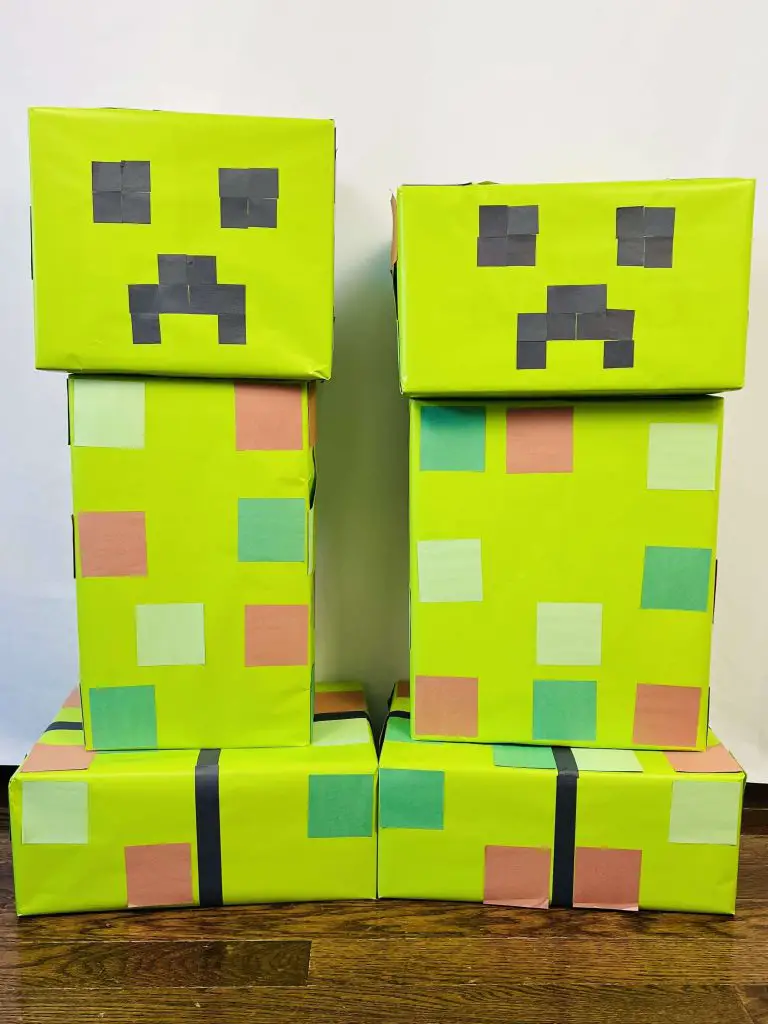
You need 4 pixels per eye and 8 for the mouth. You want to lay them out to look something like my image below. Once you are happy that the size and location are good, go ahead and glue them onto the box.

Assemble your DIY Minecraft Creeper
Now for the last step, we have to put the 3 boxes together.
This is simple enough, all you need is some tape. Fold it over on itself to make a loop and stick it onto the box. You want to make sure you are sticking it on the correct side of the box.
I started by putting tape on the bottom side of the middle box and placing the middle box onto the feet box. Then, I again placed tape on the middle box and placed the head on top.
And that’s it! Your DIY Minecraft Creeper is done!
Things I learned while making these DIY Creepers
This was a fun project, and my kids love them. There are a few things I would do better next time.
- Make sure that the pixels have glue applied right to the edge and the corners. After the extensive play, the pixels started to curl around the edges. They don’t care, but it could have looked nice longer.
- When taping the 3 boxes together, I used packing tape to hold them all together. This worked great for having the creepers stand around and not fall over, but when my kids started playing with the creepers and moving them around, this was not sufficient. Needless to say, there were several instances where the creepers lost their heads (which worked well for their game), but I had to tape them back on. I’m not sure how I would attach the pieces together more securely unless I made the whole creeper as one box or something. If anyone has any ideas, I would love to hear them, as I may be having more than one Minecraft-themed birthday party at my house in the future.
- Do not offer up the decorations to friends and family. I did that, but then my kids didn’t want to give up the creepers, so I couldn’t pass them along right away. And after several weeks of being played with, they were no longer in any state to be passed along.
Did you enjoy this DIY Minecraft creeper tutorial?
Did you enjoy learning how to make a DIY Minecraft creeper? Let me know in the comments if you tried it out!
If you liked this craft, be sure to check out my other Minecraft projects as well: