We have been watching the Harry Potter series at our house, which has resulted in everyone wanting to be a character from Harry Potter for Halloween. No big deal. We can do this. But the one thing that we noticed is that we have nowhere to hold our wands when they are not in use, so we came up with a DIY wand purse to hold our wand safe while we are not using it, but also keeping it close at hand.
As an Amazon Associate, I earn from qualifying purchases. This post contains affiliate links. I may receive a commission if you purchase an item from one of my links. This will not change the price you pay.
Things you need for a DIY wand purse
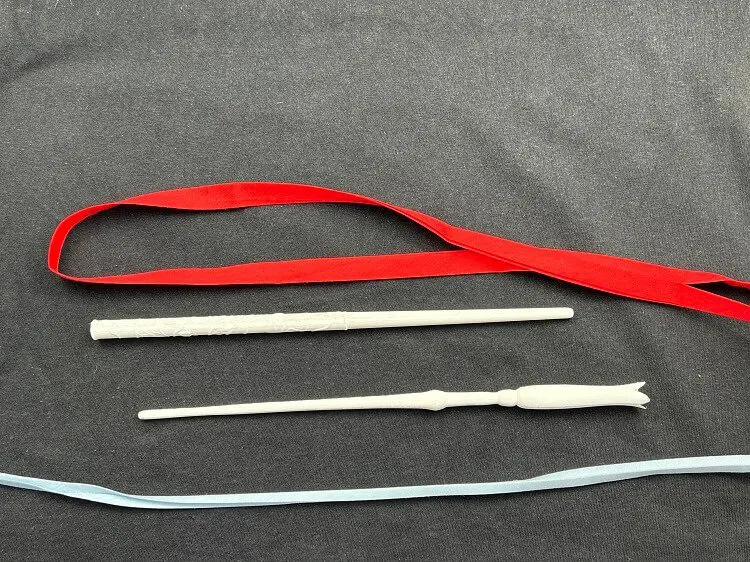
- Fabric – I cut up some old shirts that just happened to be black, but any fabric will work.
- Bias tape – there are numerous colors available we went with Blue for Ravenclaw and Red for Gryffindor. You can also use thick or thin bias tape. The option is yours. Some thoughts on this – thick bias tape is easier to work with, but thin bias tape looks sleeker.
- Sewing machine – You can do this by hand, but a sewing machine is much faster.
- Matching thread – to match bias tape and ribbon. You do not need this, but I thought it worked better this way.
- Ribbon – I used 1-inch black ribbon for the purse strap.
- 1 hour of time
Let’s Start making out DIY wand purse
Design the wand purse
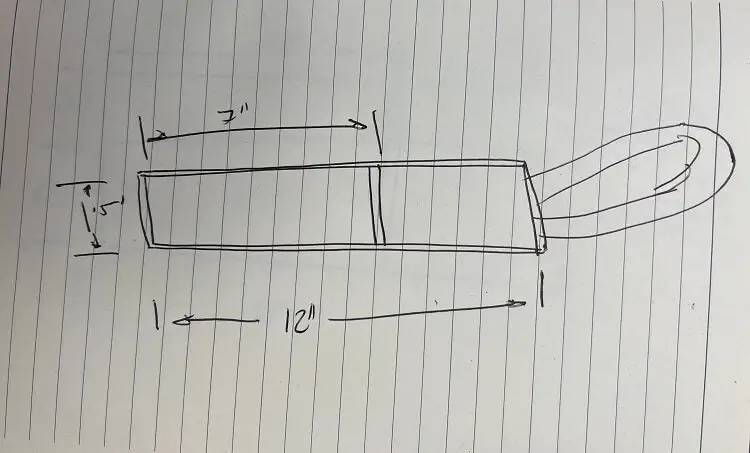
We already have several wands in the house that we made, and all are about 12-inch long, so the purse needs to fit the entire length. However, we want part of the wand to stick out of the purse so it can be easily grabbed. So we made the front face of the purse 7-inches.
And, of course, the purse will need a strap to go over your shoulder.
Cutting the material for the wand purse
Before you cut anything, make sure you iron your fabric and bias tape! This will help in the long run! Trust me!
Based on my design and the existing size of my wands, and keeping in mind that I do not like to sew very small things, I need 2 pieces of fabric for the purse, one 7” x 1.5” and one 12” x 1.5”. I cut them out with a bit of surplus material leaving just a little room for mistakes and trimming.
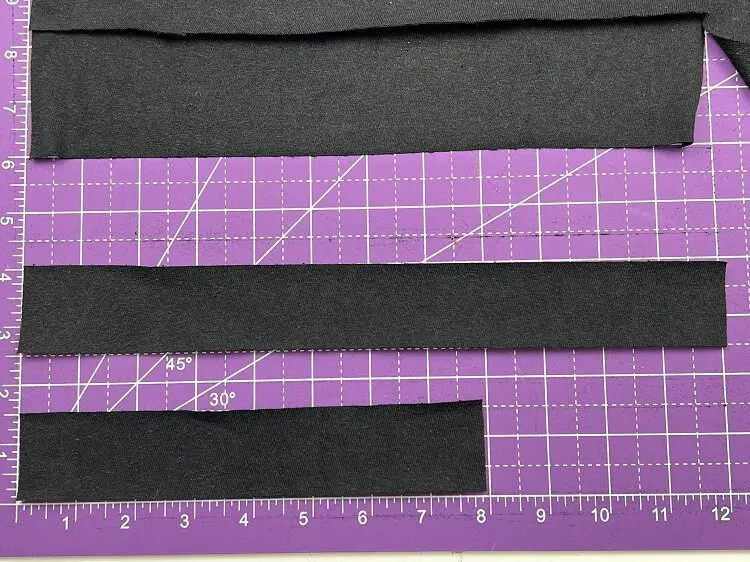
I also cut one piece of bias tape at about 1.5” to sew onto the top of the 7” front of the purse and enough bias tape to go around the whole purse with a bit of overlap.
Now all of my fabric is ready to go.
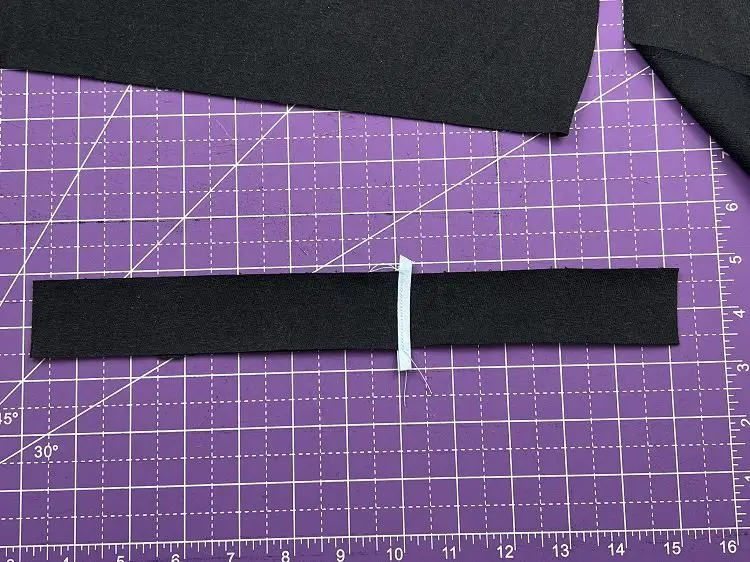
Sewing the pieces together
Quickly sew the 1.5” bias tape onto the 7” front face. This has to be done before the other bits are sewn together.
Once that is done, measure all of the pieces again and trim any excess fabric or thread.
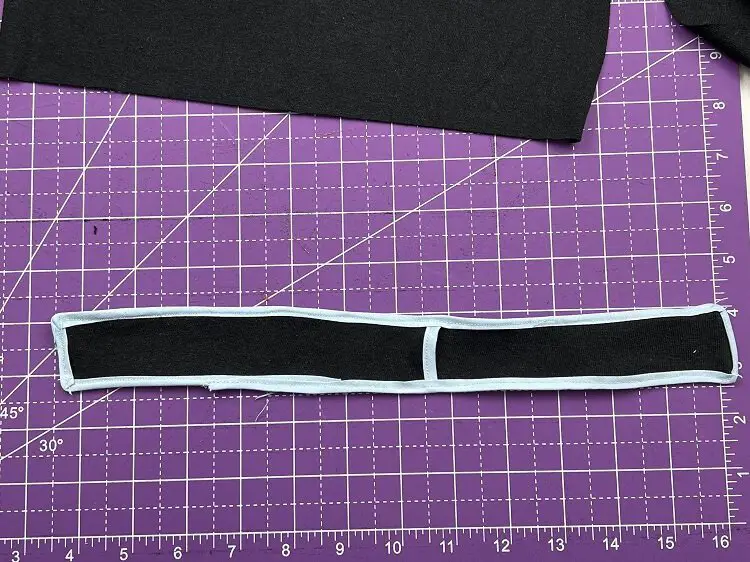
Pin the top and bottom faces of the wand purse together, aligning the bottoms. You can pin your bias tape onto the purse to hold it in place, or you can freehand it. I pinned it together at the start, but once I started sewing, I did not need pins.
Sew the bias tape around the outside of the purse. Try to overlap a bit of the end of the bias tape over the beginning to cover up and make it look sleek.
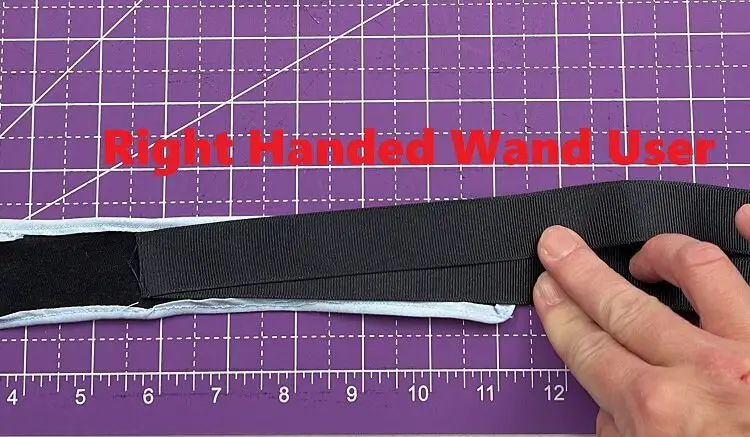
Attach the purse strap
The purse is going to be over-the-shoulder with a non-adjustable strap, so for this, I used ribbon. You will need to measure the purse wearer to see the length of ribbon required. You want the top of the purse to be just above the waistline. If you are making this for kids, you will need roughly 1 yard, which is what I used (36 inches).
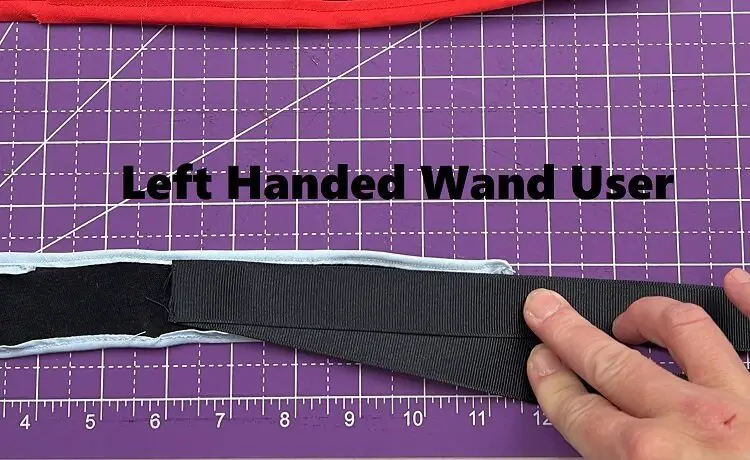
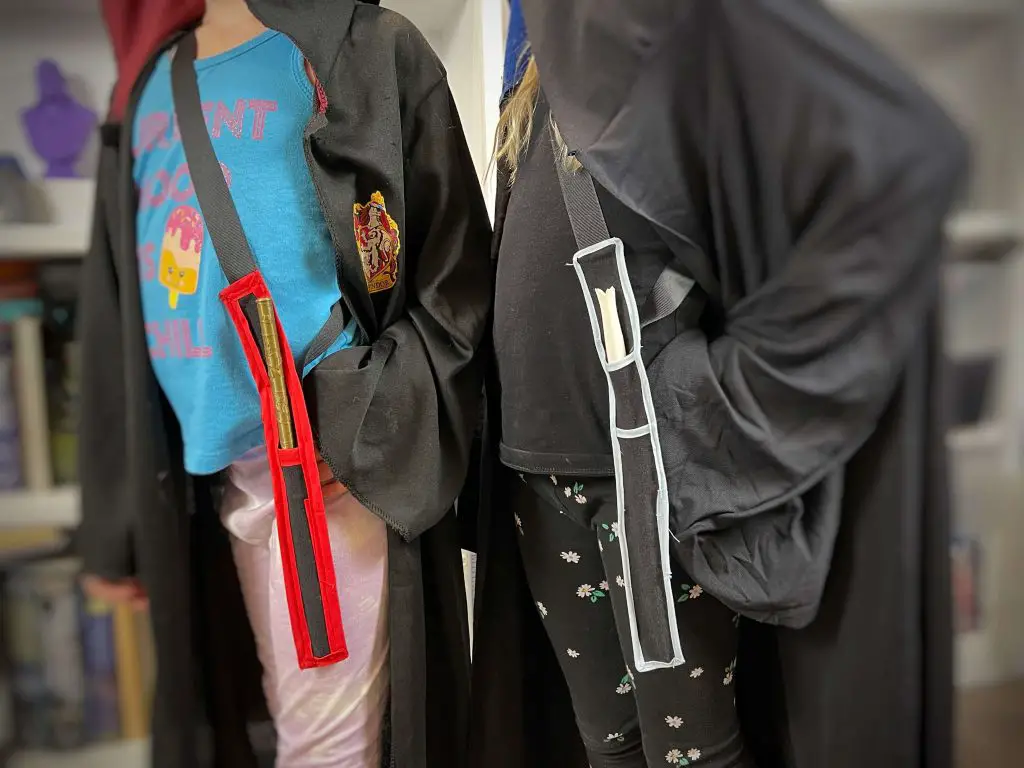
Before you sew the strap on, you should see what hand the wand will be in. If they are right-handed, you will want the purse to sit on the left side and vis versa. This will dictate which way the ribbon should be folded.
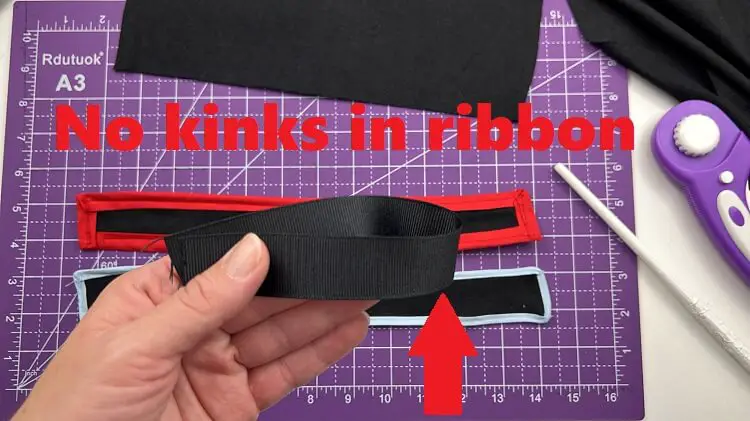
If you are right-handed – you will want to align the ribbon with the top ribbon pointing slightly to the left and the back ribbon going straight up.
If you are left-handed, you will want to align the ribbon with the top ribbon pointing slightly right and the back ribbon going straight up.
In both instances, make sure you have a straight loop and no kinks in the ribbon. Hopefully, these pictures help.
Sew the ribbon onto the back of the top part of the purse.
And that’s it! Your DIY Wand Purse is complete!
Frequently Asked Questions:
How to add a wand pocket to a cloak? Do you need a wand purse?
You can simply add a wand pocket on the inside of the cloak. All you would need is to add the 7” front face of the purse on the inside of the cloak. I considered doing this, but we are not always wearing our cloaks when walking around with our wands, so the wand purse came in handy.
How deep should the wand purse be?
For the original design, I used 7 inches for the front pocket of the purse. However, one of the wands we had was much slimmer than the rest, and it did not stay in very well with 7 inches, so I added an additional length onto the front of the pocket, making it about 9 inches. This depth is really dependent on the wand and the wand holder.
What type of Bias Tape should be used?
I made several wand purses as everyone needed their own, and no one can be left out. Some with thick bias tape and some with thin bias tape.
Thick bias tape is much easier to work with. It will also hold the wand tighter as you can sew farther into the fabric.
Thin bias tape is difficult to sew with if you are new to sewing. There is very little purchase on the fabric, and even using pins to hold everything in place is challenging as there is not much fabric to work with. However, I find that the thin bias tape produces a much clearer and sleeker look.
How long does it take to make a wand purse?
From start to finish, it took me less than an hour to make a wand purse. By the time I made the third one, it was taking probably 15-20 minutes, including all cutting, measuring and sewing.
Did you find this tutorial on making a wand purse helpful?
Was this tutorial helpful? Don’t forget to share your thoughts and comments below. If you like this tutorial on making a wand purse, be sure to check out my other wand-related posts here:
And check out my other Halloween posts here: