Let’s Make a Simply Multi-Color HTV Design
There are so many neat ways to use HTV vinyl. And there are so many different types to buy! You can even purchase multi-colored designs. But if you are like me and try to use up your stock of vinyl before you buy more, including all of your scrap bits, they may be the trick for you. When you have lots of bits and pieces, finding designs to use those can be a challenge. And this is where I learned how to use HTV scraps in one cut to make a multi-color HTV Shirt.
I am not talking about layering HTV. If that is what you are looking for, you can read about that here. I am talking about making a multi-color design HTV shirt. This can use up your scrap bits, or you can cut out specific shapes and sizes. But this creative way to use lots of scrap colors has rocked my world. So, let’s get started.
This post contains affiliate links. I may receive a commission if you purchase an item from one of my links. This will not change the price you pay.

Materials You Need to make your HTV Scrap Design:
- A Shirt – In this tutorial, I’m making a shirt, but this will work with a tote bag, a pillow, a dust cover, or whatever your design is going on.
- Scrap HTV Vinyl in several different colors – I am using leftovers from a bunch of recent projects.
- Transfer Tape – This is the one I use.
- Cutting Mat – When my Cricut Brand Cutting Mats wore out, I started using these DooHalo Cutting Mats, and I have had no issues with them.
- Design program – I use Inkspace and Vectornator and then pull my design into Design Space
- Cutting machine – I use my Cricut Explore Air 2
- Iron/Heat Press – I use my COZ Heat press
Let’s Begin!
Pull out your Scrap HTV Vinyl!
If you make shirts for fun, as I do, you most likely have a bag, a box, a binder, or a storage container full of scraps of HTV vinyl. All different shapes and sizes, big ones, small ones, white ones, black ones, shiny ones, and many, many more.
Pick out a handful of pieces. You can work on color coordinating them, or have them in series from lightest to darkest, or you can have just a random selection, anything works.

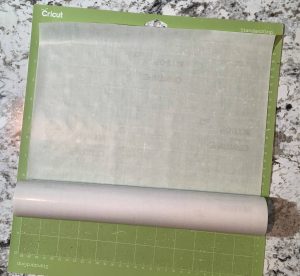
Prepare your Cutting Mat for One Cut
Before you do anything with all of your vinyl, you need to place a piece of transfer tape over your cutting mat. Shiny side down and sticky side up. Also, take the backing paper off.
This will now essentially act like your cutting mat, but it is needed to make this work easily.
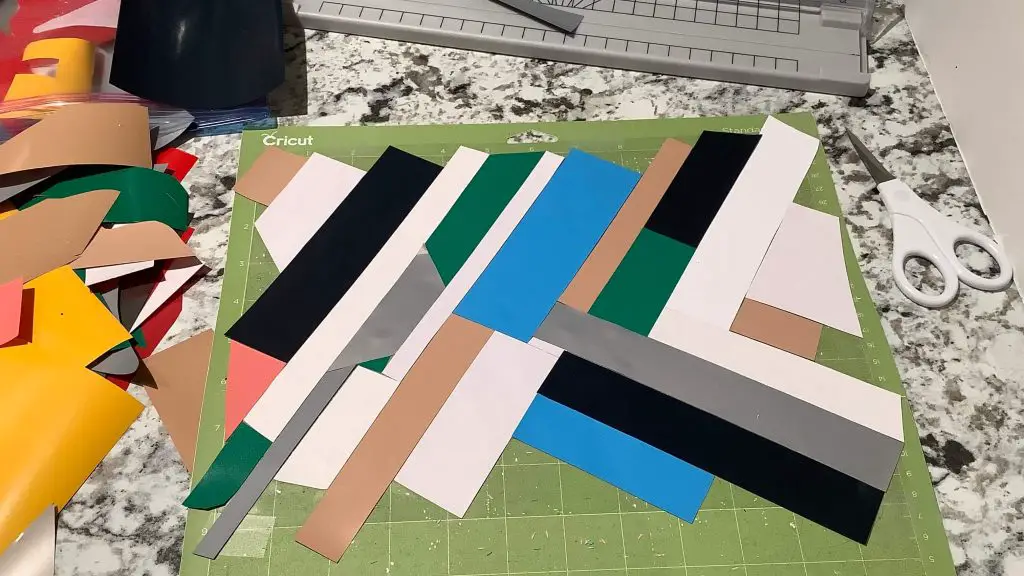
Apply Your Scrap Multi-Color HTV Vinyl Pieces
Using the transfer tape and mat we prepared earlier, start to place all of your scrap pieces of vinyl on the transfer tape, the same way you would when just using the cutting mat. Shiny side down.
Get all the edges to line up the best you can. You may need to cut and trim some edges to make them straight.
When starting out, I recommend just having straight edges. But as you progress with this method, you can start to experiment with more complex shapes, and angles.
Once your cutting space is covered with multi-colored HTV vinyl scrap pieces, you are ready to cut your design.
Prepare Your Design for One Multi-Color Cut
Since we are doing all of the hard work on the mat, all we need to do with our design is to pick one and send it to cut.
Make sure you know the size and the location of it on your mat. We want it to cut in the right spot.
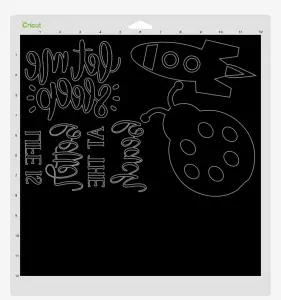
Cut, Weed, and Peel your Design
You have your design picked and your mat ready! Time to send it to cut.
Once it is cut, you need to weed the design. But you have to remember that you are using a piece of transfer tape to hold this all together. So, depending on how you typically weed, this may be a bit different.
You can either:
- Remove the cutting mat from the transfer sheet, or;
- Weed directly on the cutting mat.
I just leave it on the cutting mat and weed all of the HTV off this way.
Then, I pull the whole transfer sheet off the cutting mat.

Press your Design – No Layering Required
Now your design is on your transfer sheet, all lined up perfectly. You just need to press it like you would with normal HTV. Make sure you follow the heating requirements for your vinyl so that you do not burn anything.
Once pressed, peel the transfer sheet and all of the carrier sheets.
And That’s It! You’re Done!

Things I have learned along the way
As always, there are mistakes I made in my first attempts, but over time, I learn how to fix them and almost perfected how to use HTV scraps in one cut, so here we go:
- Do not forget that your Cricut will cut just a bit off the edge of your cutting square, so make sure you have a little bit of extra vinyl around the edges of where it is supposed to cut. You do not want to have most of a design done. Because with this method, it is hard to go back and re-cut that small piece.
- It is a good idea to trim all of the scrap pieces so that they have straight edges. If they do not meet up perfectly, there will be gaps between the vinyl, and you will see the shirt through them.
- You do not really need to be picky with the colors and pieces you select. I have found that most color combinations work great in these designs. So do not get stuck on using new vinyl unless you have a specific color combination or design in mind.
- I am not a fan of heating transfer tape, so I will do a quick 5-10 second press, just long enough to get the vinyl to grab the shirt. I will then peel the transfer tape and do a full press on the vinyl.
- When using scraps, you may have hot and cold peel scrap pieces. Make sure you know which are which, as you can ruin a project if you peel at the wrong time.
- Once you peel all of the carrier sheets off, it is not a bad idea to do a quick extra press to remove any crease lines and make sure the design melts together nicely.
Was this Tutorial on how to use HTV scraps in one cut Helpful?
Did you find this tutorial on how to use HTV scraps in one cut helpful? Let me know your thoughts in the comments below!
If you liked this tutorial, be sure to check out my other tutorials here.
Don’t forget to sign up for my newsletters! You’ll get inside tips on upcoming posts and additional behind the scenes details about what’s happening on the site!
can I use my weeded scraps that don’t have carrier sheets attached anymore for doing this project.
I would guess you can, but you would need to make sure you know which side is which, and you would need to apply it to a carrier sheet/transfer paper. But it could word.