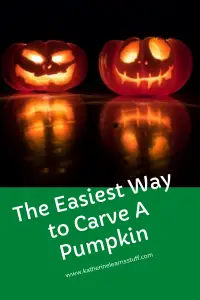
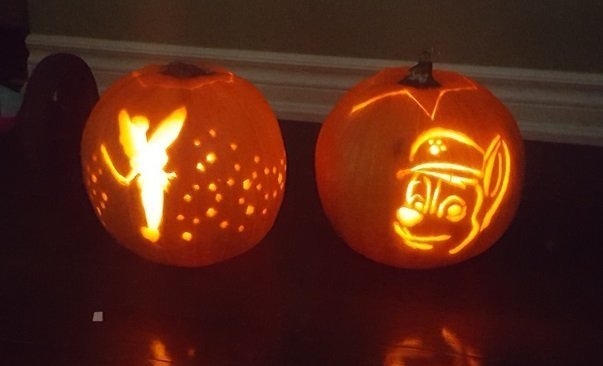
Get your Pumpkins Ready! It’s Almost Time to Start Carving Pumpkins!
Halloween is one of the favorite holidays at our house. We have always gone overboard with scary decorations. We have loud spooky music playing and always give out lots of candy. But the thing I like the best is carving a pumpkin! I am not the best at it however, over time, I have been getting better at perfecting the craft. And the one thing I have learned is this super-easy way to carve an awesome-looking pumpkin. And I’m here to share the easiest way to carve a perfect pumpkin with you!
This post contains affiliate links. I may receive a commission if you purchase an item from one of my links. This will not change the price you pay.
Pumpkin Carving Tutorial
Follow these steps for the easiest way to carve a perfect pumpkin every time! You can make the design as simple as you want or make it something more complicated. Let’s get started!
What You Need to Carve the Perfect Pumpkin
- A Pumpkin – Or you can use a melon or gourd, or turnip? Pro-Tip – keep your pumpkin inside before working on it. Working on a pumpkin that is room temperature is much better.
- A simple coloring sheet of the design you want off the internet
- Pumpkin carving tools – I use a cheap set from the grocery store. I have had them for years. They still work great. You can get this cool one from Amazon. But a steak knife works well in a pinch, as well.
- Tape
Let’s Begin Carving the Perfect Pumpkin!
The first two steps of the process are interchangeable. You can either pick your design first or pick a pumpkin first. But either way, you need both a design and a pumpkin!
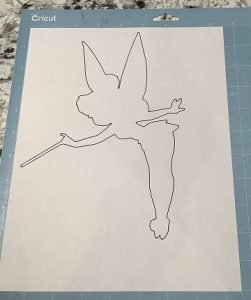
Pick the Design for your Pumpkin
The first thing you need to do is pick the design. If you select your design first, it will help you with the pumpkin selection later.
Once you have an idea of what you want, google it. If you are looking for a Halloween theme, you can find black and white pictures or coloring pages. I suggest you look for something like “pumpkin carving templates” as a starting point. It will help the creative juices to start flowing.
It is key. You need to find a picture of what you want to use.
Print it.
If you are like me and do not have a printer but have a Cricut, you can print it with your Cricut. Simply follow this tutorial on How to Make Coloring Pages with a Cricut.
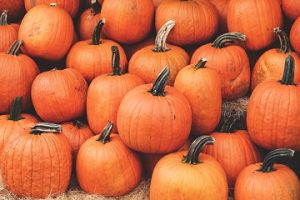
Pick your Pumpkin
Go out and pick a pumpkin! You can get them anywhere. Go to a farm or the grocery store, or anywhere you want. I find that the grocery stores have the best prices, but the farms are local… so pick your poison…
But pick out the best pumpkin!
You need the pumpkin to be big enough for the design that you printed off to fit on the side of a pumpkin.
Or pick a pumpkin that just calls to you, and select a design afterward.
Get Dirty and start Carving!
Now it’s time to get dirty! Cut the peduncle out (stem) of the pumpkin. Cut it out in a circle or a jagged shape. Make sure you angle the knife so that there is some flesh left underneath. This way, the top won’t fall back into the pumpkin. If your peduncle is cut straight and falls into the pumpkin, you can rotate it and have it sit on top of the pumpkin but not entirely fit in.
Pull all the guts out of the pumpkin. If your pumpkin has been outside in the cold, this will be cold on your hands, so be brave!
If you like pumpkin seeds, you can salvage those and bake them, but I’m not a fan of pumpkin seeds, so they just get tossed at my house. But you can learn to roast pumpkin seeds if you want here.
Now, for the Precision Work
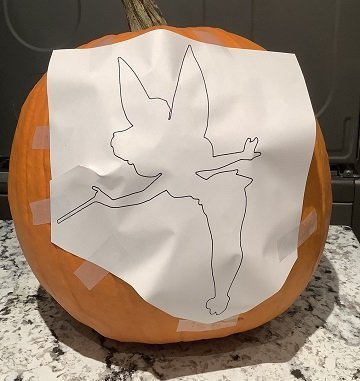
Take the picture that you printed off and tape it onto the pumpkin.
Hopefully, your pumpkin has been inside and is warm because if not, the tape won’t stick well once condensation starts to form on the pumpkin.
Tape it in several spots to secure it to the pumpkin.
Take your precision tools and start cutting. Or, if you’re like I was several years ago, use your steak knife and have at it!
I prefer to use the small cutting knife as I find it has the best control.
Using your tool of choice, start cutting the pumpkin through the picture.
Keep cutting until finished.
You may need to add more tape to your paper. As you start to cut, the design may start to move around. You want the design to stay in one place so that it doesn’t slide around the pumpkin while being carved. This can distort your carved image.
Final Cleaning
Do a final cleaning to get rid of any guts and make sure the design is visible.
Add in a candle or a battery-operated one, and that’s it!
And That’s It, You’re Done! You have Carved the Perfect Pumpkin!
Things I have learn about carving the easiest Perfect Pumpkin
Over the years, I have carved numerous pumpkins, so here are some pointers that I would like to share with you:
- Cold pumpkins are terrible to work with! Your hands will freeze, and your design won’t stick, and the paper will get wet faster and rip when you don’t want it to. A cold pumpkin just makes for a miserable pumpkin carving experience.
- Using the right tools helps but is not necessary. You can still cut your hand with a dull knife. So try to remember to carve away from your hands.
- Pumpkins don’t last very long after they are carved. You have about 2-5 days before they start to rot. If you are not going for the rotting pumpkin look. Carving your pumpkin 1-2 days before Halloween will produce optimal results.
- When your pumpkin is complete, it is often required to go back and make adjustments to the design. You will be able to see these spots after you put the candle in. Narrow areas don’t always allow light to pass through, so they may need to be widened.
- Do not forget this is Halloween, and it is supposed to be fun! So do not stress out if it does not work! You can always try again this year or wait until next year!
- Happy Halloween!
Was this Tutorial Helpful?
Did you find this tutorial on the Easiest Way To Carve A Perfect Pumpkin helpful? Let me know your thoughts in the comments below!
Check out some of my other Halloween related posts:
If you liked this tutorial, be sure to check out my other tutorials here.
Don’t forget to sign up for my newsletters! You’ll get inside tips on upcoming posts and additional behind the scenes details about what’s happening on the site!
these look so cute and i’m sad that here in serbia nobody is doing that 🙁
sadly,i was never taught how to carve a pumpkin so i won’t be participating in this fun activity
Pumpkin carving is one of my favorite activities. Hopefully one day you can try it out!
My pumpkins always end up looking very unimpressive haha! This is a great guide, I’ll definitely be taking some points from it.
You definitely should try it! I’m not good at free hand drawings, so this always helps make the perfect pumpkin.
This is a super fun idea! My kids have already carved traditional jack-o-lanterns this year, but I know they will want to pick a picture and carve another one!
My kids are always eager to help, and they each get to choose their own design and their own pumpkin.
Great tips. Such a fun way to celebrate Halloween.
It really is! Hopefully you can carve a pumpkin also!