Working away on Christmas preparations, and I need a few more new ornaments for this year, so I have opted to make some simple paper Christmas ornaments as well. These are super cute and don’t take much time to make! So, let’s get started making our simple paper Christmas Ornaments.
As an Amazon Associate, I earn from qualifying purchases. This post contains affiliate links. I may receive a commission if you purchase an item from one of my links. This will not change the price you pay.
Supplies needed for Simple Paper Christmas Ornaments
This is a quick list, as it is a simple craft:
- Cardstock – For this craft, I used red and white Recollections Cardstock. But you can use seasonal cardstock to make the ornaments more festive.
- Glue & Glue Gun – I use my glue gun because it dries much faster than regular craft glue, but you can use either. When using craft glue, I use Bearly Art Precision Craft Glue.
- Ribbon – any color will work, but a thin ribbon is better.
- Cutting machine of Scissors – I used my Cricut to cut the shapes out, but scissors work also.
- About 15 minutes.
Let’s Start Making our Simple Paper Christmas Ornaments
Cut out the Shapes
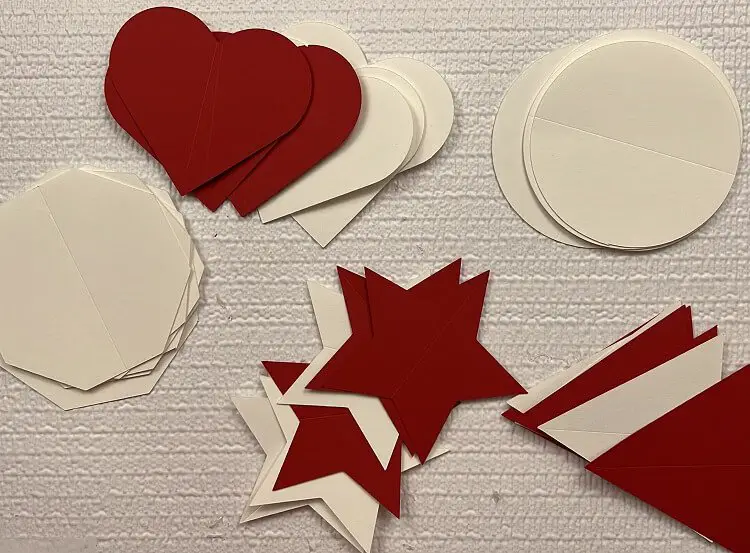
I wanted to make several different designs for my ornaments, so I cut out the following shapes:
- Circles,
- Octagons,
- Hearts,
- Stars
- Triangles
You can use any shape, as these are readily available in Cricut Design Space, but any shape will do.
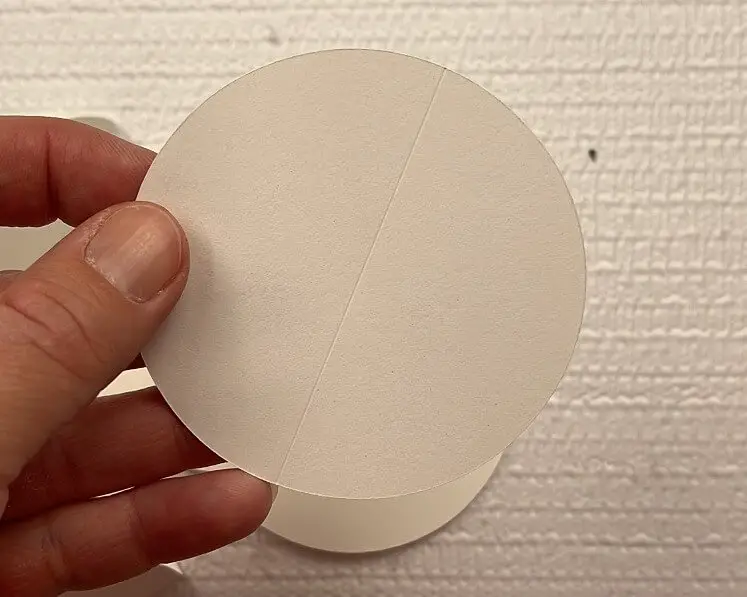
When preparing my shapes in Design Space, I added a score line to the middle of the shapes to help with folding later.
You don’t need many pieces of each shape, but I recommend at least 4. I cut out 6 of each. Keep in mind the more you have, the more ridges your ornament will have.
Once all of the pieces are cut, fold them down the middle. This is where doing it with the Cricut comes in handy, as I did not need to score by hand to create a nice crease for folding.
Assemble your Simple Paper Ornament
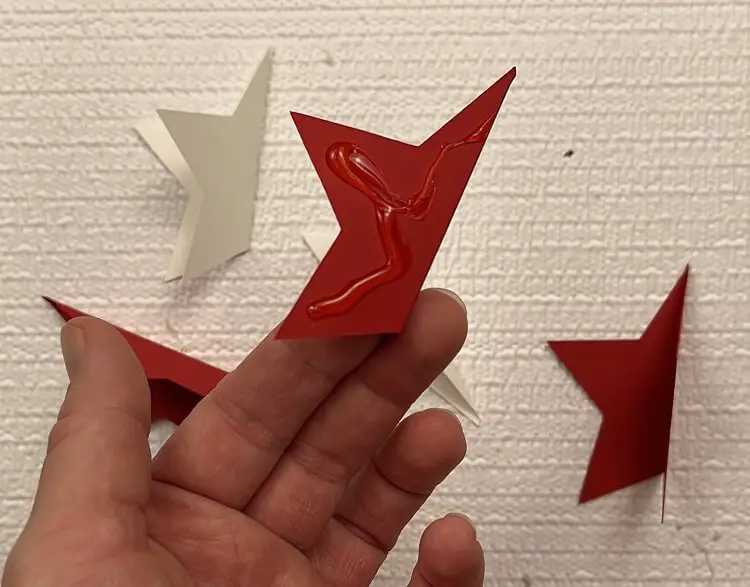
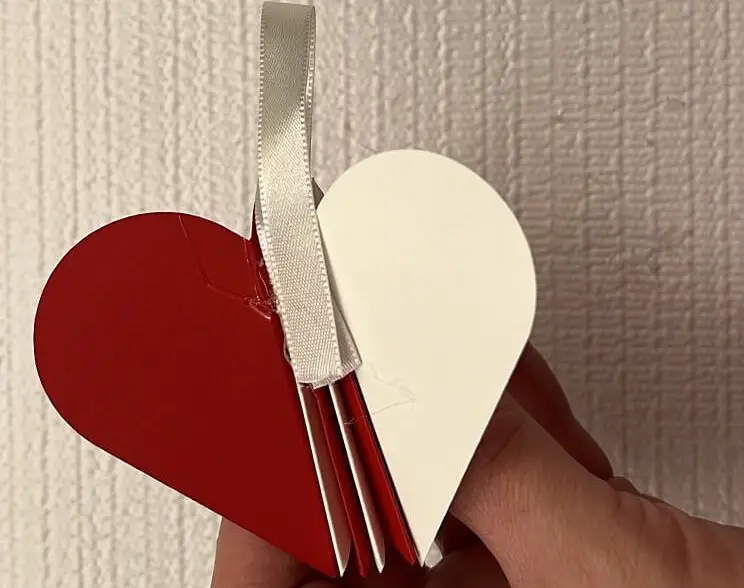
Now that all your pieces are cut and folded, you glue them together. I used my glue gun and hot glue but crafting glue will work.
Glue the pieces today, one by one. Before you glue the last piece to the first piece, add a bead of glue onto the spine of the ornament and place the ribbon on it. Once the ribbon is in, glue the first and last pieces together.

And that’s it! Your Simple Paper Ornament is complete!

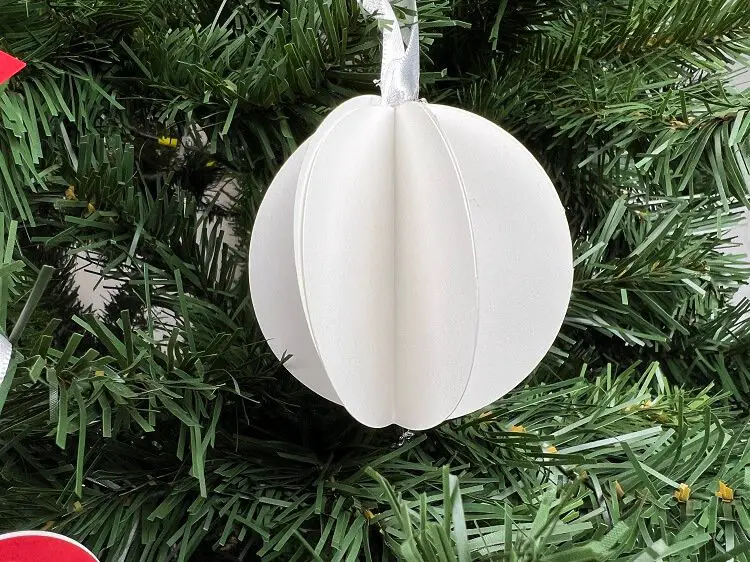
Simple circle paper ornaments
Circles are simple to make and look very similar to a Christmas bulb. For my design, I only used 6 circle cutouts, but if I had used more, there would have looked fuller inside.
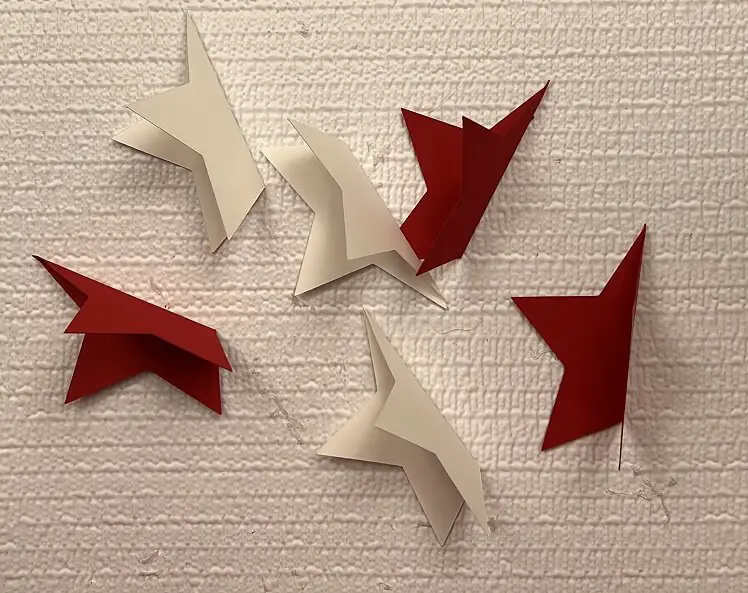
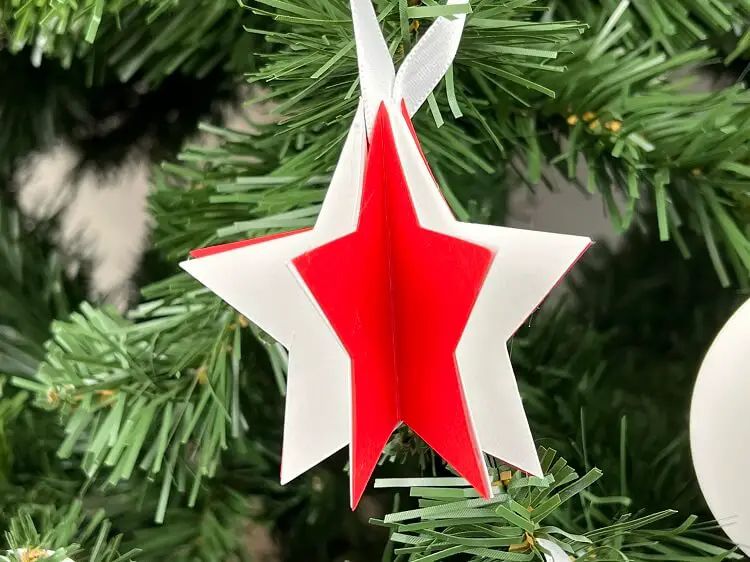
Simple Star Paper Ornaments
Stars are a great addition to the Christmas tree and look beautiful with an alternating pattern. I used only 6 star cutouts, and for this design, I feel they turned out great. If I had used more, the ornament would have been too busy.
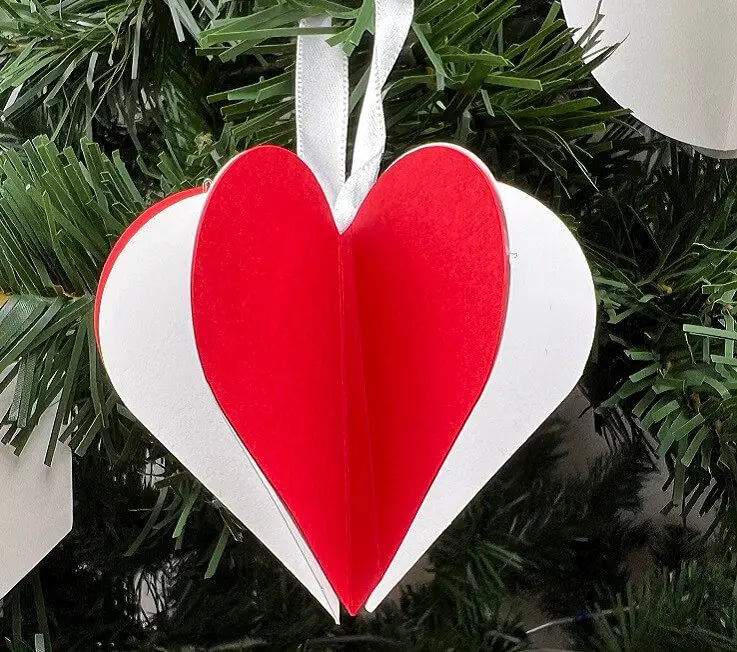
Simple Heart Paper Ornament
Paper heart ornaments are great for any occasion, not just Christmas. An alternating paper and a simple solid pattern look great with this design. More heart cutouts would have provided a fuller look, but with the alternating pattern I chose, I think 6 was the perfect number.
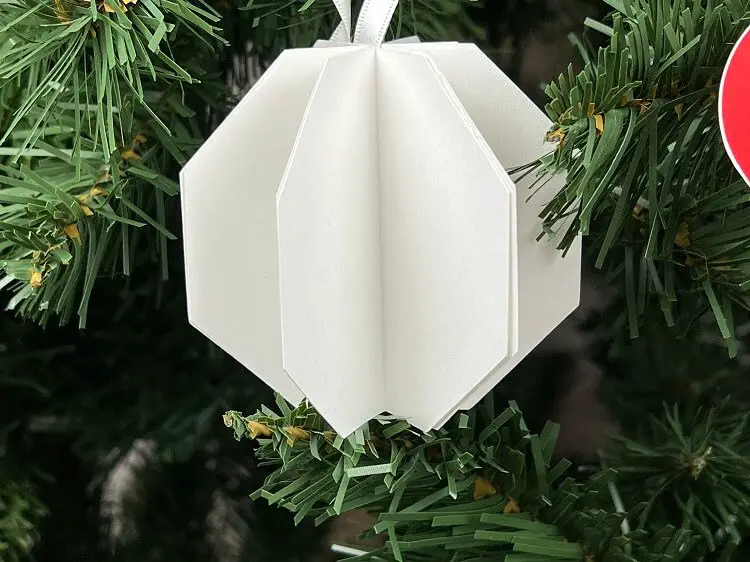
Octagon paper ornaments
The octagon paper ornament was easy to assemble. I had my fold go through the center of one of the sides, giving it more of a square feel. If I had folded the octagon along two corners, it would have looked more like a Christmas bulb. This design would have looked better as a multi-colored ornament with more octagon pieces.
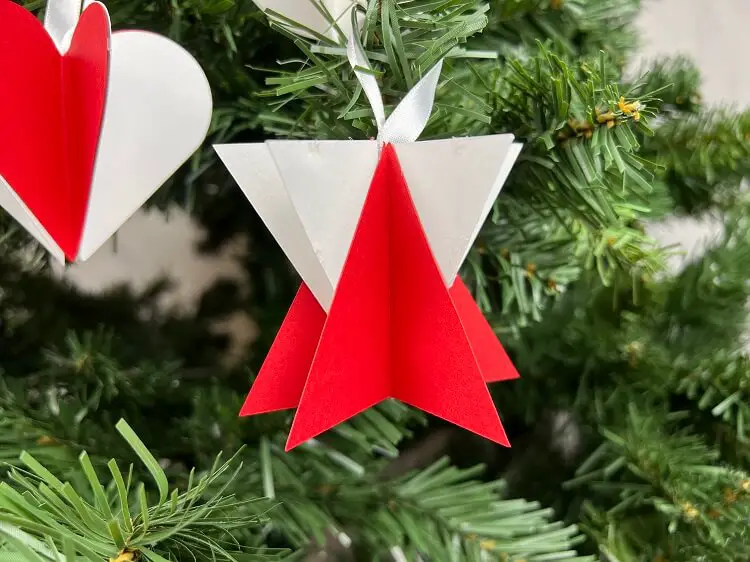
Rotating Triangle Paper Ornament
For the rotating triangle paper ornament, I chose to rotate the location of the triangle tip on each glued section. This gives the ornament a bit more of a geometric design. It took a bit of effort to get the pieces to glue together properly as there was less area to apply the glue, but the final result was great.
Frequently Asked Questions:
how to make multi-color paper ornaments
There are many ways to make multi-colored simple paper ornaments. If you are looking for a simple 2 color combination, alternating between the two colors in an ABAB sequence works best.
How long does it take to make a Multi-color paper ornament?
Including paper cutting time, you can easily complete one ornament in less than 15 minutes. I completed 5 different shapes in under 30 minutes.
How to make a triangle paper ornament?
Using triangles can become tricky as one end is pointed and does not leave much room for gluing. What I found to be a nice solution was to alternate the point of the triangle facing up and down to give it a nice visual effect.
Did you enjoy this tutorial on simple paper ornaments?
If you enjoyed this tutorial on making simple paper ornaments, let me know in the comments below. Let me know if you tried it out and how it went!
If you liked this paper craft, check out my other paper crafts here:
Also, check out these cute Paper Christmas Balls as well!


Very happy to find your site. I look forward to doing the ornaments with my grandkids😊
I’m so glad to hear that! I hope you enjoy making the ornaments! Let me know how they turn out!
Simple Paper Christmas Ornaments we’re very simple and fun to make. Looks great on my tree.
I’m so glad they worked out for you! Thanks for sharing!