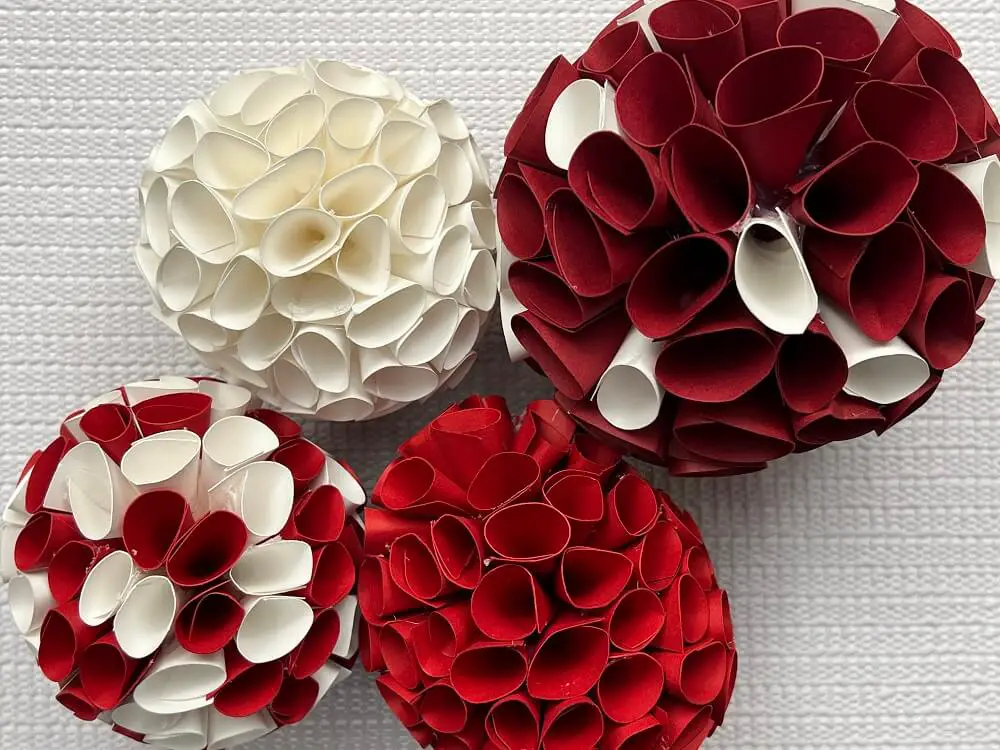
With Christmas on the way, I have been busy getting my Christmas crafts started. I’m behind schedule as usual, but not as behind as usual, so I’m feeling pretty good. And the first one on my list this year is a Paper Christmas Ball. I’m not sure that is the best name for them, but here we go. Let’s make some Paper Christmas Balls.
As an Amazon Associate, I earn from qualifying purchases. This post contains affiliate links. I may receive a commission if you purchase an item from one of my links. This will not change the price you pay.
Supplies needed for Paper Christmas Balls
This is a quick list of supplies:
- Cardstock – You can use any Christmas color or themed paper. I recommend that you make sure it is solid-core cardstock so that the cut lines are not white.
- Glue – you will need lots of glue, so I recommend a glue gun and hot glue.
- Optional – Cutting machine – I used my Cricut Explore Air 2 to cut the paper, but you can do it by hand with scissors.
- Optional – Ribbon for hanging.
- About 45 minutes per paper Christmas Ball.
Cut your Cardstock
I used my Cricut to cut the cardstock, but you can use scissors. I find that the Circut does a better and faster job than I can do by hand.
So, I made a semi-circle in Design Space. I made the height 3-inches. Then, I duplicated them until I had enough to cover my 8″x11.5″ paper. In my case, I was able to fit 18 semi-circles per page. This required some manipulation, but it was worth it.

I then cut out 4 sheets of paper like this. This gave me 72 semi-circles. They don’t need to be perfect.
Once they were all cut by the Cricut, I cut them in half with scissors. I find that this part was faster by hand and wasted less paper. So, I essentially had 144 quarter circles.

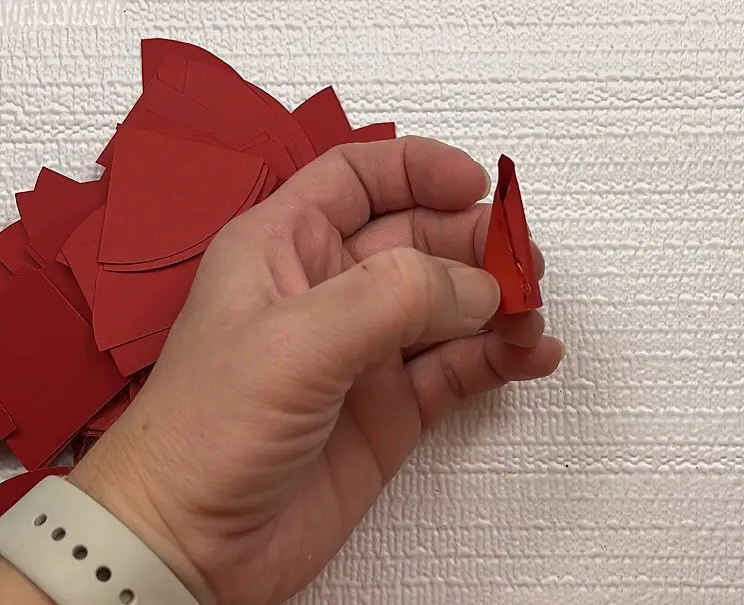
Roll your quarter circles into little trumpets
Once all the pieces are cut, it is time to roll them. You want them to look like little trumpets.
So, simply giving the quarter circle a bend, and applying glue to one edge, glue the quarter circle into a trumpet.
Repeat this step for all 144 pieces.

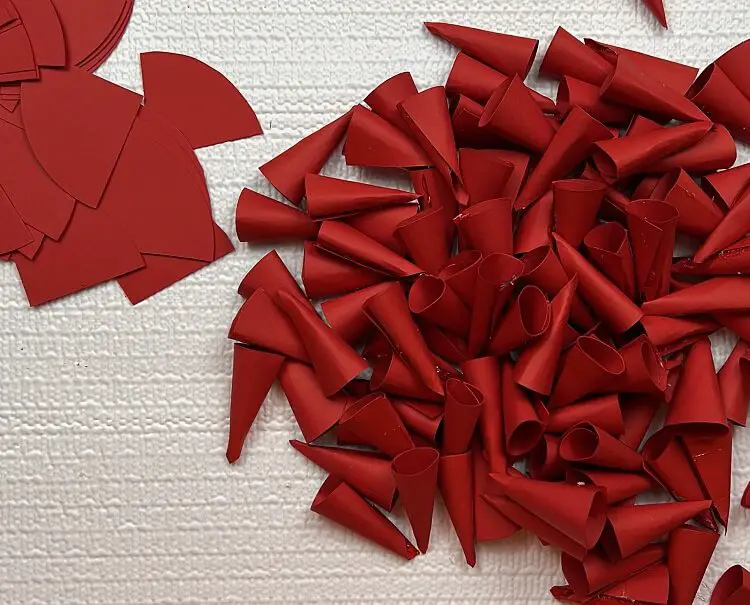
This is the longest part of the project, so you can watch some TV or something else while doing this.
Assemble the Paper Christmas Ball
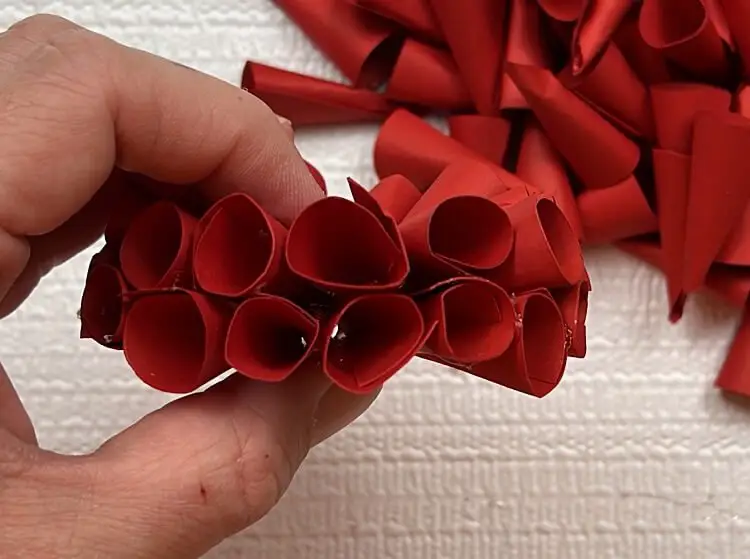
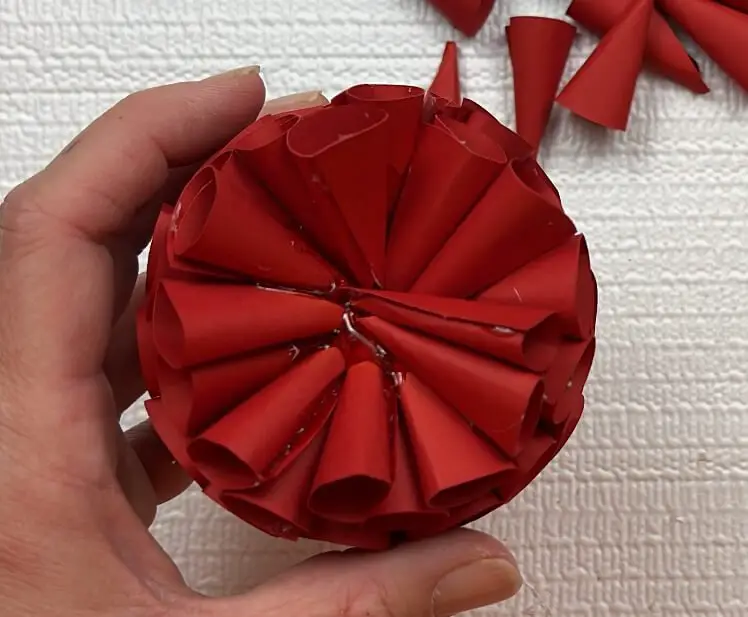
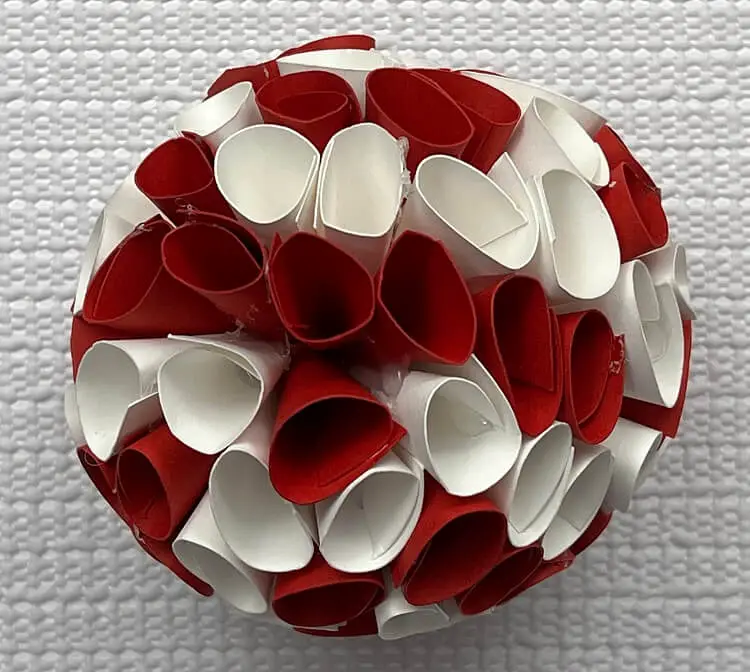
When assembling the paper Christmas balls, it is best to start with the center. Simply apply glue to one side of a trumpet, and attach another trumpet to the side. Continue this until you have a circle.
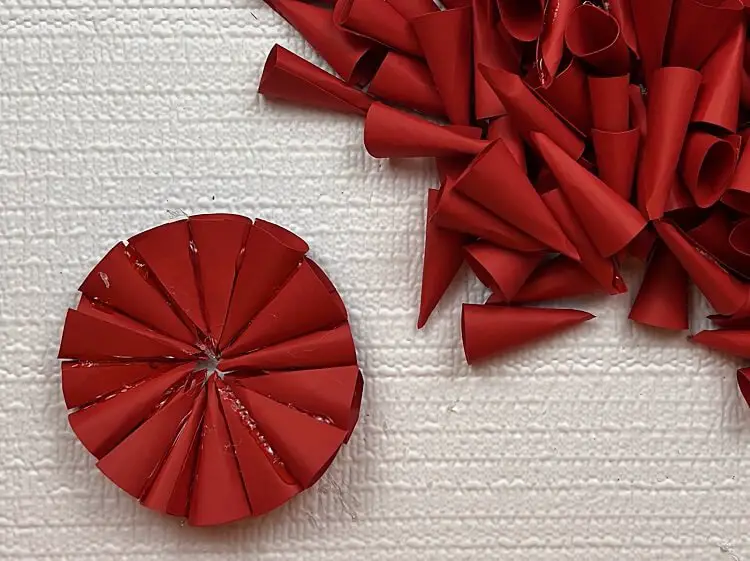
Once the circle is complete and dry enough to handle with your hand and not fall apart or wobble too much, you can start to glue on the rest of the trumpets.
I find that pouring a bunch of hot glue onto the top of the circle piece that was just created and then placing the next layer of trumpets on works best. I also found that this was the quickest way for assembly.
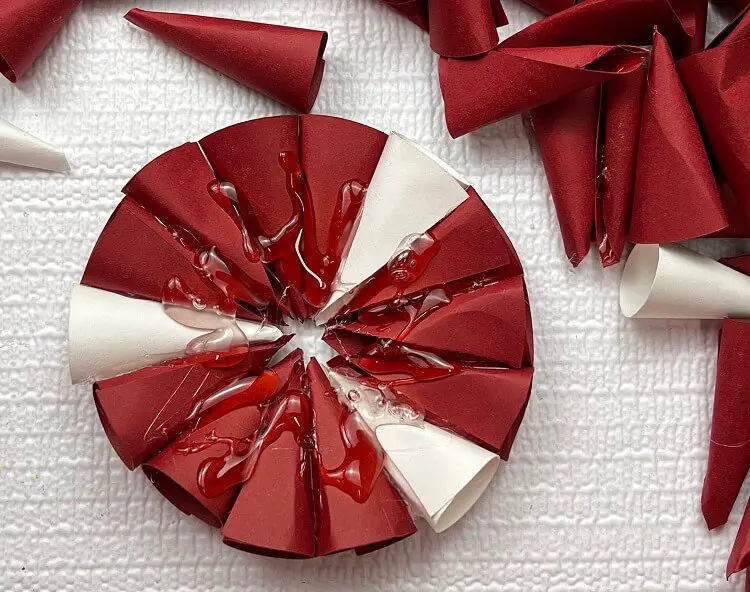
Continue this step for 2-3 layers.
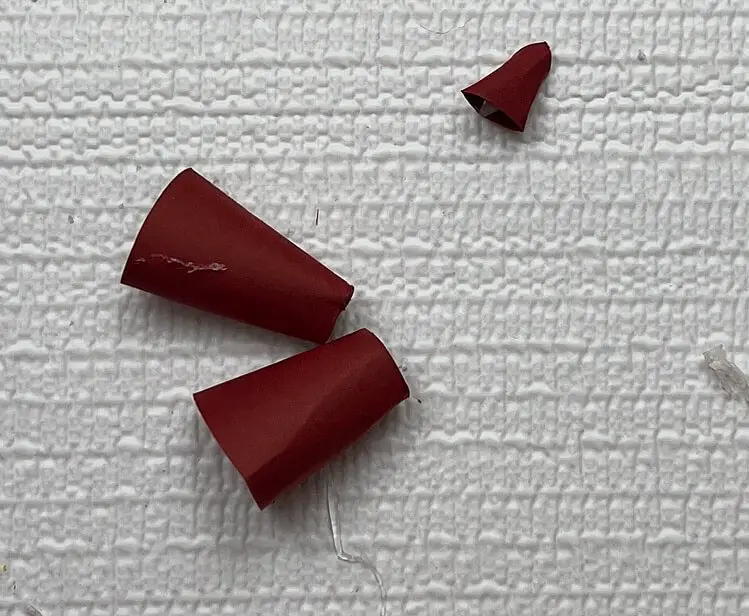
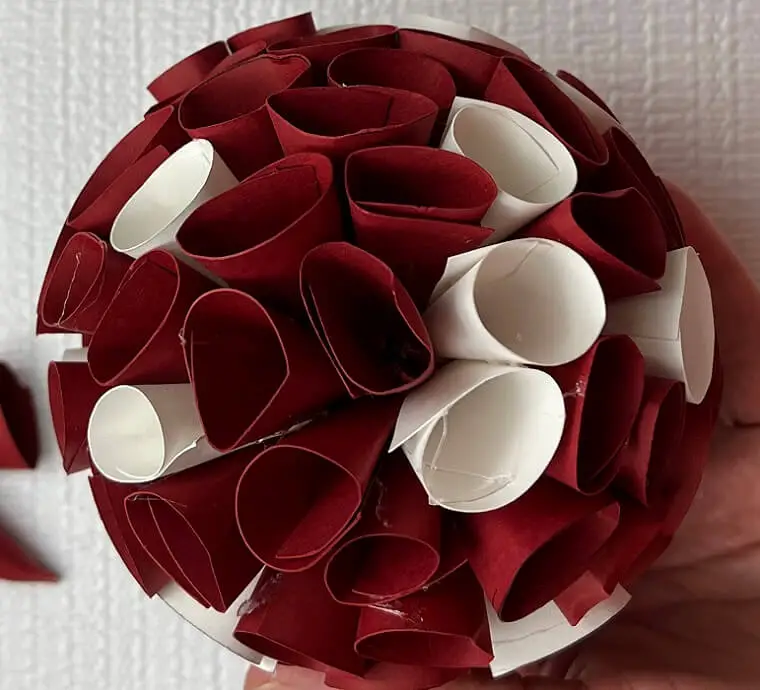
There will be a point when the ball starts to curve, and the trumpets no longer seem to fit all the way in, at about the third or fourth layer. Cut off the tip of the trumpets, about 1/4 of the full length, and then use those pieces. Keep putting them onto the ball.
Once the first half is done, you can hold it in your hand and help shape it into a half-ball. The nice thing about having so much hot glue inside is that it will still be hot and pliable at this time. Get the half circle mostly shaped, and then continue the above steps for the other side.
Once both sides are done, hold the ball in your hand and continue to shape it with your hands, as the glue will still allow this. You can also look for any holes in the ball and add additional trumpets if you wish.
Optional Ribbons on Paper Balls
If you plan on hanging the paper ball adding a ribbon is quick and simple. Cut the ribbon to the length you want, typically about 4-6 inches, put some glue into an opening in the ball, and push the ribbon in. I used 1″ ribbon on some of the paper Christmas balls and found that it was too thick for the 3″ ball.
And that’s it! Your Paper Christmas Ball is complete!
Frequently Asked Questions
How big will a Paper Christmas Ball Be?
The size of the ball all depends on the size of the semi-circles that were cut out at the beginning.
For reference, if you use the 3″ height and 1.5″ width that I did above, the Christmas Ball will be about 3.5″ in diameter.
For a 4″ semi-circle, it will be about 4.5″ in diameter.
This all depends on how tightly you squeeze it all together. But in theory, the paper Christmas ball should be the same size as the height of your semi-circle.
What size should I make the Paper Christmas Ball?
This is entirely up to you. However, some things I have learned while making these. The smaller the quarter circles, the harder they are to manipulate into trumpets and the harder it is to glue them all together. I found that a 3″ and a 4″ semi-circle were a good size. The 2″ was very hard to work with and resulted in me gluing my fingers more than the paper.
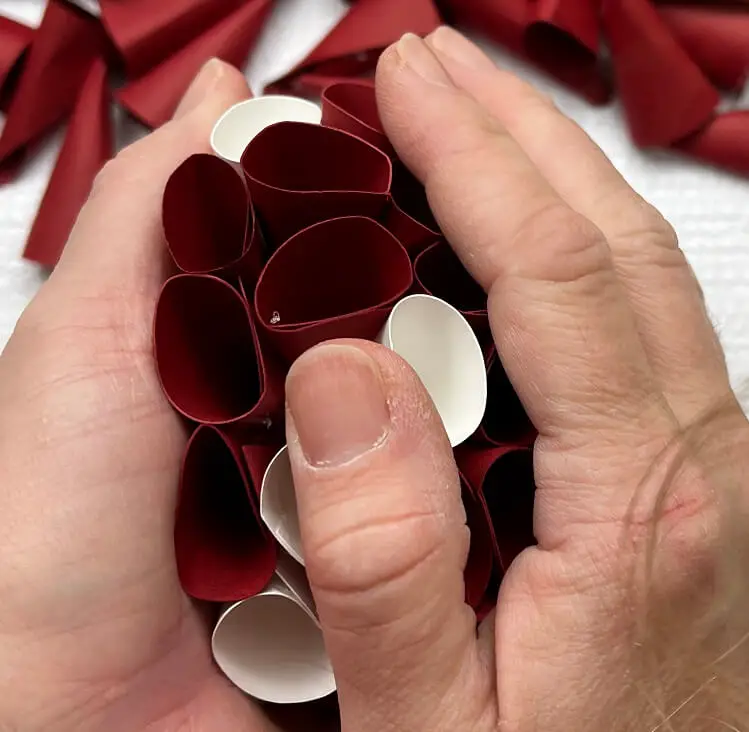
Multi-Color Paper Christmas Ball
If you want to make multi-colored paper Christmas balls, it is very simple. Instead of using one color of cardstock, you can use 2 or 3 or more different colors. Simply think of a color ratio that you want to use and glue the trumpets in at that ratio.
For example, if you have:
- 2 colors, you could do a 1:1 ratio – for every one white you add one red.
- 2 colors, you could do a 1:5 ratio – for every one white, you add 5 red
- 3 colors, you could do a 1:1:1 ratio – for every white, you add one red and one green.
The options are endless, you don’t even need to have a ratio planned, simply gluing the trumpet together randomly also looks beautiful.
What can Paper Christmas Balls be Used for?
Paper Christmas balls can be used for many different types of decorations, such as:
- Christmas Tree ornaments
- Accent pieces on your mantle,
- Additions to a centerpiece on your table
- Hanging ornaments off of lights/chandeliers
Did you enjoy this craft?
Did you enjoy this craft? Let me know if you tried making a paper Christmas ball? Let me know in the comments below!
If you liked this paper craft, check out my other paper crafts here:
And, check out my other Christmas paper crafts:


Loved your Christmas balls craft! Will try it on my own. Thanks!
Thanks so much! I’m really happy with how they turned out! I hope yours turn out awesome too!
i love this idea. Going to make some tomorrow. Thank you.
I’m so glad to hear that! Let me know how they turn out!