I’m jumping on the composition notebook cover bandwagon. I was asked about this the other day, and I fell down the rabbit hole… and so today, I’m walking you through how to create your own custom-designed composition notebook cover. This is a fun project where you’ll learn how to design fun covers in Canva – using both the free version and Canva Pro’s AI image generator. I’ll also show you how to print, apply, and protect your designs so your notebooks look amazing and last longer.
This is a fun DIY project for back-to-school season, journaling, or making your notebooks stand out. Let’s jump in!
As an Amazon Associate, I earn from qualifying purchases. This post contains affiliate links. I may receive a commission if you purchase an item from one of my links. This will not change the price you pay.
Supplies Used for Composition Notebook Cover
Supplies! We need supplies! Here’s what we need to bring this project to life:
- Sticker Paper – I used Koala Inkjet Sticker Paper (glossy finish), as that is what I have in stock, but any full sheets of sticker paper will work.
- Holographic protective sticker sheets – I use a variety pack that has plain, stars, confetti, and dots. This is optional. I used this as added protection to keep the design intact longer. My kids can be rough with their books.
- Scraper with a felt edge (to apply sticker paper smoothly) – Alternately, you can use a ruler, a squeegee or a burnishing tool. The felt edge reduces scratching on the holographic sticker paper.
- A paper cutter for cutting the long sections of the sticker paper. Scissors will also work.
- Craft knife and a ruler – for final precision cuts.
- Painter’s tape – Optional. I did this to keep my composition book in place.
- Standard composition notebooks.
- Printer – I used my Epson Eco-tank 2850.
How to Measure a Composition Notebook
Before you start designing, you’ll need the correct measurements for your composition book.
The book I purchased has the size written on the front of the book, but not all books will have that. For my book, the size is 9 ¾ inches tall by 7 ½ inches wide. The width is measured right to the edge of the page. We want our design to be slightly smaller so that some of the black spine of the book is uncovered—it gives your notebook a classic look and prevents issues with placement.

To be safe, I will design my cover at 7 inches wide by 9.75 inches tall, which gives enough coverage while keeping the spine visible.
Not every notebook lists the size on the cover, so measuring with a ruler is the best way to get it right.
Making a Composition Notebook Cover for FREE with Canva
If you’re using Canva’s free version, it’s still easy to make stylish covers.
Start by creating a custom-size document with your book’s measurements (7 x 9.75 inches). Be sure to set your dimensions to inches before typing them in—otherwise, Canva will default to pixels.
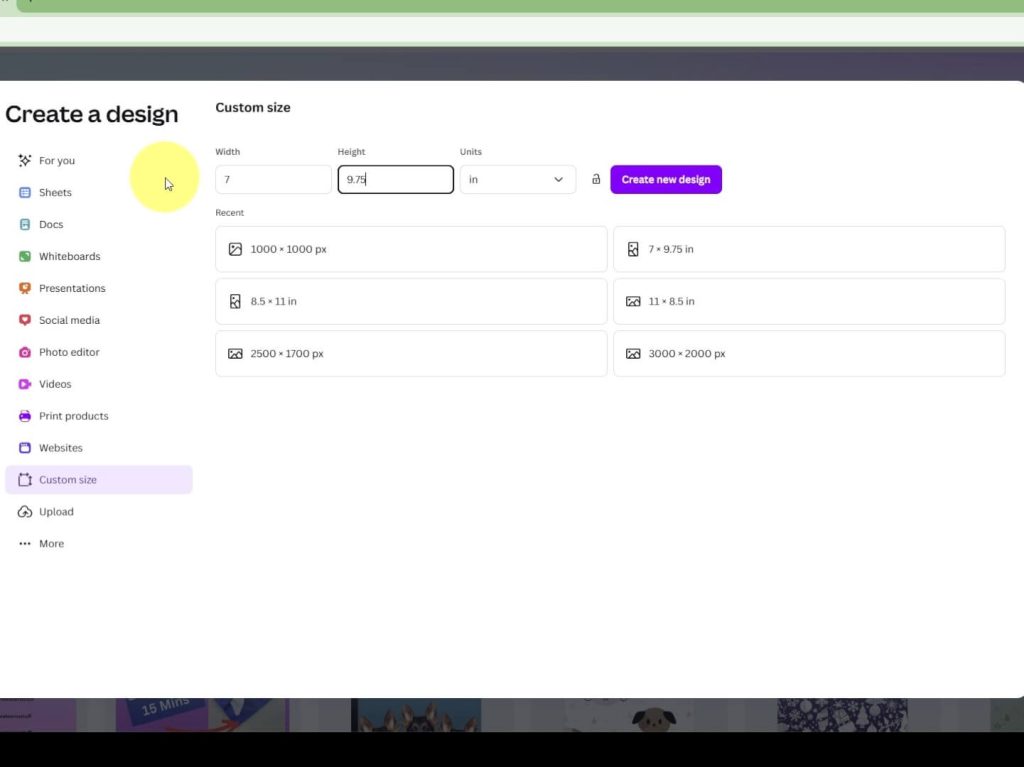
Once you have your blank design space, search for free elements like patterns, wallpapers, or illustrations. Avoid items with the crown icon since those are Pro-only. In this case, I typed in “dog wallpaper”. There was nothing that I liked in the dog category, but I found some cute cats instead. I placed the design on my blank canvas and pulled the corners so it would cover the whole canvas.
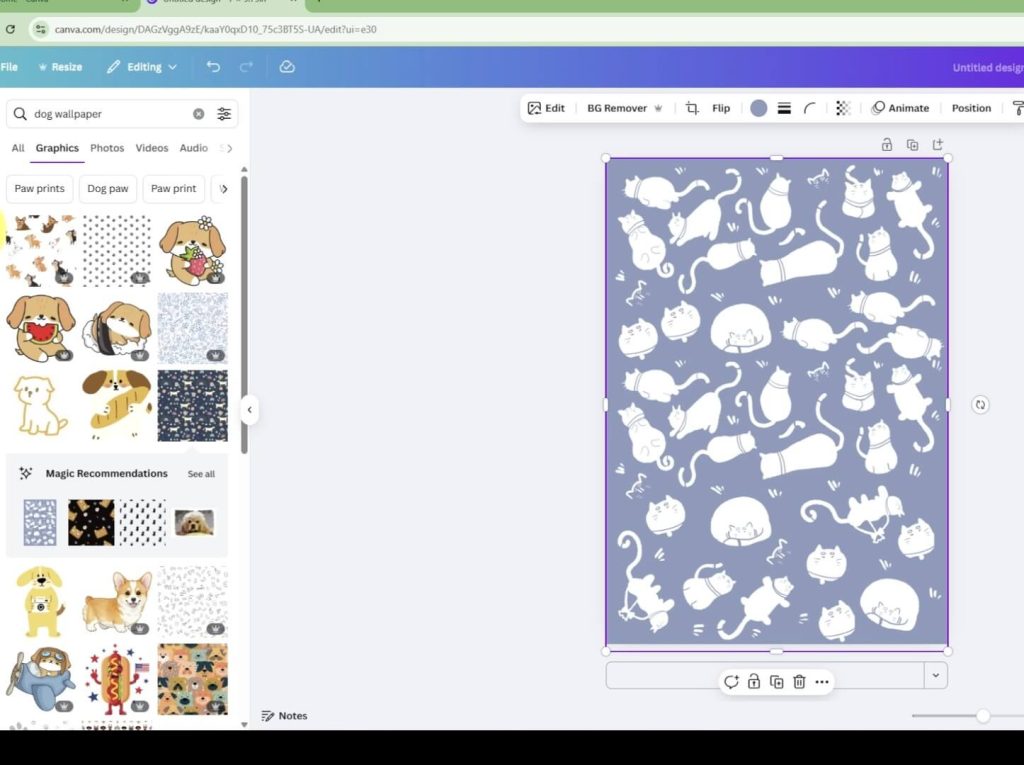
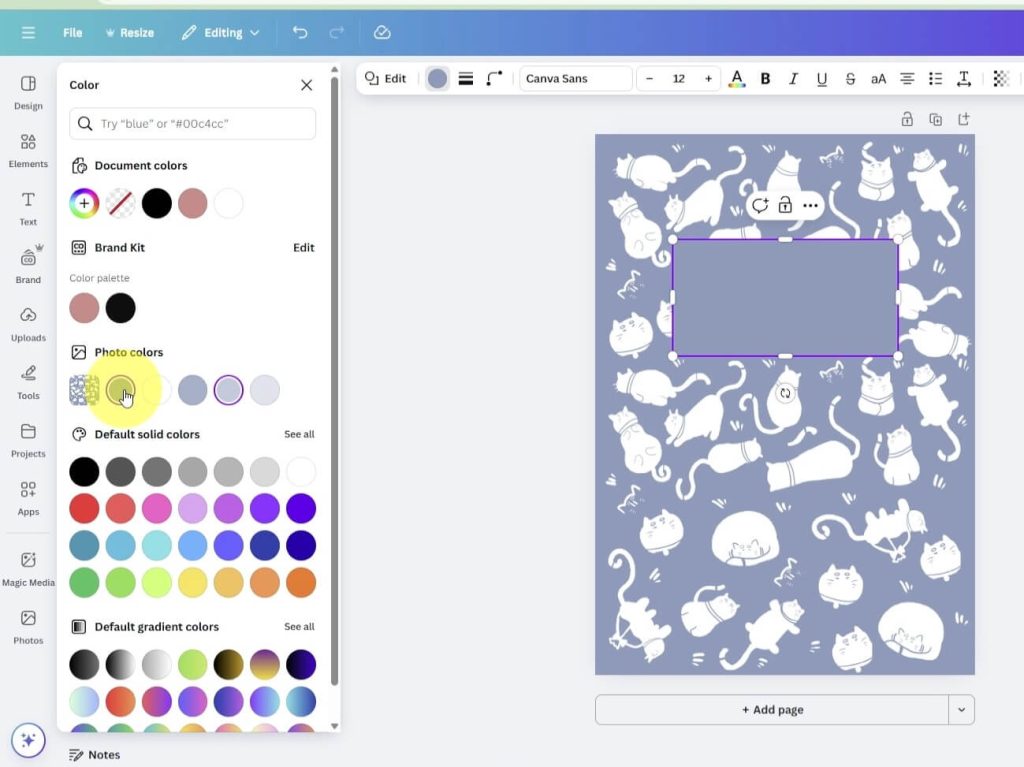
From there, I went to the elements toolbar on the left side and typed in “rectangle”. I pulled in a black rectangle and placed it in the top third of the design. Clicking the color circle, I adjusted the color to match the color scheme of the background.
Once happy with the placement, I did the same thing with text. I picked a “header”, wrote the name, and moved it over the rectangle and centered it the way I liked. You can also change the text type to a different font, instead of the standard.
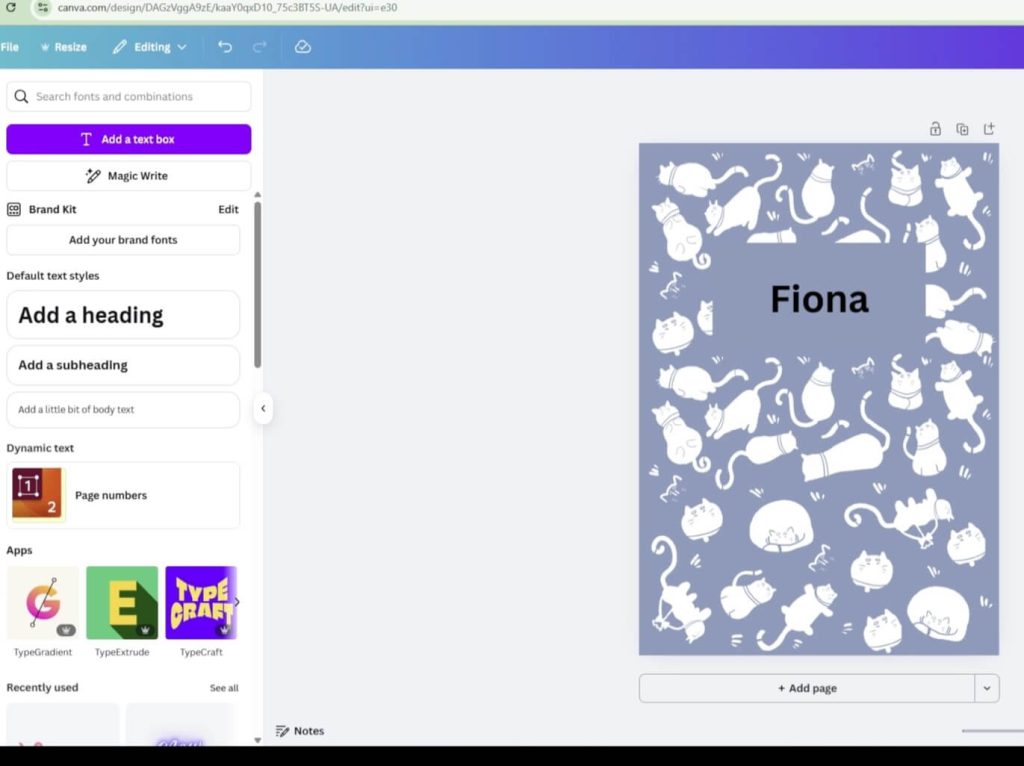
Now you have the front of the book complete.
We need to make a back cover as well. This part is faster as we have done the heavy lifting on the front cover. Simply hit the duplicate page icon above the top right corner on the first page. This will copy your first page, and we can make some quick changes.
All that we need to do is delete the text with the name and the rectangle, and our back cover is complete.
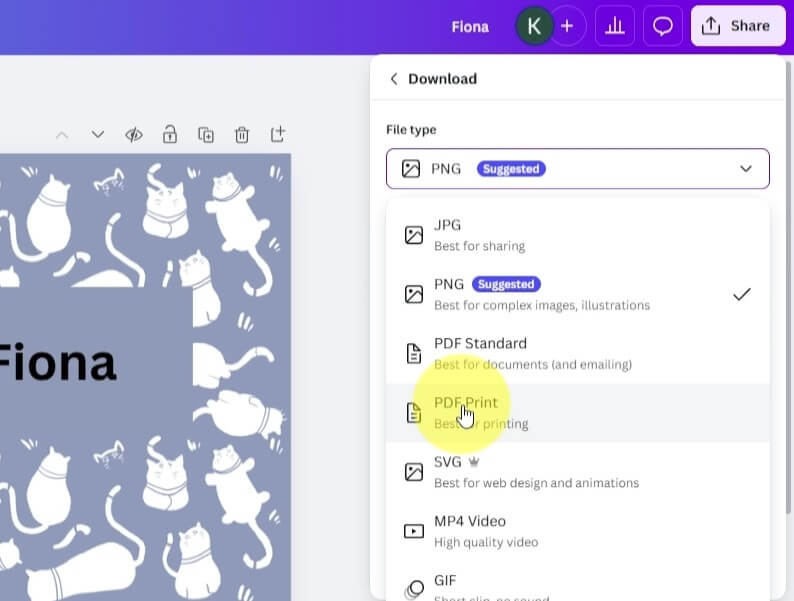
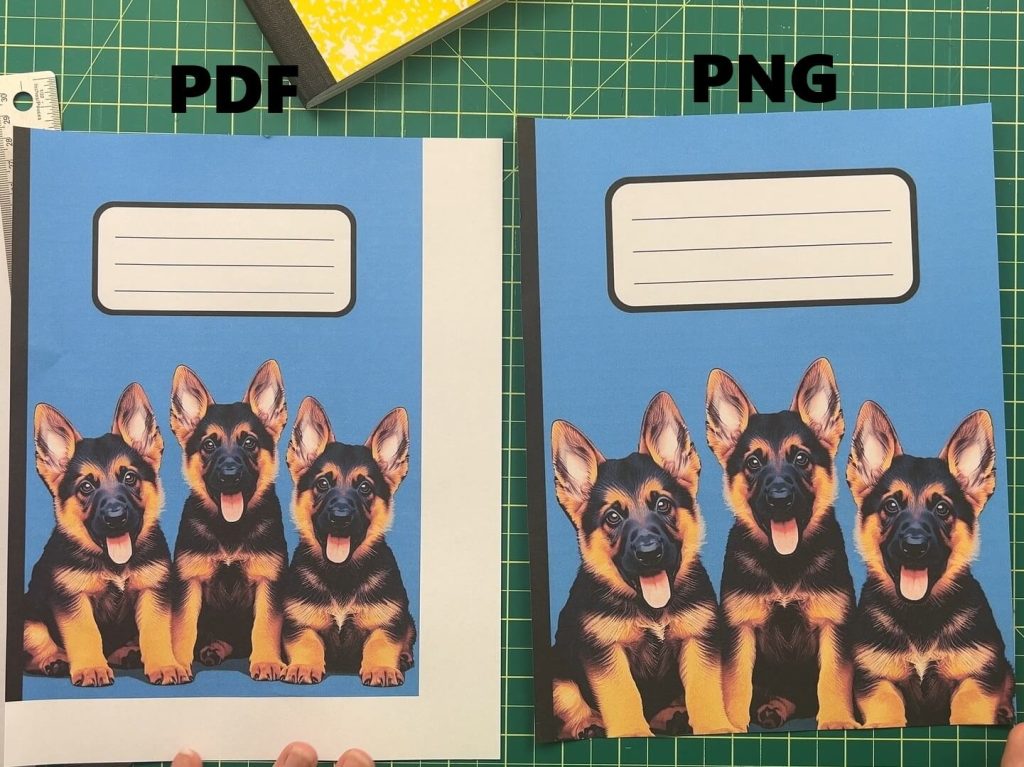
When you’re finished, export your file as a PDF Print, not PNG—this ensures your design prints at the correct size. If you save it as a PNG, you will have trouble printing it to the correct size later.
Making a Composition Notebook Cover with Canva AI
How to make an AI Image in Canva
If you have Canva Pro, you can use the AI image generator to create unique covers. This is fun, but it can also be frustrating as there is a bit of a learning curve. So if you are just starting, take your time and breathe.
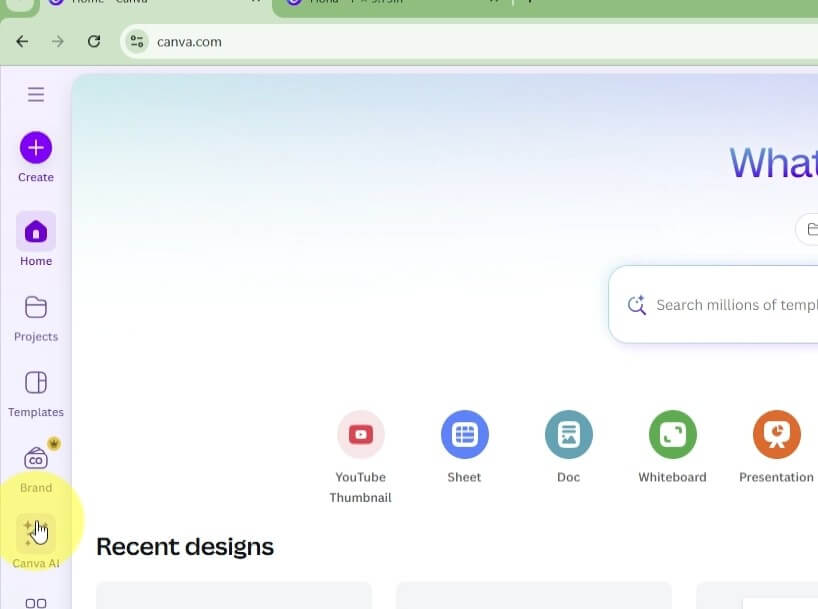
On the menu on the left side of your screen, click the Canva AI icon. This will open a new window for you.
In the prompt box, you will need to type in specific details of what you are looking for. For example, I typed: “I’m making a composition notebook cover. The dimensions are 7″ x 9.75″. I would like to have a name box space on it and the color scheme to be blue. Please make a cute puppy cover for me.”.
Before hitting the left arrow to have Canva process your request, you have to click on the Create Image button below the text box, and you will need to select a different size. The default is 16:9. I suggest using 3:4. We will need to make modifications later, but for now, this will work.
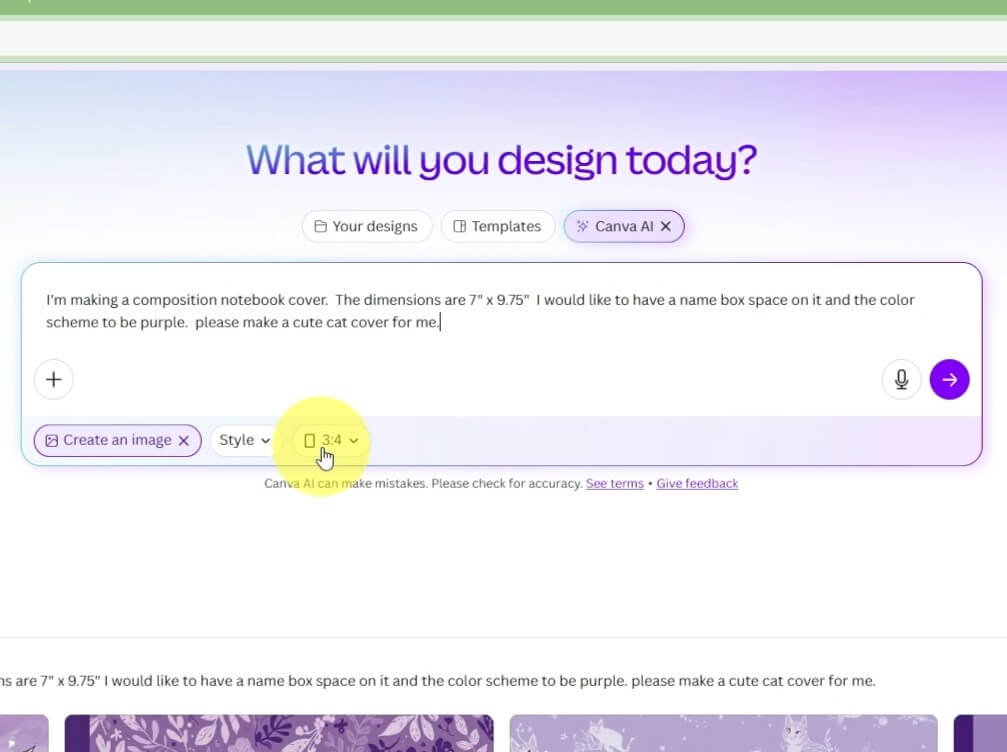
Finally, you should select a Style. Click on the drop-down menu and pick a style you like. In my case, I picked “Illustration”.
Once you have populated these items, select the right-pointing arrow and wait for the AI to generate four images.
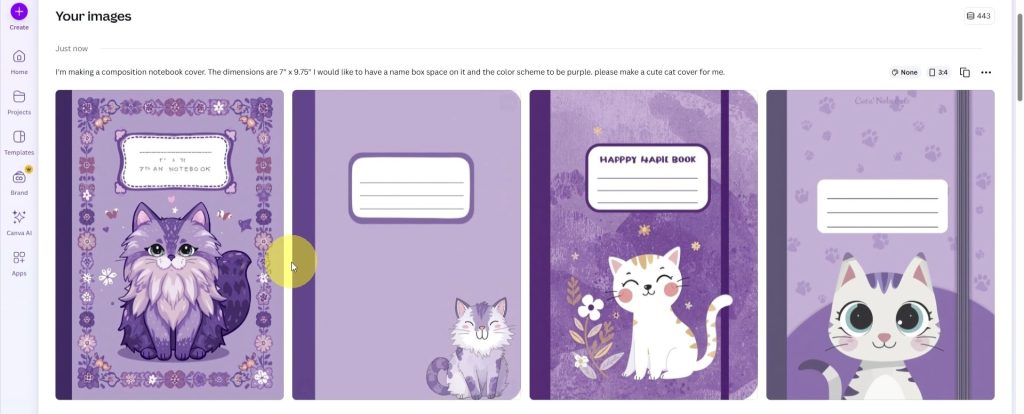
If you do not like the images, you can tweak the text or just click the Reuse Prompt Icon (top right side of images produced, looks like 2 sheets of paper). And it will reuse the details provided.
Modifying AI Images In Canva
To make modifications to the AI-generated image, click on the image (and not the Edit button). This will take you to an editing screen with a prompt bar below the image. You can write in the changes that you want to occur there. This will modify only the selected image per your instructions.
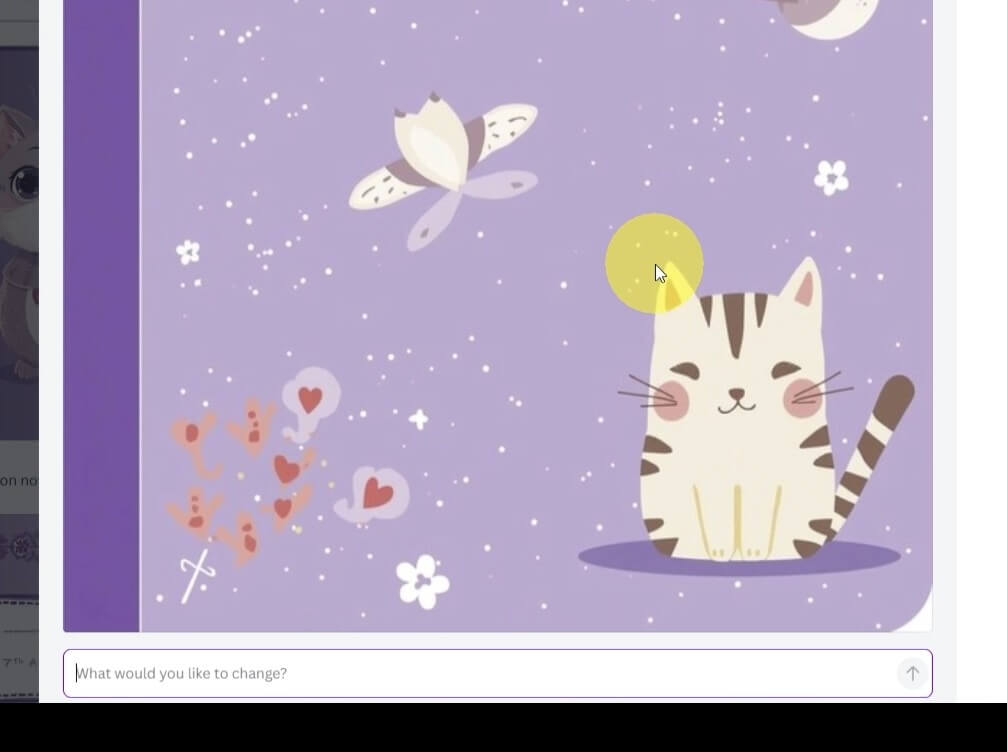
Some things to keep in mind:
- If you like a design but want to change something about it, Canva AI will alter the whole image, and not just make the small changes you want.
- The AI text often comes out wrong. So if there is text on the images, read it first and make sure it is correct. If it is not correct, do not use it.
Finalizing the Front Cover of the Composition Notebooks
Once you find a design you like, click the Edit Icon on the image, and it will open up in a new tab so you can work on it.
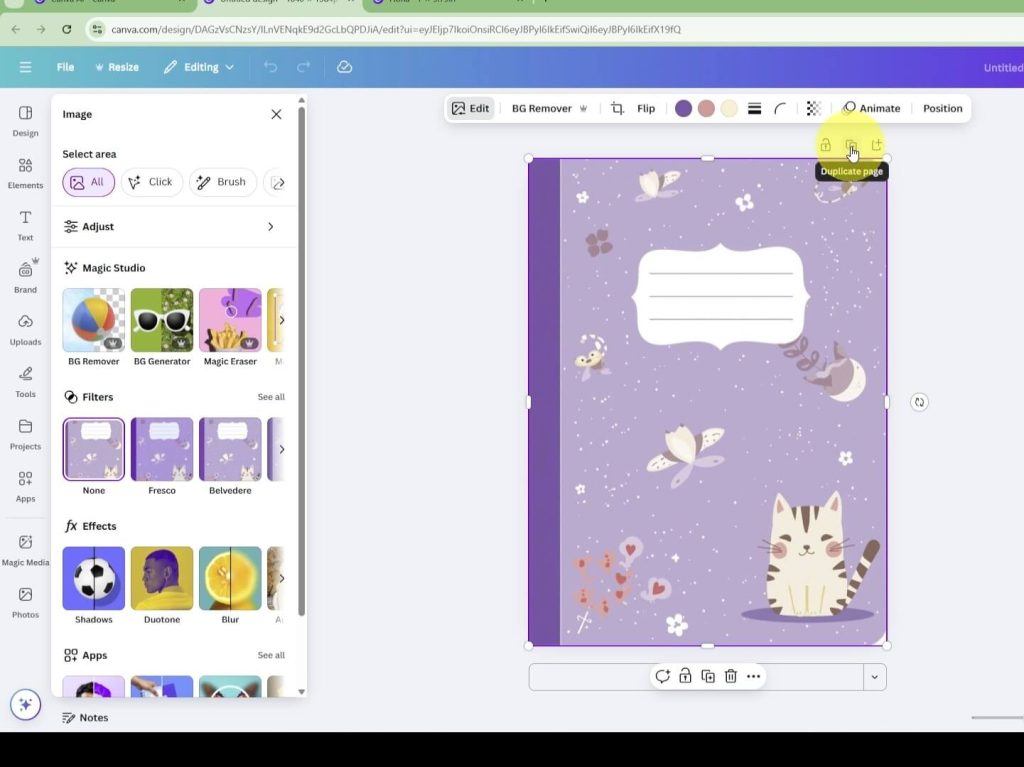
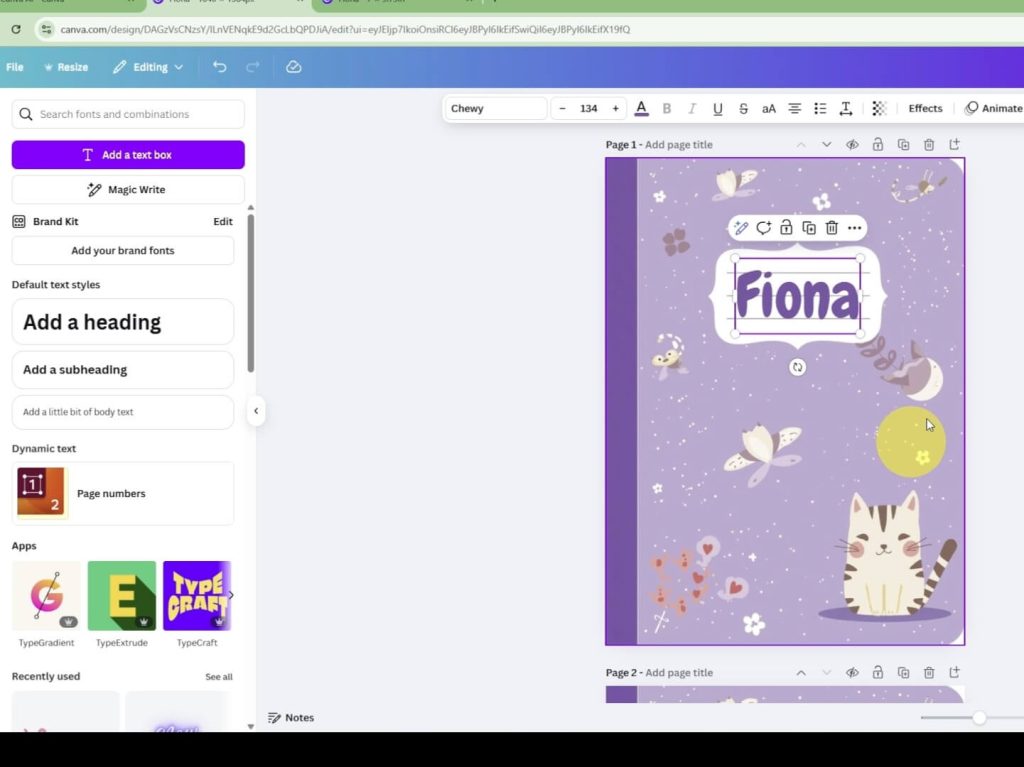
If you requested your design to have a box for the name, you can’t omit making a new box, but if you did not, in the elements toolbar on the left side, type in “rectangle”. I pulled in a black rectangle and placed it in the top third of the design. Clicking the color circle, I adjusted the color to match the color scheme of the background.
Once happy with the placement, I did the same thing with text. I picked a “header”, wrote the name, and moved it over the rectangle and centered it the way I liked. You can also change the text type to a different font, instead of the standard.
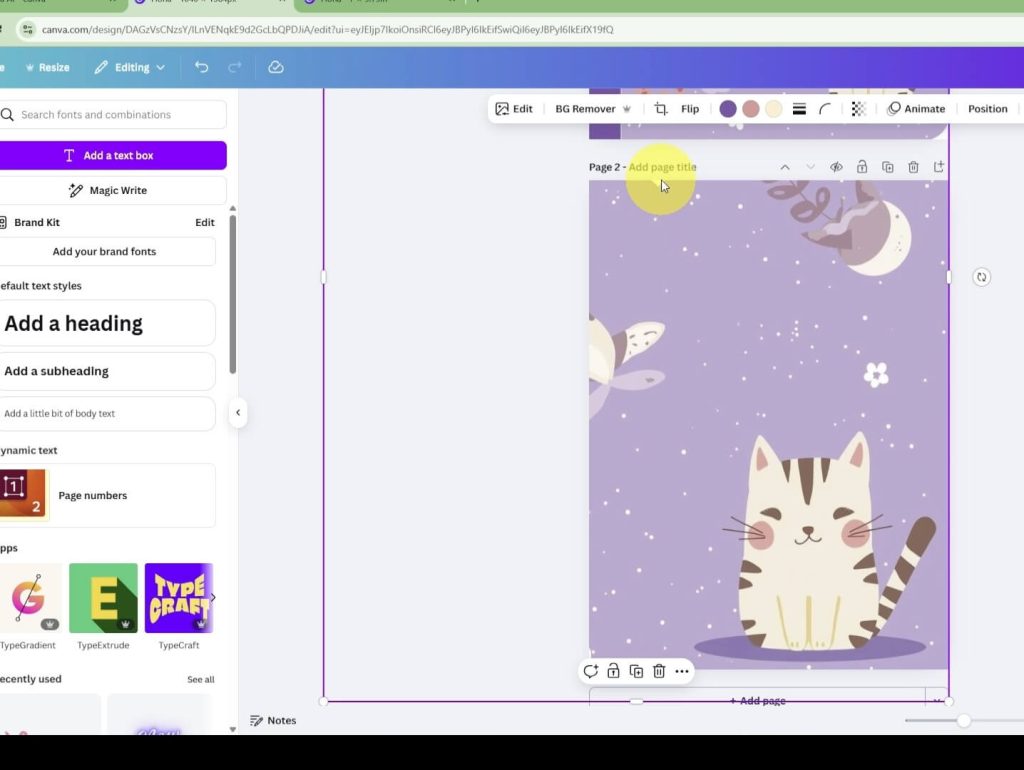
Finalizing the Back Cover of the Composition Notebooks
As you want the back cover to match the front cover, you will need to make some modifications for the back.
There are a few options of what you can do, but here is what I did:
- Stretch the design out so that the name and text box are out of the image. Move the image around until you have the best placement on the canvas.
- Rotate the image 90 degrees by grabbing the round arrows. Then, stretch the image to fit the canvas area.
This will allow you to have a back cover that matches the front, but it will not be an exact duplicate.
Adjusting the image size in Canva
The image we just made with Canva AI is not sized correctly for our composition book, so we need to modify this before we save and download our project. This is a feature that is only available in the Pro version of Canva, but as we were working with Canva AI, I assume you have the Pro version.
On the top left side of your screen, there is a “resize” button. Click this. A drop-down menu will appear. You will need to either click “show more”, or in the available options, pick 8.5″ x 11″. Then, click the Open Document Button.
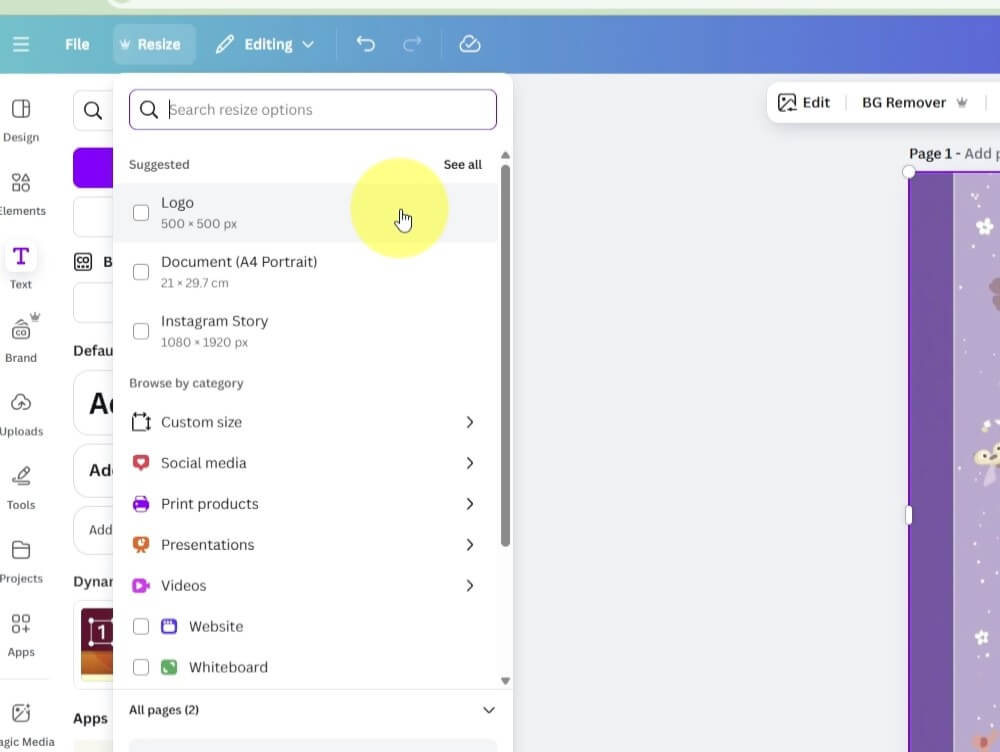
Your image will stretch to the full size of the page.
You will need to select the image and any elements you created (text, box, etc.), and grab a corner, scale it down to be the size of your composition book. In my case, I scaled the image to 7.3″ x 9.8″. Repeat this for both the front and back cover designs.
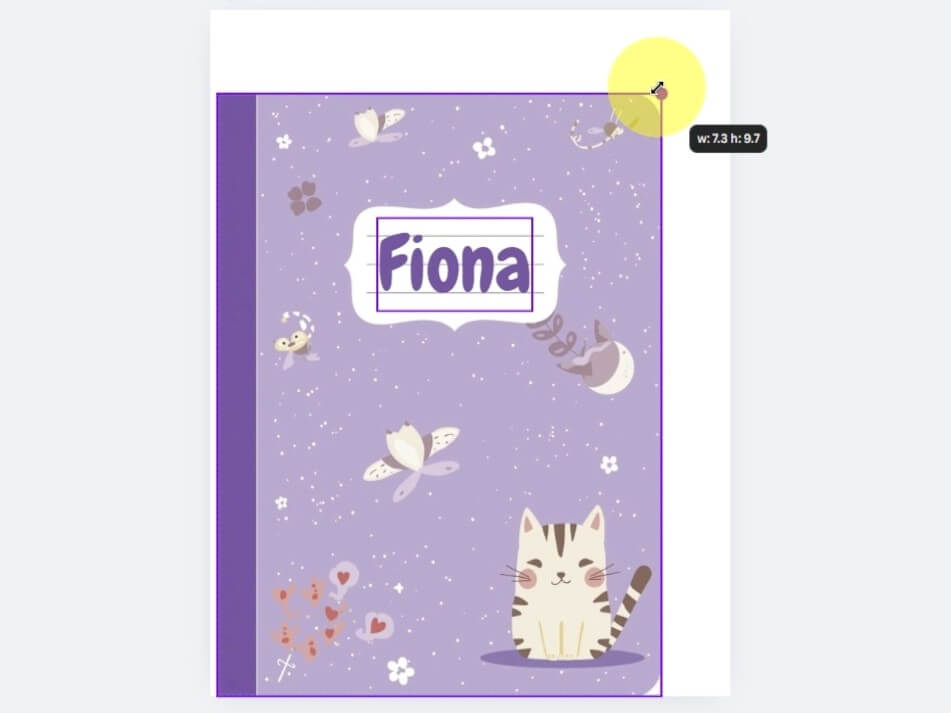
When you’re finished, export your file as a PDF Print, not PNG—this ensures your design prints at the correct size. If you save it as a PNG, you will have trouble printing it to the correct size later.
Check the Print Size of Your Composition Book Cover
Before you print your designs on sticker paper, I recommend you practice on regular paper. I don’t like to waste supplies, and I’m sure you don’t like to either.
The file we just saved, either from the Free or Pro versions of Canva, should not cover the whole page of an 8.5″ x 11″ page. However, some programs will stretch it to be the size they think you want. For example, when I open the PDF with MS Edge, it will force the image to be the full size of the sheet. But if I open it in Chrome, it will open the file the way I saved it. Even though the image may look correct on the screen, I recommend you print out a copy on regular paper and compare it to your composition book.
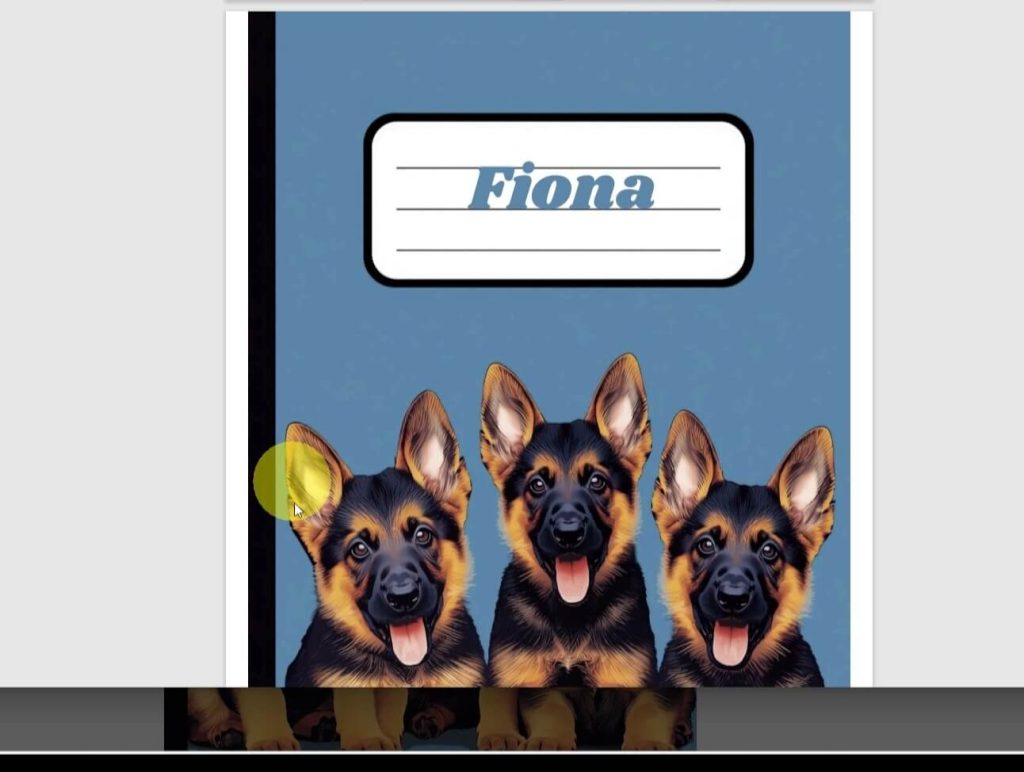
Incorrect Placement
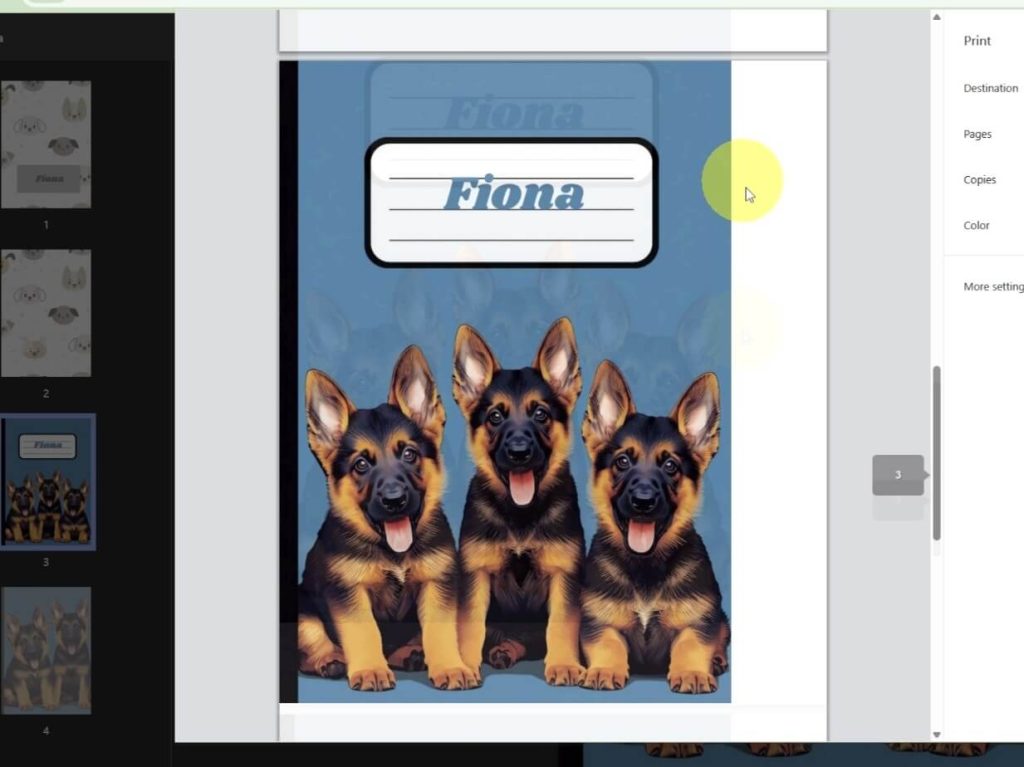
Correct Placement
If you have either of those two programs, you will need to play with your printer settings to make sure the image prints correctly.
Once you are happy with your draft print, print the design on sticker paper.
Comparing PDF and PNG Print Sizes
When saving the files, I mentioned that it is important to save the File as a PDF and not an SVG. I wanted to show you the difference between the two files when printed.
Applying your Design to your Composition Notebook
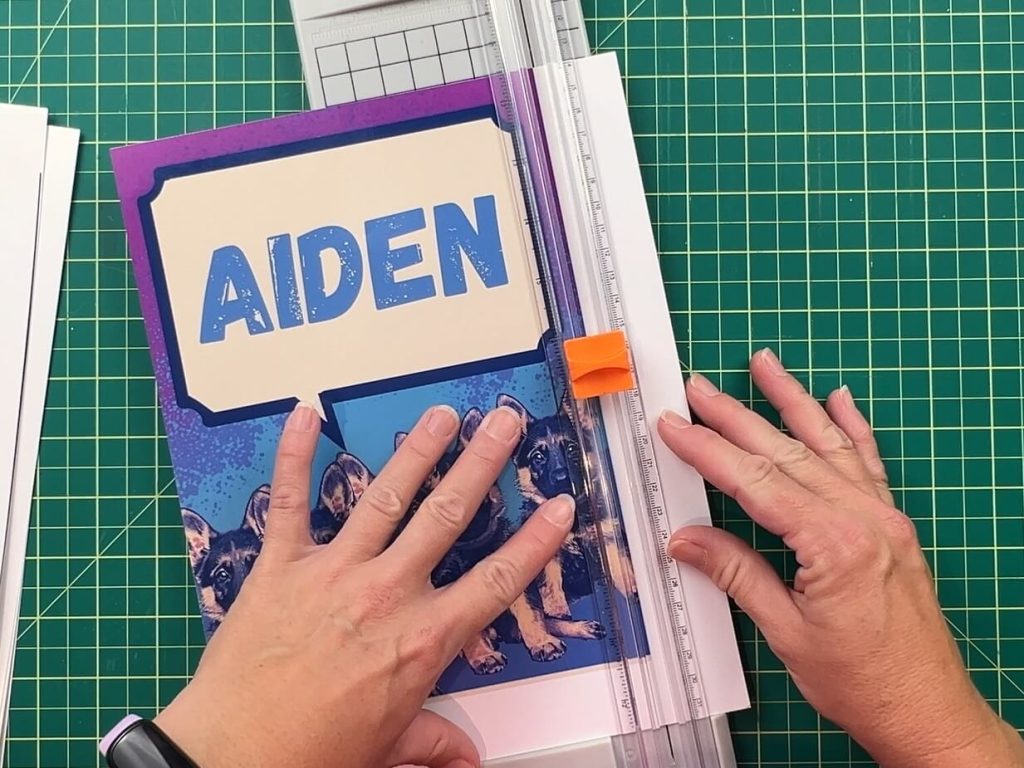
Before we do any work on our design, grab your paper cutter and trim off the white space on your printed sticker.
Adding Holographic Sticker Paper to Protect Composition Book
To give my notebooks durability and shine, I applied holographic sticker sheets over the printed sticker paper.
First, I peel back an inch of the holographic backing and fold the backing paper so it is not in the way. But do not peel off the whole thing.
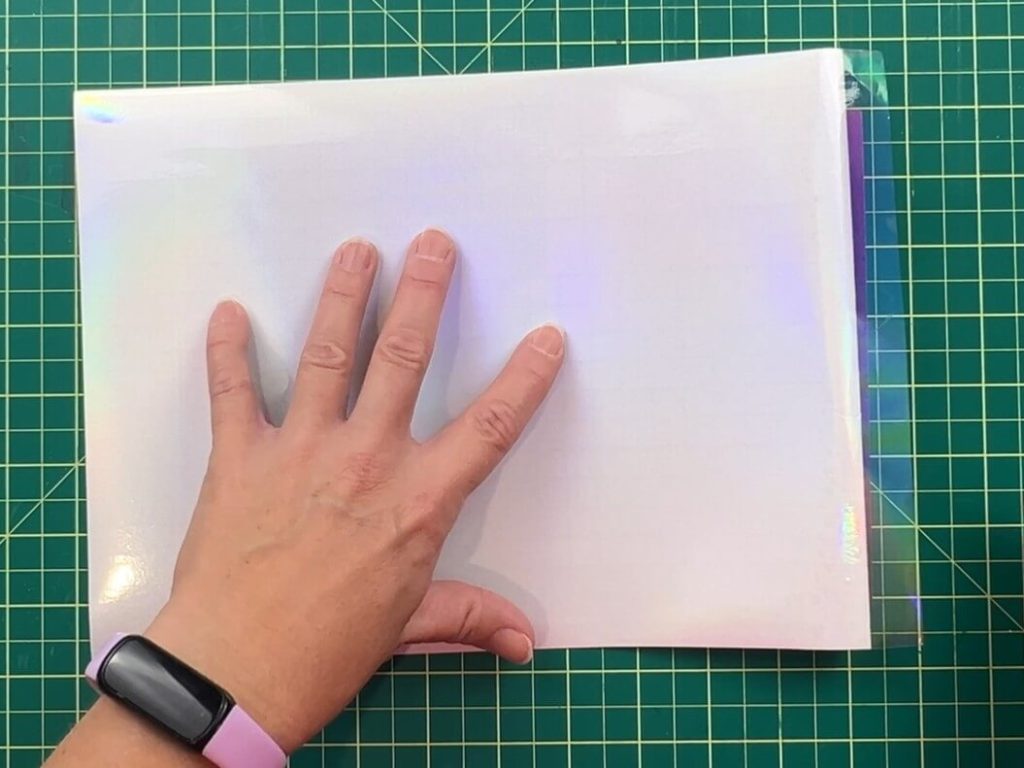
Place the sticker paper on your workstation, and align the holographic paper on top. Once you are happy that the whole sticker paper is covered with the holographic paper, stick the holographic paper to your workstation, and make sure to grab onto a small portion of the printed sticker. This anchors the sheet, keeping everything aligned. Slowly pull the backing away from the holographic paper while using the squeegee to push the holographic down and avoid any air bubbles.
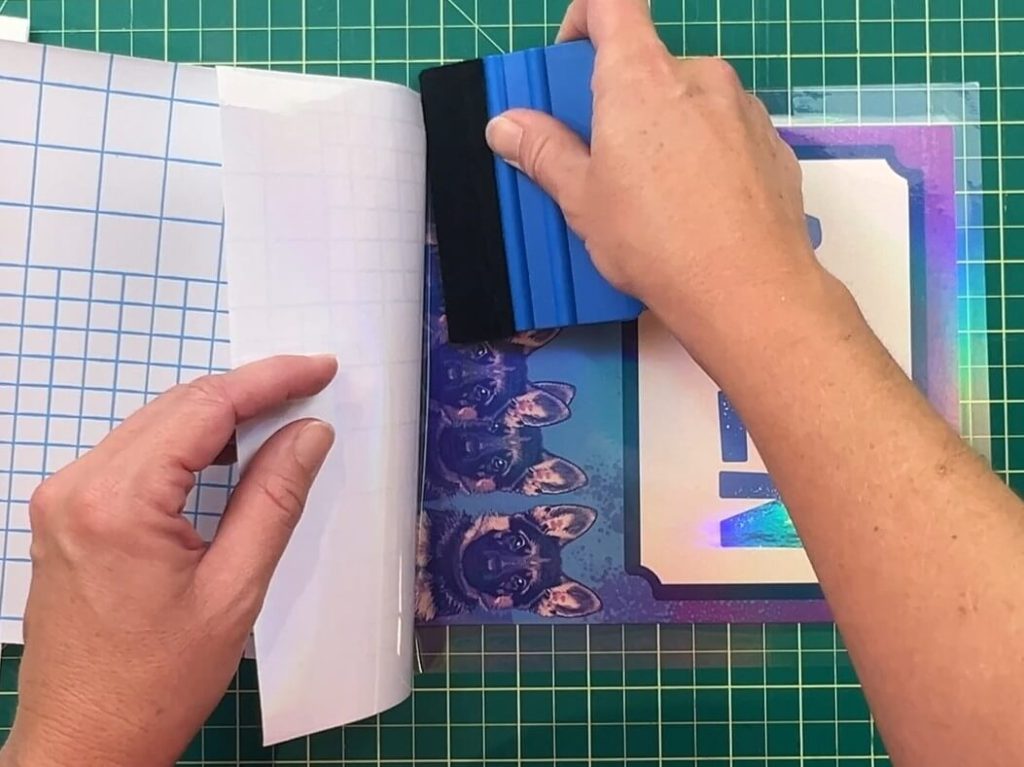
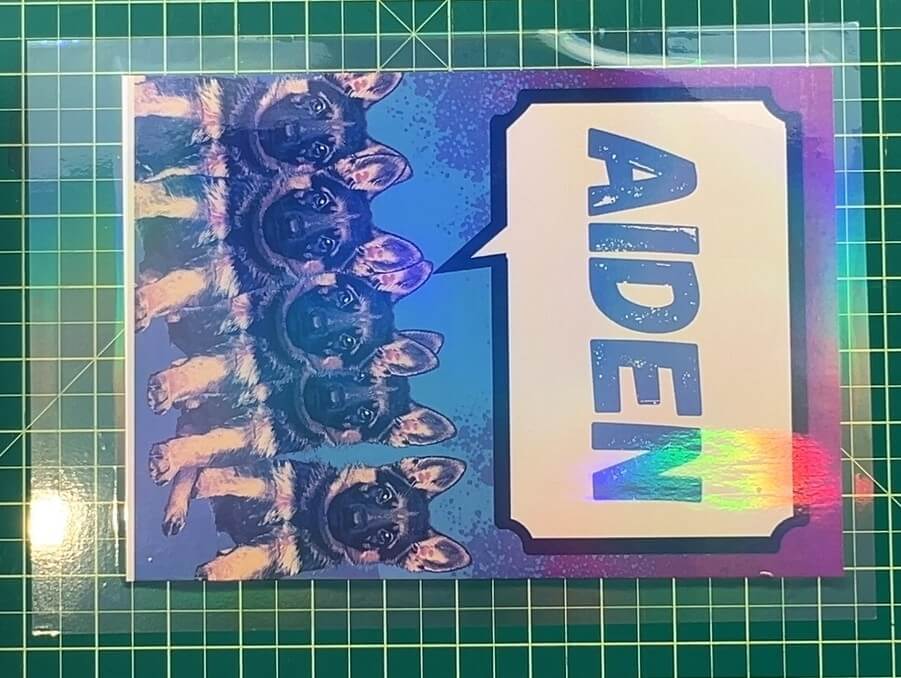
Use a squeegee with a felt edge to avoid scratches and bubbles. The holographic layer not only protects the design but also makes the cover pop with shine and dimension. Once you have the holographic on the sticker paper, cut off the surplus holographic paper.
Applying your Design to the custom Composition Notebook Cover
Now that the holographic paper is on our design, it is time to place it on our notebook!
This is similar to what we did with the holographic paper. Pull back about an inch of the sticker backing. I like to start with the top of the design. Line up the bottom and sides of the design with the notebook. Once happy with the placement, stick the uncovered portion onto the book.
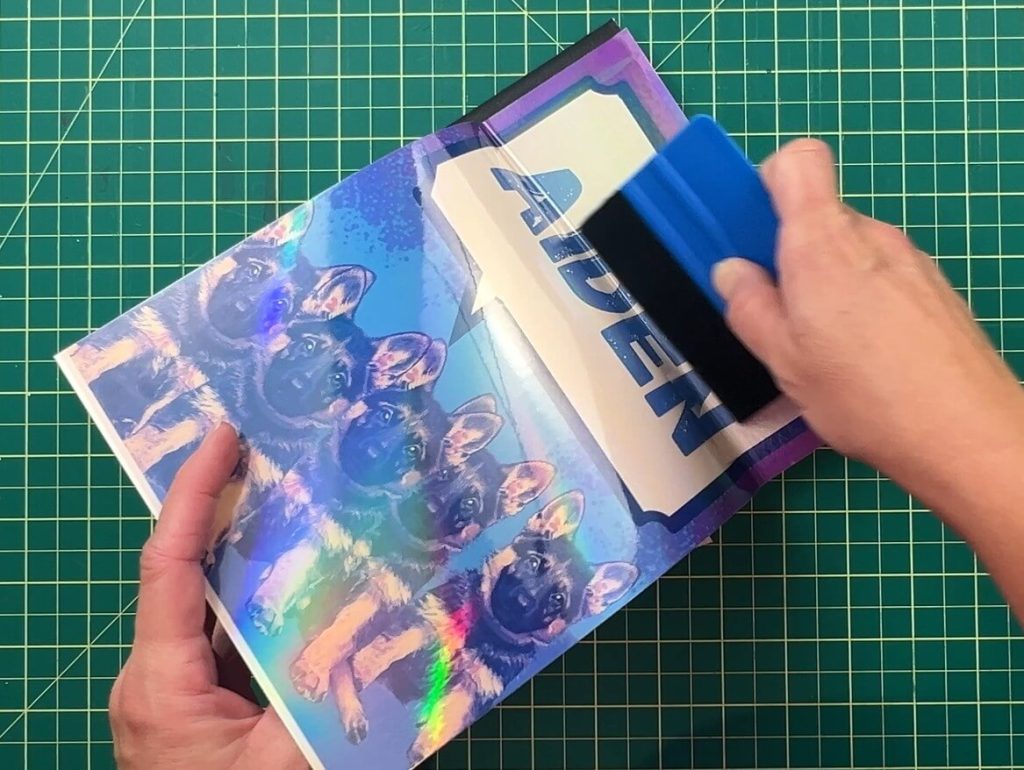
Slowly, pull the backing paper away while using the squeegee to push the sticker paper down flat.
Trim the Edges and Corners
Once the design is on the notebook, you may have some edges and corner to cut. The books that I have had rounded corners.
Simply using a ruler and a craft knife, slowly cut off the surplus.
And that’s it! Your Custom Composition Notebook is Complete!
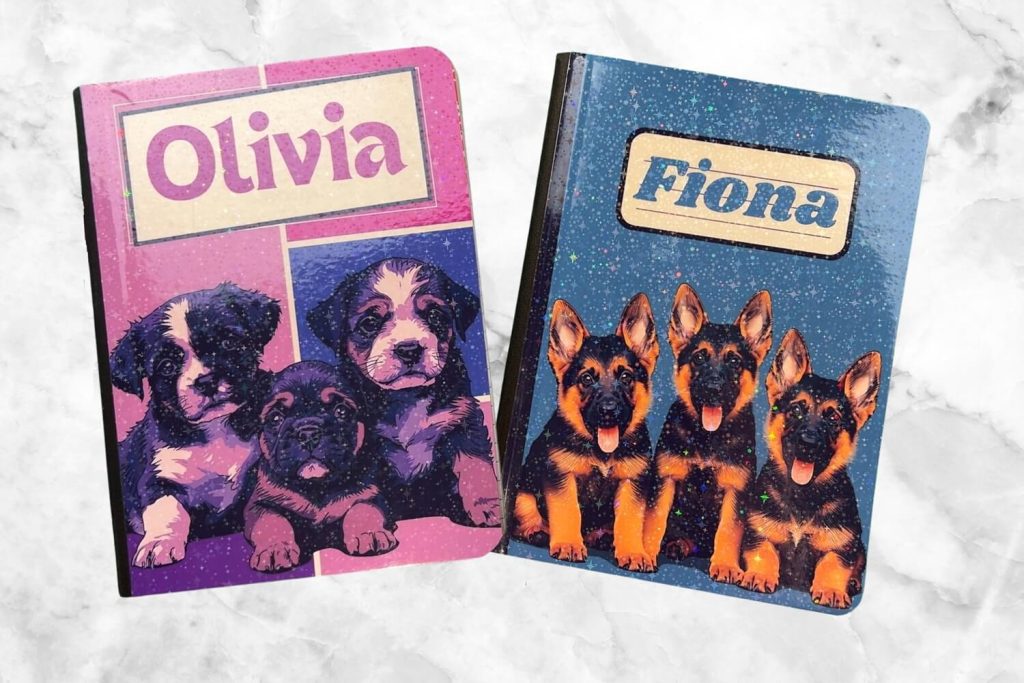
And there you have it—front and back covers for your custom composition notebook! Each one is personalized, durable, and way more fun than the plain black-and-white notebooks.
Some Mistakes to Avoid when Making a Custom Composition Notebook
I love how these custom composition notebooks turned out for my kids, and now their school supplies are totally unique. With Canva, a printer, and a few craft supplies, you can make endless designs that reflect your style. But as usual, there are a few things we need to discuss, so that you don’t make the same mistakes that I did!
- Measure Twice! Cut Once – Double-check your notebook size before designing. It only takes a few minutes, but it would really suck if you wasted all that material for nothing!
- Don’t export as a PNG – Always use PDF to keep print dimensions accurately. But if you are super tech-savvy, maybe you can make it work with a PNG and print the correct size. I’m not that good, yet.
- Make sure you Test Print! Save your sticker paper and do a test on plain paper first. Trust me! You will thank me later!
- It’s ok to have your design a bit bigger than your notebook covers. If you leave some extra bleed space in your design so you can trim it neatly after applying and not worry about lining everything up perfectly.
- Take your time when applying the holographic paper! I wasted a bunch of designs on air bubbles. And once you get one air bubble, you will get more, very quickly. So, take your time to avoid air bubbles.
- I used composition books that had a matching color to my theme color. This allowed me a bit of extra space to make mistakes. If I didn’t completely align my design, the original color would match and not show up as much.
Did you enjoy making This composition Notebook cover?
Did you enjoy making this custom composition notebook cover? Let me know in the comment below if you tried it out and how it turned out! If you tried, it let me know if there is anything I can do better next time!
If you enjoyed this craft, check out my other sticker-related project here.