If you’ve ever had a bookmark slip out of your book or disappear between the pages, corner bookmarks are the solution you didn’t know you needed. They hug right onto the corner of a page and actually stay put — and they happen to be a fantastic way to use up scrap fabric.
If you’re looking for how to sew a corner bookmark, you’re in the right place. This tutorial walks through the full process, from cutting your squares to the final stitch. I’ll also share a mistake I made along the way so you don’t have to repeat it.
🎥 I also made a video about how to sew a corner bookmark from scrap fabric. You can watch the YouTube Video Here.
As an Amazon Associate, I earn from qualifying purchases. This post contains affiliate links. I may receive a commission if you purchase an item from one of my links. This will not change the price you pay.
Supplies Needed to sew a Corner Bookmark
Here’s everything you’ll need before getting started:

- Fabric – cut three 4×4-inch squares — two for the inside and outside flaps, and one for the folded accent edge that wraps over the page corner. Contrasting prints work beautifully here; I used a cat print for the flaps and a berry print for the accent piece.
- Interfacing – you’ll need one 4×4-inch square piece and one triangle piece with a 4-inch outer edge. Interfacing keeps the bookmark structured rather than floppy. I’m using sew-in interfacing, and it works well. You simply stitch right through it. Iron-on interfacing makes the sewing process easier as you have to sew through fewer layers of fabric. You will want the interfacing to be 1/4″ smaller than your squares (so, 3-3/4″ squares).
- A sewing machine,
- Matching thread,
- Pins or clips,
- Scissors,
- Iron and
- Something pointy to push out corners — a pencil, chopstick, or crochet hook all work great.
Arranging Fabric for Sewing
Before sewing, take a moment to plan which fabric goes where. Once you start stitching, changes are difficult.
You have 3 squares. Two squares will be the back and inner front of the bookmark, and the third square will be folded in half to cover the pages of the book.
Before you start, decide which piece of fabric will be folded in half.
I recommend folding the piece in half first and ironing it flat. Once ironed, place the triangle interfacing between the flaps of the triangle. You want the design facing outwards.
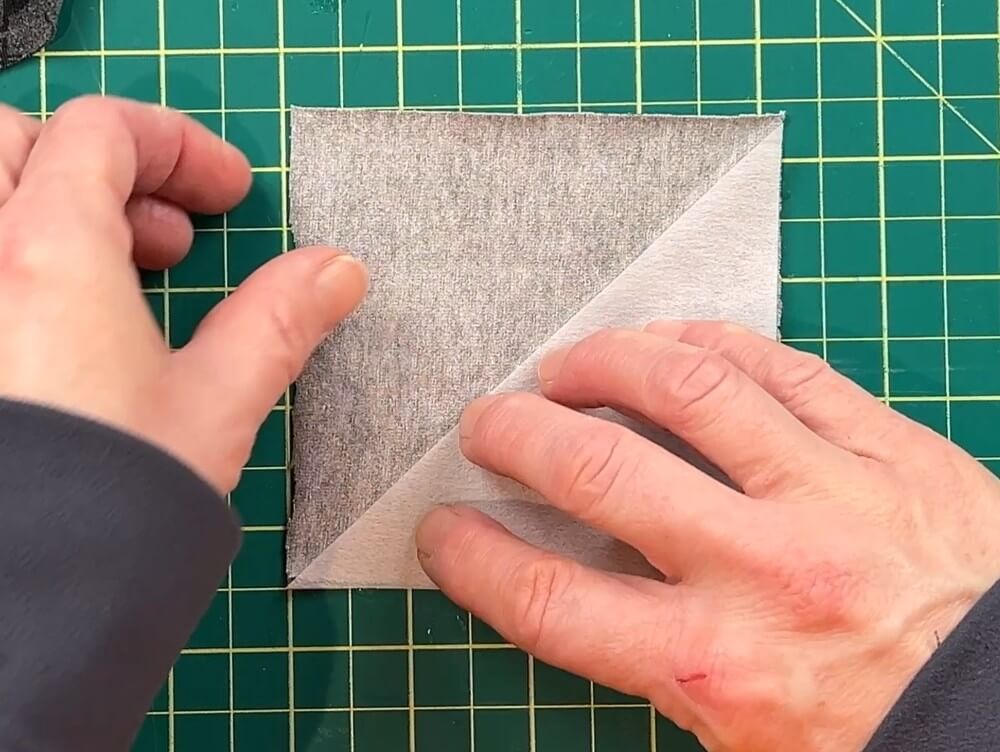
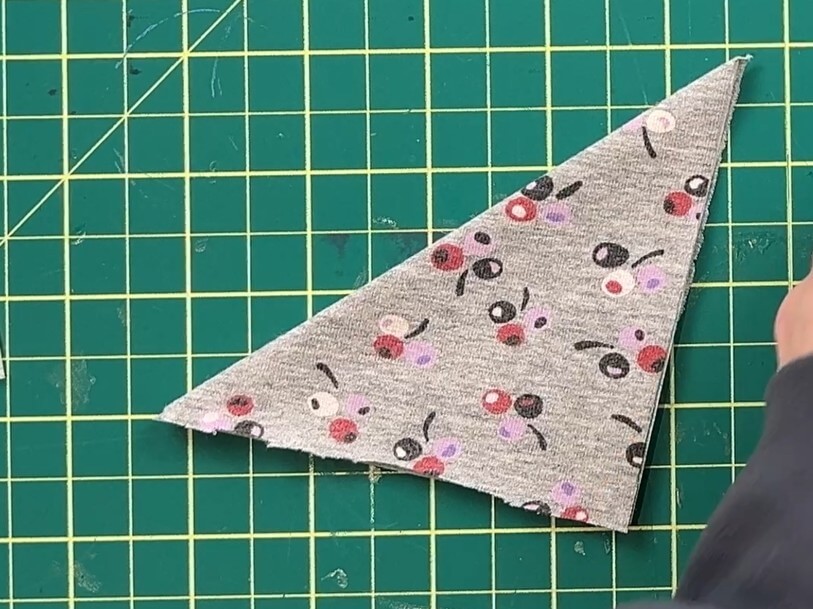
Next, you need to think about which direction your print will face once the bookmark is finished. Place the design face up and play with the folded triangle on top, and see which corner it looks best on. Repeat this for both back and inner-front pieces. You want the design to look nice on both sides.
Once you know which way you want the triangle on your squares, it is time to place everything together.
First, place your back square down on your work table, designs facing up. Next, place the folded triangle with interfacing on top, in the position that you just figured out above. This is followed by the second square on top of the triangle. Finally, you place the interfacing on top of the last piece of fabric.
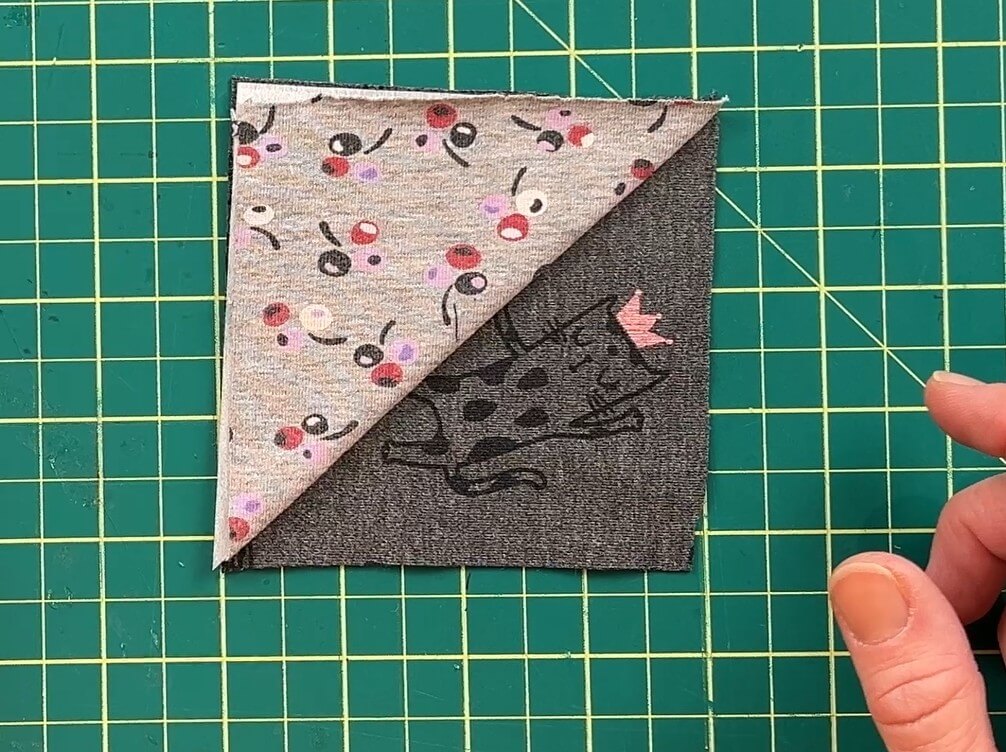
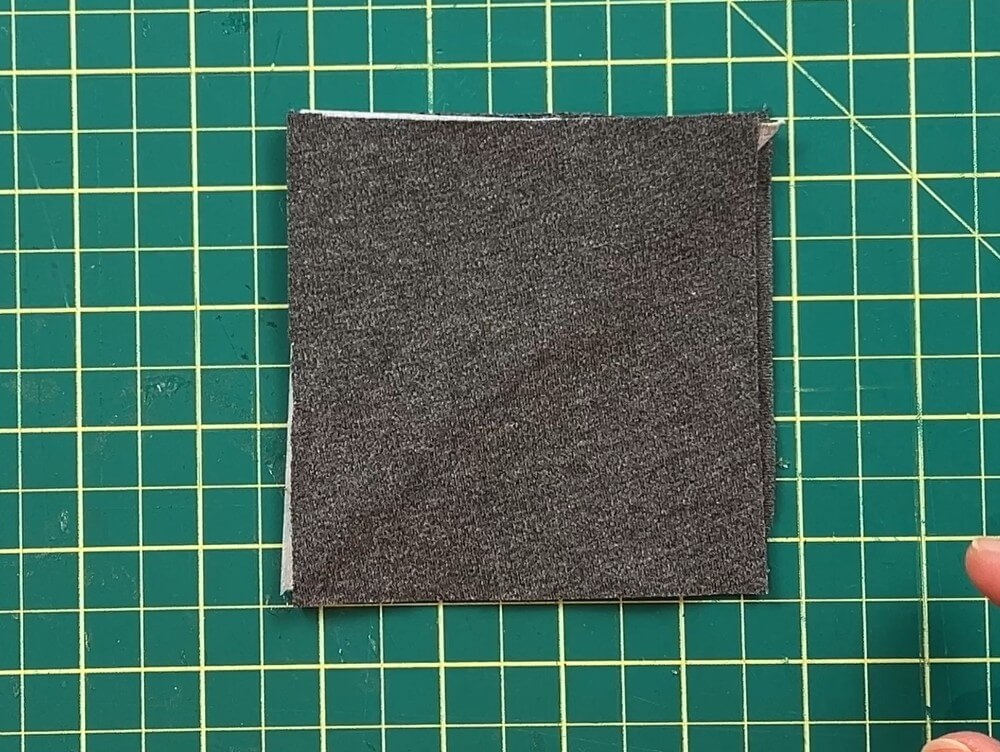
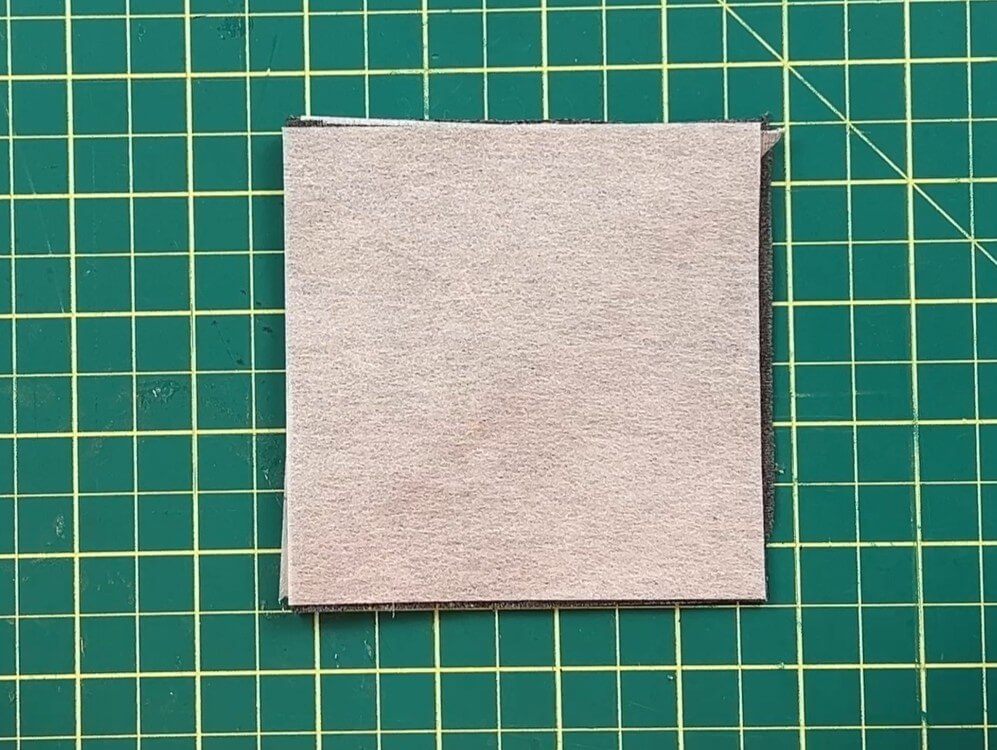
Pinning the Bookmark for Sewing
With your layers arranged, pin everything in place. If you prefer to use clips, you can use them. It is easier to work with clips when you have this many layers together.
You’ll be sewing all the way around the outside edge, but leave a 2-inch gap on one side of the bookmark. Ideally, you want this to be a side without the triangle on it. This gap is there so you can flip the bookmark right-side out later. Place two pins to mark the gap clearly so you don’t accidentally sew it shut.
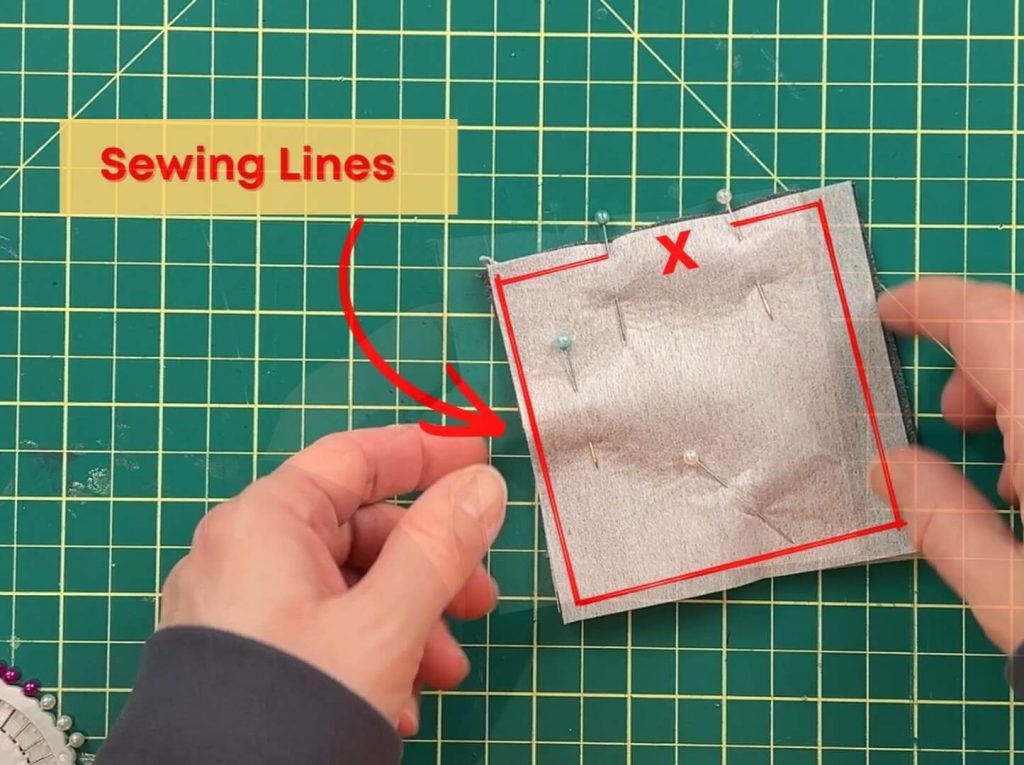
First Sew Lines
I like to start sewing at the edge of the gap and work around the full outside of the bookmark, finishing at the other side of the gap.
When turning corners during sewing, keep your needle down when pivoting at corners to prevent shifting. Finish with a backstitch to secure the seam.
Trimming the Bookmark – Post Sew
Before flipping, clip the corners close to, but not through, your stitching. This reduces bulk so your corners come out sharp and neat rather than thick and rounded. Give the edges a general tidy-up as well before moving on. When cutting the surplus fabric, leave extra fabric at the gap for folding in and sewing in the later steps.
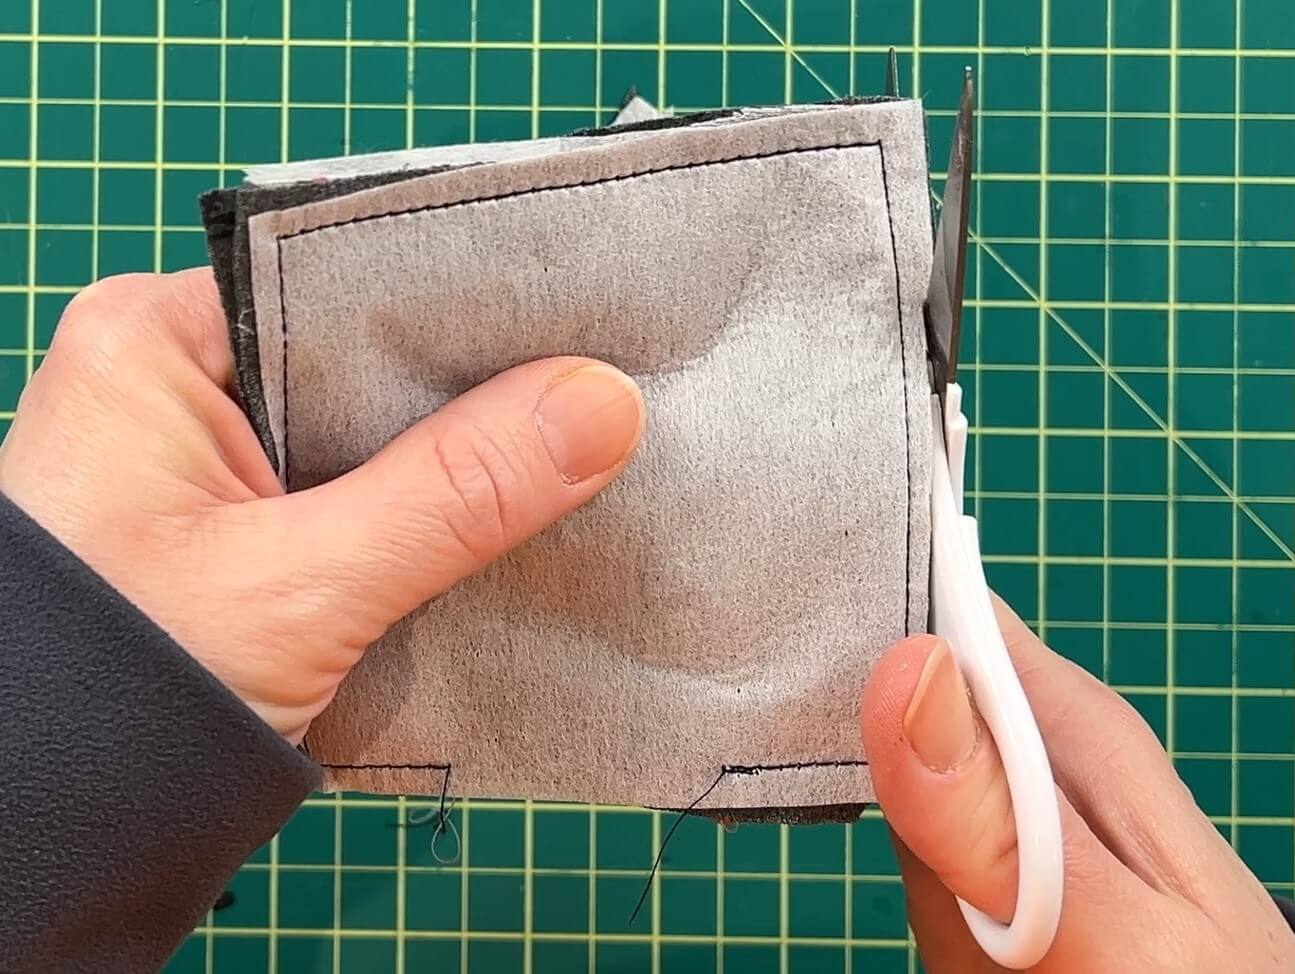
Flipping the Bookmark
When flipping the bookmark right-side out, make sure you’re pulling through the inner two layers and not accidentally separating the lining from the outer fabric.
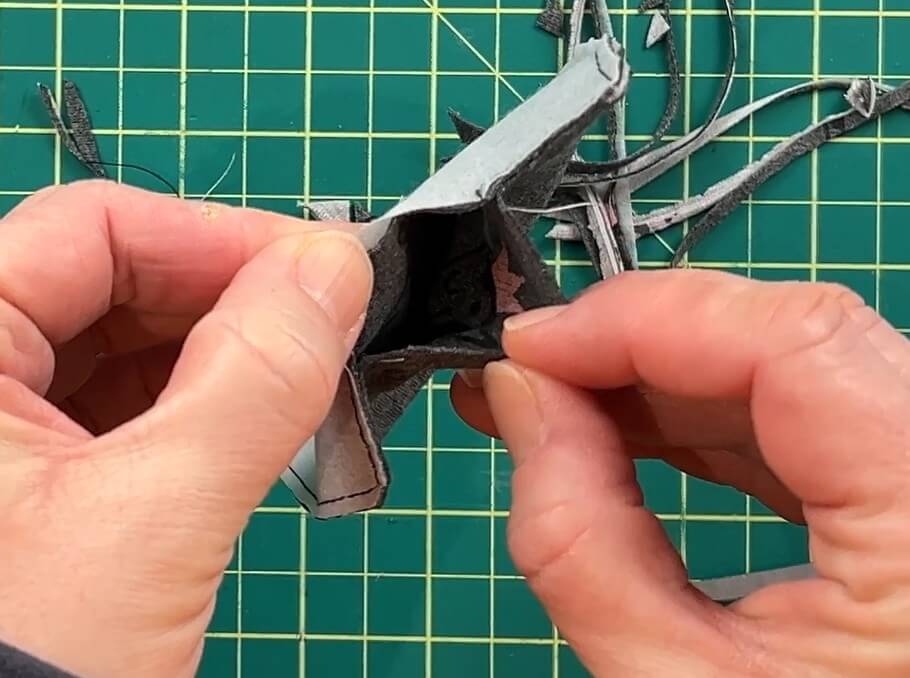
Once flipped, use a pencil, chopstick, or poking tool to push the corners out fully from the inside. Taking time on this step gives you clean, sharp corners that make a real difference in the finished result.
Align, Fold and Iron
Tuck the raw edges of the gap inward neatly, check that everything is aligned, and press the entire bookmark flat with an iron. Getting it crisp and smooth at this stage makes the final stitching easier, and the finished bookmark looks much more polished. Don’t skip the iron — it’s worth the extra minute.
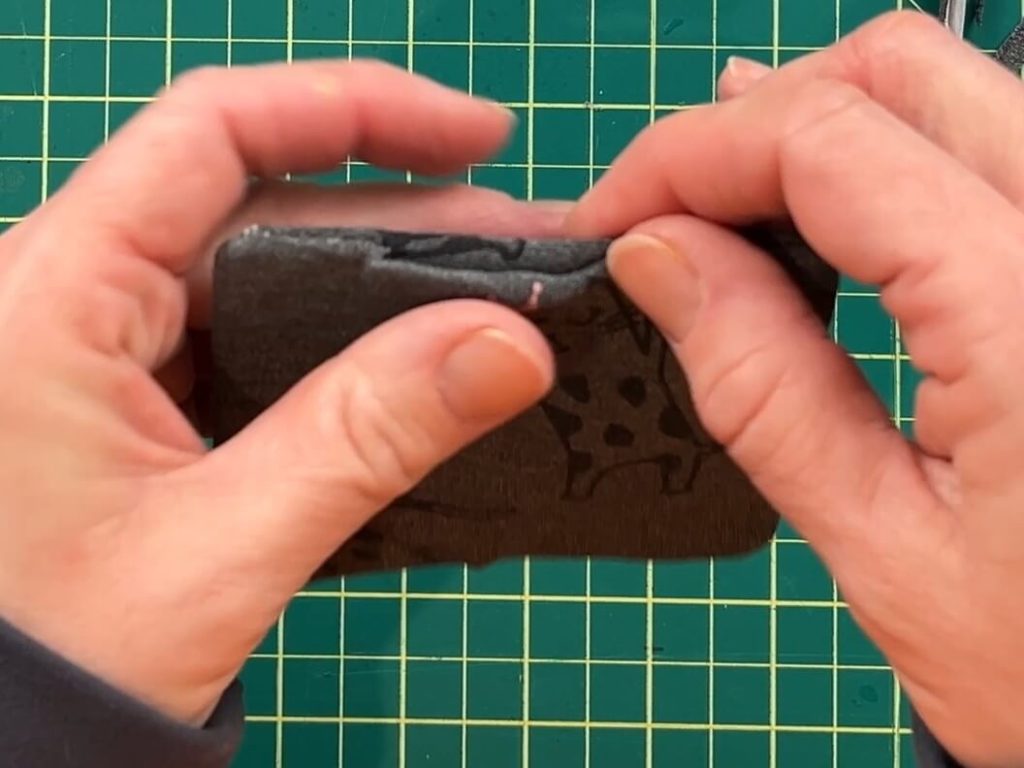
Second Sewing Lines
With the bookmark flat and pressed, sew a seam around the entire outside edge. This closes the gap and gives the bookmark a clean, finished border. I used dark thread on the front and light thread on the back for a bit of contrast, but matching your thread to your fabric works just as well.
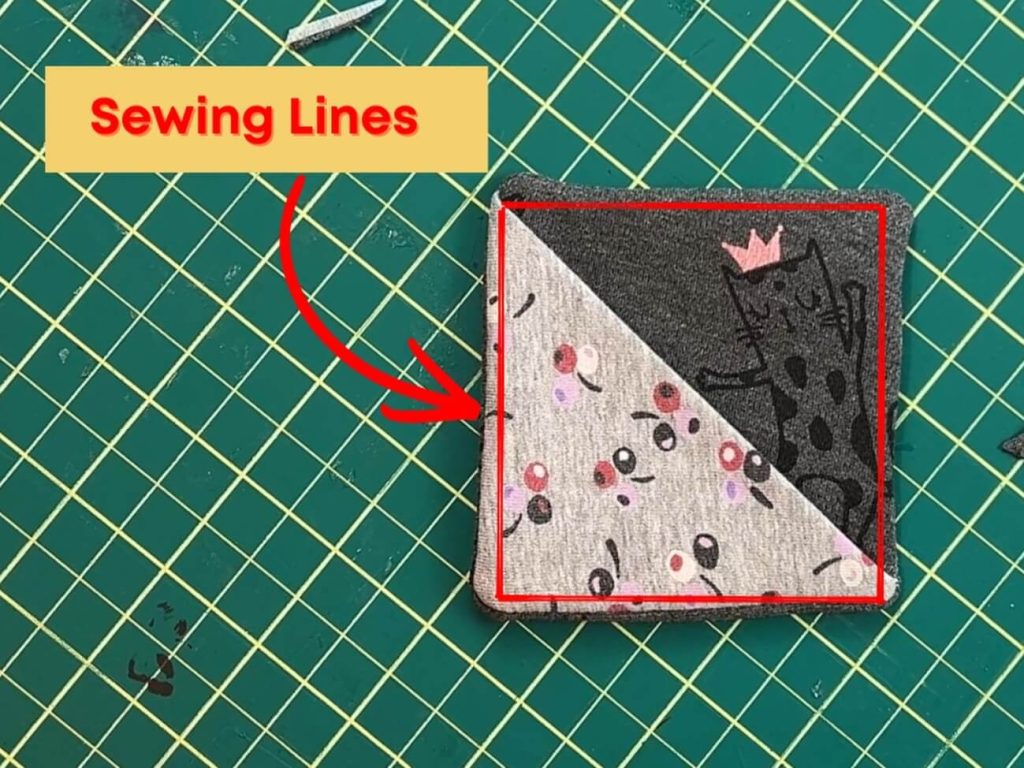
Don’t forget to backstick at the end of the project to keep the threads secure.
Bookmark #1 Completed!
Your corner bookmark is finished! Slip it over the outside corner of a book, or tuck it over the inside corner of a page — either way, it grips the corner neatly and stays in place.
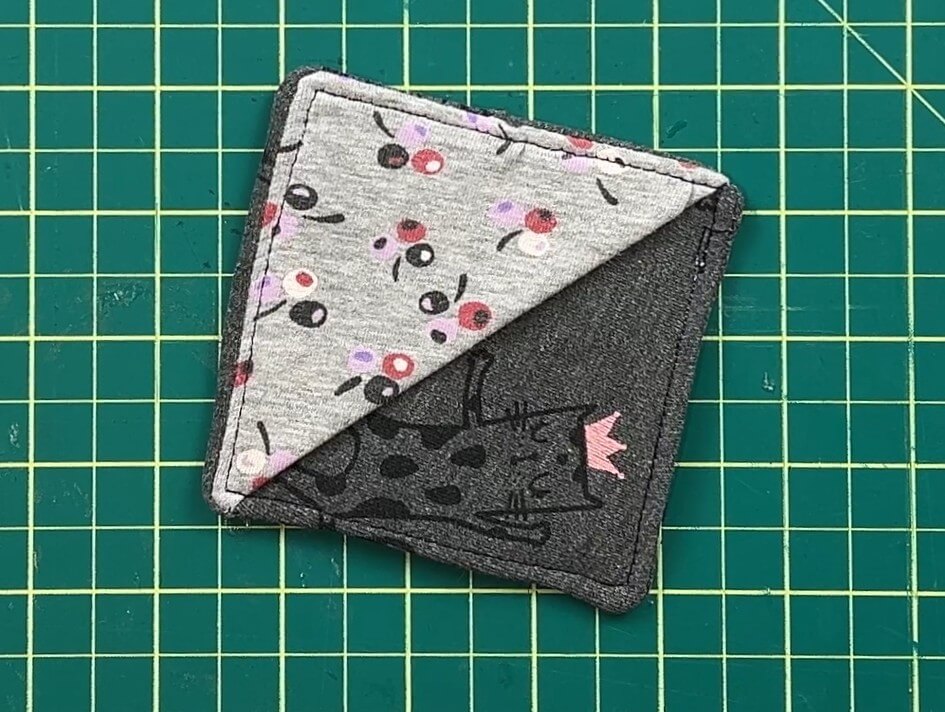
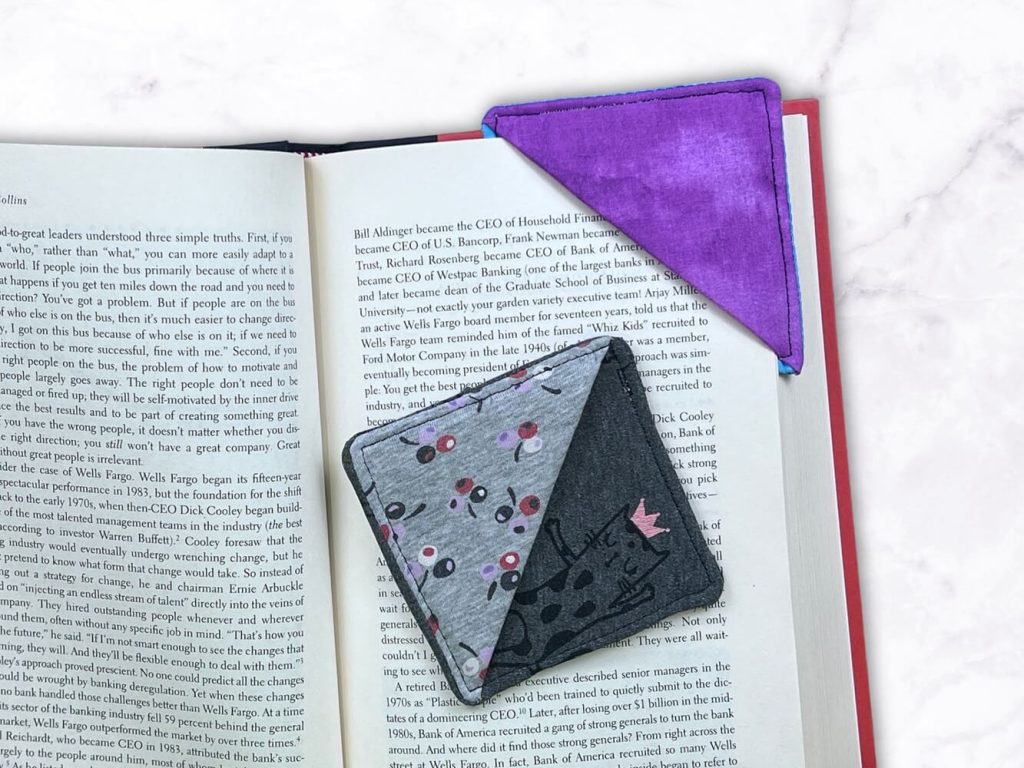
👉 How many did you make before stopping? These tend to turn into a bit of a production run — share your count in the comments!
Oops! I Made a Mistake!
Here’s what went wrong on one of mine, because it’s genuinely useful to know.
When sewing the final side before closing off, I wasn’t tracking how many stitches I was putting in. The result was a side that was two or three stitches short, leaving me with a shape that wasn’t quite square. I didn’t catch it until after trimming and flipping — too late to easily fix.
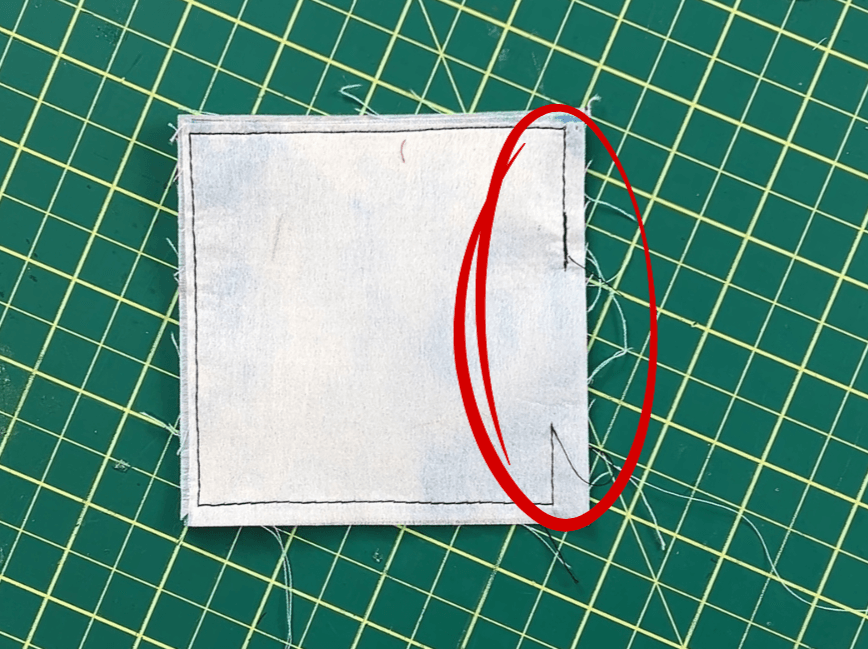
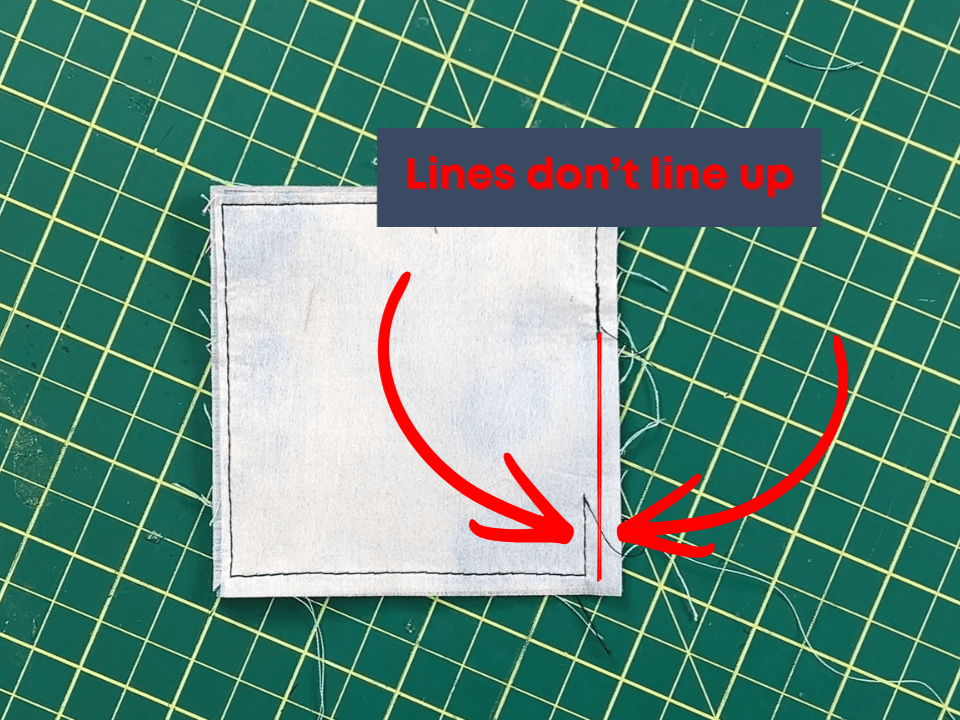
Draw on a Square
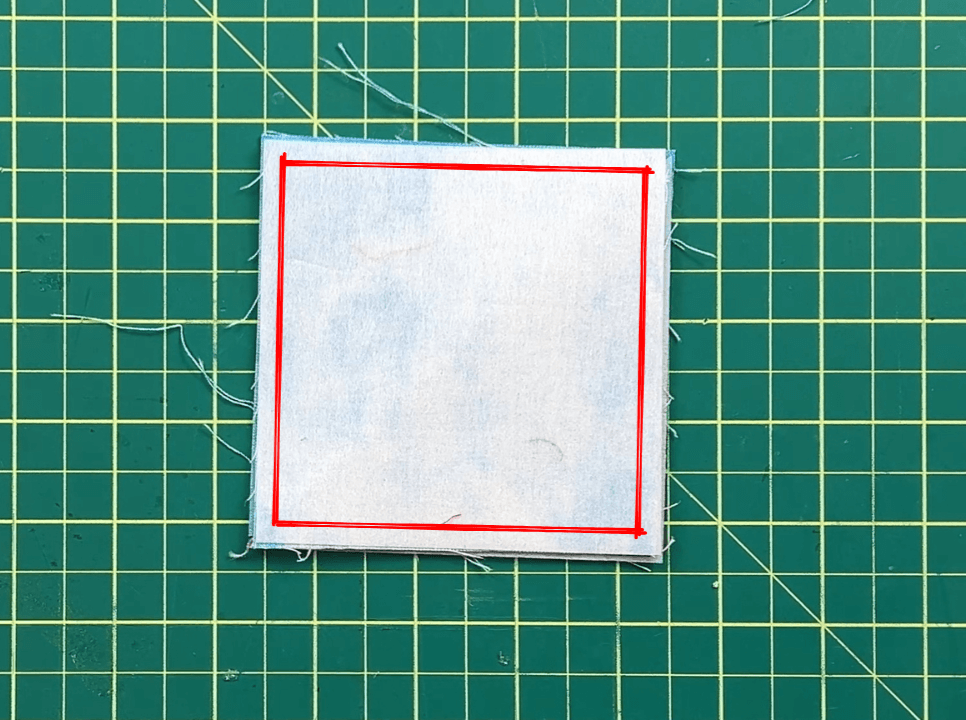
To avoid this, draw your square directly onto your interfacing with a pencil or fabric marker before sewing. This gives you a clear line to follow on every side.
Count Stitches
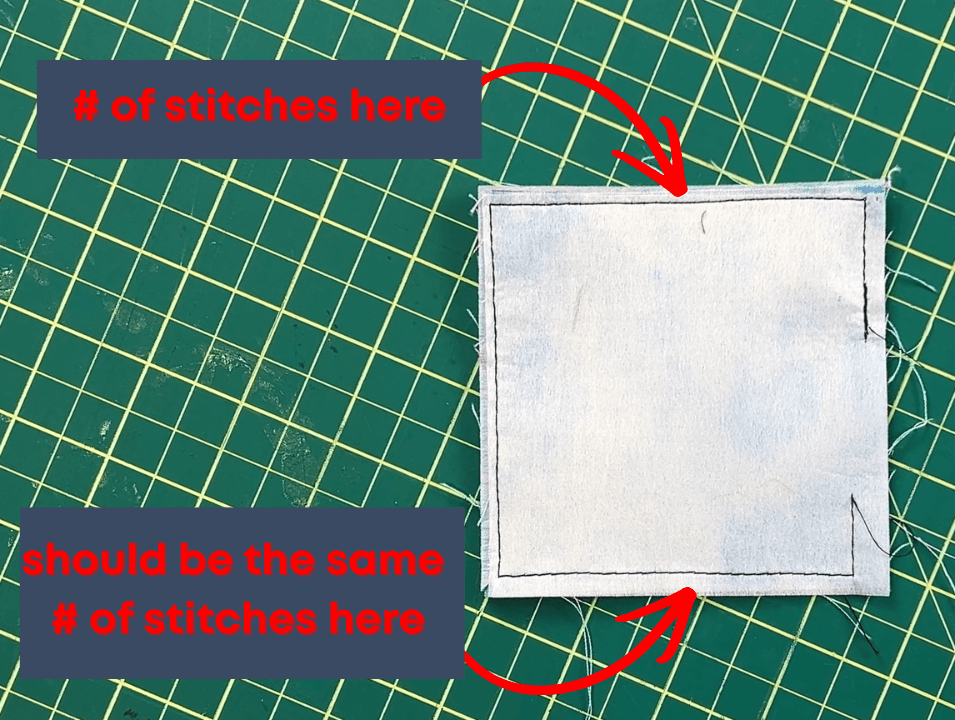
Alternatively, count your stitches. If you sew 43 stitches on one side, count 43 on the opposite side as well. It’s a bit tedious on a 4-inch square, but it keeps things even.
Do imperfect bookmarks work?
Yes, they do! The imperfect bookmark still works as the uneven corner hides behind the book pages. It’s a good habit to check as you go rather than discover the issue at the end.
👉 Have you run into a similar issue when sewing? Share your experience in the comments — it helps other readers know what to watch for!
How to Use These Bookmarks
To use your finished corner bookmark, open your book to the page you want to mark and slip the bookmark over the corner. The folded flap holds the page corner snugly, and the bookmark stays in place without sliding or falling out.
These also make wonderful handmade gifts — a set in coordinating fabrics, or prints chosen to suit someone’s personality, is a thoughtful and practical present that comes together quickly.
👉 Which fabric combination are you planning to use? Leave a comment below — I’d love to see what you come up with!
🎥 I also made a video about how to sew a corner bookmark from scrap fabric. You can watch the YouTube Video Here.
Did you enjoy learning how to sew a corner bookmark?
Did you enjoy learning how to sew a corner bookmark? Let me know if you have made corner bookmarks and how they turned out!
If you enjoyed this sewing project, check out my other sewing projects here.