So, every once in a while, things do not work out as planned. And this was one of those times. My kids are big enough to walk everywhere. But we are travelling. And I needed a cheap umbrella stroller to make it through the airport late in the evening. And my kids are not small-small. Even my smallest is not small. So I picked up a cheap umbrella stroller just for the airport. Well, it turns out my smallest is so big that his shoulders reach over the top of the fabric on the umbrella stroller. Fortunately, I am always looking for ways to improve my life. And this umbrella stroller needed a headrest attached. This would allow my kid can sleep comfortably while we roll through the airport. So, let’s jump in and make a DIY umbrella stroller headrest.
As an Amazon Associate, I earn from qualifying purchases. This post contains affiliate links. I may receive a commission if you purchase an item from one of my links. This will not change the price you pay.
Supplies Needed For a DIY Umbrella Stroller Headrest
Now, I get that this craft is not for everyone, but maybe someone is in the same predicament as me, and this is a quick solution, so let’s get our supplies ready!
What you need:
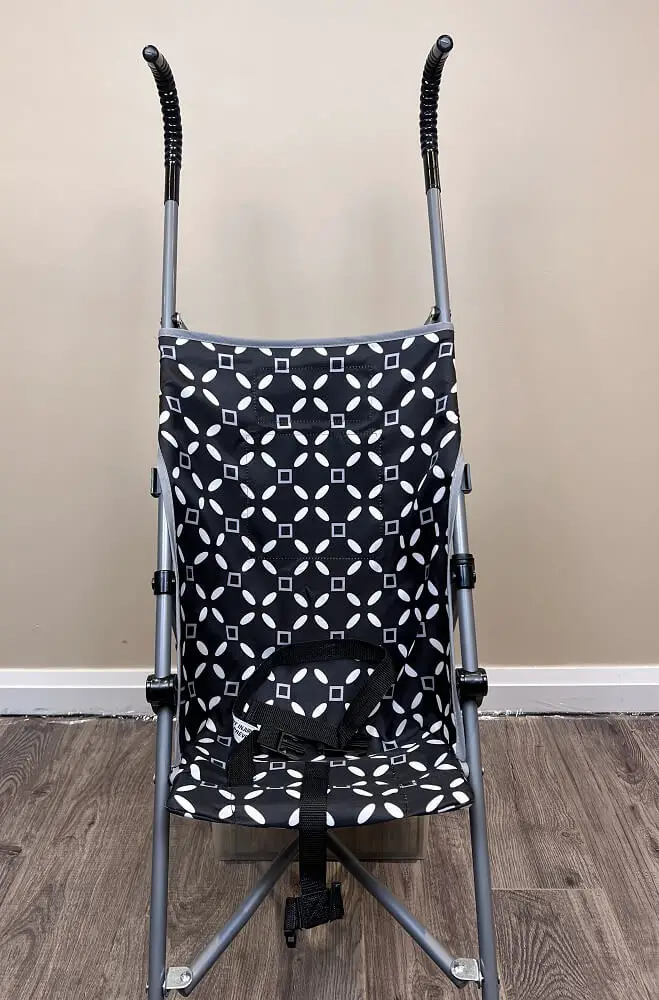
- Umbrella stroller – obviously, this needs not be already equipped with a high back and all that fancy jazz. We are talking about a bear bones umbrella stroller.
- Fabric – I am using some old black-out curtains that I have. This material is thick enough to support a sleeping head. But you can use any fabric you may have lying around. You will need about 20″x16″ in size, but we will go through figuring out the exact size you need and how to measure it.
- Thread – to match your fabric or any color will do.
- Sewing machine or a needle – I like to pull these small projects through my sewing machine, but if you do not have one, a needle will work. It will just take a bit longer.
- Cutting wheel or scissors – I like my cutting wheel, but scissors will also work.
- 15 minutes if using a sewing machine. Maybe an hour if sewing by hand.
Let’s get started making our umbrella stroller headrest!
Measure your umbrella stroller
The first thing we need to do is measure our umbrella stroller in the following areas:
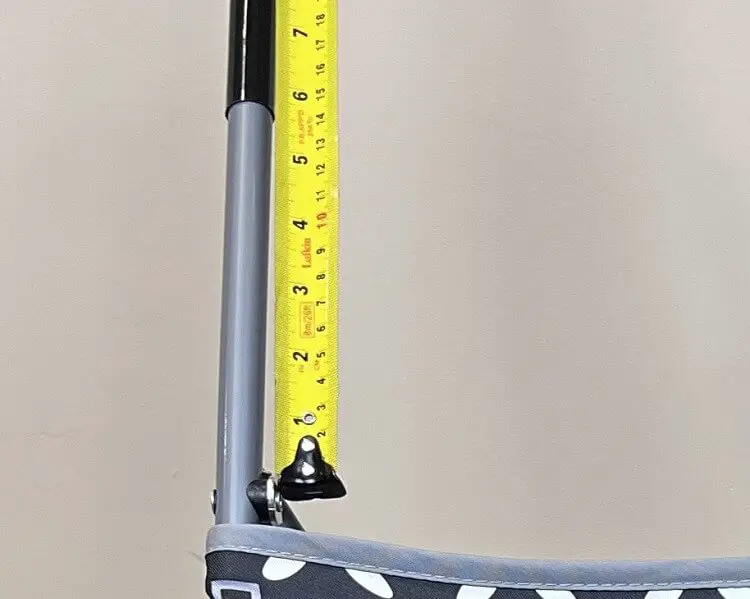
- The height available for the headrest – Simply using a tape measure or ruler, measure the distance from the top of the existing fabric on the umbrella stroller to the bottom of the handlebars – the spot where it starts to bend or where the rubber ends. This will be the height you want your headrest to be. In my case, I have just over 6” of clearance. As we want the headrest to look somewhat nice I am adding 3/4″ on the top and bottom of this to allow for a nice seam at the top and bottom so the fabric does not fray.
- The width between the two handlebars – This measurement is slightly tricky, as we need to consider some extra items when measuring this.
- You need slack in the fabric so that when your child’s head rests against this headrest, it almost cradles the head. But not so much so that the head falls back uncomfortably.
- Similar to the height measurement, you want to leave some surplus fabric to make a nice seam on both ends.
- The fabric must loop around the handlebars to stay secure on the umbrella stroller.
- This headrest is going to slip onto the handlebars. We are not sewing it in place, so the loops must be large enough to allow the headrest to slide on easily.
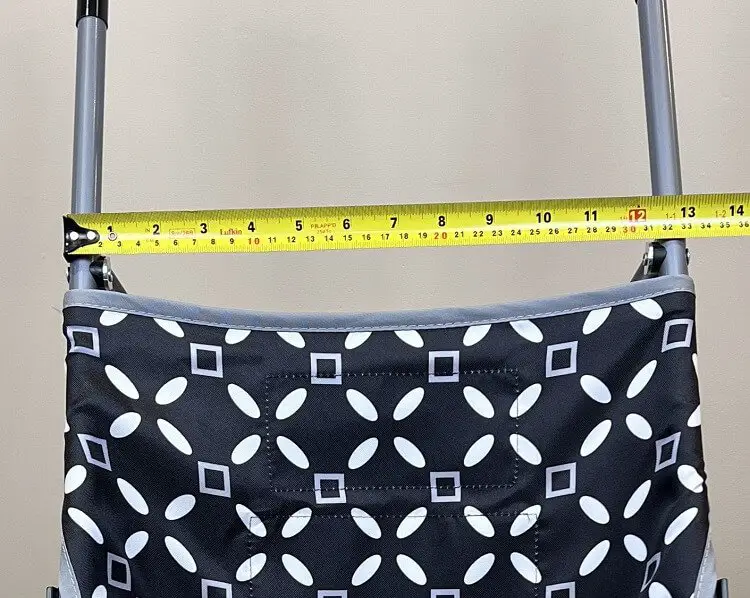
In my case, the total fabric I needed for this was 22″ (13″ for the distance between handlebars + 1″ for slack + 2″ for end seams (1″ for each handlebar) + 6″ for loop with slack for installing onto the umbrellas stroller (3″ for each handlebar))
So, now that we have done all the measurements, we need to cut out our fabric. From the measurements above, I cut out 22″ x 8″.
Let’s Start Sewing our headrest
Now that the tough part is done, it is time to sew this headrest.
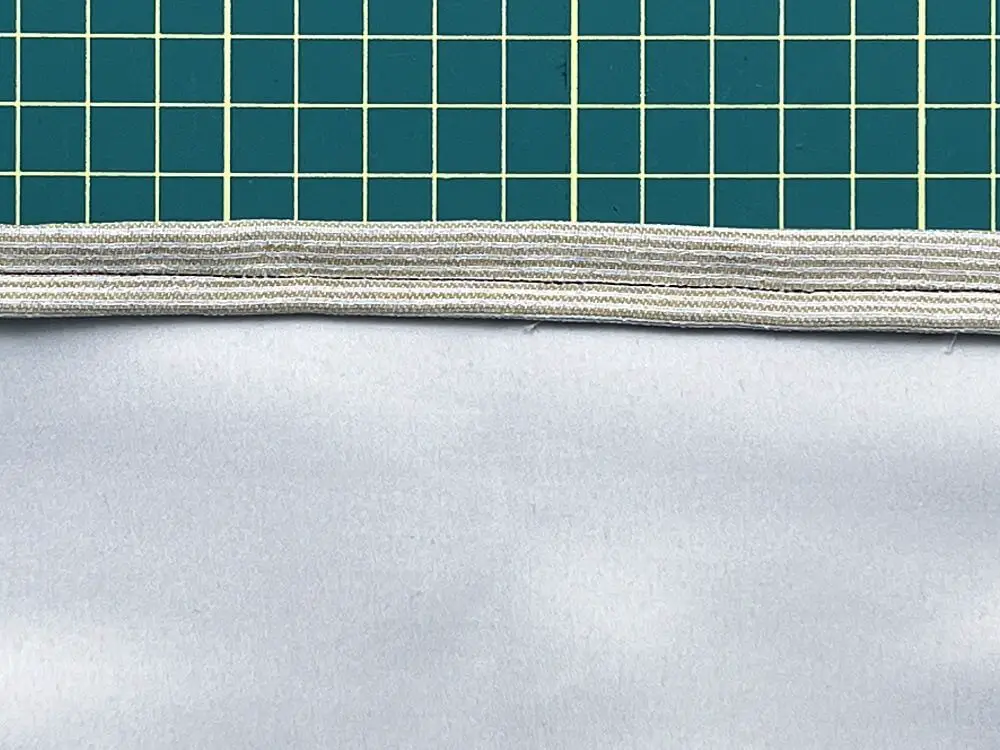
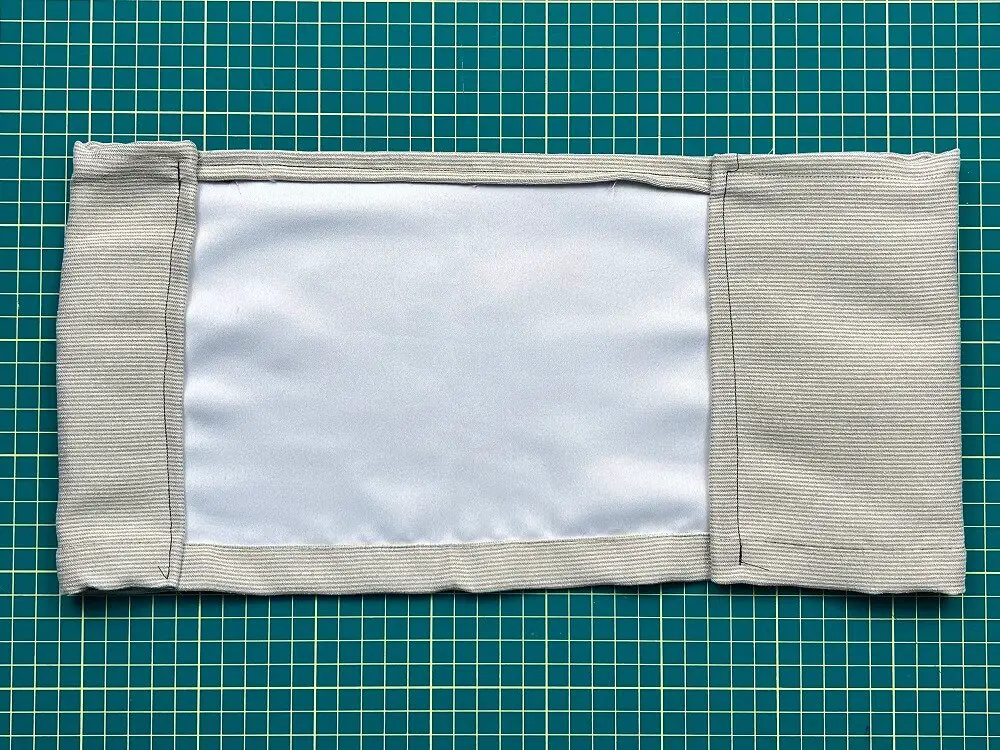
Sew the seam around the fabric
I like to start with the simple parts – sewing the seam around the fabric for the headrest. You can use pins to hold it together or fold the fabric twice and run it through the sewing machine with a straight stitch. As we want this around all sides of the headrest, we can do it all in the first pass. Just keep in mind that the corners will have a lot of fabric, so it is ok to cut a notch in the corners, to reduce the thickness and keep it all clean.
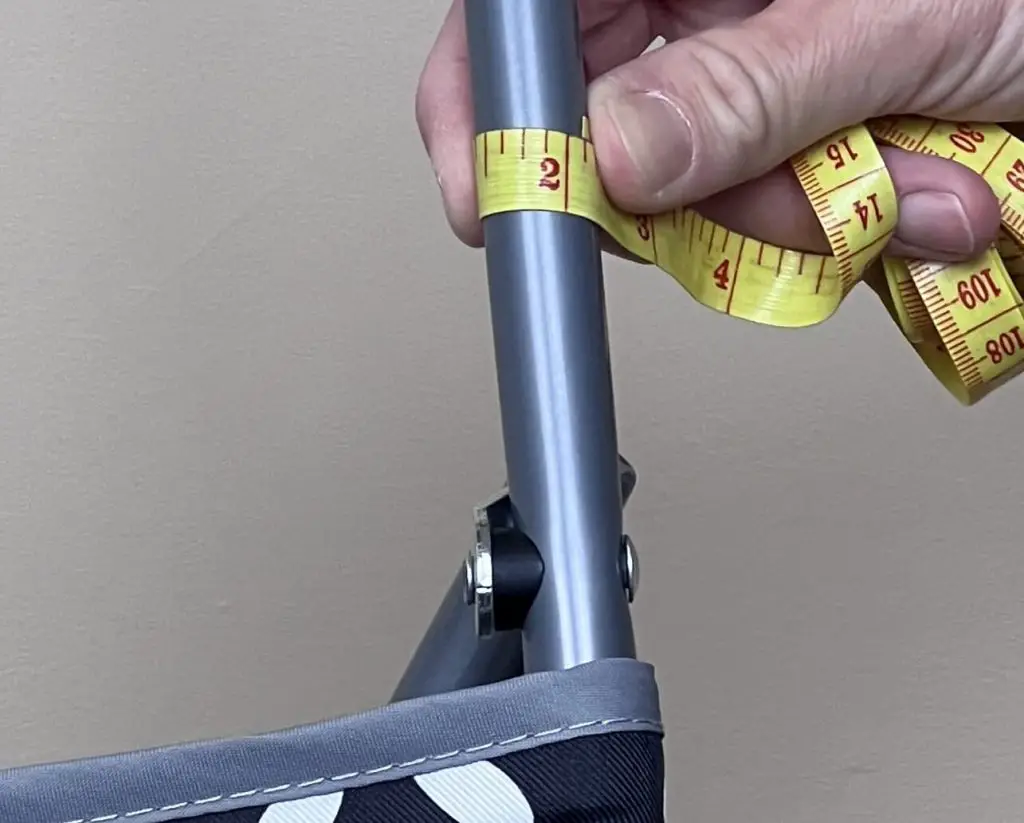
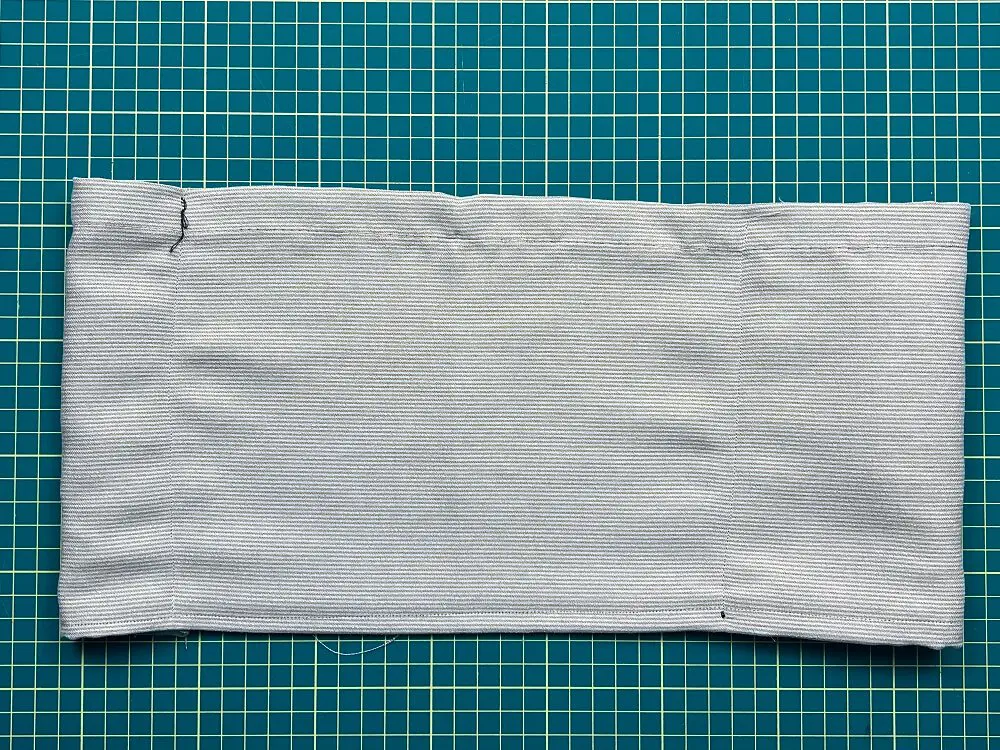
Sew the first handlebar loop
As mentioned above, you want the loop around the handlebar to be loose enough to slide it on and off.
My handlebars are about 2″ in circumference. Even though I measured before cutting the fabric, I like to take the fabric to the stroller and measure the size and location of the handlebar thickness again. I used 2 pins to mark the locations, one at the top and one at the bottom. This way, I am forced to pull the headrest off the handlebars to ensure it fits.
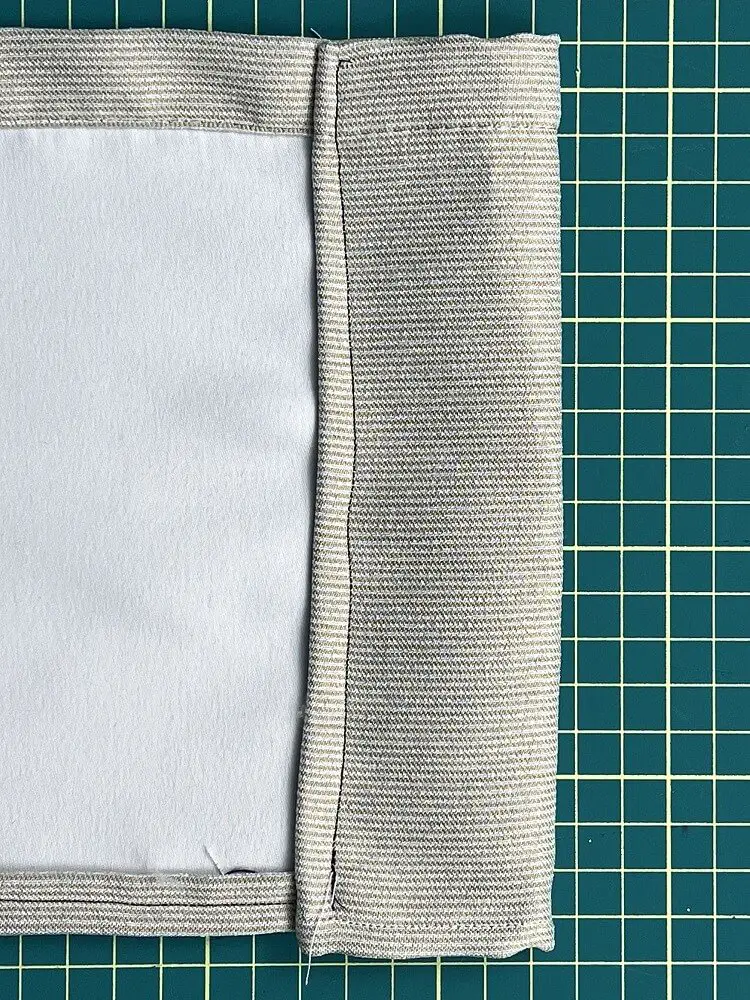
For this first handlebar piece, I positioned my fabric to sew as close to the seam as possible. This is so that all the slack is in the second handlebar loop. You do not want to have a lot of play on this one side.
Once happy with the location of the pins, it is time to sew this loop.
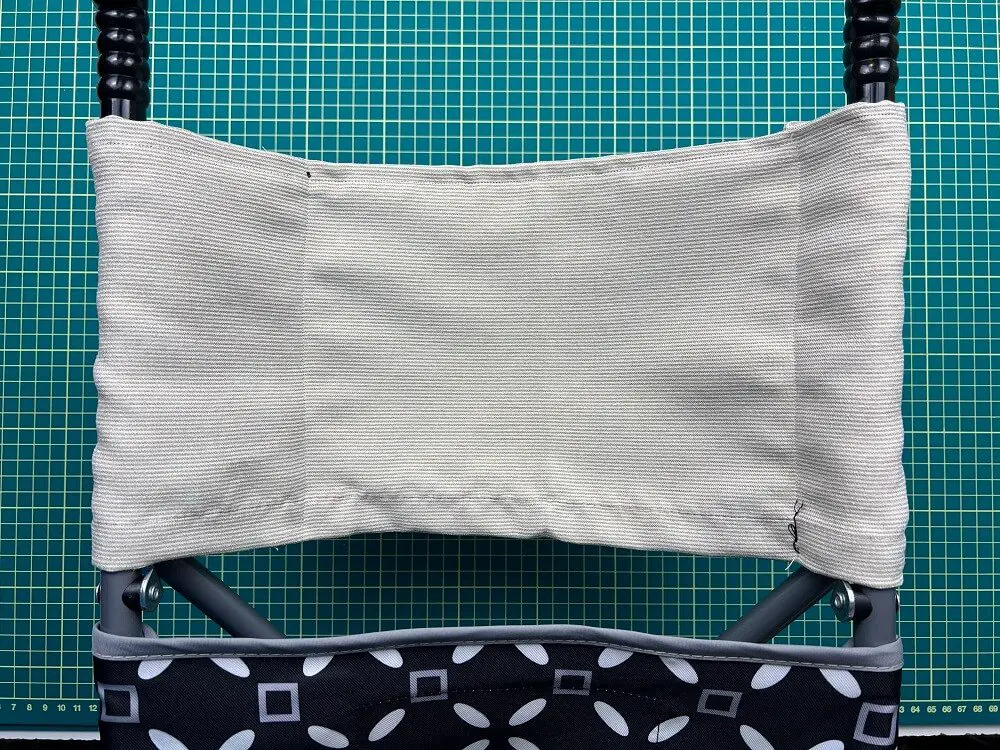
Sew the Second Handlebar Loop
Back at our umbrella stroller, we must check the first loop and ensure it fits. Slide it onto the handlebar. Then pull the fabric over the other handlebar. Leave slack in the fabric to cradle your child’s head. Then, again, using your pins, pin the front and back of the fabric together so that you know where to sew.
There should be a larger area for this second loop than the first. That is ok. Mark off with the pins where you will need to sew. This helps with allowing for slack in the fabric for the head to be cradled in this headrest but also allows for easy on and off. If both loops have little surplus space, it gets harder to put it on. With one side looser and one side tighter, it works well to keep the headrest in place.
Once you are happy with the location of the pins and slack in the headrest, sew this loop shut as well.
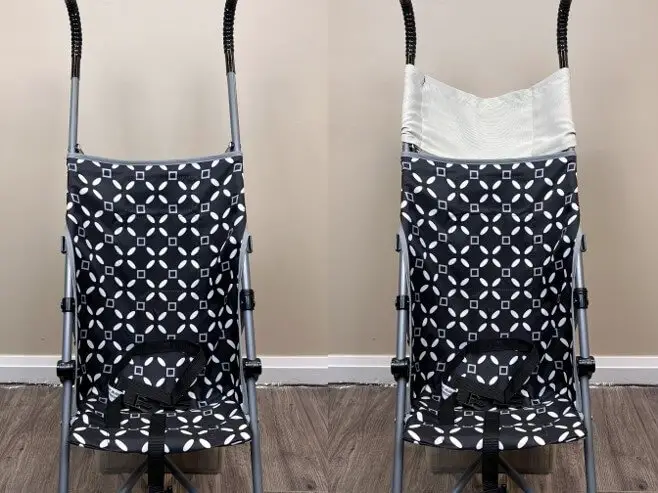
Put the headrest on the stroller
Now that all the sewing is done, it is time to put the headrest onto the umbrella stroller. Simply slip it on and give it a try. I had my child do a test run to check that their head sat nicely on the headrest.
And that’s it! Your DIY umbrella Stroller Headrest is complete!
Frequently Asked Questions about Making a Headrest for your Stroller
How do you know how much slack to put in the headrest to cradle your child’s head?
This is a tricky one. And it may take some trial and error. But what I found helped was, I made my child sit in the stroller after the first loop was sewn, and then I tested different amounts of slack in the fabric. This way, I could see how their head was positioned on the headrest, and they could let me know if they were comfortable or not.
How long does it take to make A headrest for a stroller?
This whole project took me about 15 minutes. If you are not experienced with sewing, it might take a bit longer, but this is a quick project that can be done the night before travel if needed.
Can I remove the headrest from the stroller?
Yes, you can! The way the loops are sewn allows for easy removal of the headrest for washing but also keeps it secure so it will not fall off during travel.
Did you enjoy this tutorial on the DIY umbrella stroller headrest?
Did you enjoy this DIY Umbrella Stroller Headrest post? Let me know in the comments below. If you tried it, let me know how it turned out!
If you enjoyed this sewing post, be sure to check out my other sewing projects here.