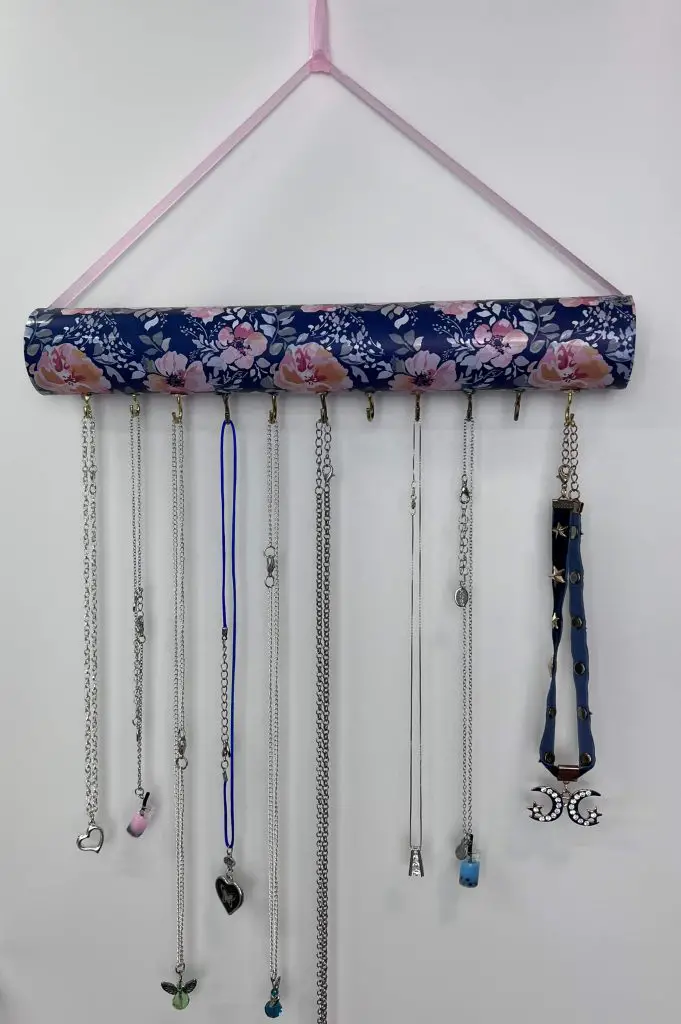
As my girls are growing up, so is their need for accessories. And with more accessories comes the need for better organization. We live in a small house, and we have limited space, so making sure that we use our space efficiently to store and display our things is vital. So, it was time to design and make a simple necklace holder for my girls. This is a simple necklace holder that can hang on a wall or a door yet be easily accessible. So, let’s jump in and DIY a simple necklace holder.
As an Amazon Associate, I earn from qualifying purchases. This post contains affiliate links. I may receive a commission if you purchase an item from one of my links. This will not change the price you pay.
Supplies Needed to for a DIY Simple Necklace Holder
The supplies from this list are simple. Whenever possible, I like to use up scraps as well, so we have some of those in the mix. Here are the supplies we need for a DIY simple necklace holder:
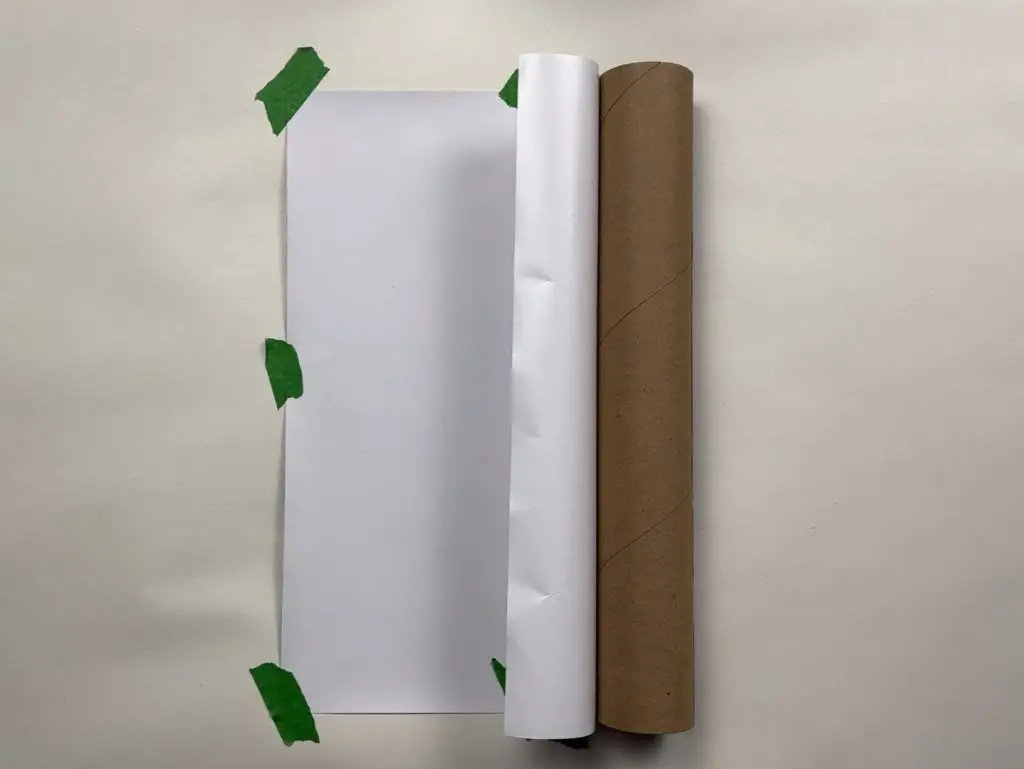
- Cardboard tube – I used an empty vinyl roll cardboard tube. You can also use a toilet paper roll tube, a paper towel roll tube, a cling wrap or an aluminum foil cardboard tube. Any tube will do. I will point out that the paper towel and toilet roll tubes are made of thinner cardboard and may bend and deform faster, so be cautious with those items.
- Permanent vinyl – I used some permanent vinyl I purchased at the Dollar Tree a while ago. But any permanent vinyl will work.
- Paint – Optional – If you prefer to use paint instead of vinyl, you can use acrylic paint to do the job as well.
- Ribbon – Ribbon to match the vinyl (or paint color)
- Paper Cutter or Scissors – For cutting vinyl and ribbon
- Painters Tape – Optional – To hold down vinyl
- Glue – I used my hot glue gun and hot glue, but any glue will do. I find hot glue dries fast and works well.
- 11 small screw hooks – I used these 5/8″ screw hooks, but any will do. Keep in mind the bigger the hook, the bigger the crew. We are working with cardboard, so you do not want to have a large hook and screw as it will not stay put in the cardboard tube.
- Wall hooks or nails – I used 3M command strips and hooks because they are easy to apply and remove without leaving a mark on the wall or furniture.
Okay, now that we have all our supplies, let’s DIY a simple necklace holder.
Making a Simple Necklace Holder
This is a simple craft and does not take much time. So, let’s get started!
Apply vinyl to cardboard tube
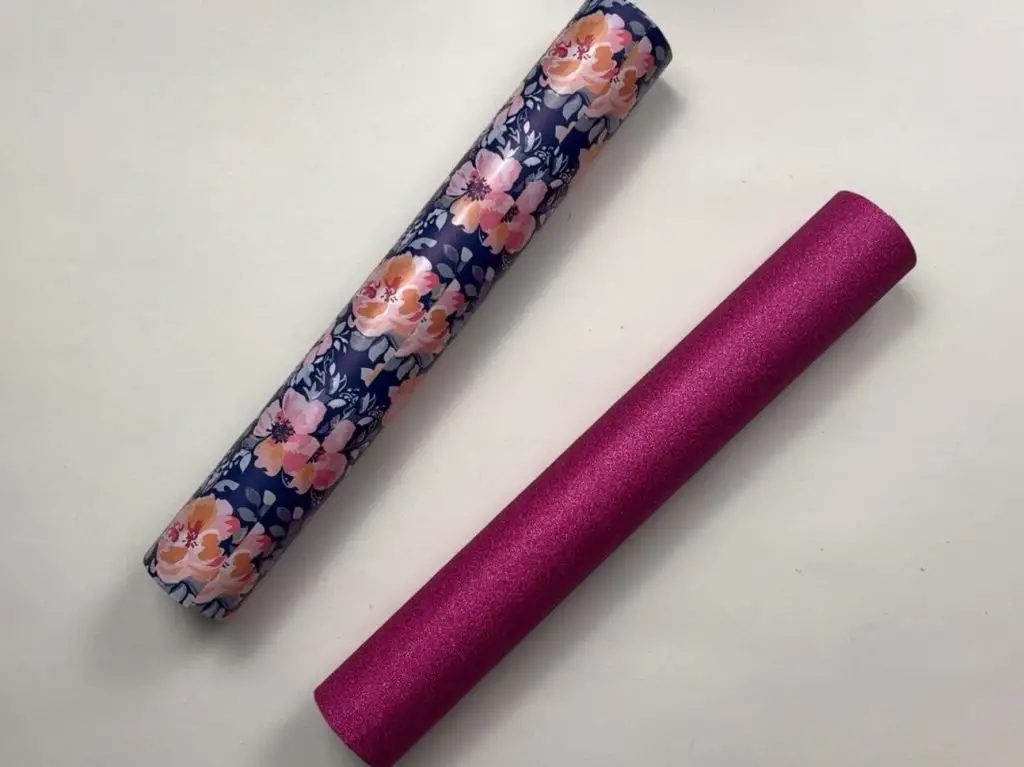
When thinking about making this craft, I initially thought I would use paint and paint the cardboard tube, but that would take longer. Also, you would still see the outline of the cardboard, so I thought using permanent vinyl would look better. I have a lot of vinyl in my supplies collection, so I thought it would be good to use some of it.
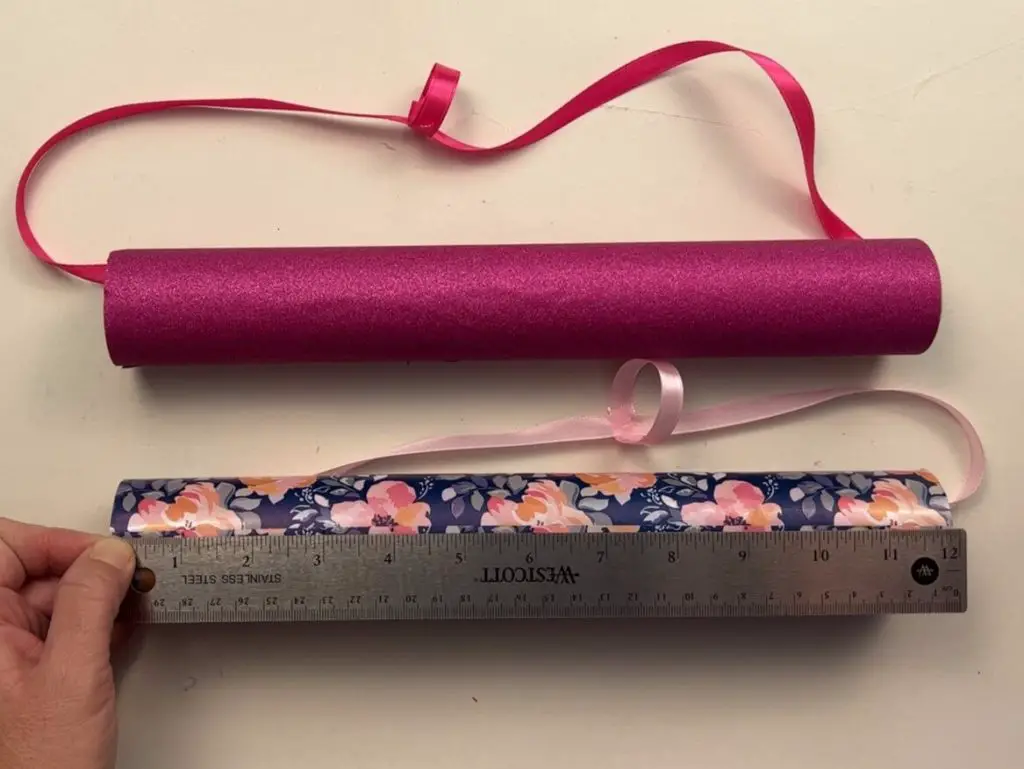
You want to make sure that the size of your vinyl is the same size or larger than the length of your cardboard tube. In my case, I am using a 12″ long cardboard tube and 12″ wide vinyl.
If you are using long sheets of vinyl, I recommend cutting a piece which is wider than the circumference of the cardboard tube. In my case, I cut a section that was 8″ wide. This way, if you have not centered the tube correctly, you will have overlap at the end and not leave any cardboard exposed.
Place the vinyl face down on your workstation. I taped down my vinyl, as I keep it in rolls, and it is harder to manage this way. I applied a few pieces of painter’s tape onto the backing paper of the vinyl to hold it in place on the left side and middle.
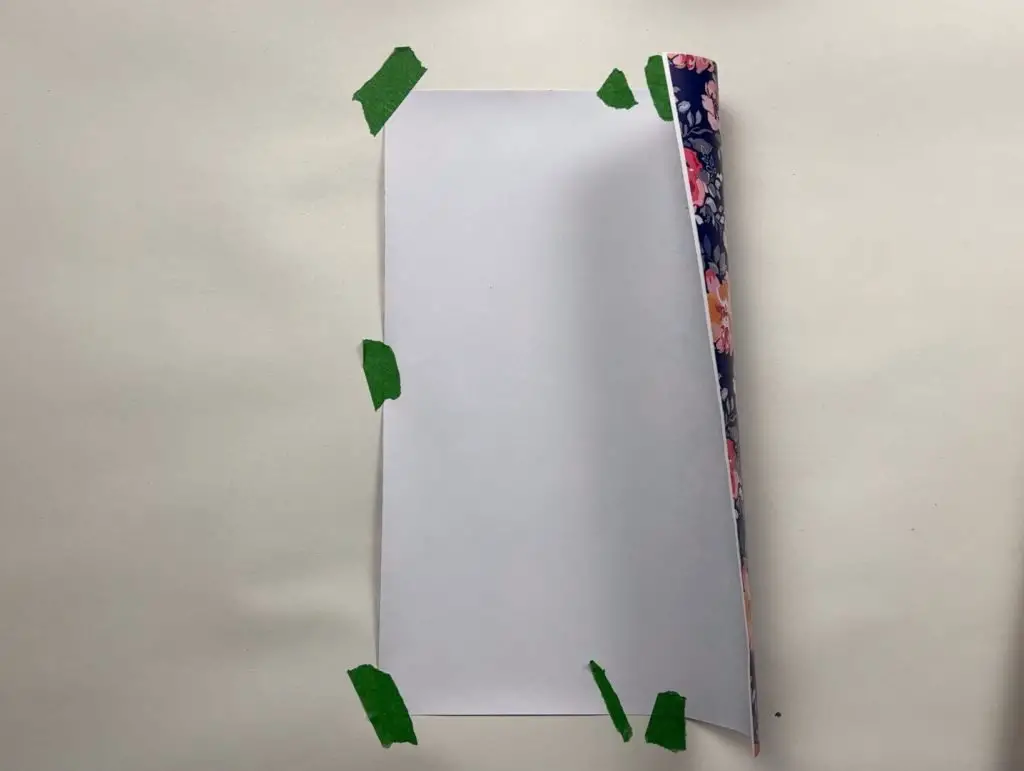
Remove part of the backing paper from the vinyl.
Place the cardboard roll on the vinyl. Be mindful to place the cardboard roll down so that it is aligned with the vinyl and so it will roll straight on the vinyl and not askew.
Roll the cardboard tube along the vinyl while pulling away the backing paper. Do this slowly to make sure there are no wrinkles in the vinyl.
Attach a hanging ribbon
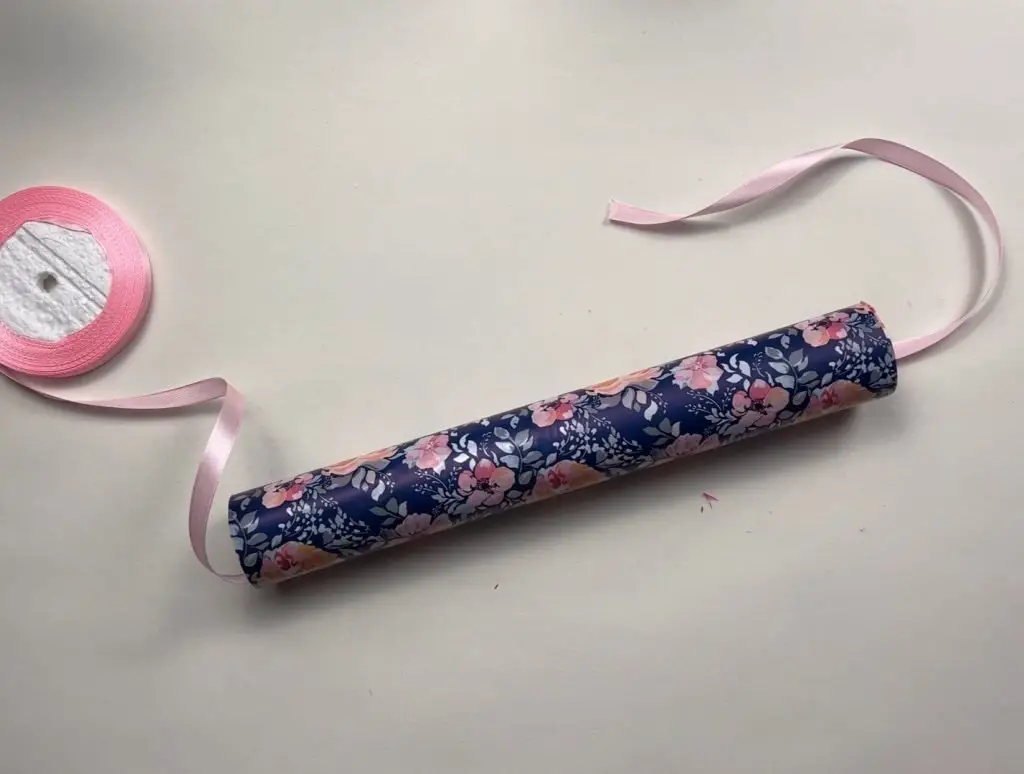
For this simple necklace holder, I want it to hang as I do not have much space for it to sit or stand anywhere, so we are going to use some ribbon to help us accomplish that.
I picked out a ribbon that matched my vinyl. But any color will do.
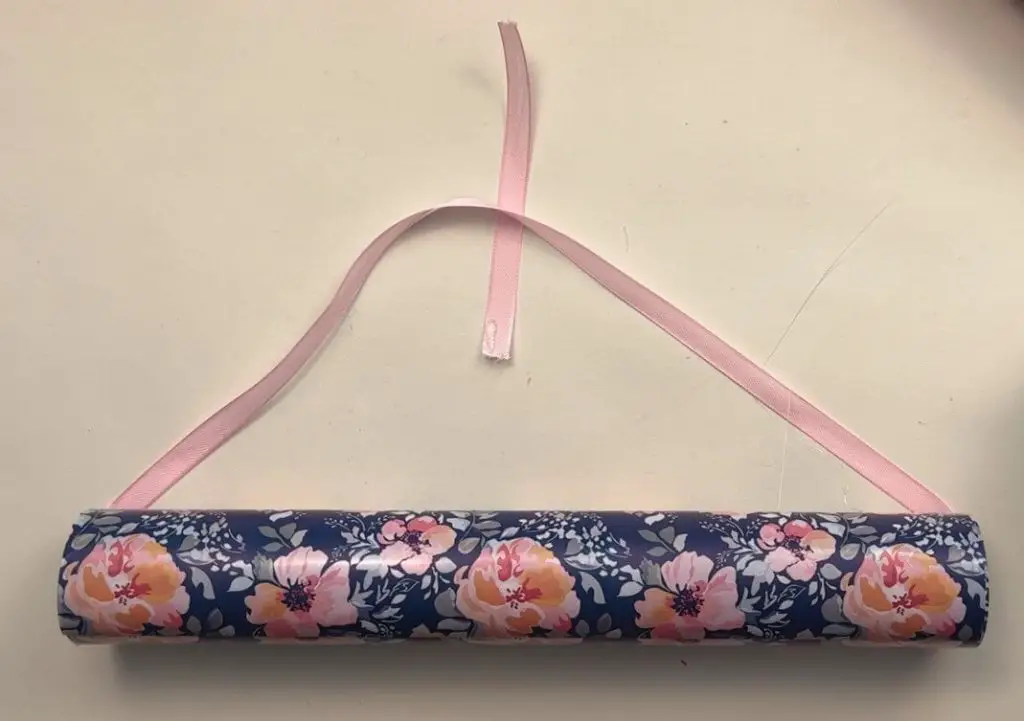
You need enough ribbon to go through the cardboard tube and around while leaving enough slack so it can hang and also have a knot tied into it. In my case, I used about 26″.
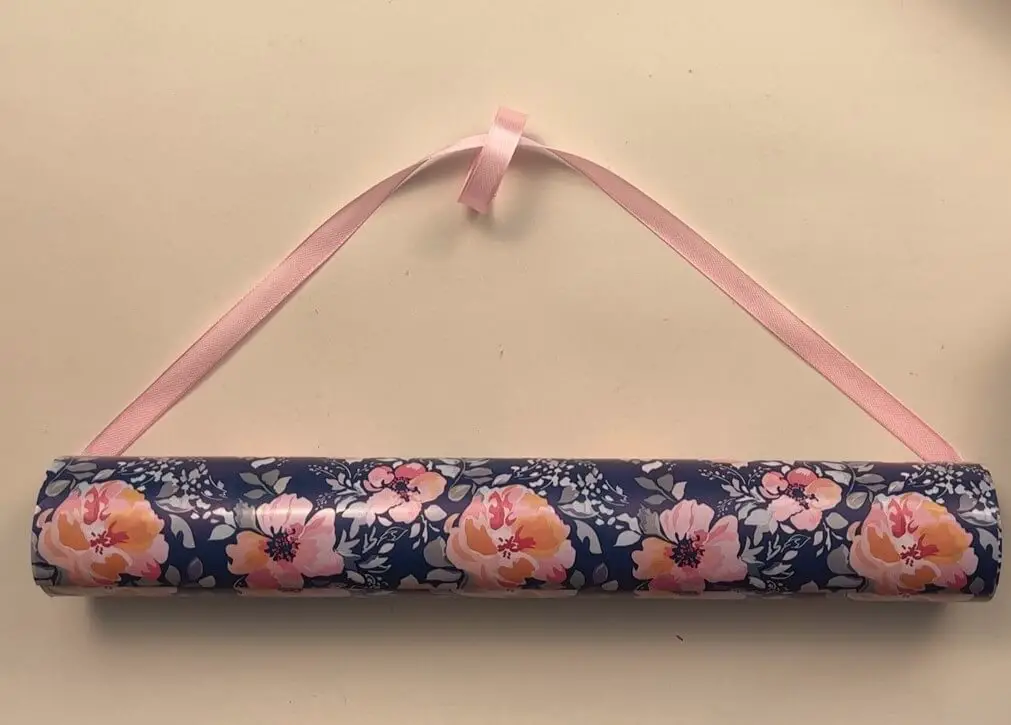
Slip the ribbon through the hole in the cardboard tube and pull it through. Tie a knot with both ends attached. Adjust the ribbon so the knot is hiding inside the cardboard tube.
This is optional, but I like to use some glue to glue the ribbon in place. This will stop the ribbon from moving around as much and keep the knot in place.

Now that the ribbon is in place, it is nice to add one more ribbon loop in the top ribbon at the center so the necklace holder is always centered when hanging and not flopping around from side to side from uneven weight distribution from necklaces.
Simply use a small piece of ribbon, about 1.5″-2″ long, loop it around, glue it closed and glue it to the long ribbon.
Attach Necklaces hooks
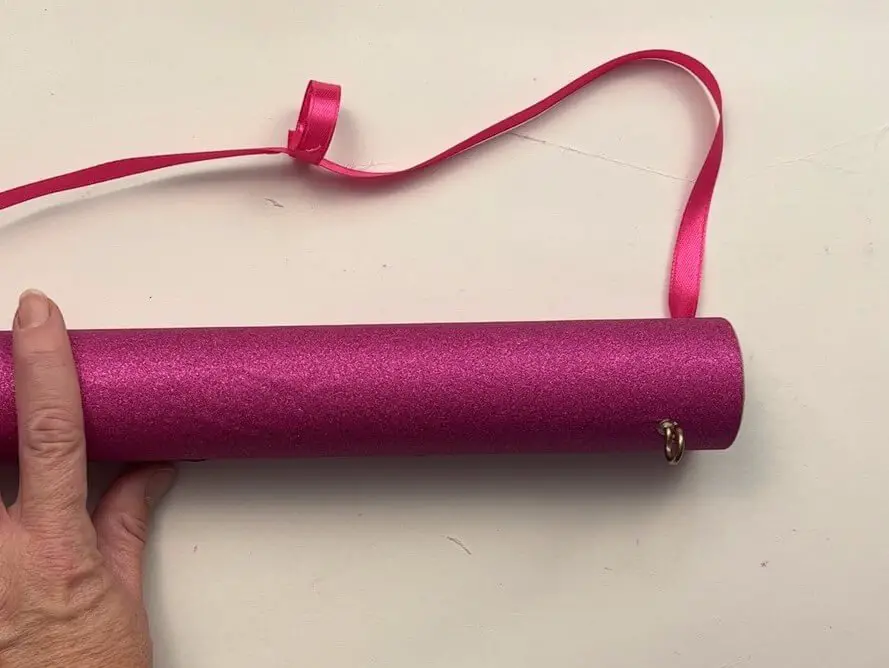
So, if you want your necklaces to stay in place and not slide back and forth on the necklace holder, you need to have something to keep them in place. I have opted for using simple hooks for this.
If you are worried that the hooks will fall out over time, you can add a dab of glue on the thread of the hook just before your final twist into the necklace holder.
I used 11 hooks per necklace holder. I measured out 1″ gaps and marked them with a pencil. Then, I screwed each one in.
Leaving a 1″ gap will allow me to add more in the future if I need to, at the 1/2″ marks. But for now, 11 is enough.
Find the perfect spot for your DIY Simple Necklace Holder
While the glue is drying on your ribbon, you can look for the perfect place to hang your necklace holder. You can use nails or picture hangers if you like, but I prefer to use 3M command strips with small hooks as they are easy to apply and easy to remove. At our house things move around a lot, so this saves me from making and patching holes all over the house.
And there you have it! Your DIY simple Necklace holder is complete!
Things I learned while making a DIY simple necklace holder
Although this is not a very difficult craft, it is a practical one, so I find that sometimes making things work in real life is harder than planned. So, here’s what I learned:
- Initially, I wanted to have the necklaces simply on the cardboard holder, with no hooks. However, this would require each necklace to be clipped on individually. This would be fine for the first one, but after that, each one would slide around and could get tangled up. Also, this would start to scratch up the wall afterwards as well.
- I wanted the necklace holder to stay put when on the wall, and not having an extra stabilized loop would allow the necklace holder to slide like a picture on the wall. But with the uneven distribution of necklaces, this would only get worse. And I wanted to keep life simple for my kids.
- I made two different colors of this necklace holder. One with a patterned vinyl and the other with glitter vinyl. I was not too worried about the patterned vinyl. The glitter vinyl will, over time, start to scratch up the wall, so I placed two felt pads, one at either end of the necklace holder, to keep it off the wall to avoid scratches.
- For this craft, I only made one level for necklaces. As my kids get older, I may modify this to add 2 or 3 levels to accommodate bracelets and other accessories.
- I only used 11 screw hooks on this necklace holder as we do not have enough necklaces to need more. However, with the 1″ spacing, it allows me the freedom to add more hooks later on. I can either look at adding a hook at the 1/2″ mark or two more, one at the 1/3 and 2/3″ marks.
Did you enjoy this craft?
Did you enjoy this DIY simple necklace holder craft? Let me know in the comments below. If you liked this craft, check out some of my other similar crafts her:
- Hair Clip Holder – How To Make One
- Jewelry Box From Toilet Paper Rolls
- DIY Easy Cat Schedule – In/Out Sign
And check out my other vinyl craft here.

what a great idea!
Thanks!
This is a wonderful idea. I think I’d make mine from wood, tho. It might make it mor difficult, but it would last forever. You can be freer with the way you decorate it, too. Decoupage it with any paper that you like or paint it any way you like. It will last longer than a cardboard tube, I’d think. This is great, though. Thanks for sharing!
I had thought of making it with wood, but I didn’t have any larger dowels available, and I had a lot of cardboard tubes. The ones I use are from vinyl, so they are very thick, unlike the ones that come from paper towel roll. Thanks for reading! And Happy Crafting