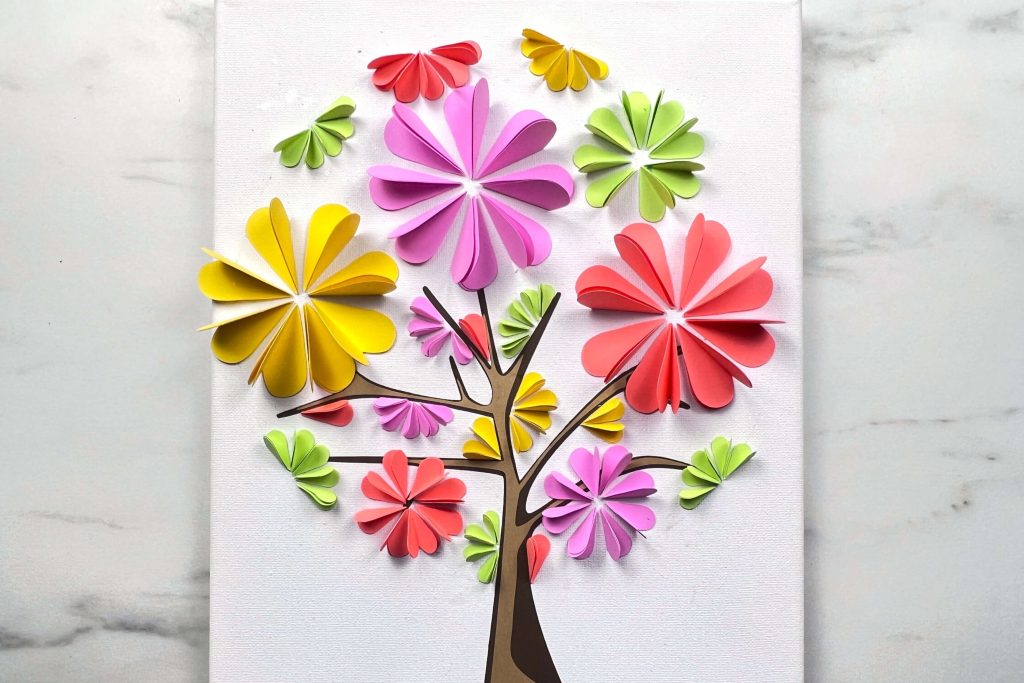
It was a long winter and I’m over it! I’m done with the snow and the cold and ready for bright colors and warmth. Just not winter! And, in my desire to get away from winter, I decided I needed to add some color into my world, and that is how I came up with this Colorful Spring Paper Tree Craft. So, let’s jump right in!
Supplies Needed to make Colorful Spring Paper Tree Craft
As with all projects, I say this one doesn’t need many supplies, but this time I may be a bit off… There are a few things you need to make this project, so let’s do a detailed review:
- Project Design File – You can buy my design for this project HERE at my shop. Now, you don’t need to. You can make your own design, that is what I did, but just in case you don’t have time to make the design and the project, I have you covered.
- Cardstock – I have set this project up so that you can make this using 8.5″ x 11″ cardstock. However, if you want to make it larger, you can increase the sizes to be larger than I have indicated. For this, I used my standard Recollections Multi-Color Pack of Cardstock. And I pulled out:
- 1 shade of dark brown
- 1 Shade of light brown
- 2 pieces of light purple
- 2 pieces of pink
- 1 piece of green
- 1 piece of orange.
- 1 sheet of scrap 12×12 paper (or 2 pieces of 8.5″x11″ taped together) – optional
- Glue – I used my standard crafting glue for this project. You may need to use lots of glue to adhere to the canvas.
- Canvas – I used an 11′ x 14″ canvas. If you are using canvas, just be aware that the glue might not want to stick very well. To counter this, you can:
- Optionally, paint the canvas to help the glue stick, or
- You can place a book or hard surface close to the canvas so that when you adhere the petals to the canvas, you can press them onto something to help them hold, or
- You can use paper for this design and put it into a picture frame instead.
- Pencil & Eraser – for a quick outline and then to remove it.
- Cutting Machine – I used my Cricut Explore Air 2, but any cutting machine that works with 8.5″x11″ or 12″x12″ cardstock will do.
- Cutting mats to hold the paper in place while cutting.
- Scoring pen – I use my Cricut Scoring Stylus by hand. I find this faster than having it done by the machine.
- Ruler
OK, now that we have all our supplies, it is time to get this project started!
Making Colorful Spring Paper Tree Craft
Using my Design to make the Colorful Spring Paper Tree Craft
You can grab a copy of my design at the shop, here. I have based the tutorial on my design, but you can recreate it with your own design and follow along with the important steps.
Also, if you purchase my design, when you are done with the checkout process the last screen will show you a link to the design. And you can access it again and again by logging into your account. It will not be emailed to you.
After you have the design on your computer or tablet, we import it into Cricut Design Space.
You may get a note saying the file is large and may take a moment to load. This is normal and nothing to worry about. The file will load into Cricut Design Space with no problem.
Once the design is loaded onto your canvas, you need to make one modification. You will need to adjust the width to be 10″. Before you do that, verify the dimension proportions lock is on so that the whole design adjusts size proportionately.

When working with my design, you will notice a large circle behind the tree. You can cut this out if you want, or you can not. This is a template that I have created so you can see the design of the tree in Cricut DS, but also so that you can use it to make the circle on your canvas. If you do not want to cut out this circle (as it is about 10″ in size), you can Ungroup the design, select the circle and delete it.
Now the design is ready to cut, hit Make and cut out the design. All of these elements are to be cut in cardstock.
Scoring the Hearts of the Tree
I am not a fan of adding score lines to my designs for a few reasons. The first one is that you then need to go into each element, manually change a cut line into a score line and then attach the pieces back together. The second one is, that I find that after scoring a bunch of items on my mats, the scoring stylus will pop out and only score some of the items.
So, you will need to manually score each heart through the center down to the bottom. This only takes a few moments and is faster than making the changes in DS and then scoring it on your machine.

Assembling the Flowers on the Tree
Once all the petals are scored, it is time to fold them in half. I like to fold all the petals and place them into piles of their respective sizes and colors.

There are several ways in which you can make the flowers, so I will tell you how I did it, and give you some other options as well.
Each flower has 8 petals. Each petal had 2 hearts glued together. So each flower has a total of 16 hearts used.
Gluing the second heart inside the first is optional. I did this to add more depth to the design. If you also do this, I recommend you try to glue on the same side of each heart. This will create symmetric petals for the entire flower. You do not need to do this, but if you glue once on the left side and once on the right, the folds will open up slightly differently.
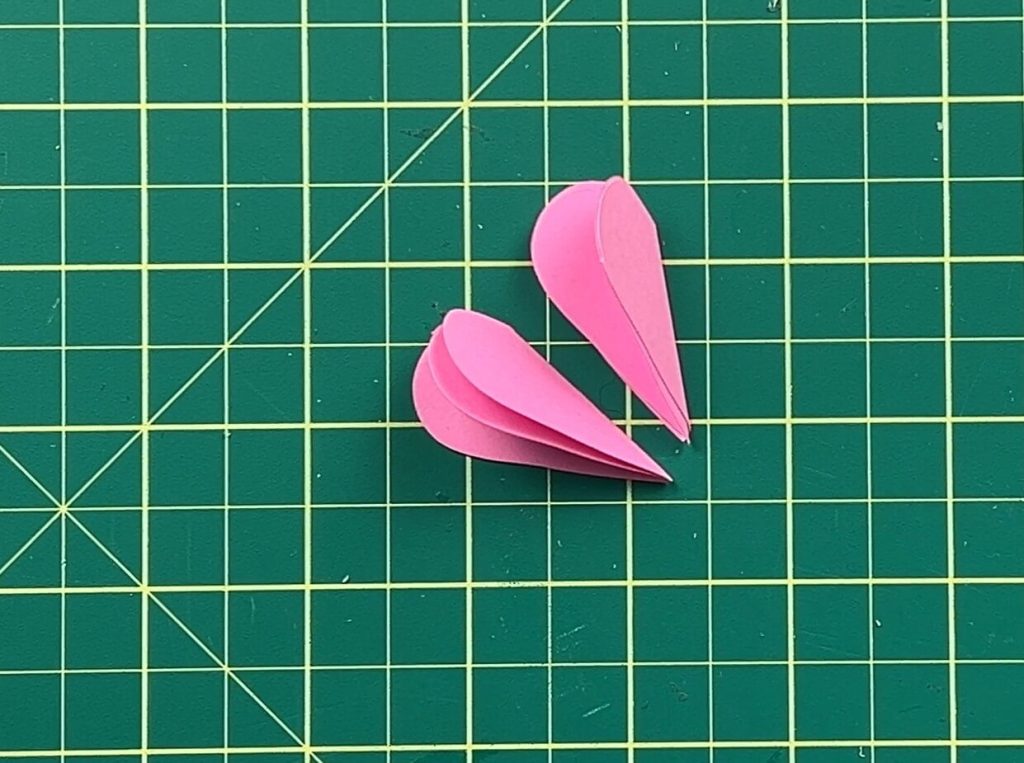
I recommend folding and gluing all the petals in one fell swoop and keeping them organized in piles to make assembly faster.
Assembling the Tree Trunk
For my design, I created a tree with two colors. This gives the tree more depth and makes it look more realistic.
You need to align the two tree pieces facing the same direction. The tree is not symmetric. Once you have them aligned, apply glue to the smaller tree outline and glue it onto the larger one. When I glued my pieces together, I found that one of the smaller branches didn’t want to stay put, so I cut it off instead of forcing it to stay down with more glue.

Assembling the colorful Spring Paper Tree Craft
Now we are ready to start assembly!
If you cut out the circle template, place it on your canvas. Then, place the tree on top. Adjust the location of the circle and the tree so that they fit nicely on the canvas.

Once happy with the placement, make a small mark on the canvas below the bottom of the tree so we know where it needs to be placed later.

Then, using a pencil lightly trace around the circle onto the canvas.

If you did not cut out the circle, you may hand sketch a circle, use a pen compass to make a circle or leave it without a circle altogether.
Next, glue the tree onto the canvas, using your mark to help align it in the correct spot.
Starting with the largest petals, place them onto the tree. There are three large flowers in this design. Remember, each flower has 8 petals. Place them onto the canvas where you would like them to be. Once happy with the placement, apply glue to the back of each petal and glue them into a circle onto your canvas. You want all the petals opening in the same direction when gluing them into place.

Next, repeat the placement and gluing of the remainder of the petals. You can do this in one or two sections, but I recommend placing all or most of the petals onto the canvas first and then gluing them into place. This will allow you to maximize your space.

In my design, I have tried to keep all the flowers inside the circle. This allows me to make half-flowers along the circle edges. You can make half flowers as well, or you can make full circles and go outside the circle of the tree. The choice is yours.
There are extra petals in the design. You can line them up between tree branches or at the edges of the circle. Or you can leave them out entirely.
Also, do not worry about covering up the tree branches. Tree branches are meant to be guides and add accents to our craft.
Remove the pencil lines
Once all your flower petals are glued into place, take your eraser and erase the pencil lines you made at the start of the project.
And that’s it! Your Colorful Spring Paper Tree Craft is Complete!
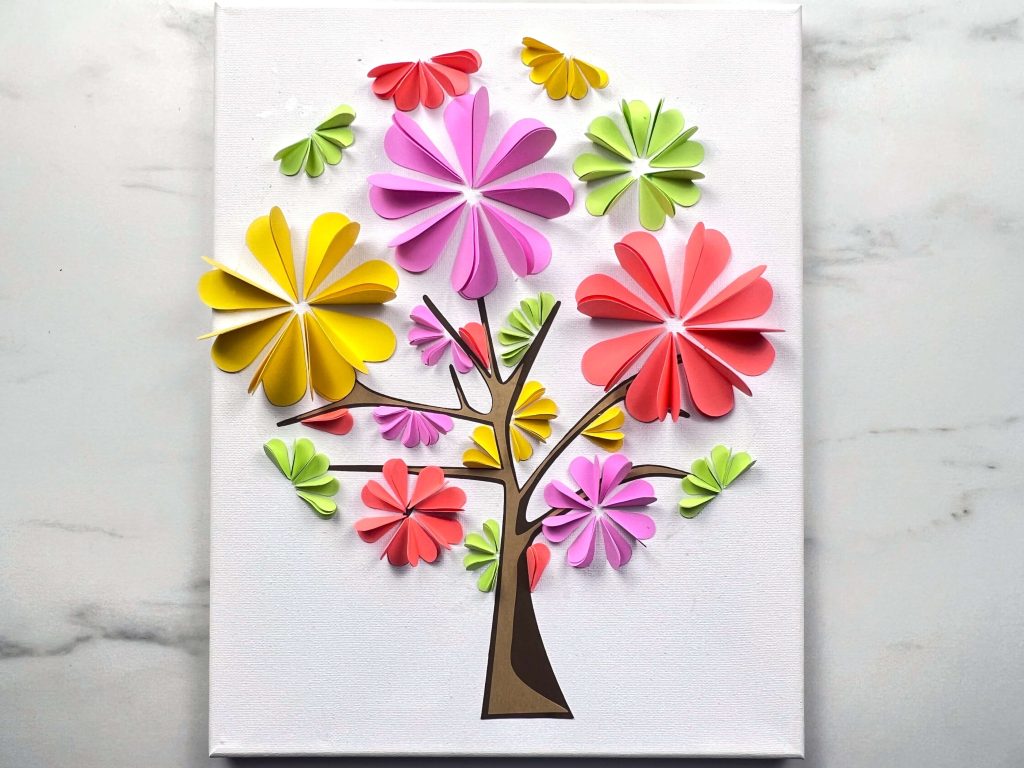
Things I learned while making this Colorful Spring Paper Tree Craft
When I started this project, I knew it would take a while to make, so I was prepared, but there are always things to learn. So, here are my latest learnings:
- When gluing the flower petals onto the canvas, I recommend starting on the outside of the flower. What I mean is, the side closest to the edge of the canvas. I say this because when I was gluing down one of my flowers, I started near the middle of the tree. When I got to the outer petals, they ended up hanging over the edges of the canvas. This isn’t a big deal, but something to keep in mind.
- When gluing the two petals together, I recommend you try to glue the same side of each heart. This will create symmetric petals for the entire flower. You do not need to do this, but if you glue once on the left side and once on the right, the folds will open up slightly differently. I wasn’t paying attention while gluing and glued them on both sides. The final result still turned out great, but I would have liked all my petals to unfold the same distance, and that didn’t happen when I glued them willy-nilly.
- I thought I was gentle when using my pencil to mark my circle. Based on how difficult it was to remove the pencil from the canvas, I think I used too much pressure. I managed to get it all off, but it took longer than I thought.
- I used a framed canvas for this project. I was going to use a picture frame, but I ran out, so framed canvas won. But if you are working on canvas, remember that glue might not stick. You may need to apply a base coat of paint onto the canvas before you begin the project. Or, you can place a book or several pieces of cardboard under the canvas so the canvas doesn’t stretch when you press the petals on.
- I created a large circle to be used as a template for this craft. But in reality, I could have added that to the design. I could have cut it out in cardstock of any color and glued it behind the petals to add more depth to the project. I didn’t want to.
- Also, you can add more color to this project by painting the canvas any number of colors, or shades, like a sunset or northern lights first. After the paint dries, you can make the project on top.
Did you enjoy making this Colorful Spring Paper Tree Craft?
Did you enjoy making this Colorful Spring Paper Tree Craft? Let me know if you tried it and how it turned out! Also, if you tried it out, let me know if you have any suggestions on how to make this better!
If you enjoyed this project, check out my other paper project here.
If you want to create more canvas projects, you can check them out here.
Don’t forget, you can get a copy of my design at my shop here.