Somehow, it feels like birthday season is upon us all the time. And here I am, making more birthday cards. This time, it is an 80th Birthday Shaker Card. This is a simple design, and you can make this for free by yourself in Cricut Design Space. I’ll walk you through how to design it below, and the assembly is here. And if you do not have time to design it for yourself, you can buy the design in my store here. So, let’s start making an 80th Birthday Shaker Card.
Supplies needed to design an 80th Birthday Shaker Card
For this craft, all we are doing is designing the card, so we need a design program. And as I promised above, this will be a free design in Cricut Design Space, so that is all we really need. (This assumes you have a computer or tablet that supports Cricut Design Space). So, let’s open Cricut Design Space and get started designing!
How to Design a Free 80th Birthday Shaker card in Design Space
Get a Free Card outline From Cricut Design Space
When making a card, I often like to get the card for free from DS. They have numerous different designs available for free. They are not always the same, and they can change from time to time, so you might have to pay for them the next time you use them, but you can change them out. So, let’s find a free card template.
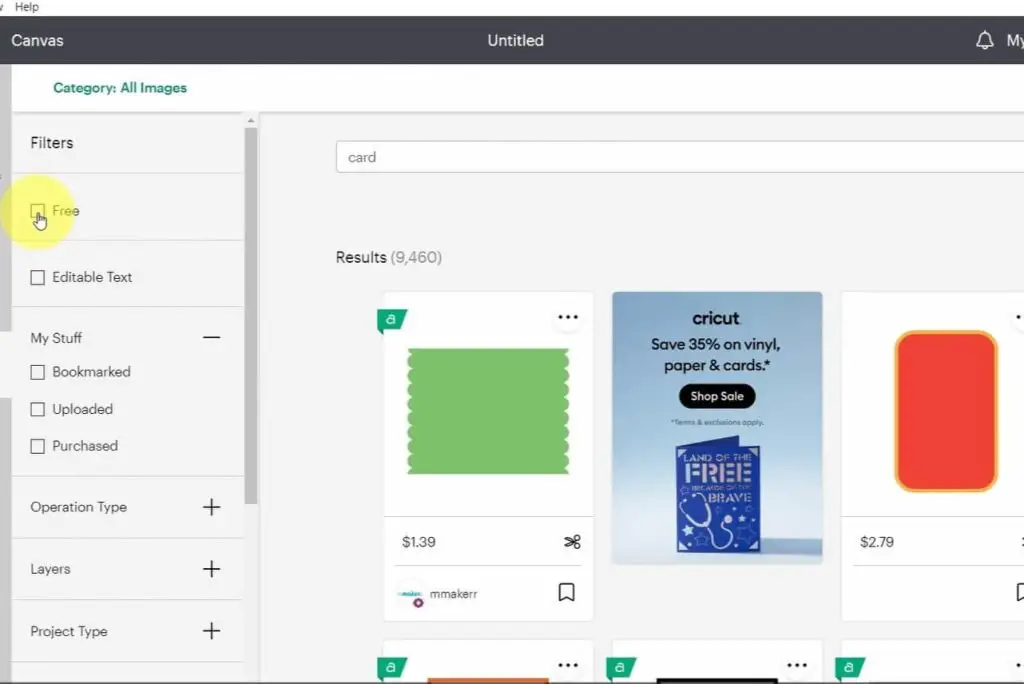
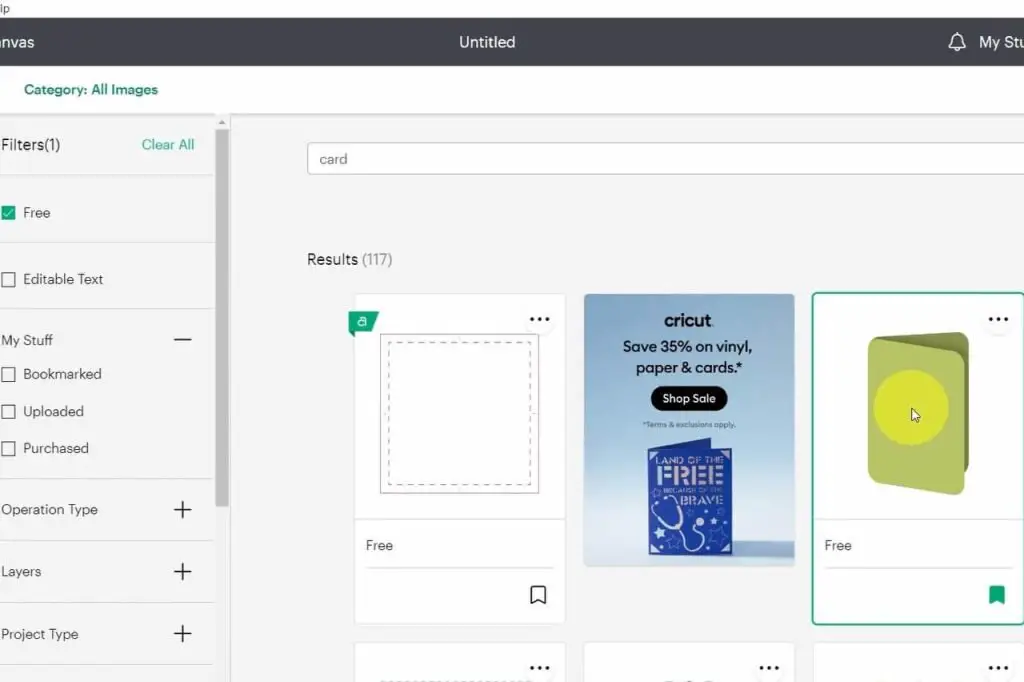
In Design Space, select the IMAGES icon. This will bring you to a menu of all the available images from Cricut and more. In the search bar, type in CARD. Now, move over to the filter button (3 lines with circles on them) and select FREE. This will remove any paid items. Just be aware that some of these free items are free for Cricut Access members, so they may not be free if you do not have a membership.
You will see several different card types, but you want to pick one similar to what I have below. Select it, and Add it to your canvas.
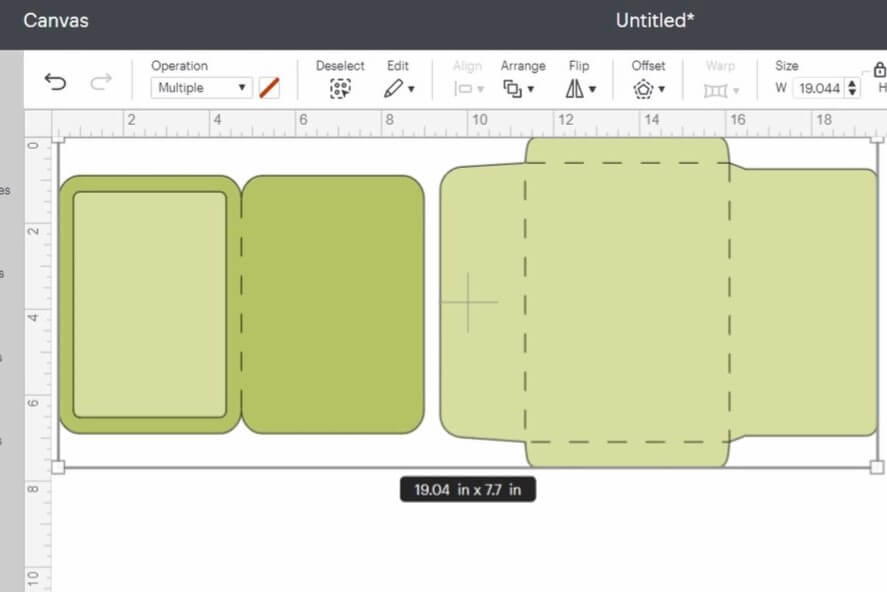
Once it is in your canvas, select the card and ungroup the image. This will make all the pieces individually so you can move them around, remove items you do not want, etc. We are going to select the envelope and delete it. We do not want to use this, as it will not work for our project. Using a simple envelope will be easier. But you can keep it if you like.
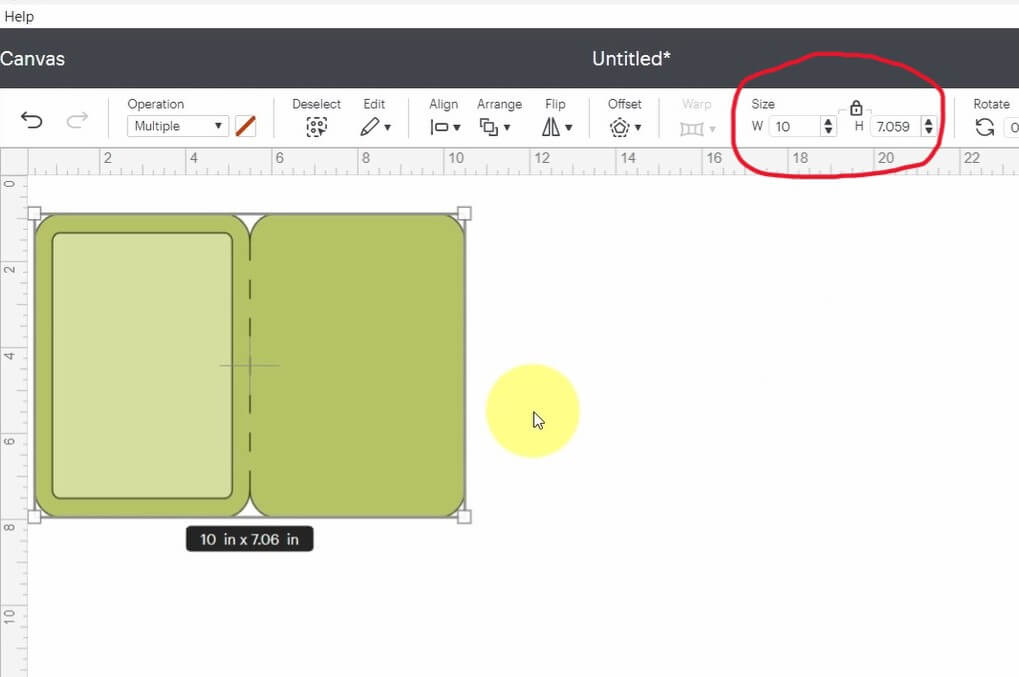
Now, select the card and the card insert, and change the size for the card width to 10.5”. This will make the card height around 7”.
Ok, the back of the card is done.
Design the Shaker
For this shaker card, the number 80 will be the shaker. Select the TEXT icon, and type the number 80. (Or any other number you want. But for this type of shaker – where the numbers are the shaker, it works best with numbers like 0, 4, 6, 8 or 9, as the hole in the middle of the number is where the shaker will go).
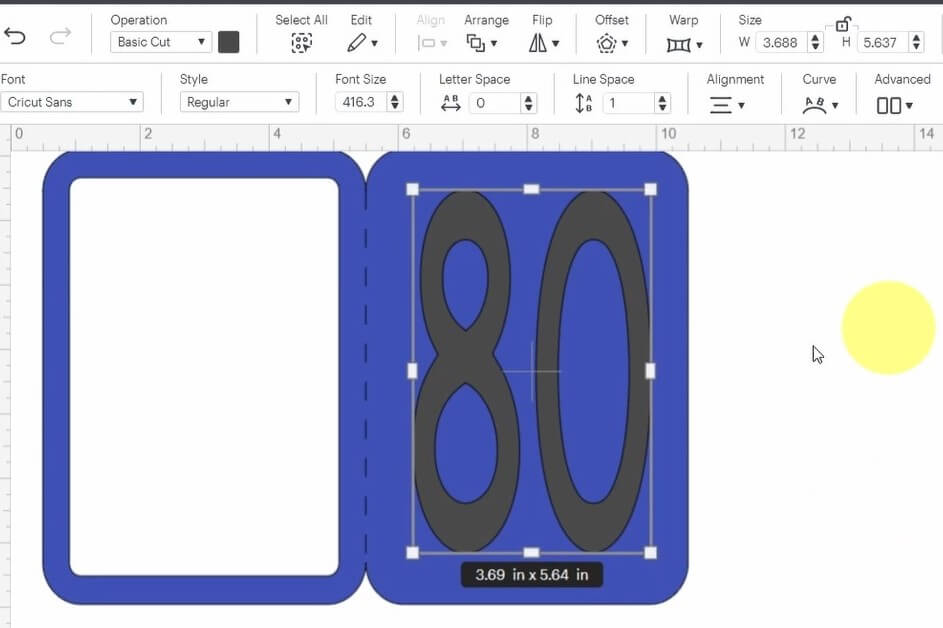
Once you have the numbers, place them over your card. You will need to UNLOCK the dimensions and stretch the number vertically and horizontally so it takes up most of the blank space on the card. You will want to leave some space around the edges, but it should look similar to my image.
Once you are happy with the size, make two duplicates, one duplicate in case you make a mistake and the other for the acetate paper.
Move your just-in-case number off to the side. This is just in case we make a mistake and must return to our original sized number.
The duplicate for the acetate paper needs to be modified a bit, so select it. Now, click the UNGROUP icon. Once ungrouped, select the 8. Next, select the CONTOUR icon. Deselect the inner sections of the 8, so that only the outline of the 8 remains. Now repeat this process for the 0.
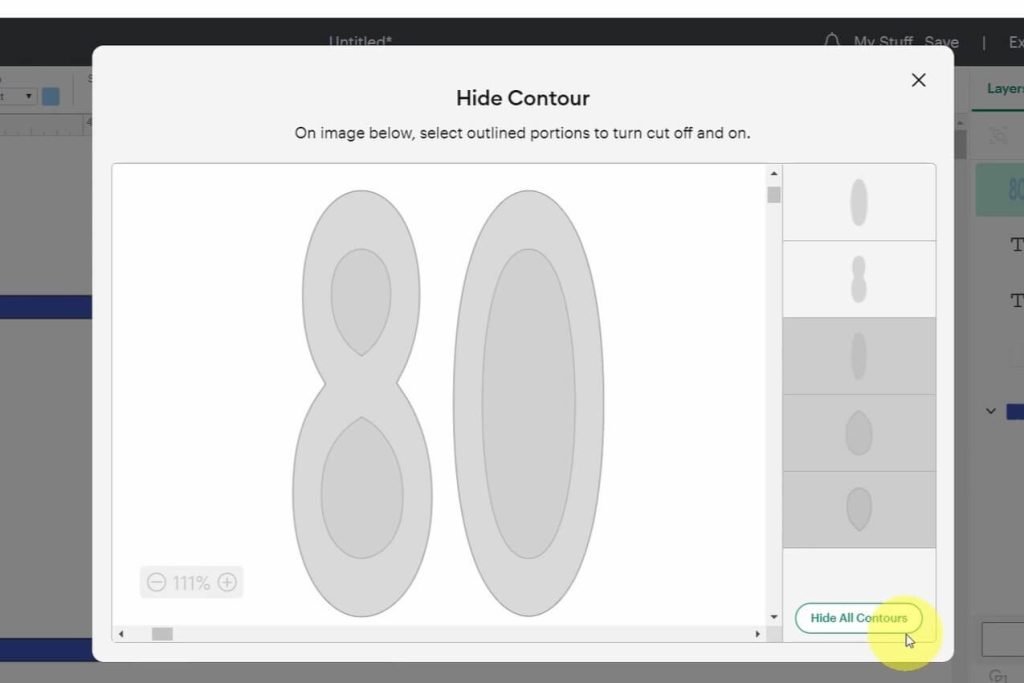
Once you have the outline for both the 8 and the 0, select both and duplicate them.
You will want to start to color-coordinate all these numbers. I typically make my acetate piece a light gray. For the duplicate of the acetate piece, I made it white as it will be the white back of the shaker. And I have made the original number 80 blue, as that is the color I want.
Designing the Text for the 80th Birthday Shaker Card
For this card, I am keeping the phrase simple. It will say Happy 80th Birthday. I already have the 80 done. All that is left is the “th” from 80th and Happy Birthday
So, starting with the Happy Birthday.
Select the Text Icon, and click on your screen to place the text. Now, type in Happy. And repeat this and type Birthday. I am making 2 text sections for this, as one word will be above 80 and the other below.
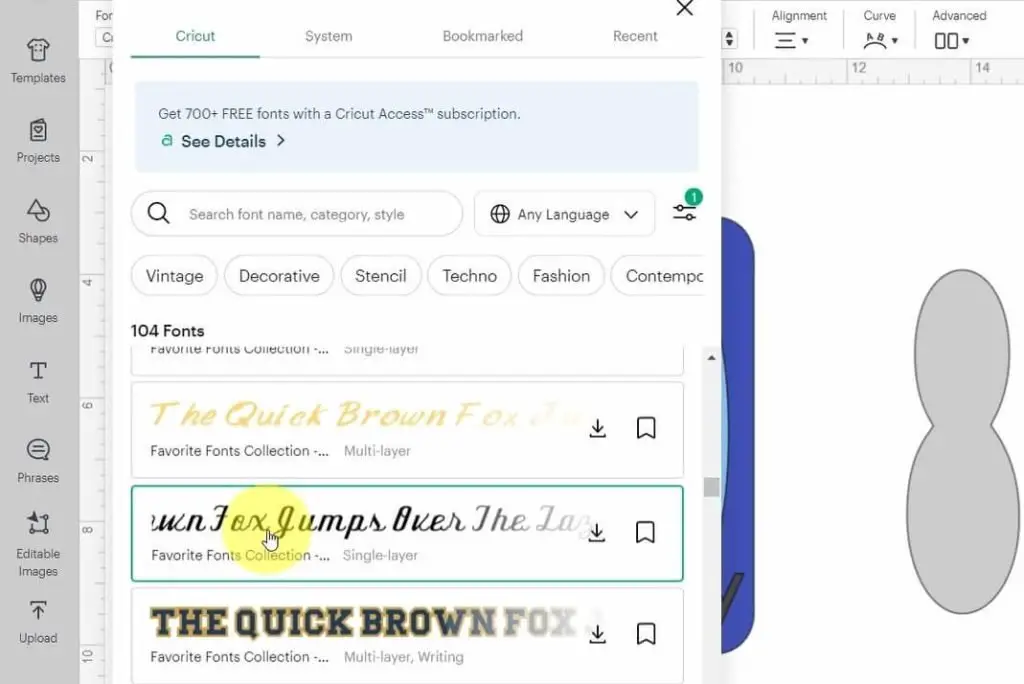
The text will be initially typed in a standard Cricut Font. Once you are done typing, select one of the text sections, and in your Edit Tool Bar, select the Font Name drop-down menu. odify your filter, the 3 lines with circles, select the Free Options and stay within your Cricut Fonts. Select a font that you like. I picked Favorite Fonts Collection – Library – Single Layer.
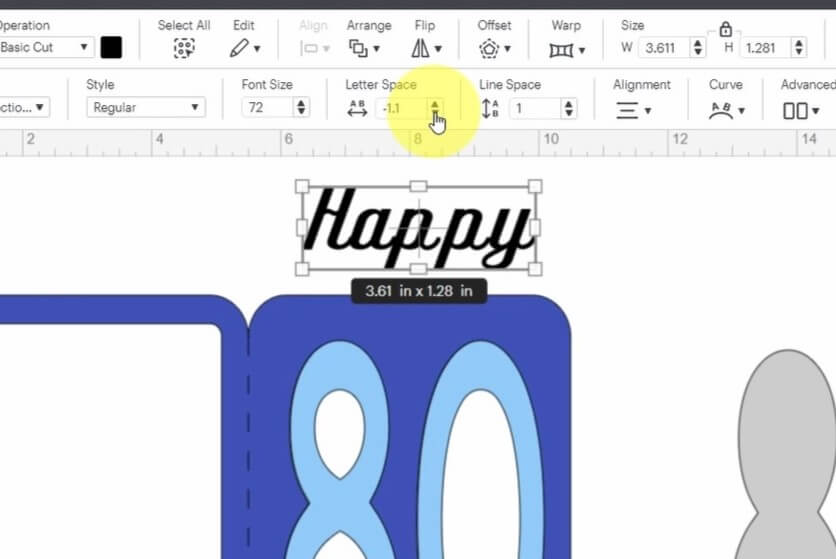
Now you need to adjust the letter spacing so the letters are closer together. You can reduce the letter spacing by reducing the value to below zero. Play with this value until you reach a closeness you like.
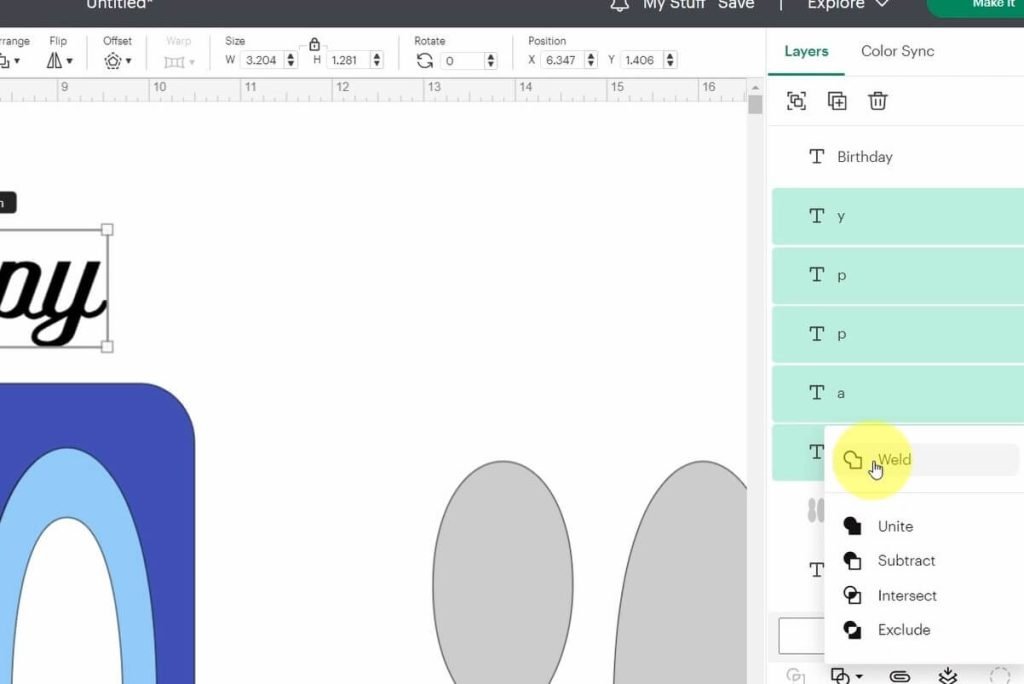
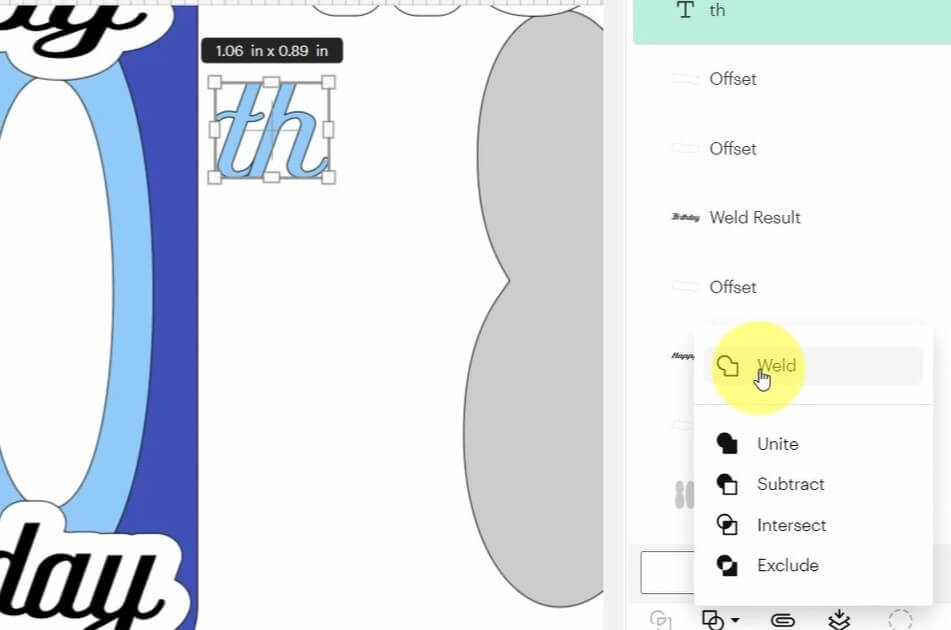
Alternatively, you can select the text, UNGROUP, and then manually move the letters closer to each other. I found this was the best way, as simply reducing the letter spacing did not adjust all the letters evenly. Once happy with the letter spacing, select all the letters, click the Combine Icon, and select WELD. This will make your text one item when cutting, and the letters will not be cut out individually.
Repeat the same for the second text line.
The B for Birthday and the dot on the “i” in Birthday will be separate items with this font. So you will have a few loose pieces to worry about when cutting and assembling later.
And finally, for the “th” for the 80th, make the modifications using the same method we did above.
Size your text on the birthday Card
Now that you have your Happy, Birthday and “th” written up, you can size them on your card. Place the 80 back over the front of the card. Move the words around to have everything fit on the card.
For my design, I put the Happy on top of the 80, the Birthday below the 80, and the “th” was a bit slanted on the top side of the 0.
Offset your Birthday Card Text
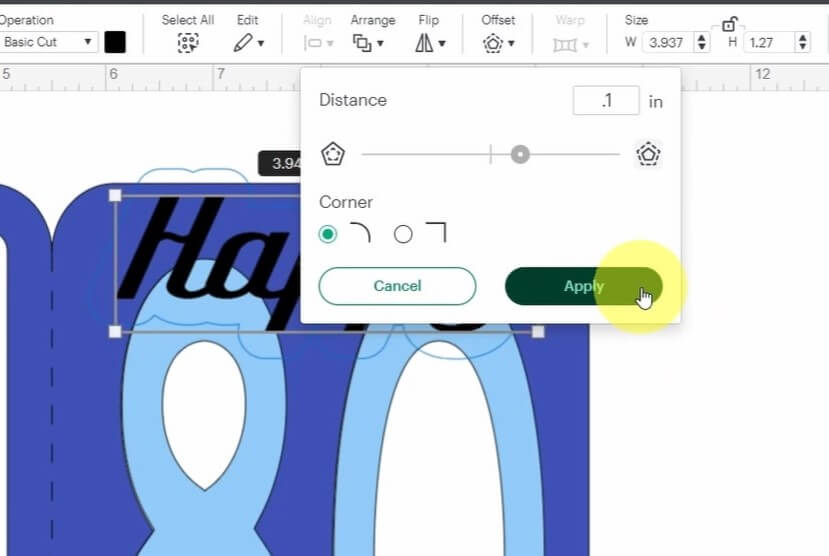
Now that our words are in place, it is time to add an offset. This will make the text pop on the card.
Select the Happy text. In your Edit menu, select the OFFSET icon. You can manually adjust the offset with the slider. For this design, I used 0.10″. Make a duplicate of this offset, as you will need one for attaching to the card and one to attach to the letters.
Repeat this for the Birthday Text.
You do not need to do this for the “th” of the 80th.
Make a Sentiment for Inside the Card
The last thing we need to do when designing our 80th Birthday Shaker Card is to attach a sentiment.
You can make up your own sentiment, google something, or even use ChatGPT to write one. Whichever way you go, once you have a good sentiment, select the Text Icon, and either type it in or copy and paste it in.
Select the FONT NAME drop-down menu, filtering down to FREE, and WRITING, and select a font you like.
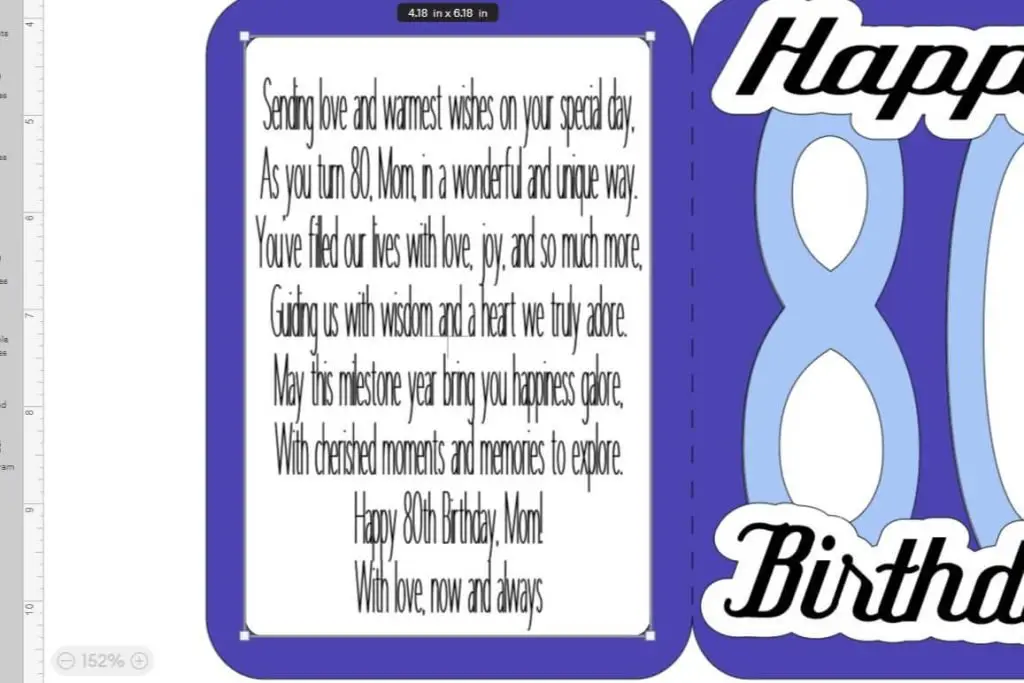
You will need to adjust the size and shape of the font to fit onto the card insert. This card insert was included with the original free Card from Design Space. This will require you to adjust the font size. You may need to remove the size lock, to allow you to fit the sentiment nicely onto the page.
Verify you have set the text to an PEN Operation, and not a CUT Operation in your Edit menu.
Once you are happy with the size and shape, select the sentiment and the card insert, and ATTACH them together so they are ready to go.
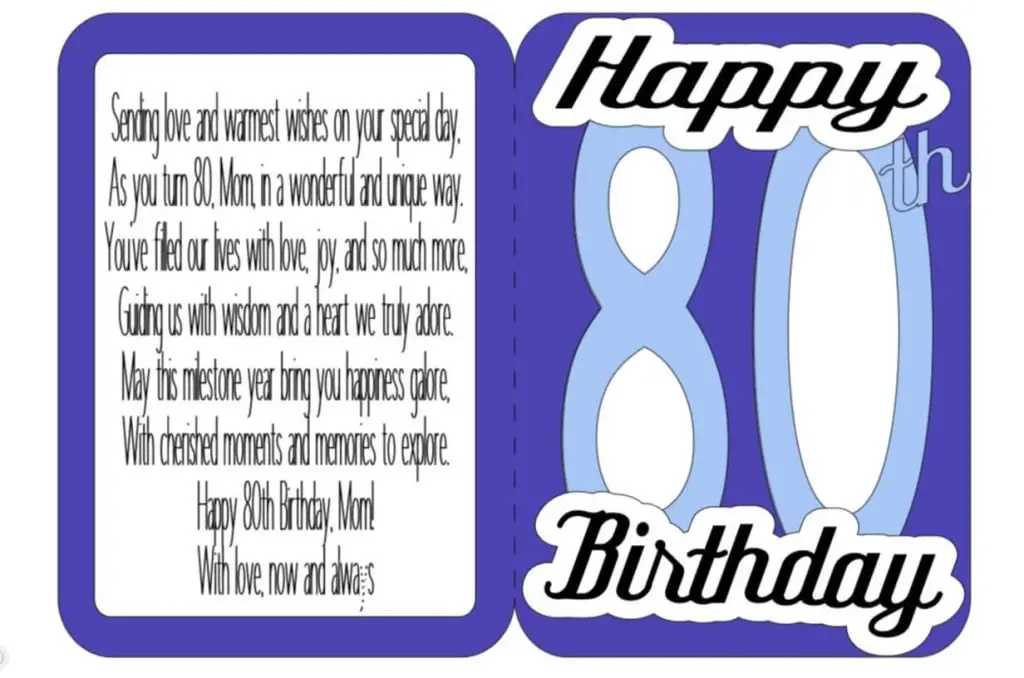
one Final Check of the Design
The last thing I like to do, is place all the pieces together, make sure everything fits and that I like what I have. This is the final check before cutting. Most of the time, I am happy with the design, but just in case, this is time to check it out before wasting paper.
The pieces you should have:
- Card body
- Card insert with sentiment attached
- 80 – 3 sets – one for the front unmodified, one for the acetate modified, and one for the backing modified
- th – one set
- Happy – 1 set of letters, 2 offsets
- Birthday – 1 set of letters, 2 offset
Also, this is the time to delete the duplicate number we made at the start of the project. You do not need to cut that out.
Once you are happy with the design and have all the pieces, it is time to hit Make It!
And that’s it! Your 80th Birthday Shaker Card is Designed!
Frequently Asked Questions About Birthday Shaker Cards
Can you make a shaker card for any birthday?
Yes, you can! But I find that the easiest Shaker Cards are the ones with numbers having a hole in them, like 0, 4,6,8, or 9. This way, the hole in the middle of the number is the place to add shaker bits. But you can always make shakers out of other shapes. You are not limited to using just numbers. I have other shaker cards showing this idea here:
Can you Design Free Shaker Cards in any design program?
Yes, you can! For this project, I used Cricut Design space for free, but you can also use free programs like Vectornator (for Ipads) and Inkscape (for PC and Mac) to design cards. They require a bit more skill and do not have free shapes, like the card background, but those are easy enough to make once you have a handle on the programs.
Did you enjoy this tutorial on How to Design an 80th Birthday Shaker Card?
Did you enjoy this tutorial on how to design an 80th Birthday Shaker Card? Let me know in the comments below! If you tried it out, let me know how it worked.
If you enjoyed this design project, be sure to check out my other design projects here: