I really like snowflakes, outside and inside. And I don’t feel like I have enough snowflakes at my house right now, so I decided to make more! And what better way to add snowflakes to your Christmas decor than snowflake curtains! This is a different rendition of my snowflake Christmas garland craft, it is sort of the same but sort of different. So, let’s jump in and make some snowflake curtains!
As an Amazon Associate, I earn from qualifying purchases. This post contains affiliate links. I may receive a commission if you purchase an item from one of my links. This will not change the price you pay.
Supplies needed to make Snowflake Curtains
Snowflake curtains do not require many supplies, but there is always a need for some, so here goes:
- Cardstock – I used two different types of cardstock for this project.
- Glue – I used my trusted Bearly Art Crafting Glue
- Cutting Machine – I used my Cricut Explore Air 2, any cutting machine, or scissors.
- Ribbon – I used a light blue to match my snowflakes, but any color will do. You can even use string or yarn if you prefer.
- Hot Glue gun and hot glue – I do not trust crafting glue when gluing ribbon to paper, so I opted for my glue gun.
- Optional – SVG design for my snowflakes – I have made an SVG file for these exact snowflakes, but you can use any snowflakes you like of have access to. You can get a copy or my snowflakes SVG file below.

Snowflake Curtain SVG file Adjustments
Like with all of my SVG files, there is a need to make some minor modifications to make the project come out the same way as mine. So, here are the steps you need to take within Cricut Design once you have the files on your computer:
- Import the file into Cricut Design Space:
- Select the Upload icon.
- Select the Upload Image button.
- Select the file from the location where you saved it.
- Select the design so that it has a rectangle around it.
- Verify that the dimensions lock is locked.
- Select the Ungroup button to ungroup all of the items.
- Select all of the items (if they have been deselected).
- Select the Align drop-down menu and select the Center (vertically and horizontally – one button).
- Change the height of the design file to 2.5″ (or any larger or smaller size you like, but 2.5″ worked well for me).
- Duplicate the snowflakes to create as many as you desire for your curtains.
- You can modify the colors of any parts by selecting them and choosing a different color in the color pallet next to the Operation.
Once happy with your size and colors, select Make.
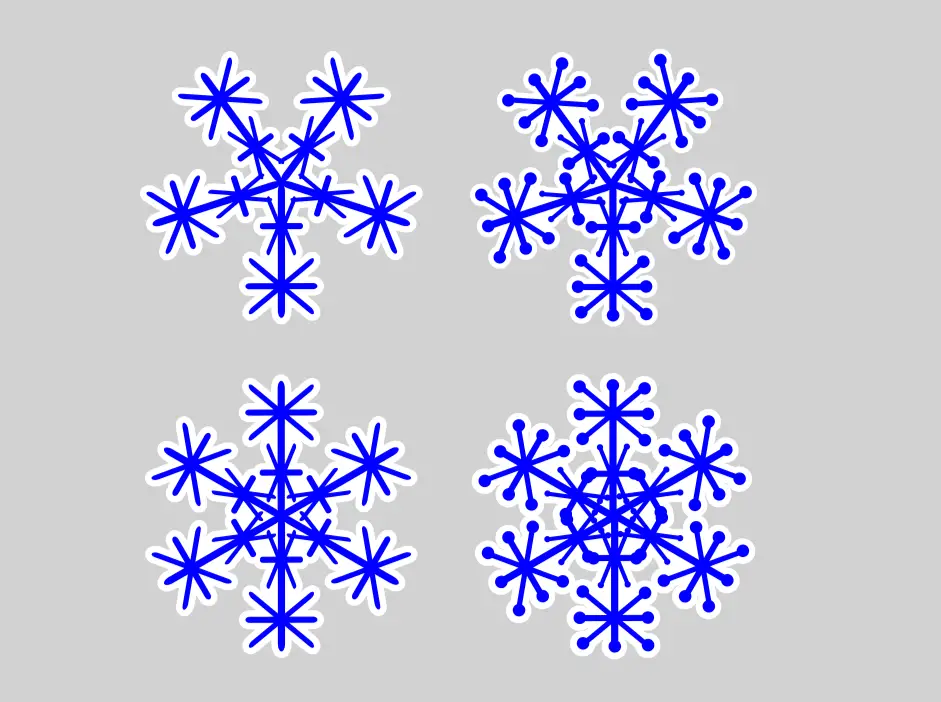
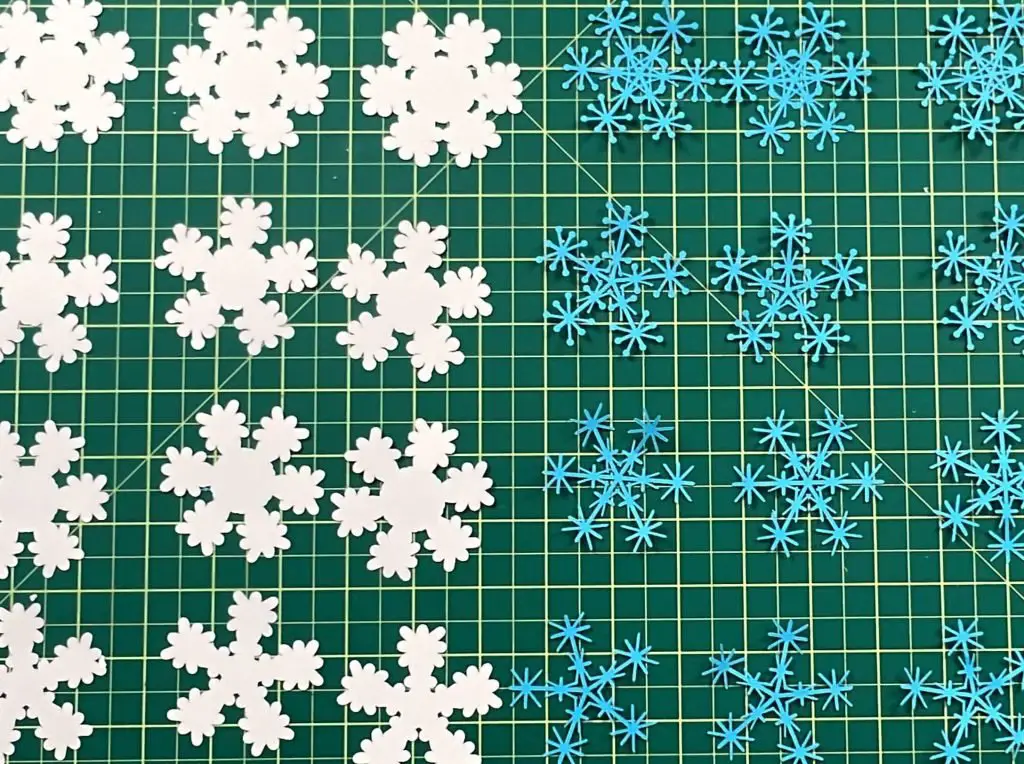
For this craft, I cut out 24 snowflakes – 6 of each type.
Assembling Snowflake Curtains
Making Snowflakes
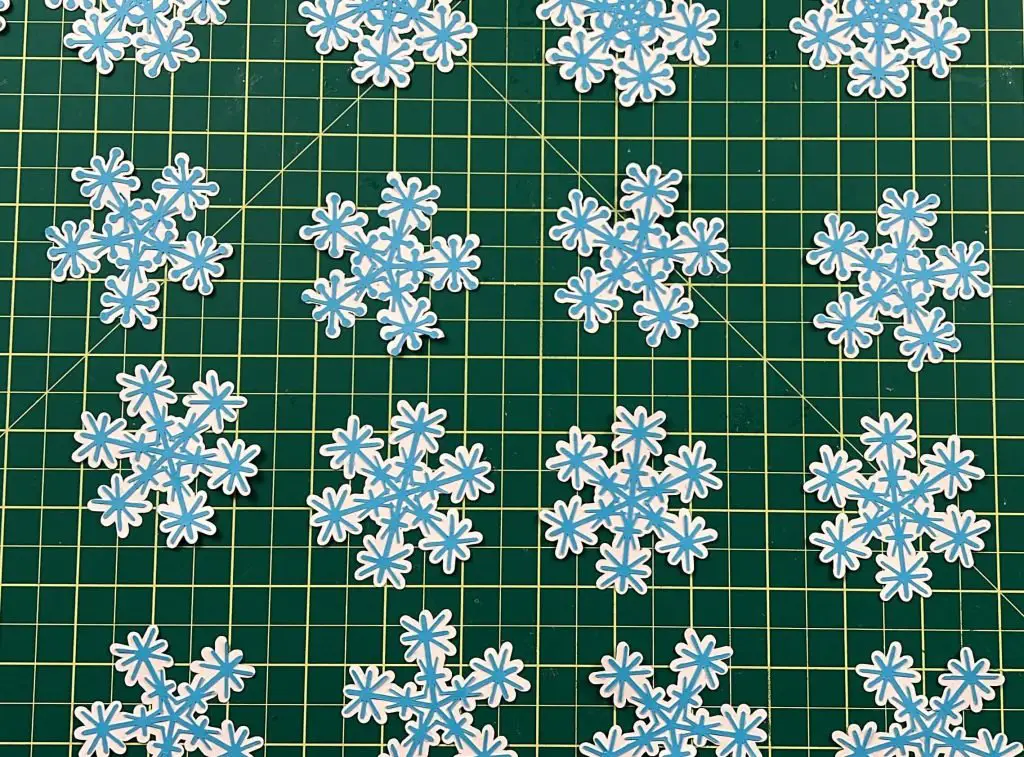
The design that I have made has 4 different snowflakes. So, once all the pieces are cut, match the white outline to blue snowflakes. Make sure to align the blue snowflake and the white backing so the number of arms matches up, either 5 or 6. Each snowflake is symmetric, so you do not need to worry about the rotation of the snowflake on the backing.
Once you have each snowflake matched up, apply glue to the back of the snowflake. You do not need to apply glue to every single edge of the snowflake, but the outer edges are a good idea. Then, place the snowflake on the white backing.
Gluing the snowflakes to the ribbon
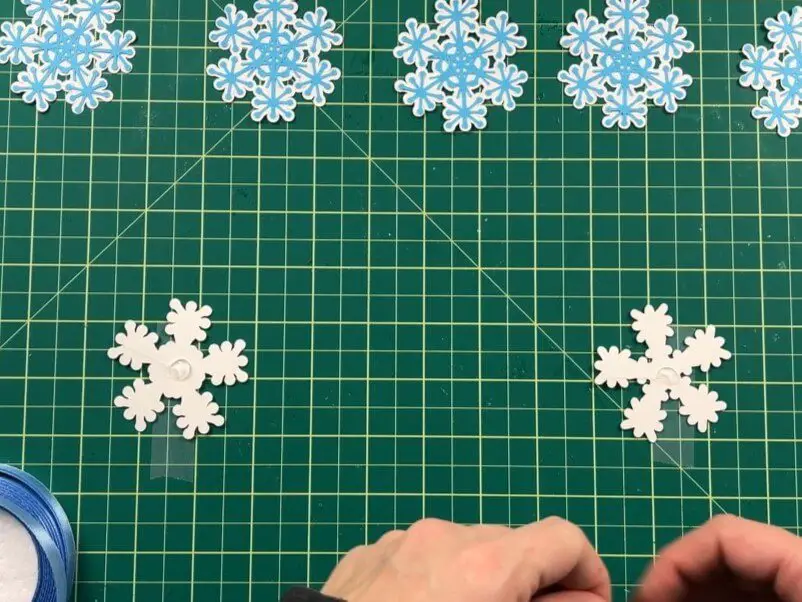
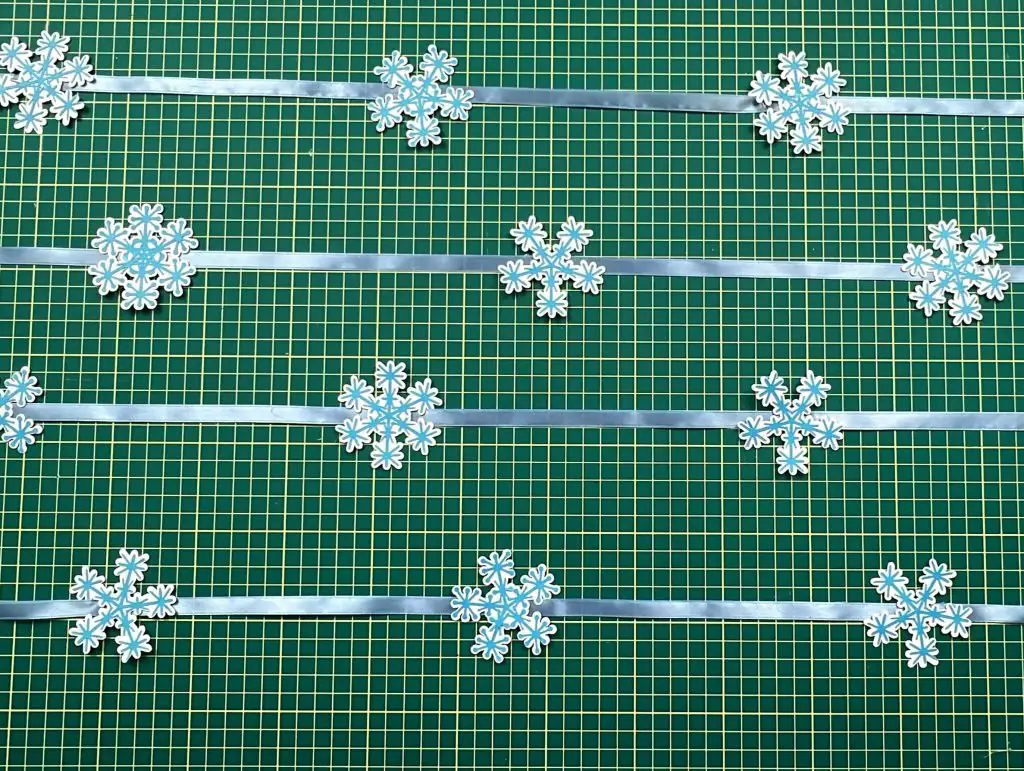
Before I started gluing anything, I thought it was important to know how far apart I wanted my snowflakes from each other. I measured and moved the snowflakes around and decided that 9″ was my magic number. Meaning, the center of each snowflake would be 9″ away from the center of the next snowflake. And in an attempt to keep things in line, I actually marked off 9″ with two pieces of tape to help me measure faster.
I have 24 snowflakes. With some simple math, I decided using 4 pieces of ribbon, with 6 snowflakes on each, would work best for me. I did not cut my ribbon at the start though I waited until later. Bear with me.
I pulled out about 8″ to 10″ of ribbon at the start as surplus ribbon. This will be used to help hang it later.
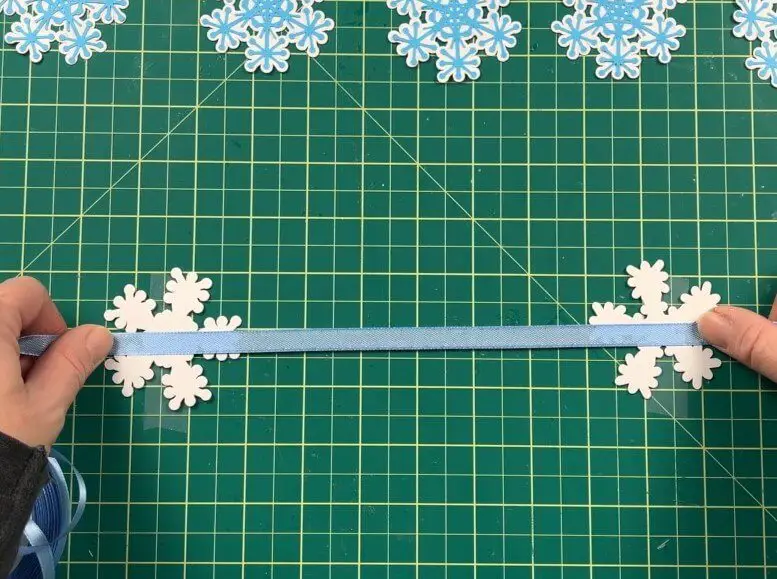
To start, place 2 snowflakes on your tape markers, face down. Put a dab of hot glue in the center of the snowflakes. Place the ribbon onto the back of the first snowflake. Trying to keep a straight line and keep the ribbon straight and not twisted, place the ribbon onto the second snowflake.
Once you have two snowflakes glued to the ribbon, pull the ribbon over so that the second snowflake (the one with the end of the ribbon still attached to the spool) is in the first snowflake spot. Then, place a new snowflake into the spot of the second one. Again, drop a dab of glue onto the new snowflake and place the ribbon down. Make sure not to have any twists in the ribbon. Continue doing this until you have 6 snowflakes on the ribbon, or however many you want per ribbon. Once you have all your snowflakes on the ribbon, pull about 5-6 inches of extra ribbon off the spool and then cut the ribbon.
Repeat the above step until you have all 4 ribbons completed with snowflakes attached. If using more snowflakes or ribbons, continue until you have them all complete.
Attaching your Snowflake Curtains to Hang them up
So, this is the tricky part because you have to figure out where they are going in your space. Here is what I did.
I placed my 4 curtain strands down on my work table and I spaced them 6″ apart from each other. I also tried to stagger the snowflakes so that they would fill in the gaps between each curtain strand.
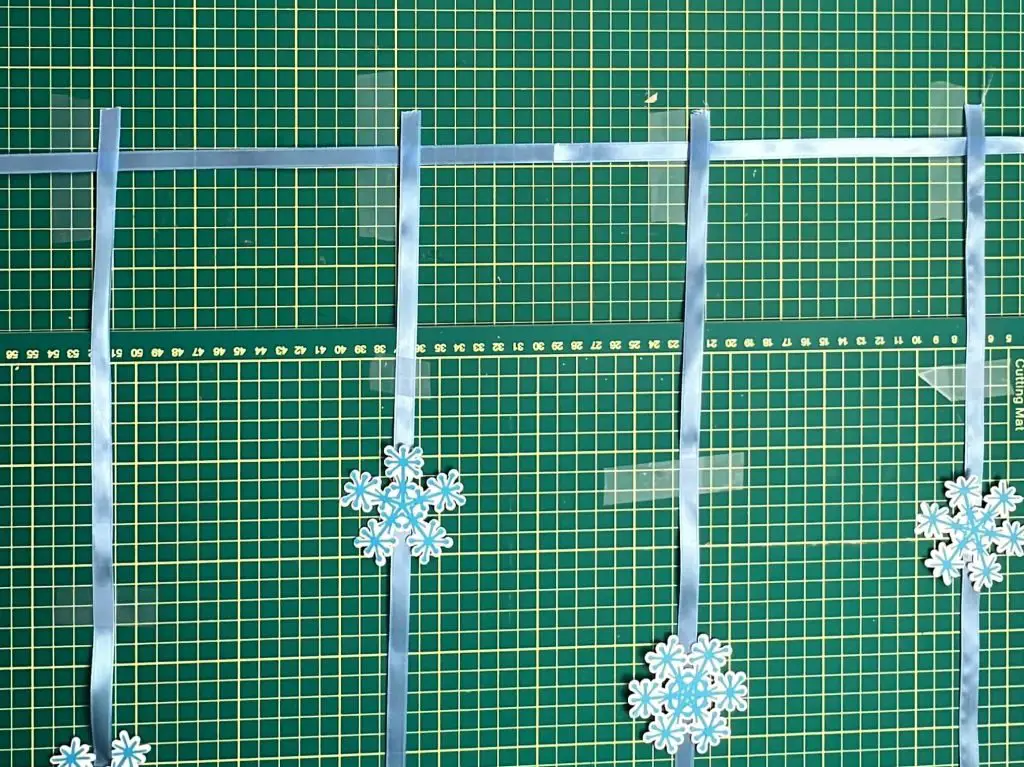
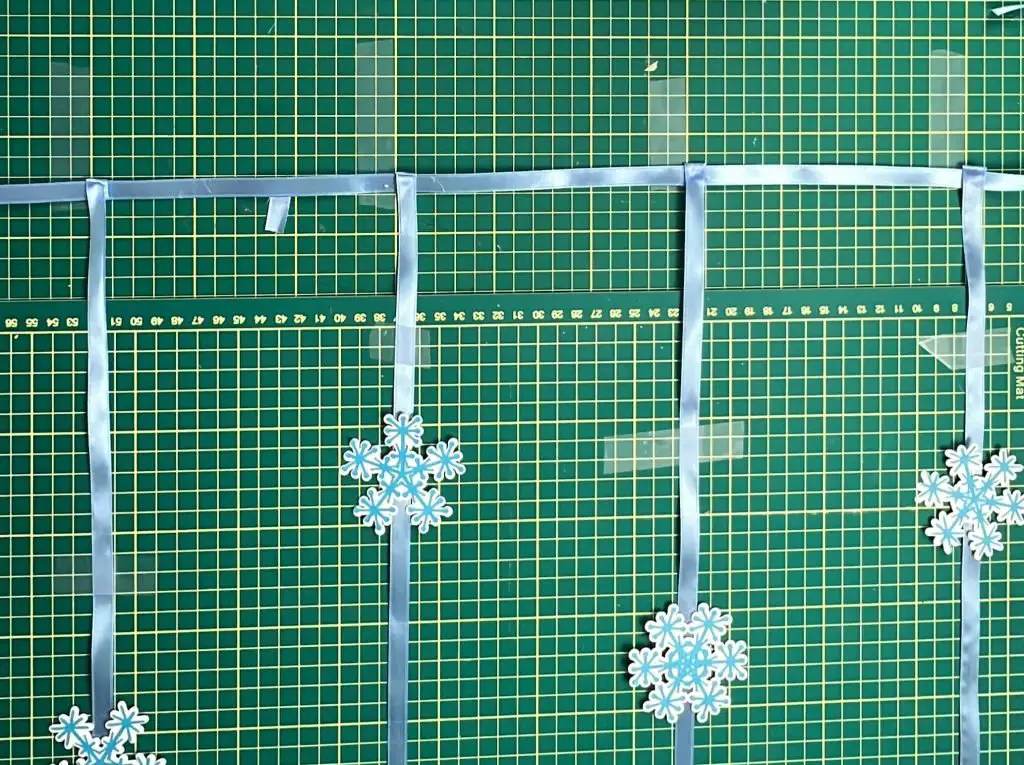
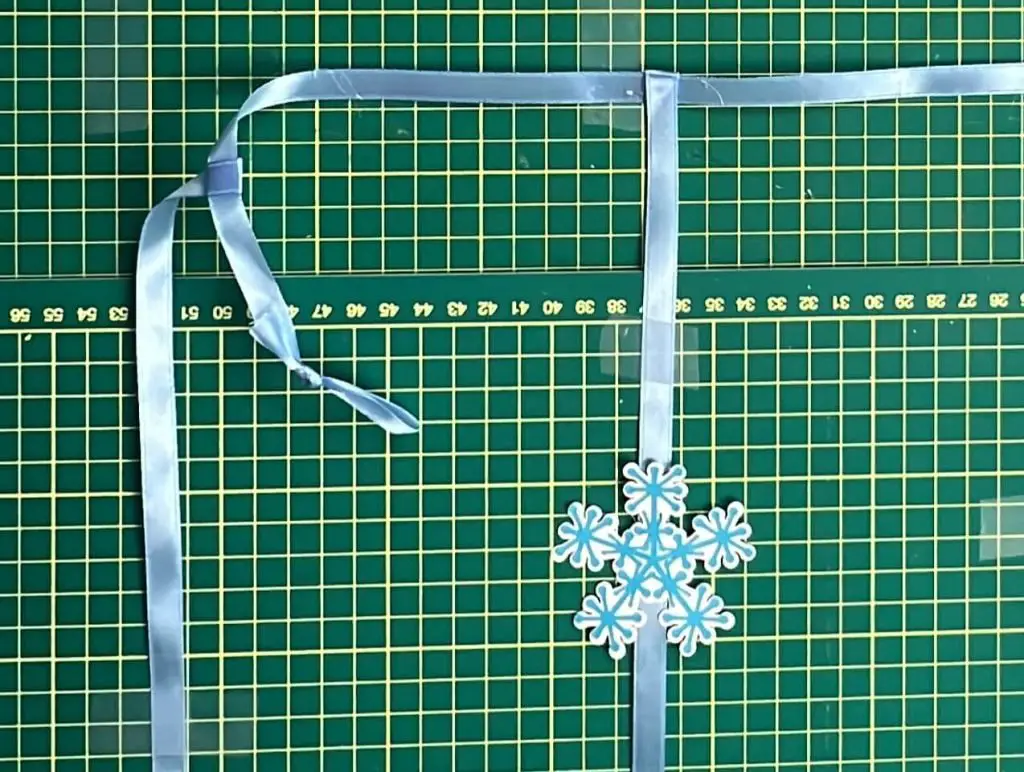
Then I place another strand of ribbon over the top of the 4 stands. Leaving about 8″ of surplus ribbon on each end to allow for a knot later on. I glued the ribbon from the curtain stands onto the new ribbon and wrapped the curtain stands around the cross ribbon 2 times. Then, I glued the curtains strands again.
Once all of my curtain strand ribbons were glued, I tied knots on both ends of my hanging ribbon. These knots are to help hang the snowflake curtains against my existing sheer curtains, walls, nails, doorways, or whatever your heart desires.
And that’s it! Your Snowflake Curtains are done!

Things I learned while making Snowflake Curtains
I did something new this year. I tried to design 6 new Christmas crafts at once. And then, I cut them all out at once, and then I assembled them all one after another. This is great for workflow, but maybe not so great for learning from past projects and implementing those learning things….. So, I have a few things that I learned….
- The snowflakes I designed are cute, but there are 4 different snowflakes. And I know that no two snowflakes are the same, but I really should have stayed with one snowflake. Cutting 4 different snowflakes with 4 different backings proved to be challenging afterwards. I probably spent more time trying to organize the snowflakes than actually assembling the snowflake curtain. So, if you are making this craft, I recommend pick one snowflake that you like and stick with it.
- I chose to use two colors for my snowflakes. The snowflake itself was cut out in blue and the backing in white. But I could have made it simpler either:
- Setting the snowflake to Draw – pen and then attaching the snowflake and backing together and making multiple copies that way, or
- Selecting the snowflake and backing and changing them to a print and cut. Then, I could print the blue snowflake with my printer and still cut it out on my Cricut.
- Initially, when I started thinking about this craft, I was planning to have a snowflake on both sides of the ribbon. I would have done that, but I have been using an awful lot of white cardstock recently, and I have run out, so I was not able to cut out more snowflake backings. So, if hanging the curtain in a doorway or somewhere with both sides of the curtain visible, it is worth the effort to put a second snowflake on the back of the first one, with the ribbon between.
- My snowflake curtain is hanging on my sheet living room curtains. But you can hang this snowflake curtain anywhere you like. Some examples of where you can hang this curtain:
- Hang each strand individually around the house,
- Hang it in open doorways,
- Hang it on doors,
- Hang it on the Christmas Tree
- Hang it off the backside of banisters
- Hang it on doors
Did you enjoy this Christmas Craft?
Did you enjoy making this Snowflake curtain with me? Let me know in the comments below! Did you try making it yourself? How did it go? Let me know!
If you enjoyed this Christmas Project, be sure to check out some of my other Christmas Projects HERE
If you enjoy paper crafts, check out some of my other paper crafts here.