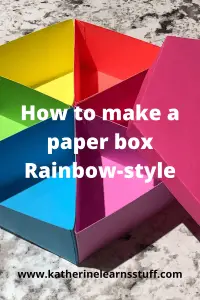
How To make a Hexagon paper Box
A square box is fine, but a hexagon box is more fun! There are so many possibilities for colors combinations! So we are going to create a rainbow paper box shaped like a hexagon.
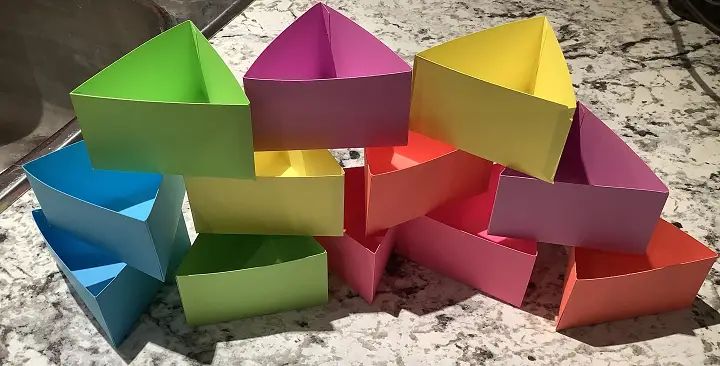
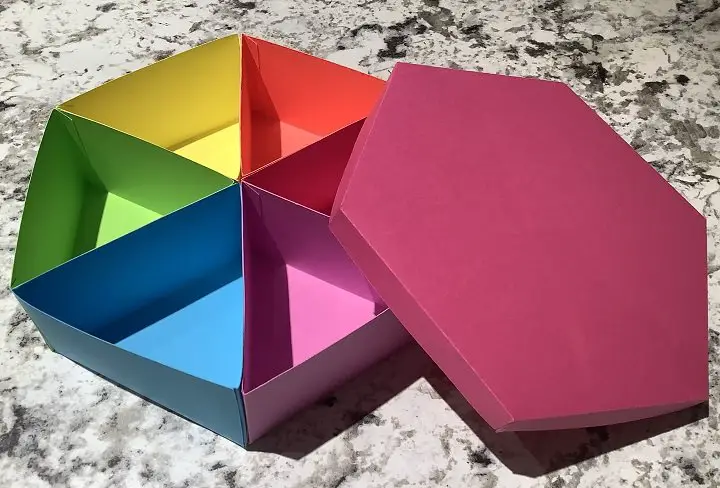
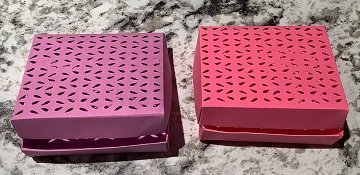
I used this for a jewelry box for my kids. I made two boxes, one for each of my daughters. As a result, there are more boxes and colors throughout this tutorial. Remember, you are making a hexagon, and there are only 6 triangle boxes and one lid.
As an Amazon Associate, I earn from qualifying purchases. This post contains affiliate links. I may receive a commission if you purchase an item from one of my links. This will not change the price you pay.
What you need:
- A reason to make a paper box, but that is not necessary.
- About 2 hours of free time
- Card Stock – 8 pieces of 8.5″ x 11″. 12″x12″ work as well.
- A cutting machine (I use my Cricut, but you can use scissors)
- Glue – I use double-sided glue tape.
Let’s Begin Designing a Hexagon Paper Box in Design Space
I created my hexagon box from scratch using Design Space. I will do a high-level description of how I got there so that you can make your own. You are also welcome to copy my images and use them if you would like. But if you’re not interested in making your own, you can sign up for my newsletter and get a free copy of my design.
Sign up for my newsletter, and you can get the free 3D download here!
Creating the Hexagon Box Design With Your Cricut
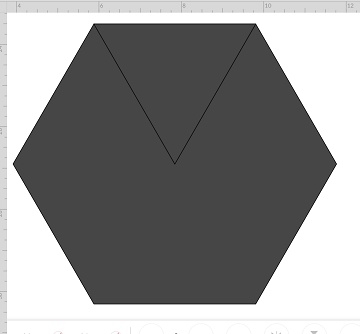
- In Design Space, I selected a hexagon as my base shape. For this, I used a 6.5″ height dimension.
- I then created a triangle with the same base as a side of the hexagon (3.93″ width). For the design portion, I am only working with one triangle. Once the design is complete, I will duplicate it 5 times.
Building the walls of the Hexagon Box
3. For the walls of the triangle wedges, I made one rectangle to start. Again, when the design is complete, I will duplicate two more. The rectangle has a width of 3.93″ to line up with the triangle, and I gave them a height of 2″.
4. Each wall side needs a tab to connect to the other wall. For this, I created a 0.5″ x 2″ rectangle. I cut off one edge of the rectangle. This is so when I glue it together it does not hit the bottom of the box.(I used a triangle and the Slice feature in DS).
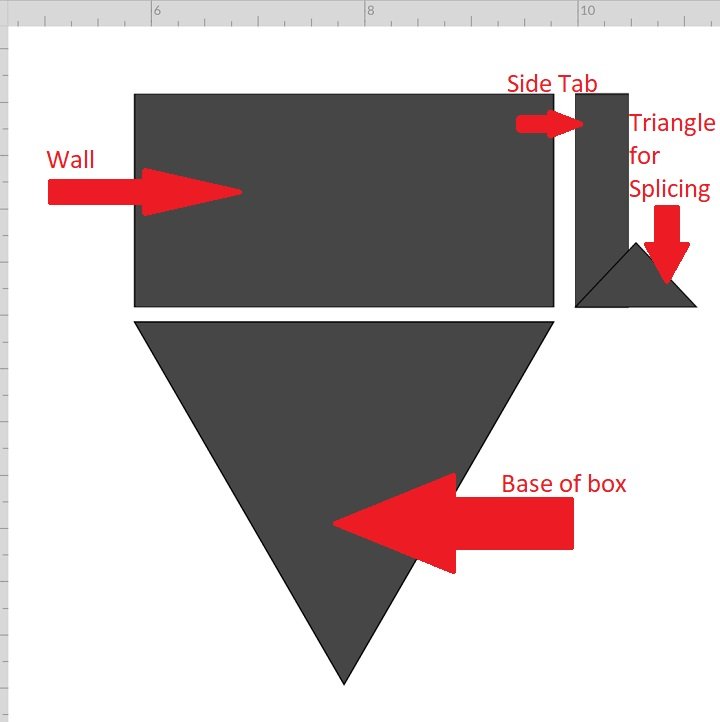
Building a Base Triangle for a Hexagon Box
5. Once my wall pieces are complete, I line them up and Weld them together.
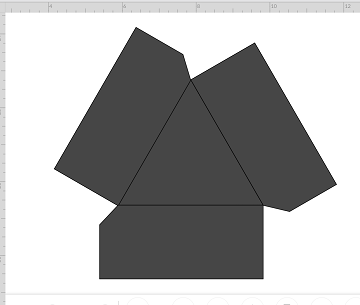
6. I duplicate two more all pieces. I rotate each one (120 degrees & 60 degrees, respectively). (Remember that if your triangle is upside down, the angles may be different, so you may need to play with this). This will allow me to line them up perfectly with my triangle base. I need to make sure that the tabs are not facing each other.
7. Once everything is aligned, I Weld the three walls to the triangle base.
Creating the Score Lines in Design Space
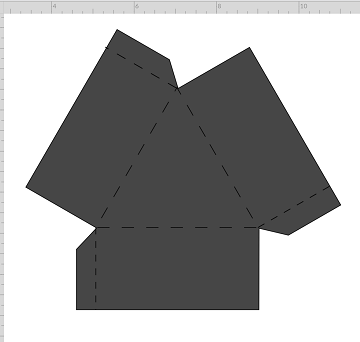
8. This next part can be tricky as you need to create score lines that will line up exactly where you want them. I made a new triangle, the same size as before, and changed the Linetype to Score instead of Cut. Center this on my triangle with walls. (I am using my iPad, so this is a built-in feature, but not on the desktop version).
9. Make 3 lines and change them to score lines. These need to be placed at the intersection of the walls/tabs for folding. Attach all the pieces
10. Once complete, Duplicate this 5 times, so you have 6 triangle boxes
Duplicate The Design Method for Lid of the Hexagon Box
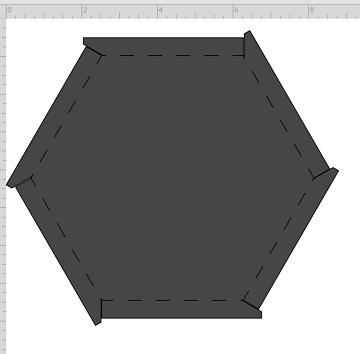
10. Using the same method as with the triangle, I made the lid for With the same method as detailed above, I made the lid for the hexagon box. However, I had to make minor modifications to the tabs to allow everything to cut correctly.
Or if you’re not feeling up to making the file by yourself, you can get a free download here!
Cut, Fold, and Glue The Box Pieces
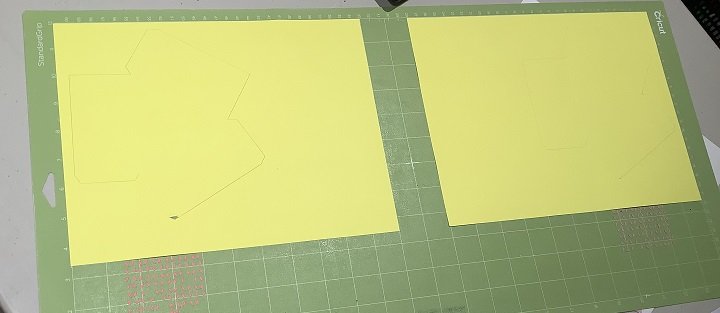
11. Now that the design is complete, you can send it to cut. I like to use my long mat so that I can cut 2 sheets at the same time. Make sure to out your layout so that everything fits on your sheet.
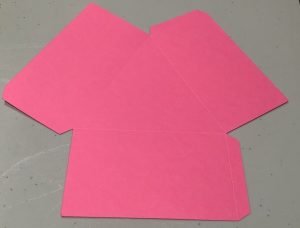
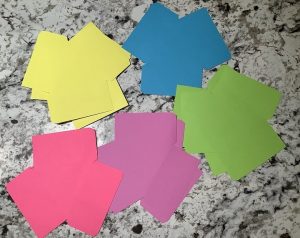
12. Once the pieces are cut, remove them from the paper (in case there are some stuck parts) and fold them on the score lines.
I have more triangles because I was creating hexagon boxes at the same time. You should only have 6 triangles.
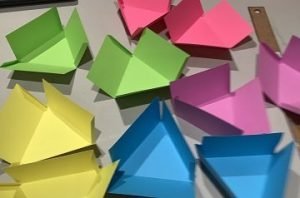
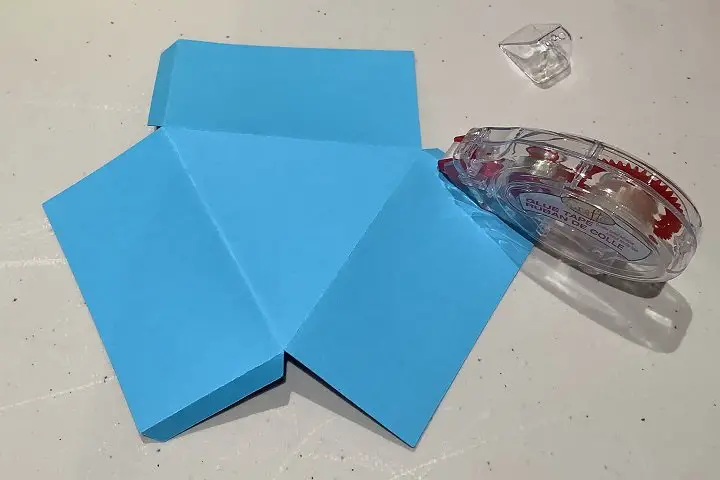
13. Apply tape on the tabs and fold the box shut. Repeat this on all 3 tabs on all boxes.
Once all of the boxes are glued together, you should have a pile of them ready for the final assembly, as I have here. Just remember, I’m making 2 boxes at once so, I have more boxes. You should only have 6.
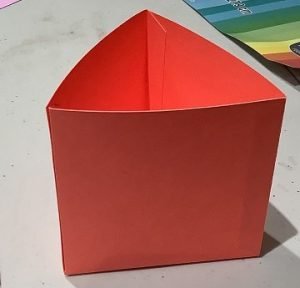
14. Tape the sides of the boxes so that they can be attached to make a hexagon. The size of the triangle piece should have glue along all 4 edges.
You only need to apply tape to 1 side of the triangle boxes, as they are all connecting.
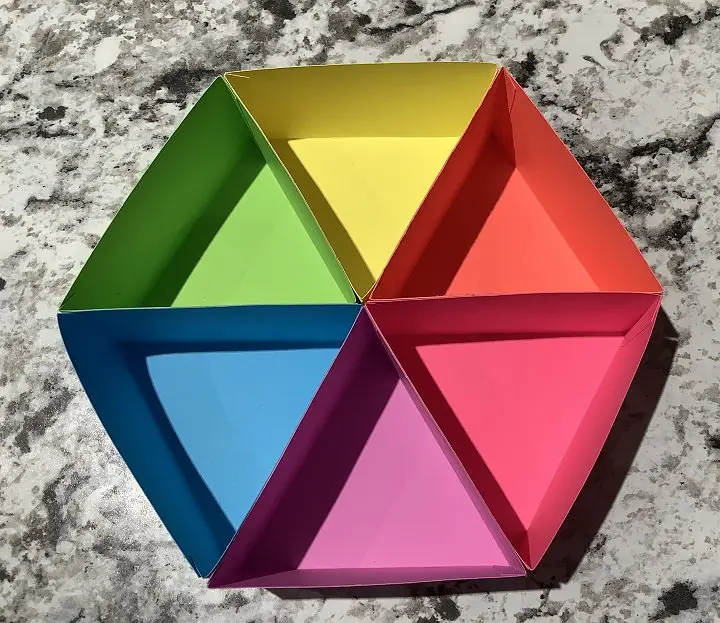
Once the glue is applied, combine the boxes and have a nice hexagon box, as shown below.
15. Repeat steps 12 and 13 for the lid.
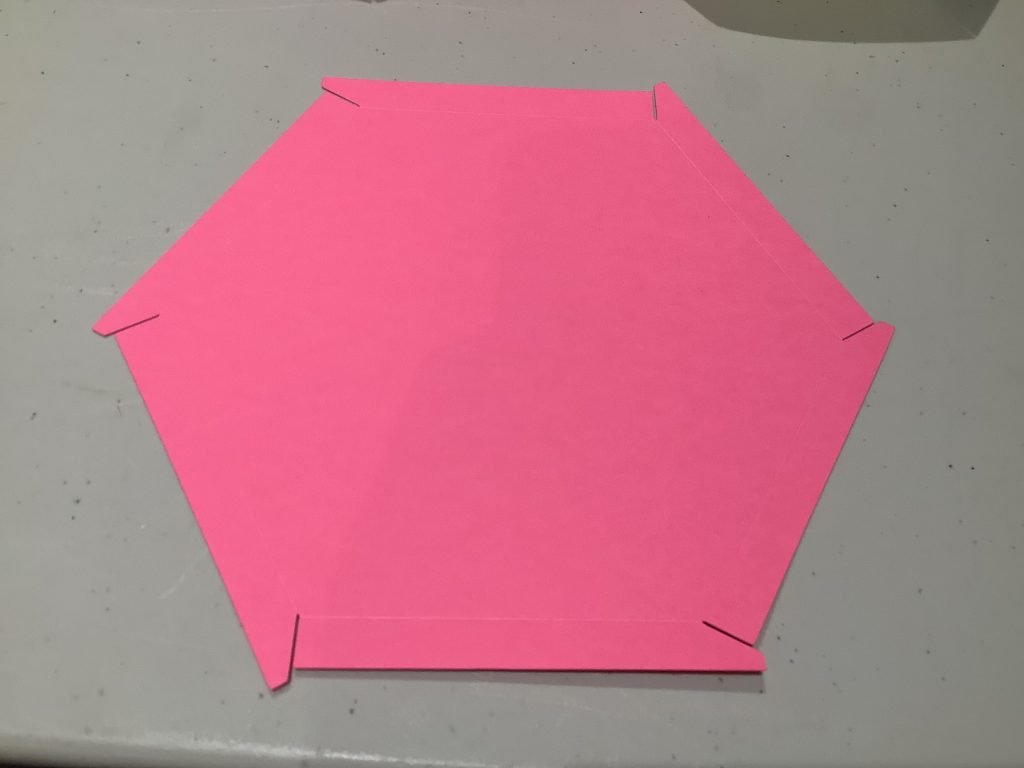
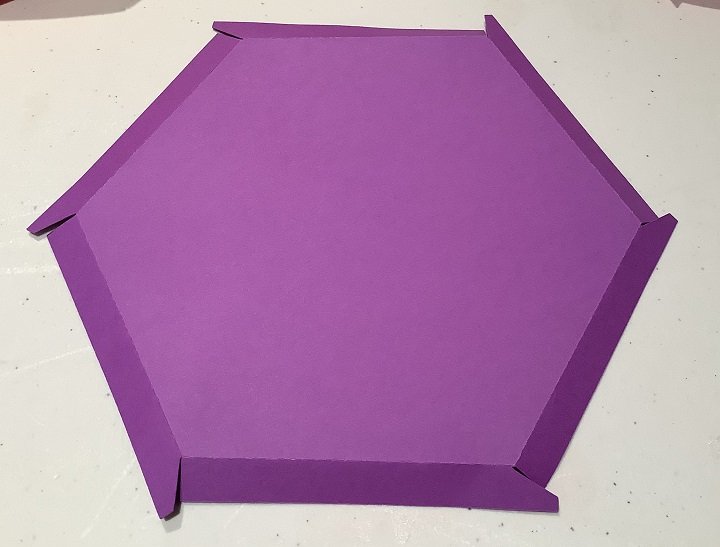
16. Check to make sure the lid fits.
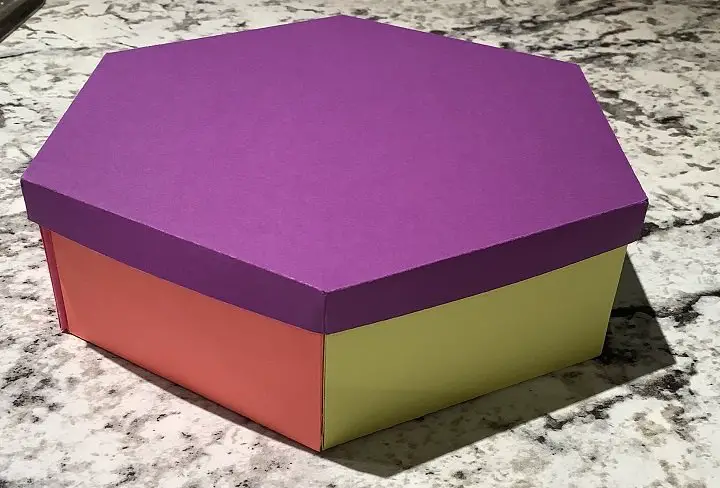
And that’s it! You’re Done! You now have a Hexagon Box!
Lessons Learned while making a hexagon box
- Not all box designs are equal. I found some free box designs online, and they did not all work. One box design I found did not close. The lid was too small to fit the box. Hopefully, if you cut mine out, it will work! If not, let me know!
2. 65lb card stock will work for beginner boxes. If you are looking for something more durable, thicker paper should be used.
3. When designing boxes, make sure you measure what you are doing. Verify that the final size will work. The box below was one of my first attempts, and it was way too tall.
4. As I plan on making more boxes, I need to learn how to make a more customizable design. This design will work for a duplicate again, but if I want to make the lid lip larger, or the individual box smaller, I have to start the design from the 5% mark.
Was this Tutorial Helpful?
Did you find this tutorial on how to make a rainbow paper box helpful? Let me know your thoughts in the comments below!
If you liked this tutorial, be sure to check out my other paper craft tutorials here.
As an Amazon Associate, I earn from qualifying purchases. This post contains affiliate links. I may receive a commission if you purchase an item from one of my links. This will not change the price you pay.