Ok, I think I did it! I got the third countdown calendar done! This one was a bit of a challenge! I got stumped when trying to design it. And then I seem to have lost my momentum… but I think I pulled it together. So, the third one of this season is the mitten countdown calendar.
As an Amazon Associate, I earn from qualifying purchases. This post contains affiliate links. I may receive a commission if you purchase an item from one of my links. This will not change the price you pay.
Supplies needed to make a mitten countdown calendar
When I started making countdown calendars, I would use old cereal boxes, and I have come back to those again…. Cereal boxes seem to be my go-to base material to make countdown calendars, and we are using it again this time! So here is the full list of what is needed
- Thin cardboard – I use old cereal boxes as they are easy to cut and are sturdy enough to hold things and stay straight and unbent. Also, we always have lots of them left over in our house. But the best part is that my Cricut will cut through them with no problem. I used 2 boxes to complete this calendar.
- Craft paper or cardstock – Since we are using cereal boxes, we need to cover up any of the brown and design of the cereal box. As I am making red mittens, I am using red craft paper. Red cardstock would have worked as well. I picked red because it is Christmasy, but any color would have worked.
- Glue – Lots of glue. You need lots of glue for this. I recommend using a hot glue gun with hot glue and regular craft glue or kids’ craft glue (it is cheaper and does the trick).
- Ribbon – you will need 2 different types of ribbon
- 1/2″-3/4″ ribbon – this is to tie your treats and to hang your calendar – This should match your tissue paper and mitten color. I used red.
- 1.5″ ribbon– this is to hide the imperfections at the top and bottom of the mitten. I used a 1.5″ red felt ribbon to match the red paper.
- Tissue paper – I used red tissue paper as my mittens are to be red. But you want a color that will match the outline of your mitten. You will need 2-3 pieces of tissue paper per treat, and it should be about 10″x10″ squares.
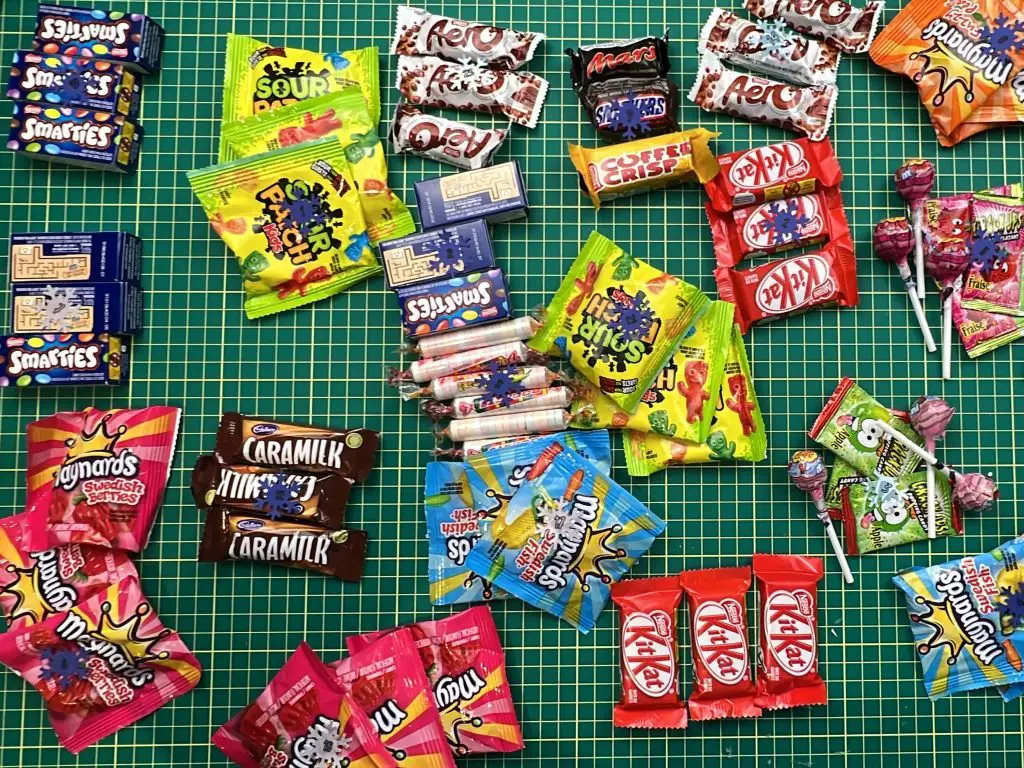
- Calendar Treats – after Halloween each year, I pull aside candies for the countdown calendar so that I do not need to buy more. But you do not have to use candy. You can use any treat you prefer.
- Mitten outline – I designed a mitten outline for this project. You can get it below by signing up for my newsletter. This file works with your Cricut or other cutting machines.
- Countdown numbers – I also designed some countdown numbers that can be used for this calendar. They are available in my resource library, or you can get a copy by signing up for my newsletter below.
- Cutting machine – I designed this craft to be done in part with my Cricut. I used my Explore Air 2, but any cutting machine will work.
- Cardstock – I used scrap pieces of cardstock to cut out the numbers. I try to use up my odd bits and pieces where I can. My numbers were done in 3 colors, but you can pick one color or many. Whichever suits you.
- Cricut compatible pens – if using my numbers file, you will need a pen to write the numbers with. You can use a Cricut pen or a pen that is compatible with Cricut machines. If you are unsure what pens work with your Cricut, check out this post here where I review many different types of pens and some solutions to make any pen work.
Let’s Make a Mitten Countdown Calendar
Now that we have all our bits and pieces ready, it is time to put this mitten countdown calendar together.
make the Mitten Countdown Calendar box
There are several ways in which you can do this. You can cut the mitten with scissors or get a copy of my mitten SVG by signing up for my newsletter below. I will explain how to use my SVG file, but the major points are the same if you do it by hand.
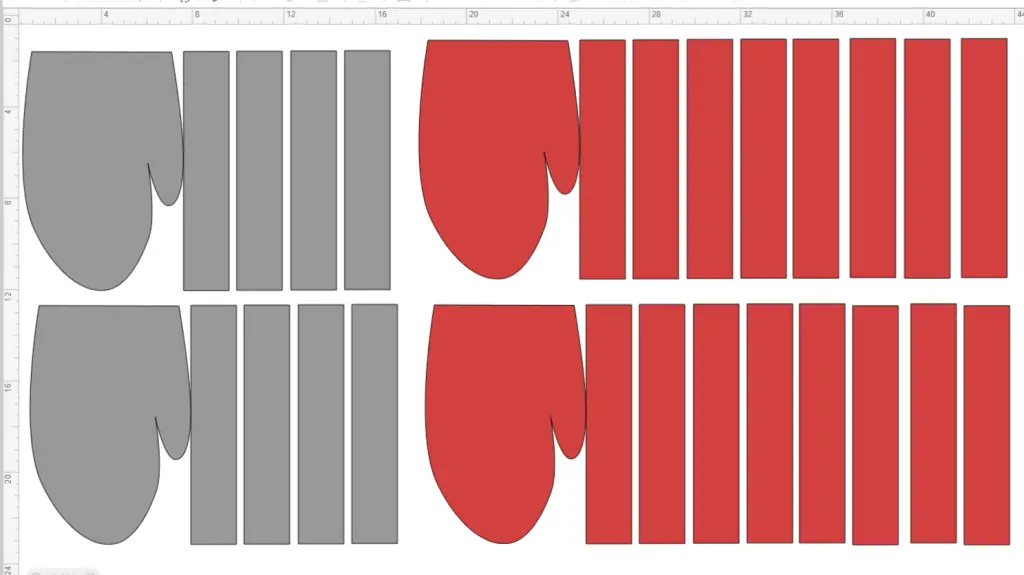
Once you have uploaded the file into Cricut Design Space or other cutting software, you need to make a few modifications. So, let’s do a quick review:
- Verify that your lock dimensions lock is closed.
- Select the file and resize it so that the height is 10.5 inches.
- Select the design and Duplicate it. If you want two mittens, you will need this. If you only want one mitten, you can skip this step.
- Optional – Select the two mittens from above (or just one if you are making one) and Duplicate them again. This time, change the color to red so that you know this is a different item.
- Ungroup all 4 copies of the design.
- Each cardboard mitten needs 4 rectangles.
- Each red mitten needs 8 rectangles, so you will need to duplicate the rectangles to have 8 per mitten.
- Select MAKE in Design Space and cut out the design.
- For the cardboard, you will want to select CUSTOM on your machine and select cardboard.
- The red mitten and rectangles will be in cardstock or light cardstock, depending on the paper you use. I used construction paper, so light cardstock worked well.
Once you have cut out your pieces, you should have:
- 2 cardboard mittens,
- 8 cardboard rectangles
- 2 red mittens
- 16 red rectangles
Make the Mitten Base
Now that all our pieces are cut out, it is time to put this mitten countdown calendar together.
The first item you need to check is how you want the mittens facing. Do you want the thumbs facing inward, outward, or in the same direction? This is important because this will dictate how you attach the walls. I wanted the thumbs facing inward, so I had to flip one of my mittens over.

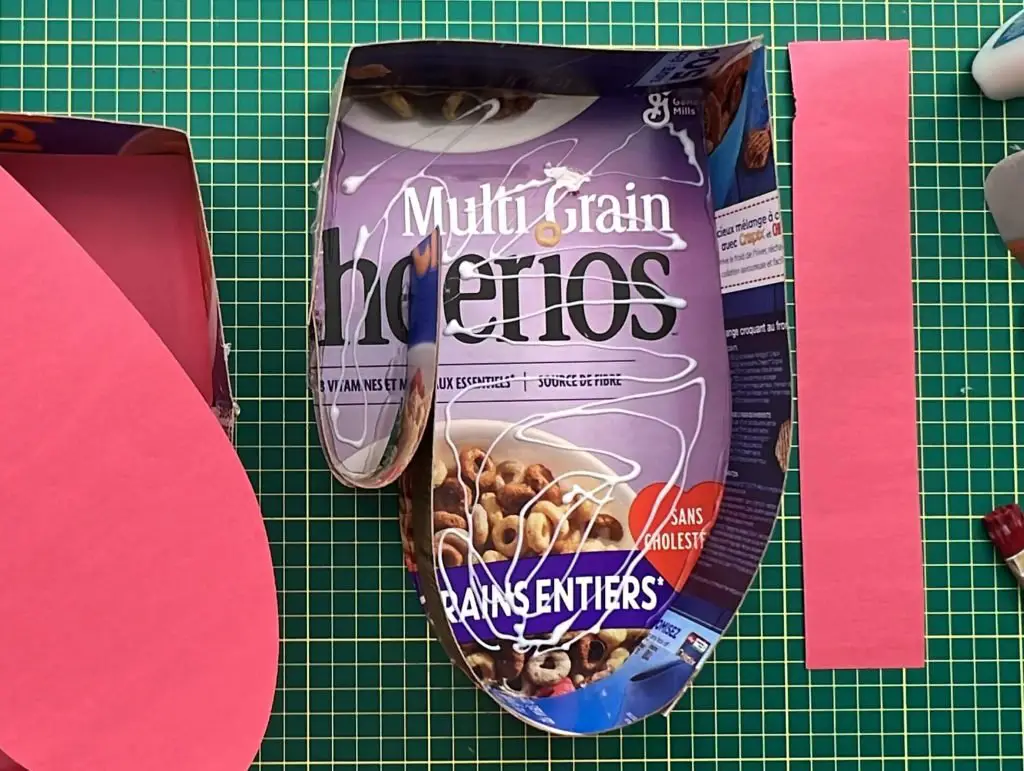
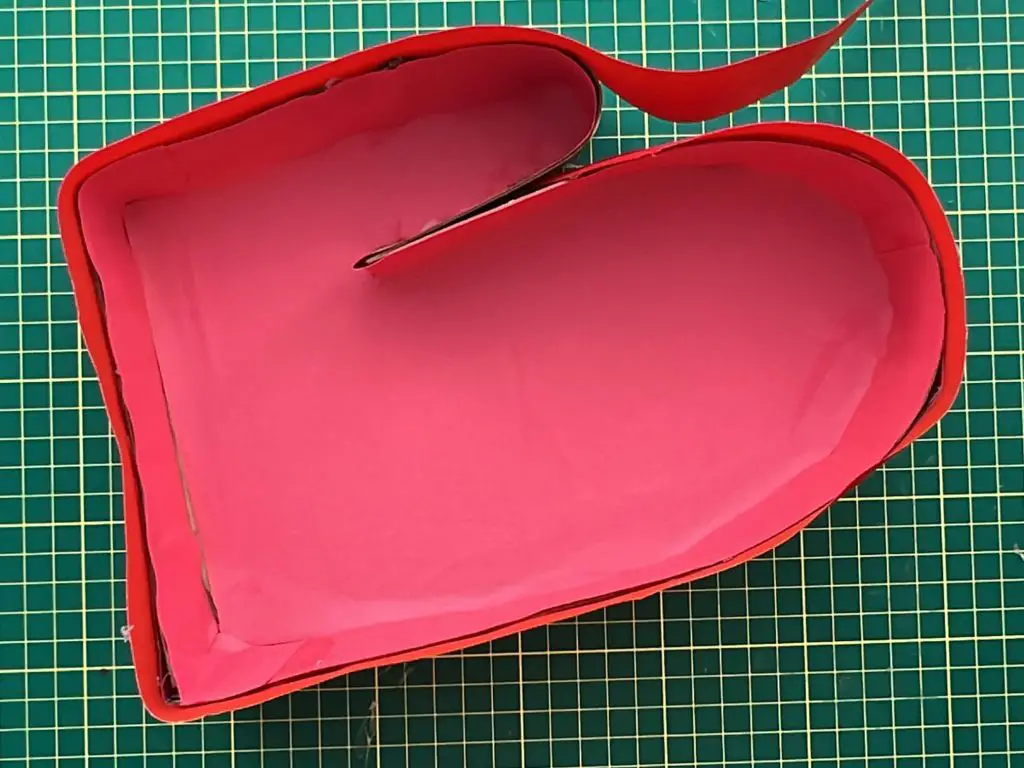
Using hot glue and a glue gun, slowly apply glue to the edge of the mitten and stand the rectangle up on the mitten. Slowly work your way around the mitten. It is best to have the design from the cereal box facing inward on the mitten. I suggest this so that when applying paper later, no cereal box design will shine through. However, if you are using cardstock or construction paper, this is not a major concern. It is more of a concern if you are using tissue paper.
In sections where one rectangle finishes and another starts, you can make a slight overlap and glue them together, so glue the seam of the two pieces and carry on. Once you have made it the entire way around the mitten, you may need to cut off the surplus from the last rectangle.
For my mitten, I followed the cardboard in toward the thumb farther to give the mitten a bit more shape, but this is not required.

Repeat for the second mitten.
Make the Mitten Red
We do not want the mitten to be ugly cardboard and cereal box design, so we need to cover it with some paper. I have chosen to make my mitten red, but you can choose any color you like.
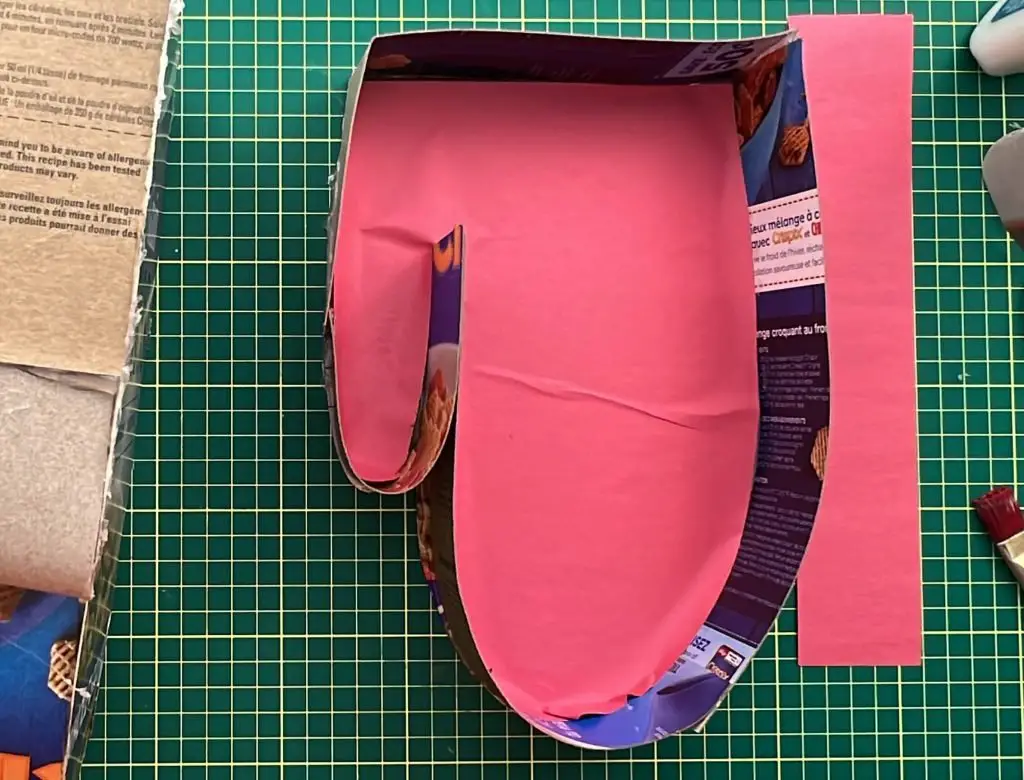
Above, we cut out a red mitten and rectangles to use for this. Depending on how you installed the box walls, you may need to cut a slit in the thumb of the mitten to allow the red paper to fit. Do a test fit before applying glue.
Once happy that the inner mitten will fit, apply glue to the cardboard. I used my kids’ craft glue and spread it around with a paintbrush to get even distribution. Then, I placed the red mitten on top. Some of the edges may come up, but this is ok. The reason for adding red inside is to hide the cardboard between the treats at the end.
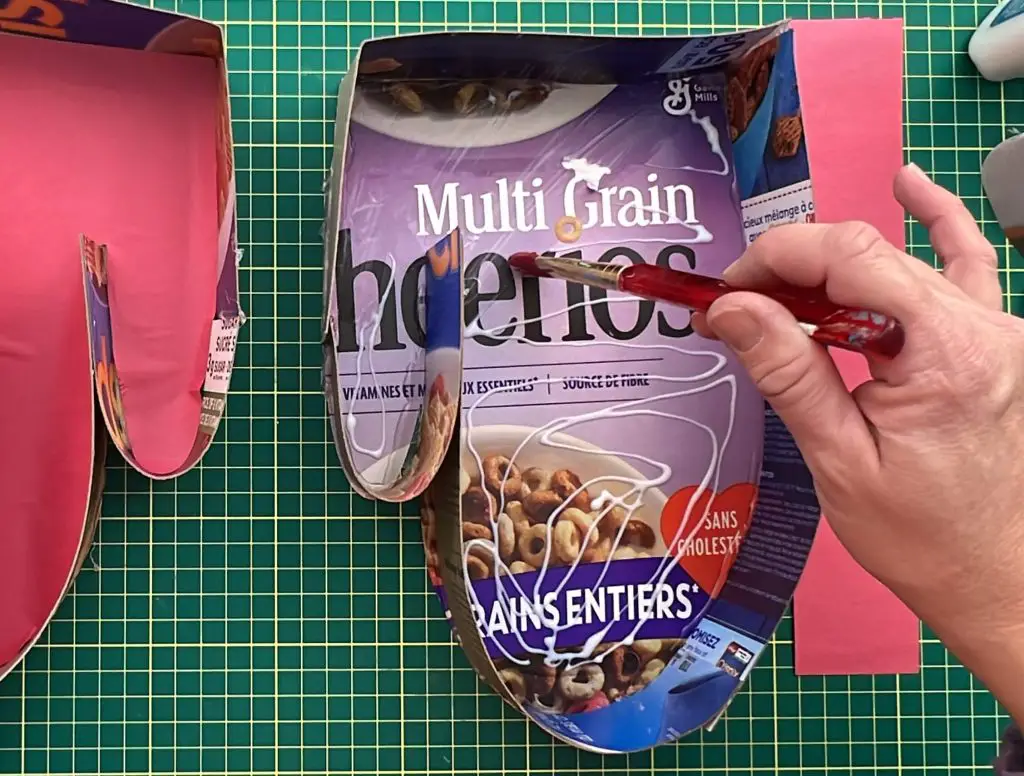
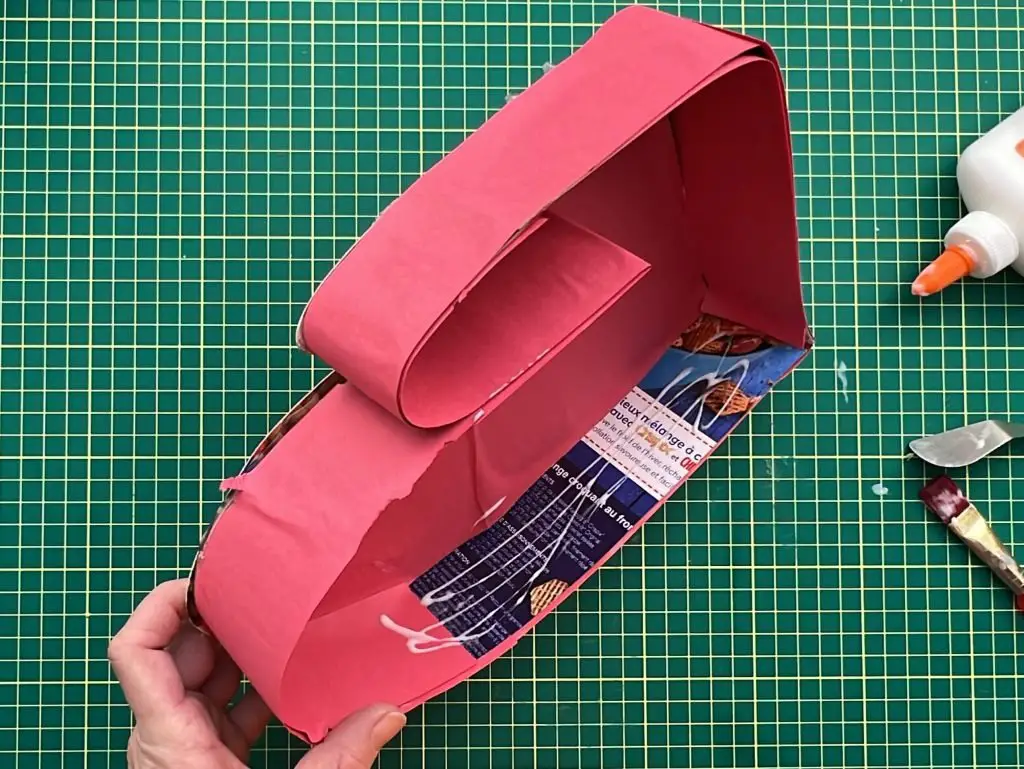
When the mitten is glued down, move over to the walls. Using the same method with glue and a paintbrush, glue on the walls to the inside and outside of the mitten box walls.
Now, we need to wait for the glue to dry.
Add some accents to the mitten countdown calendar
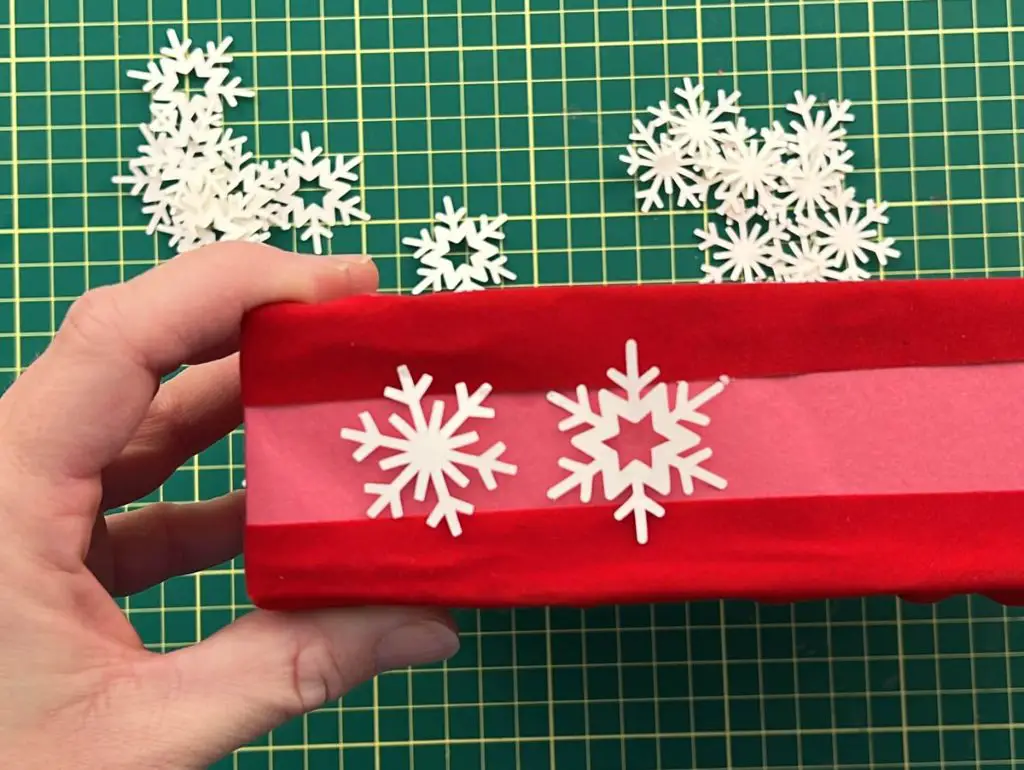
The top and bottom edges of the mitten walls may look a bit unfinished. You may have overlapping paper or spots where glue is showing at the joints.
To address this, I used a 1.5″ thick velvet red ribbon and glued the ribbon around the top edge. Make sure to glue half of the ribbon on the outside wall first then, you can easily fold the ribbon into the box and apply glue as you go. If you try doing this the other way, the ribbon will not fold over the outer corners and may rip.
Similarly, you want to run a ribbon along the bottom of the mitten, to cover the bottom edges. Again, glue half the ribbon onto the bottom wall and then fold it back onto the back of the mitten. This will produce a clean edge on the visible surfaces of the mitten.
Unfortunately, the red paper and the red ribbon I used were not the same shade of red. I was clearly not paying attention when I started picking out my supplies. So, the red paper appears pink against the red ribbon. I did not like the look of this, so I cut out some snowflakes and glued them onto the side of the mittens to give a bit of a contrast in hopes of hiding the color mismatch. If you are better at selecting colors, you can avoid this part entirely.
Select Your Countdown Calendar Treats
Every year after Halloween, I pull aside 25 candies from my kids’ takings. This gets put aside until I make the countdown calendars so they have something for each day.
This also helps limit how much they get to eat in the month of November, and I do not need to spend extra money buying things to put into the calendar.
Just some pointers – if you are making more than one calendar for your kids, for example, it is a good idea to give the same treat to each child on any given day. I like to sort my candies and place them with numbers next to them, and then I take a picture to make sure I remember what goes where.
Prepare Your Treat Numbers
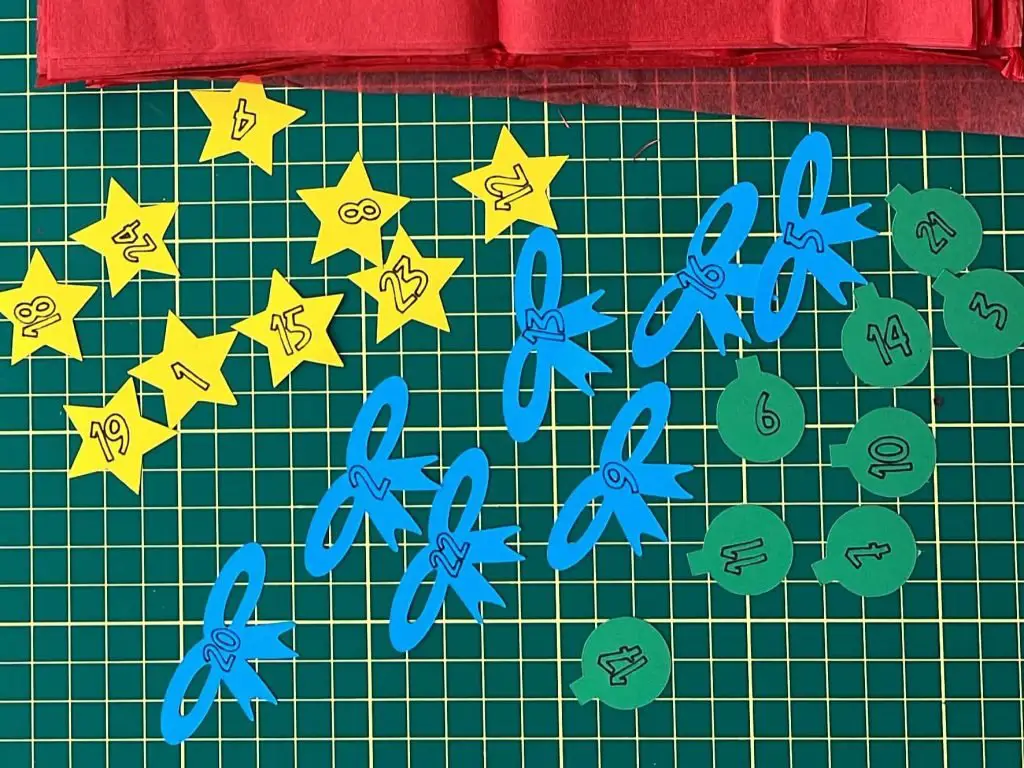
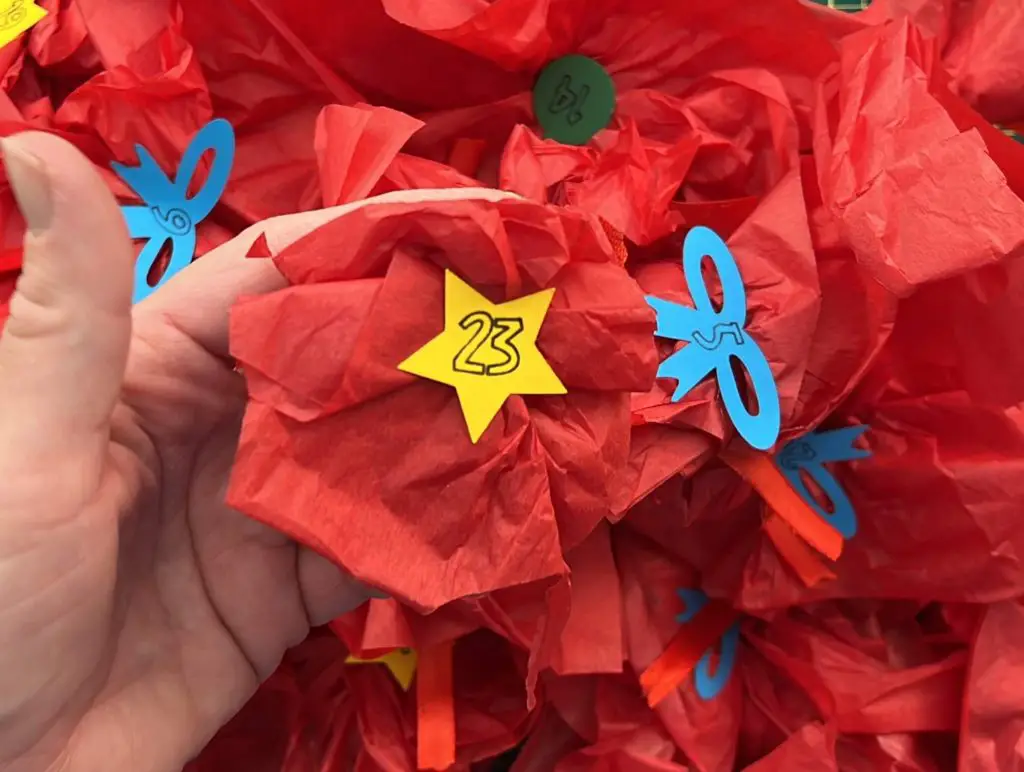
As I make 3 calendars a year, I need to make sure each candy is in a specific spot, number-wise, so before I wrap anything, I prepare some numbers for my countdown calendar.
I have created numbers for my countdown calendars, and you can get a copy by signing up for my newsletter below. You will get access to the numbers I have created.
Once you have downloaded the file, upload it to Cricut Design Space.
You will need to make a few modifications to the file, as follows:
- Ungroup the design.
- Select each number individually and change it from Basic Cut to Pen.
- Each number and shape (star, bow, bulb) will individually need to be selected and Attached together so they are drawn and cut together.
- Resize the shapes to fit your preference. I adjusted mine to be 1.5″ high.
- You can leave them all the same color or change the color for each number. For mine, I changed the colors to blue, green and yellow.
Wrap Your Countdown Treats
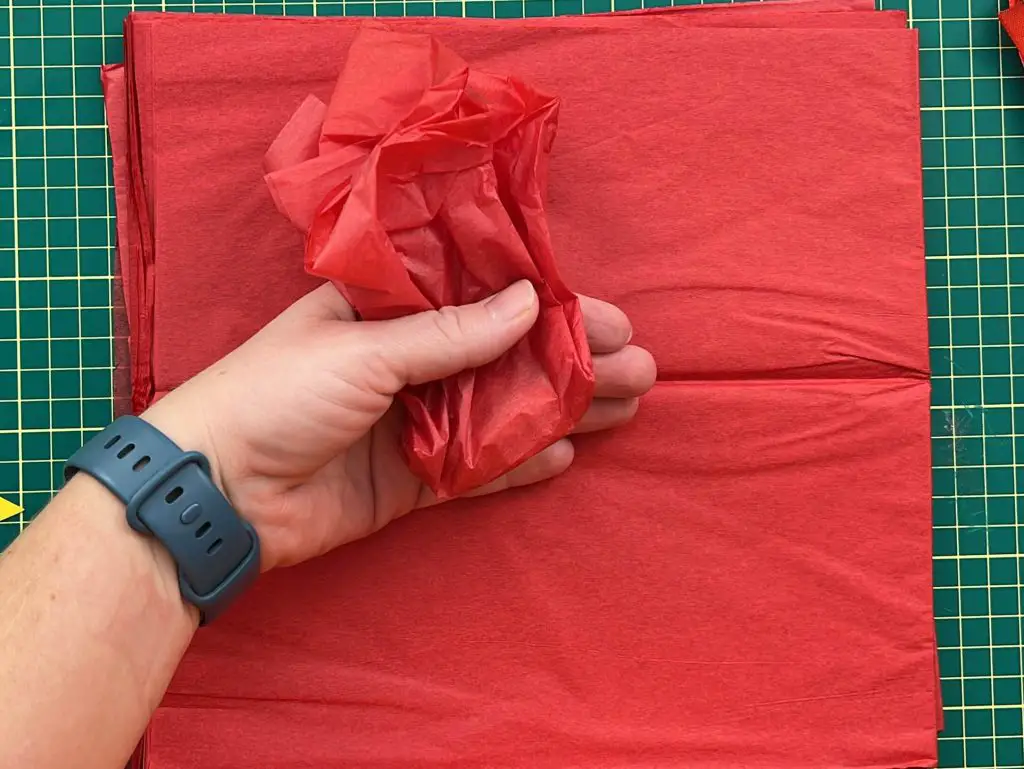
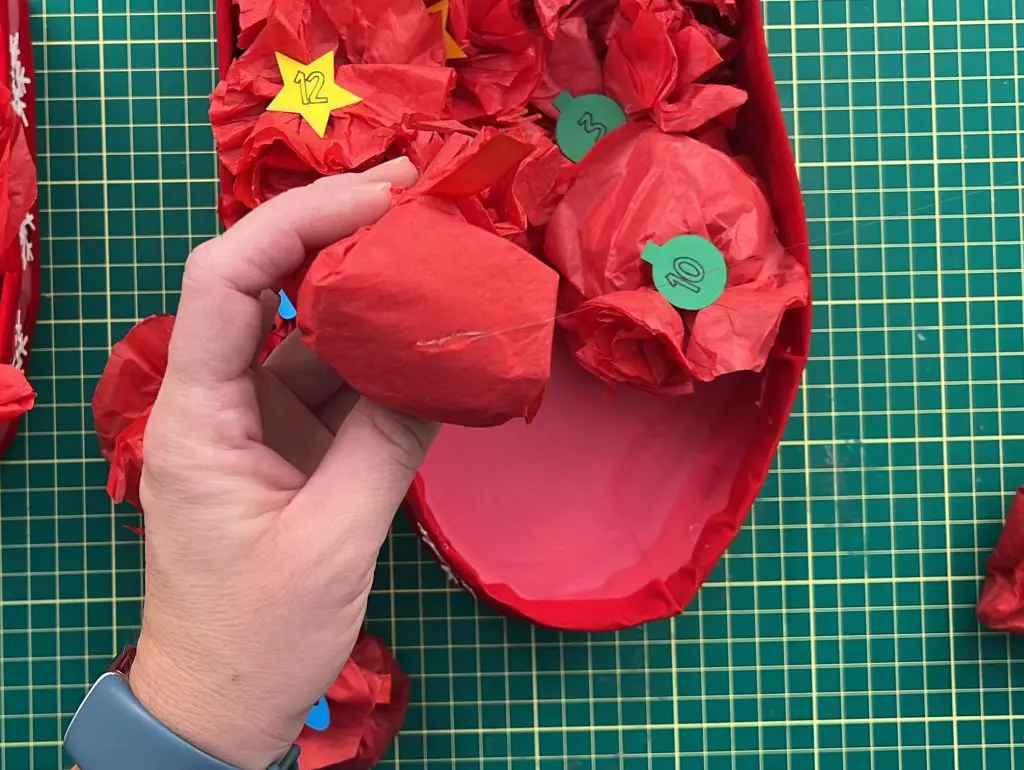
As this countdown calendar is a mitten, we will focus on keeping it red. And in that light, I pulled out some red tissue paper to wrap each treat.
I cut out squares that are about 8″x8″ of tissue paper. I used 2-3 pieces of tissue paper per treat so that the treat would not be visible through the paper. Pulling all 4 corners up, I tied a red ribbon around the tissue paper to make.
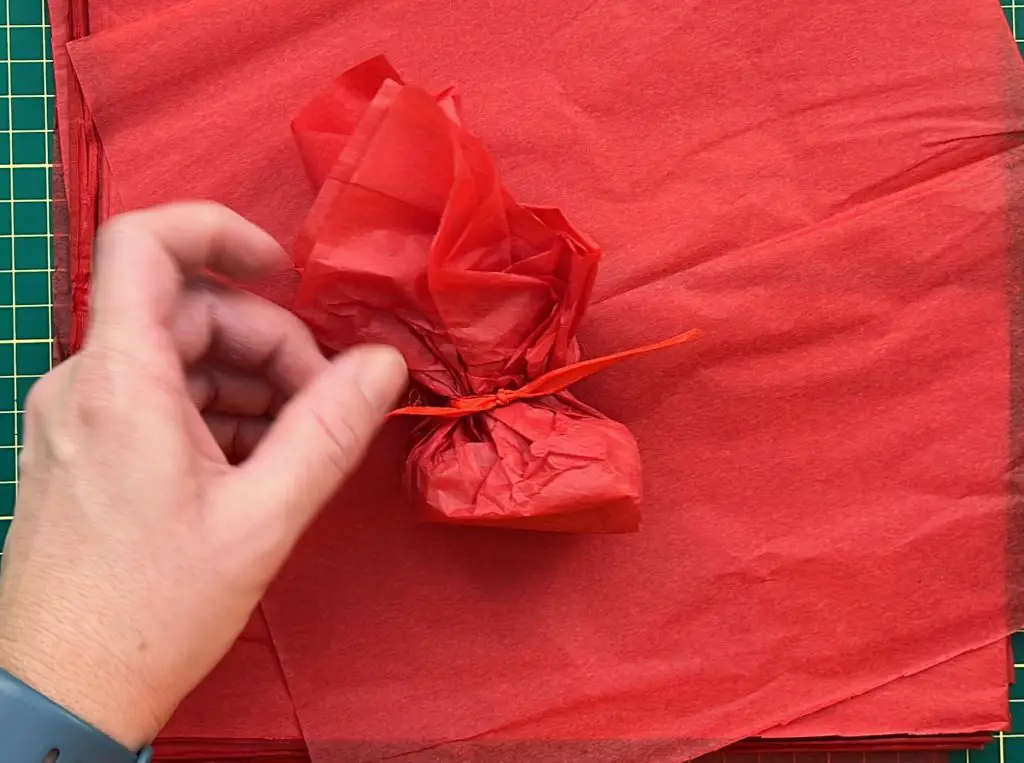
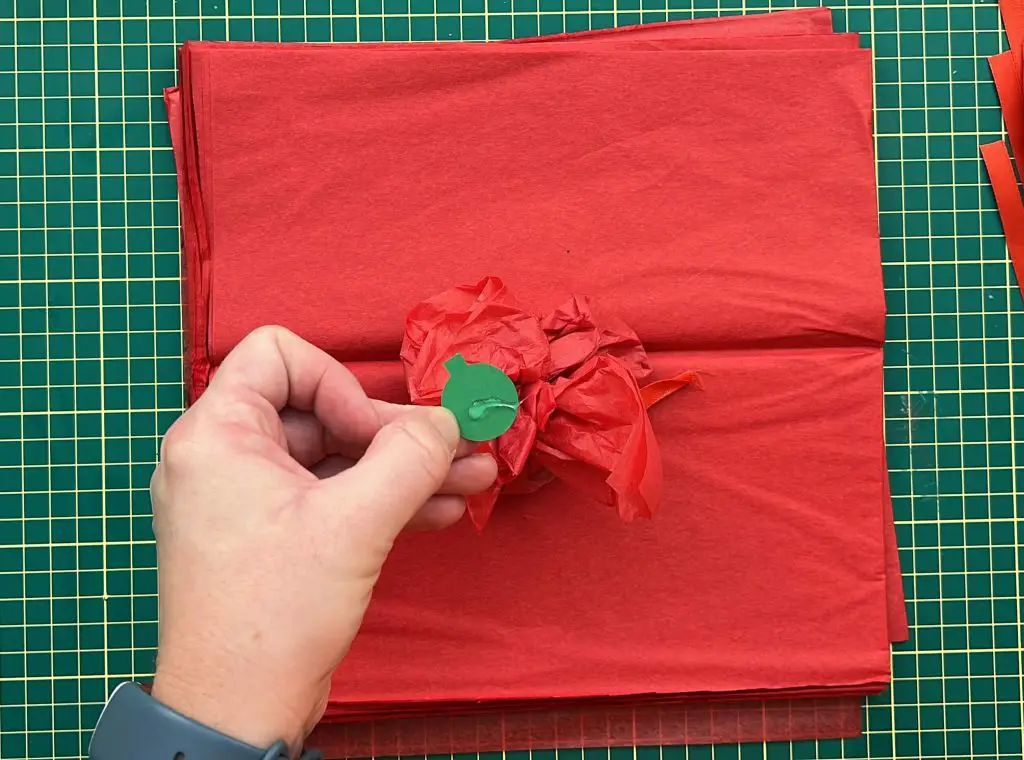
Once you have tied up one treat, push open the top that was tied up to make it look almost like a flower. I recommend gluing the number onto the wrapped treat at this point.
Continue this until all of the treats are wrapped.
Since the treats are all different sizes, I trimmed the surplus tissue paper off the wrapped treats. I attempted to make them all look symmetrical and circular.
Assemble the Mitten Countdown Calendar
Now that the major pieces are completed, it is time to assemble the mitten countdown calendar.
Before we use any glue, I recommend placing the treats into the mittens and adjusting them so they fit. The size I selected works well with leftover Halloween candy but they need to be strategically placed to fit. So I recommend you place them in and move them around until they all fit before using glue.
Once happy with the placement, take a few treats out, apply glue to the bottom of the treat and glue it into place. Continue this process until all of the treats are glued in.
Once you have all the treats in the mitten box, you may need to trim some of the tissue paper and ribbon to help show the numbers or to make the mittens look better.
Hang the Final Calendar
Once all of your treats are in and dry, it is time to apply a ribbon to the back of the mittens so they can be hung on the wall.
I used 2 ribbons, each about 20 inches long. Make a looped knot in the middle to attach to your hook later.
Place the mittens face down with the thumbs pointing in the desired direction, as selected above. Apply hot glue to the back of the cardboard. Place the ribbon onto the glue and let it dry.
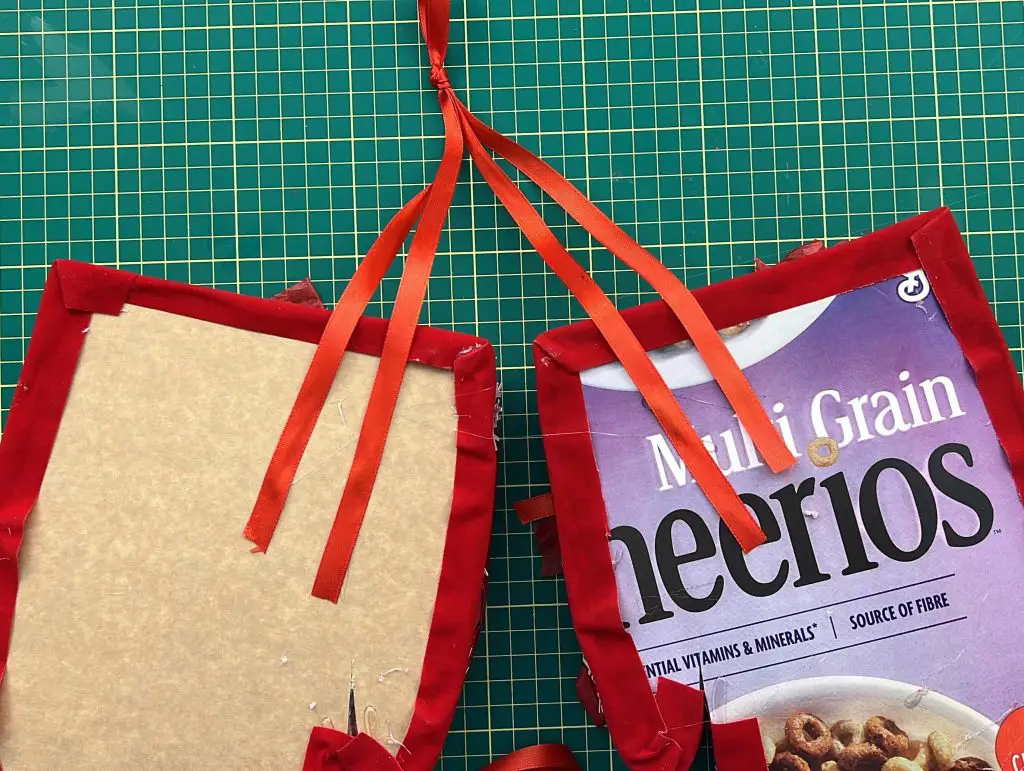
I used 2 ribbons as the mittens are getting heavy with all the treats, so this is to help hold them. You can use one ribbon if you prefer.
Once the glue has dried, you can hang the mitten on your wall. I use 3M command strips for this, as they can be removed after the holidays without ruining the walls.
And that’s it! Your Mitten Countdown Calendar is done!
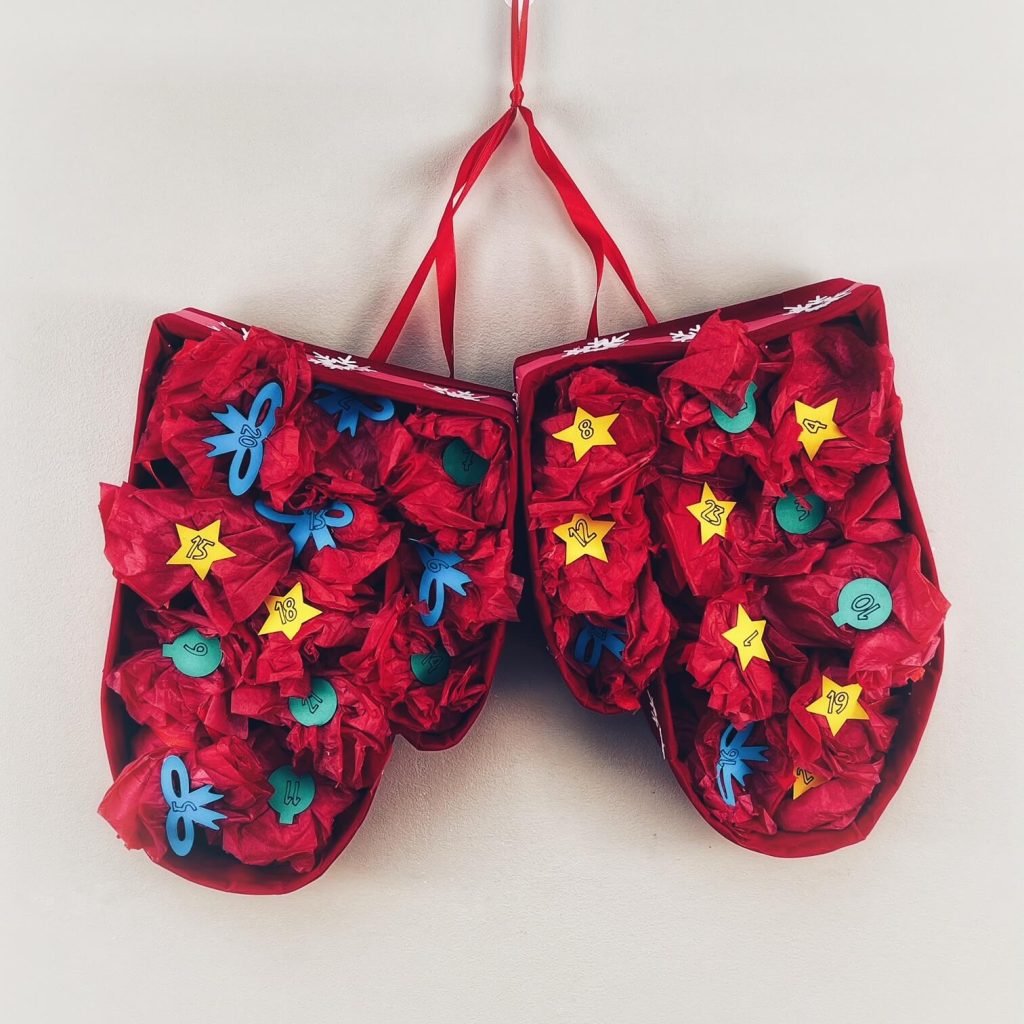
Things I learned while making the mitten Countdown Calendar
It’s funny because even though I am crafting almost daily, I am constantly making mistakes and missteps and learning something. And this project has been no different than any other. So, here is what I learned while making this mitten countdown calendar
- If you want the mittens facing opposite directions, it’s best to flip either in Design Space or flip the cereal box cardboard. Even though I covered the box with red paper, there is always a chance that the design will shine through.
- When applying the ribbon to the outer edges of the mitten, you need to make sure you glue it onto the outside of the wall first. That way, it will fold in nicely. If you glue it on the inside of the wall first, flipping it over the wall onto the outside wall requires you to stretch the ribbon over the corners. This does not work well with ribbon and can make holes in it, or even rip it. I accidentally did this and had to cut the whole thing off and start again.
- When I selected the craft paper to cover the cardboard, I was certain that the color was very similar to my ribbon. After I had glued on all the paper and was about to glue on the ribbon, I realized this was not the case. The colors were so different that the paper looked pink next to the ribbon. As the mitten will be viewed from the top and not the sides I did not need to add anything to the side, but disliked the look of it, so I added snowflakes to the mitten to have the two reds bend together.
Did you enjoy this countdown calendar?
Did you enjoy making this mitten countdown calendar? Let me know in the comments below! If you enjoy making Christmas crafts, be sure to check out my other Christmas Crafts HERE.
Want to make more countdown calendars? Here are some other ones that I have designed:
- Christmas Bulb Holiday Countdown Calendar
- Hanging Star Holiday Countdown Calendar
- Toilet Paper Roll Countdown Calendar Christmas Tree
- Snowman Christmas Countdown Calendar
- Christmas Tree Countdown Calendar – DIY
- Wine Advent Calendar
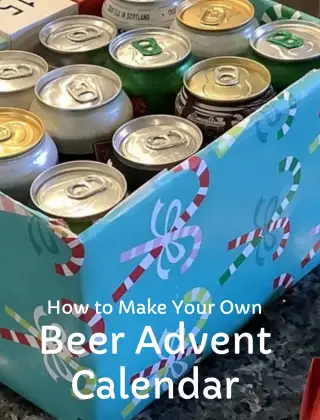
- Beer Advent Calendar