I’ve been looking for a simple, pretty way to hang up all the medals in our house, and let me tell you, they add up fast! Between school sports, swim meets, soccer tournaments, and even some of my own race medals… we needed a clean (and inexpensive!) solution.
So today, I’m walking you through how to create your own DIY medal display using a cardboard tube and a few craft supplies you likely already have. This is an easy and practical craft that you can do during one of those precious quiet moments in the day.
So, let’s jump in!
As an Amazon Associate, I earn from qualifying purchases. This post contains affiliate links. I may receive a commission if you purchase an item from one of my links. This will not change the price you pay.
🧰 Supplies Used for the DIY Medal Hanger
Supplies! We need supplies! Here’s what you’ll need to bring this simple medal display to life:
- A thick cardboard tube – I used a vinyl roll tube; however, aluminum foil tubes, packing tubes, or paper towel tubes will work. I prefer the thicker ones, from vinyl or aluminum, as they don’t bend. Some paper towel tubes are very thin.
- Adhesive vinyl or acrylic paint – This is used to cover the tube if you don’t want to leave it plain.
- Ribbon or string – for hanging
- Hot glue gun and hot glue
- A nail or Command strip – for mounting
- Scissors or a paper cutter
- Mini binder clips (optional for race bibs)
📏 Choosing the Right Cardboard Tube
There are so many different tubes you can use: aluminum foil tubes, vinyl tubes, shipping tubes, and even paper towel rolls. I prefer to use a thicker tube. I found that the thinner tubes will bend. A lot.
If you add more than three medals, a paper towel roll will look tired and droopy (ask me how I know…). So choose something thicker like a vinyl tube; they’re sturdy and hold their shape beautifully.

🎨 Decorating Your Medal Display Tube
There are several ways you can decorate your tube, or not decorate it. You can leave the tube plain, paint it, or wrap it in vinyl. I’ll show you both methods.
🎨 Painting the Tube
Paint is the easiest option if you don’t have vinyl on hand.
All you need to do is slop some paint on the cardboard tube and cover the brown cardboard with the color of your choosing. Blue was my paint color of the day, but choose whatever matches your space.
You will also need to wait for the paint to dry before moving on to the next steps. Fortunately, paint dries quick on cardboard.

🟦 Wrapping the Tube in Vinyl
If you want a clean, polished look, vinyl is your friend.
We first need to measure the vinyl. Simply wrap it all the way around the tube. Leave a tiny overlap so the cardboard doesn’t peek through. Mark that spot on the vinyl and cut it either with a paper cutter or scissors.

Next, peel back about an inch of the vinyl carrier sheet and fold it down. This will allow you to line up your cardboard tube without it sticking to the vinyl.

Once you are happy that the cardboard tube is lined up straight on the vinyl, roll the cardboard tube up onto the exposed vinyl to stick to it. Slowly pull away the carrier sheet while rolling the cardboard tube down and sticking it to the remaining vinyl.
This avoids bubbles and keeps everything straight. Smooth it out with your hands or a scraper.

When you’re done, you’ll have a flawless, professional-looking medal holder.

🧵 Adding the Ribbon Hanger
Now that your tube is decorated, it’s time to make it hangable.
Since my cardboard tubes are blue, I’m using a matching blue ribbon, but any color will work. If you are not a fan of ribbon, you can use string, yarn, or straps.
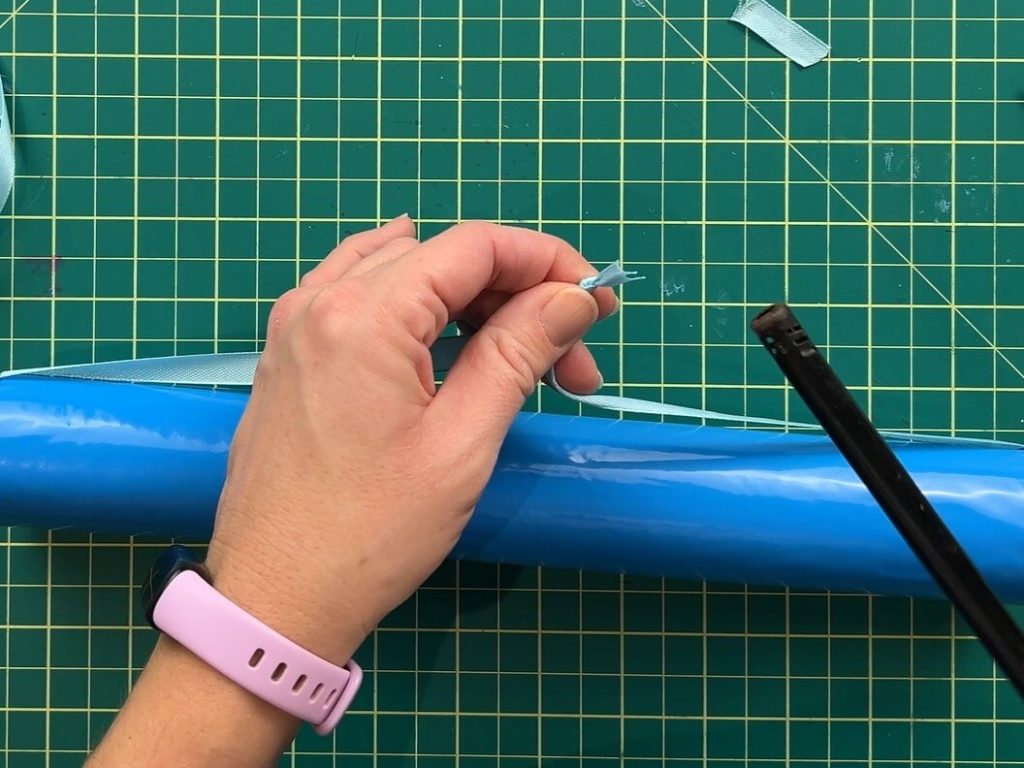
Simply feed a piece of ribbon through the tube. Leave enough extra ribbon at the top to tie a knot.
Tie a knot to hold the ribbon in place.
I like to tie 2 knots slightly apart to give my medal display a loop which will easily hang on my command strip later.

Finally, I like to glue the ribbon in place. This will help keep the DIY medal hanger straight after you hang it up. If the ribbon is loose on the cardboard tube, it will slip and slide from side to side.
I use my cutting mat to measure the location of the top knot. This helps to keep it centered and everything straight later on.
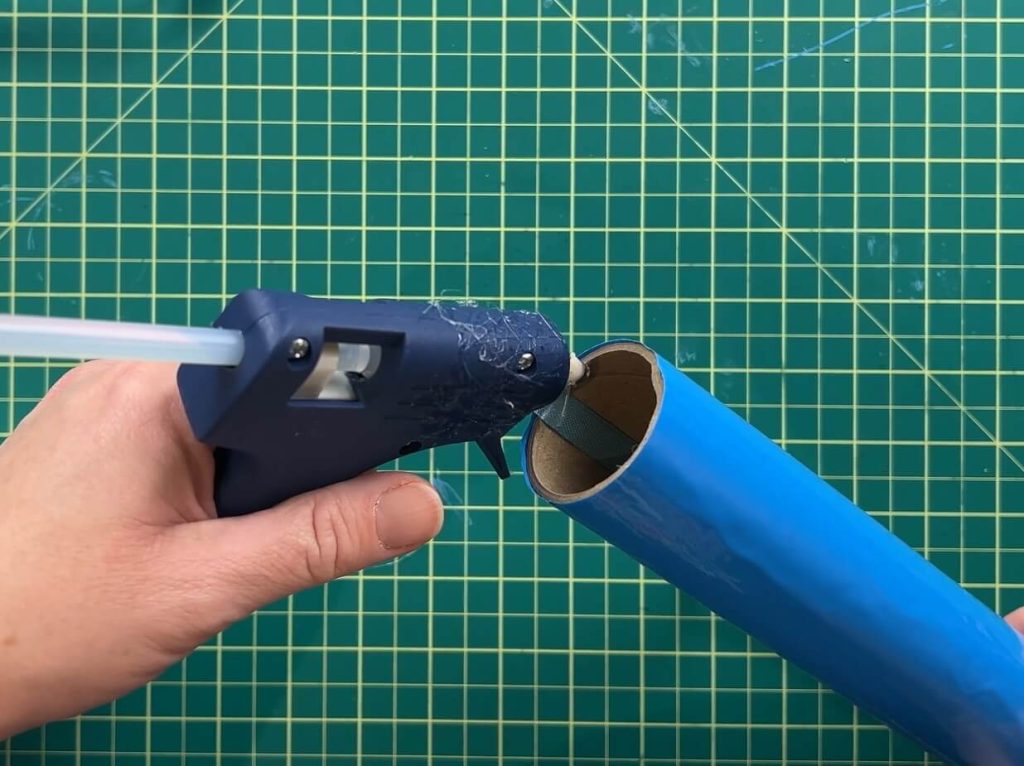
Using a glue gun, apply glue on the inside of the cardboard tube against the ribbon.
Once everything is in place, I like to melt the ribbon ends with a lighter so the ribbon doesn’t fray over time.
➕ Making a Multi-Level Medal Display
If one tube isn’t enough (and for many families, it won’t be!), you can easily extend this. I already have a large pile of medals, and it keeps growing, so I’m expanding it now, but you can easily expand it afterwards as well.
First, you will need to prepare a second tube. Ideally, you want it to match the first one, but you are welcome to have it multi-colored.
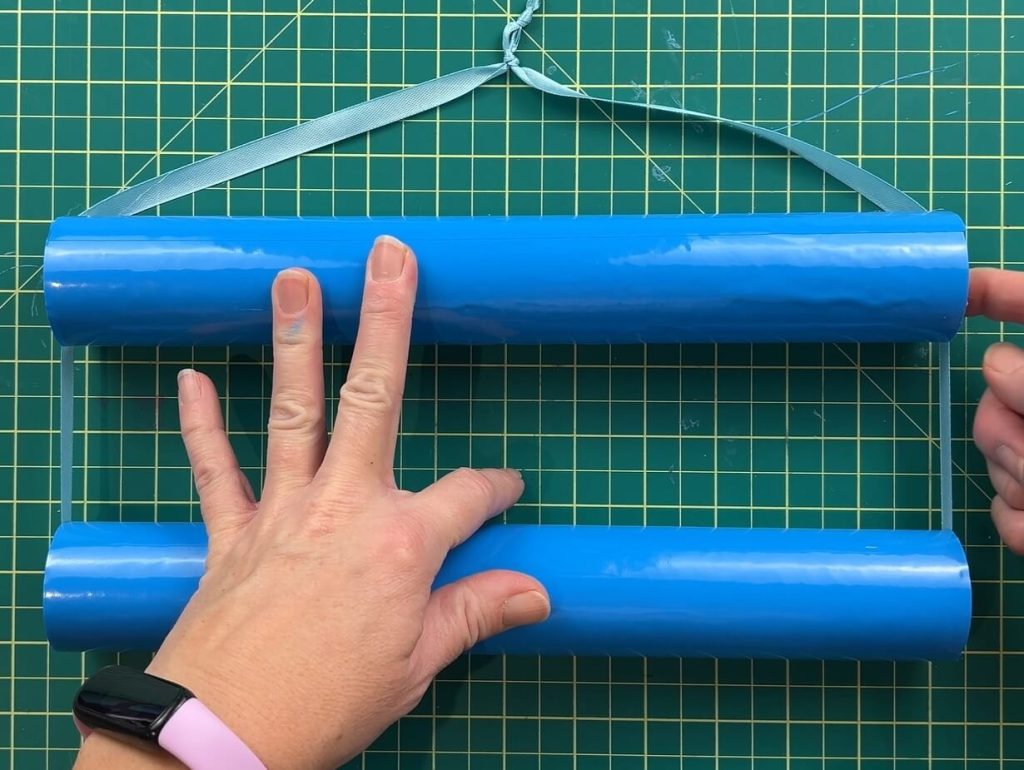
Align the two tubes one above the other. In my case, I placed them about 3-4 inches apart and pulled the ribbon through both tubes.
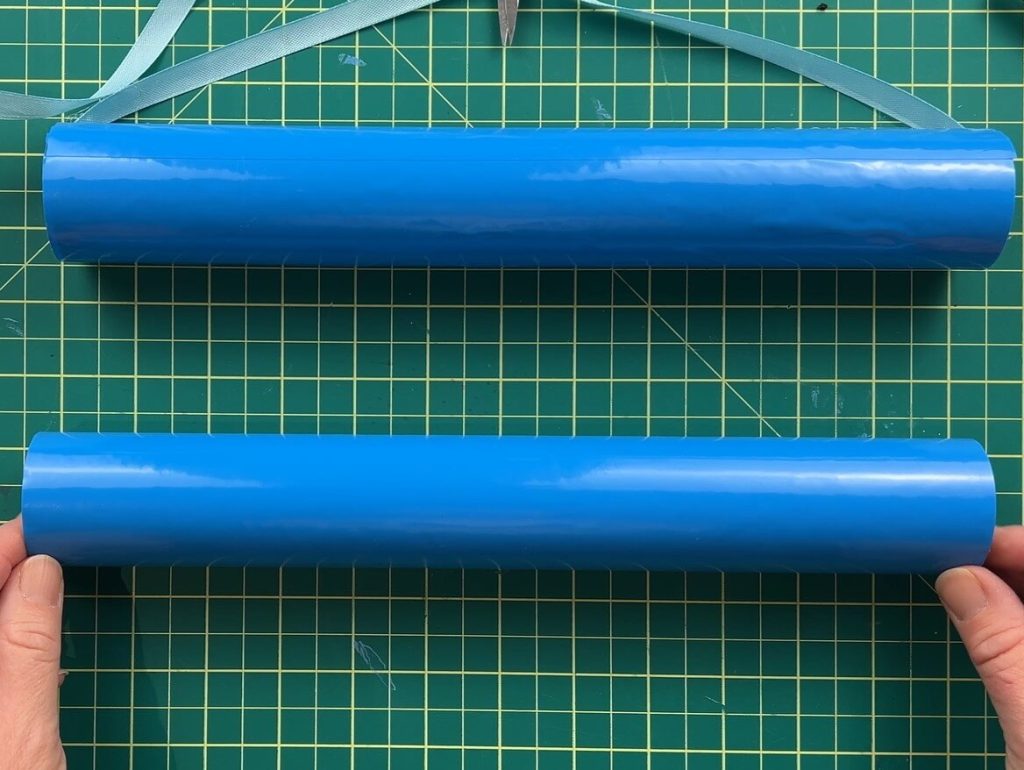
Tie a knot in the ribbon. If you find the medal hangers are too far apart, you can cinch the ribbon some more.
Rotate the ribbon so the knot is hidden inside one of the tubes, and glue the ribbon into place.
I like to hold the cardboard tubes aligned on my cutting mat so they are straight with the lines, to keep everything even later on.
This creates a clean tiered effect, and you can add levels as needed.
🖼️ Mounting Your Medal Display on the Wall
Now that we have the DIY medal hanger completed, it is time to hang it on our wall! For this, we have 2 options.
- Option 1: A small nail – Quick, secure, and perfect for drywall.
- Option 2: Command strip – This is great if you don’t want holes in your walls.
Just make sure whatever you choose can support the weight of your medals, they get heavy fast! And not all nails and command strips are good for very heavy objects.
🏅 Adding Your Medals to your DIY Medal Display
Now for the fun part! We get to place our medals on display! Yay!
To quickly and easily place your medals on the display, pull the medal ribbon over the top of the tube and pull it down behind. Then, slip the medal through the loop of the ribbon, and it is ready to go!


🎉 Your DIY Medal Display is Complete!

Now you have a simple, affordable medal holder that looks great and keeps all those memories in one place.
I love how customizable this project is! You can match the colors to your child’s room, your sports team, or whatever aesthetic you’re going for. And the best part: it uses supplies most crafters already have.
🚫 Mistakes to Avoid When Making Your Medal Display
Let’s talk about the learning curve, because yes, I always manage to find one:
- The type of cardboard tube matters! Don’t use thin tubes! They bend under your medal weight, and you will have to restart this project!
- Gluing ribbon inside a cardboard tube can be a challenge, but it’s well worth it to keep the ribbon in place! Don’t skip gluing the ribbon; trust me, it will slide!
- Don’t be scared to use too much vinyl! It’s better to use a bit more vinyl than too little. When measuring your overlap, don’t be scared to waste half an inch of vinyl!
- I use command strips for most of my wall projects. However, I find that over time, the small ones will give out, so make sure you use strong wall supports; medals can get heavy quickly.
- The neat thing about layering the medals is that they will hang over the ones below, and they are staggered in length, so it looks very cute. I like it.
- Even though I glued and knotted the ribbon to keep it all in place, if you do not distribute the medals evenly on the medal display, gravity will do its job and make the whole thing look lopsided.
- I like to hide the ribbon knots between layers, but I’m ok showing them for the top knot.
- If you are leaving your top knot exposed, I recommend burning the ribbon ends. This will stop the ribbon from fraying over time. If you hide the knots, you can still burn the ends as they will fray inside the tube; you just won’t see it.
- You can place ribbons and bibs on this medal display, but I have not tried it. You’ll need to secure them either with binder clips or additional ribbon. I’m currently working on a display for ribbons, as we have a lot of those as well! I’ll be posting that here when it’s ready.
💬 Did You Make This DIY Medal Display?
If you tried making this DIY medal display, let me know in the comments below!
Did you use paint or vinyl? Did you add multiple levels? How did your medals look afterward?
And, if you enjoyed this craft, check out my other simple DIY projects here.
If you are a fan of cardboard tube projects, there are a few of my favorites: