If you can fold paper, you can absolutely make this 5-point paper star. It looks complicated, but it’s actually super easy and incredibly relaxing. In this tutorial, I’ll walk you through everything you need—from the supplies to the final assembly—and then share some tips I learned while crafting different versions of this star.
🎥 I also made a video about these stars. You can watch the YouTube Video Here.
⭐ Supplies You’ll Need
As an Amazon Associate, I earn from qualifying purchases. This post contains affiliate links. I may receive a commission if you purchase an item from one of my links. This will not change the price you pay.
To make your 5-point paper star, you only need a few simple craft supplies:
- 5 sheets of cardstock – ideally, you want them in the same color when making the 5-point star. For this 5-point star, I’m using 12″ × 12″ cardstock. However, if you won’t have that size, you can use:
- 8.5×11 paper trimmed into 8.5″ square.
- Origami paper
- Any square paper you already have in your craft stash
- Glue – for this craft, I’m using my glue gun and hot glue, as gluing this heavier cardstock needs more power.
- Needle + thread or yarn – if you want to hang your star, you will need these.
For this 5-point star, I’m using 12″ × 12″ cardstock. However, if you won’t have that size, you can use:
- 8.5×11 paper trimmed into 8.5″ square.
- Origami paper
- Any square paper you already have in your craft stash
⭐ How to Fold Each Star Point
Each point of your 5-point paper star starts with the same series of folds. Here’s how to do it:
Start With a Diagonal Fold
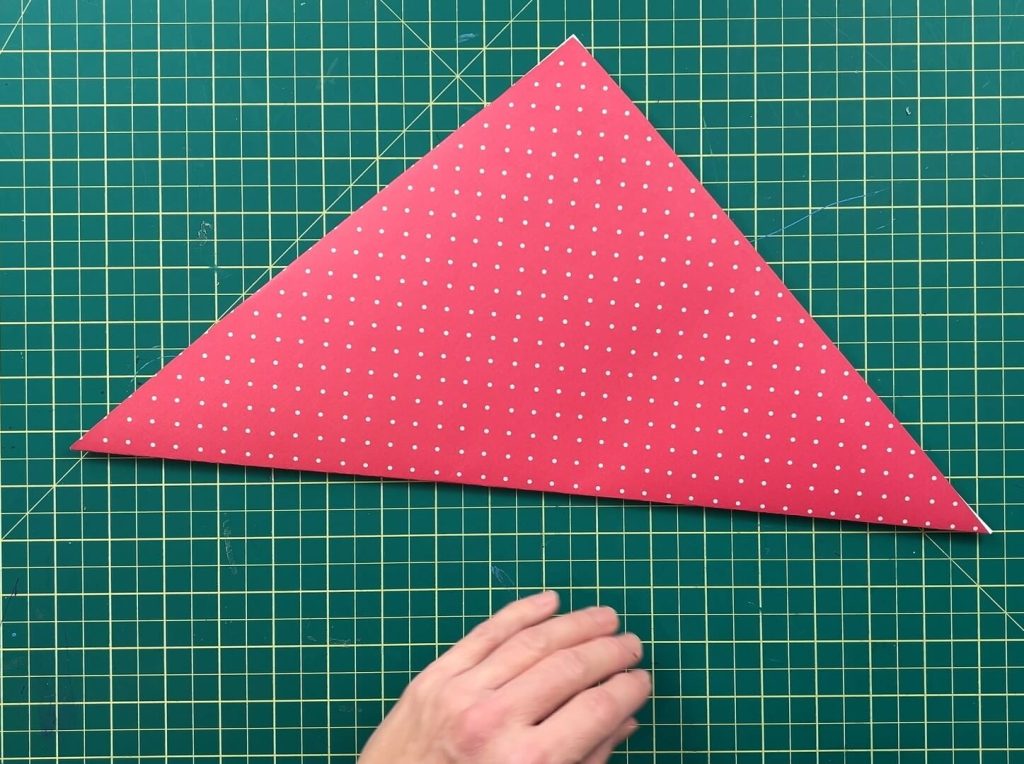
Flip your paper so the “good” side faces down. Fold the sheet diagonally into a triangle, like starting a paper airplane. Don’t worry if it’s not perfect; handmade crafts don’t need to be exact.
Fold the Corners In
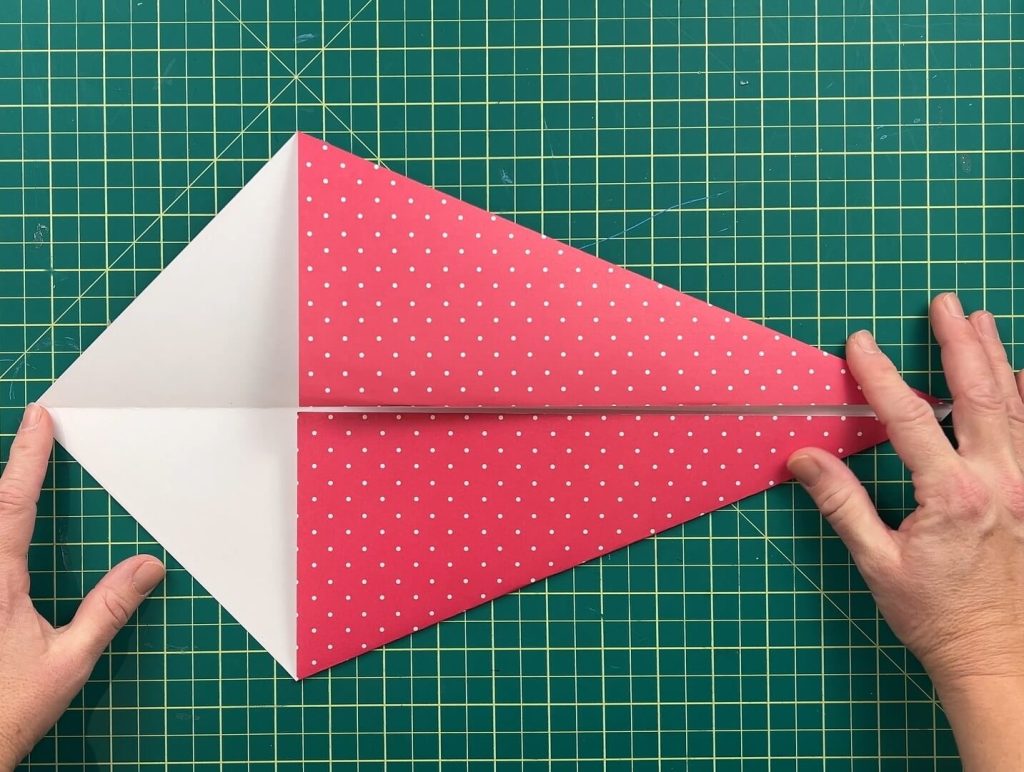
Open your triangle and fold each side corner inward toward the center crease. It should now look like a very wide paper airplane.
Create the Diamond Shape
Fold the top flap down to forms a smaller triangle.
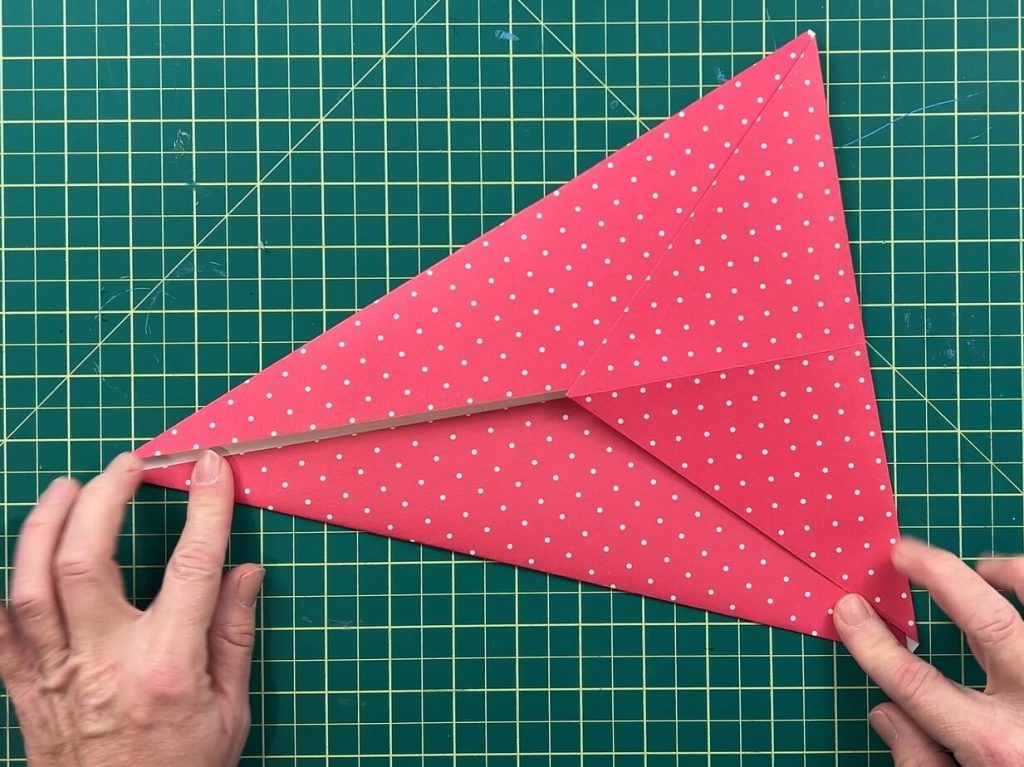
Then fold the tiny side corners inward so they meet at the middle. Press firmly, thicker cardstock may take some convincing!
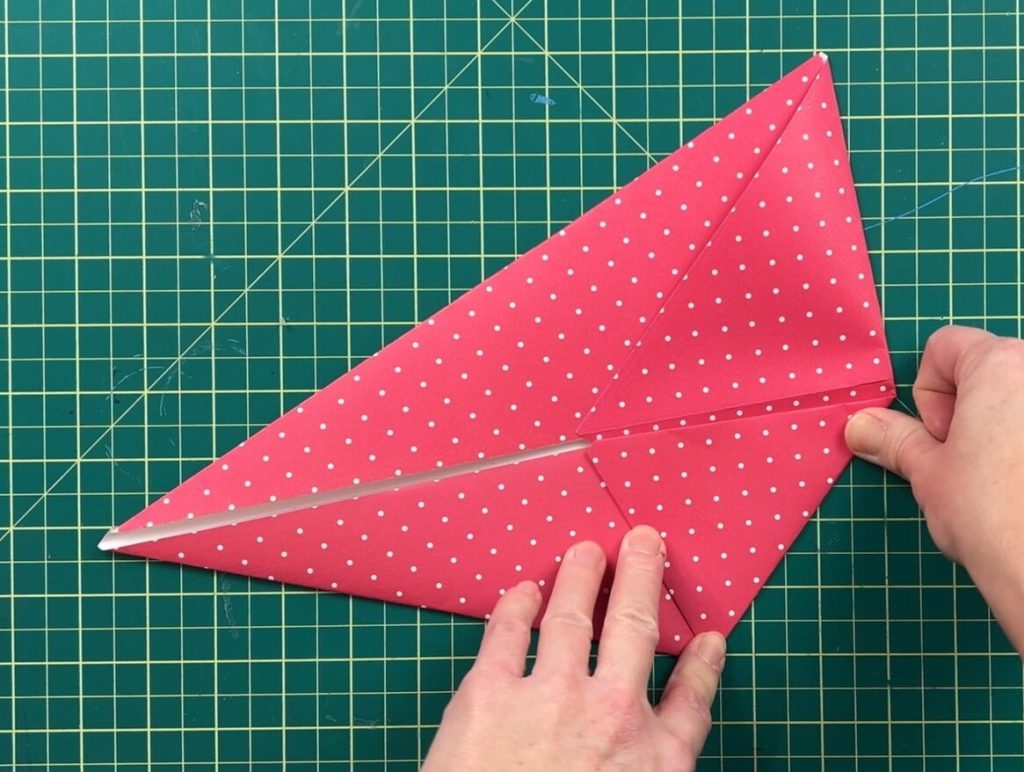
You should now have a diamond shape. That’s one star point!

Repeat this folding process four more times until you have all five points ready.
⭐ Glue the Points of Your Star Together
Once all pieces are folded, it’s time to glue them into shape.
Seal Each Diamond
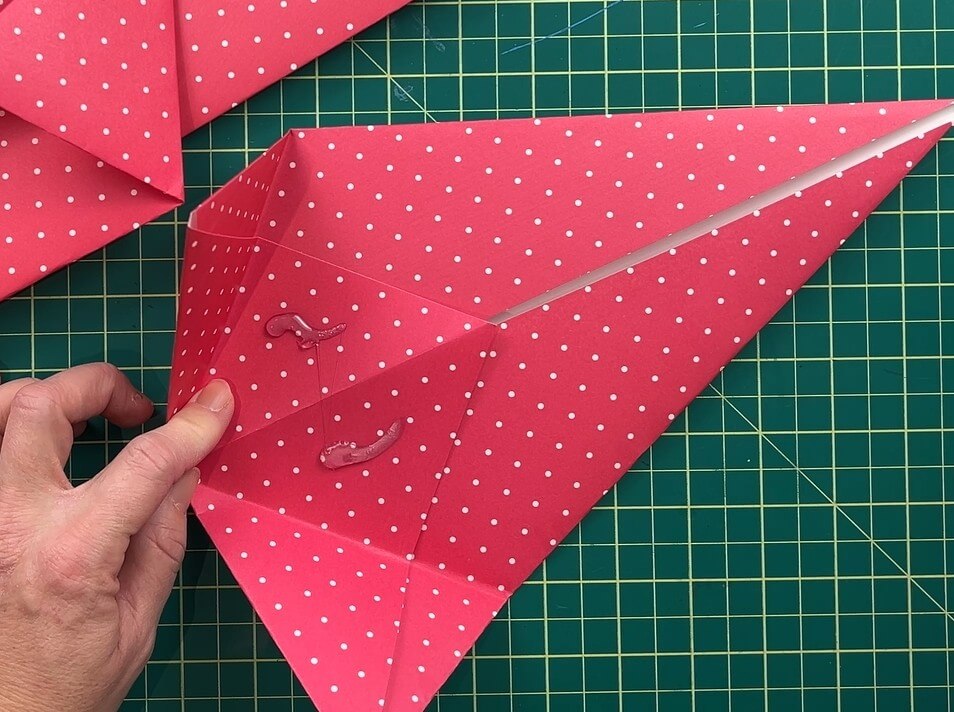
Place two small dots of glue inside the diamond to hold the folds closed. Do this for all five pieces.
Turn the Diamond Into a Triangle
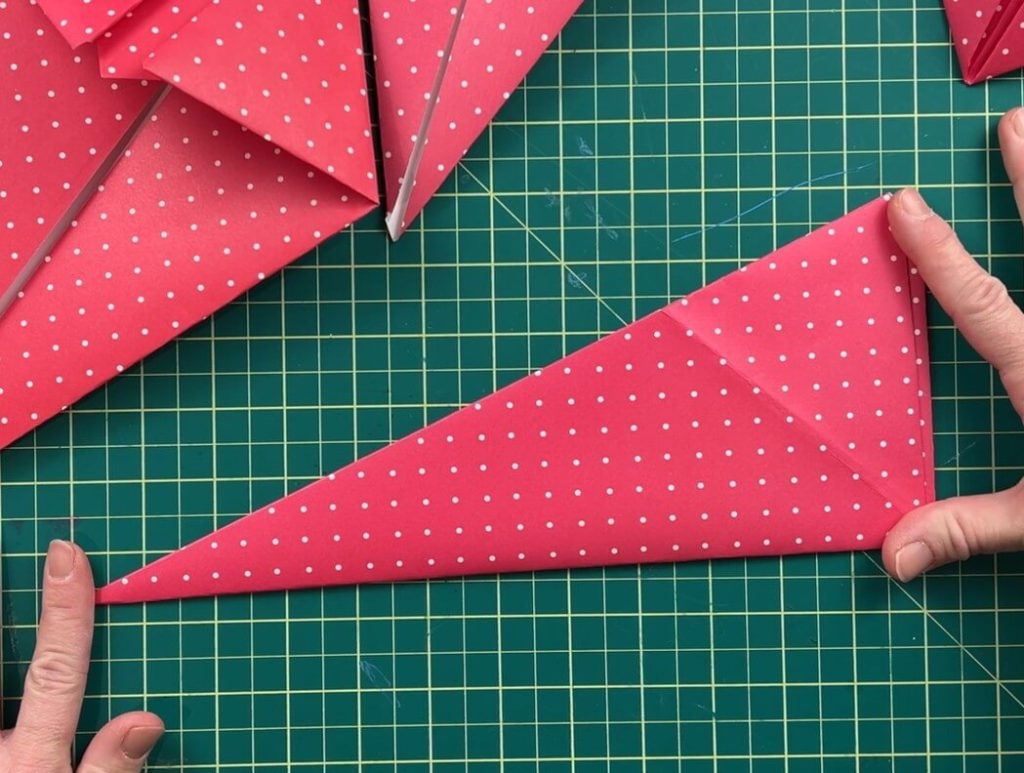
Fold each diamond in half so it becomes a right-angle triangle. This is what creates the structure of your five-point paper star.
Glue Each Triangle Together
Apply glue to the smaller of the two triangles that are visible on your folded paper. You will want to apply the glue in a triangular area, not just a dot. This helps the star hold its shape and prevents lifting edges.
Place one triangle on top of the next, lining up the edges as you go. Continue until all five points are attached.

Attach the Last Point
Add glue to the final triangle and attach it to the first piece, closing your star.
And… you now have your finished 5-point paper star!

⭐ How to Hang Your Paper Star
If you want to display your star, grab a needle and some thread (or yarn). Using the needle, poke a hole in one point, and pull the thread or yarn through. Tie the ends in a knot, and you are ready to hang it on your wall!
And that’s it! Your 5-point star is complete!

What we learned along the way!
Here’s what I learned while making several different versions of this five-point paper star:
- Paper Color Matters – In my head, this star is supposed to be all one color. But finding 5 sheets of 12″ x 12″ card stock that are all the same color is a challenge. So, if you are like me and have LOTS of paper, but nothing matches, you might have some trouble. So, cutting 8.5″ x 11″ paper into a square might be a better option for you.
- You can alternate colors, so you would not need as many sheets in one color, but a 5-point star will not allow that, as to points of the star will be the same color.
- You can increase the number of star points by folding and gluing in more pieces. I tested a 6-point version, and the extra weight causes the bottom and center of the star to squish and deform. So I wasn’t a fan of the overall look. But this did allow for alternating colors.
- You can also decrease the number of points and make this a 4-point star. However, a 4-point version stretches the paper too much, especially in the center. If you want a four-point star, I recommend making half of an eight-point star, which holds its shape better.
- Paper Thickness Changes Everything – If you are using thick paper, like 100 or 120lb card stock, the third fold, where you change your triangle into a diamond for the last time, becomes very difficult. I found that I needed a glue gun for this part, as the paper would not hold with regular glue.
- These stars can be dangerous! If you are hanging this in a doorway or from the ceiling, be sure to have it high enough so that it cannot poke someone in the eye. It can do some serious damage.
- Don’t feel like you need to use 12″ x 12″ cardstock. You can use any side you want. Just remember, the bigger the paper, the bigger the star. The stars that were made from 8.5″ squares are a really reasonable size. The 12″ squares might be a bit big.
- If you want to hang from a ceiling, you will need to trim the back/inside and make a second star, and then glue the two pieces together. Then you will have a star on both sides.

6-Point Star

4-Point Star
⭐ Did you enjoy making this 5-point Paper star?
And there you have it—that’s how to make a five-point paper star using just five sheets of paper. Let me know if you enjoyed this craft!
If you make one, let me know in the comments how it turned out!
And if you enjoyed this tutorial, check out my other paper crafts here.
🎥 I also made a video about these stars. You can watch the YouTube Video Here.
Happy crafting! ✂️⭐