If you’re new to alcohol markers, you’re in the right place, because that’s exactly where I am, too. I recently picked up the Ohuhu 48-pack alcohol markers, and I wanted to share with you all about what I learned while testing them out for the first time.
Whether you’re totally new or just looking for honest beginner insight, I’m going to walk you through:
- What comes in the box
- The best paper to use
- Blending tips that actually work
- How outlining behaves differently
- And some fun beginner-friendly practice ideas
So grab your markers (or your wish list!) and let’s jump in!
🎥 I also made a video about these markers. You can watch the YouTube Video Here.
As an Amazon Associate, I earn from qualifying purchases. This post contains affiliate links. I may receive a commission if you purchase an item from one of my links. This will not change the price you pay.
Unboxing the Ohuhu 48-Pack Alcohol Markers
You know that feeling when a new art supply arrives, and the box is bigger than expected? Well, that was me with these markers. But I won’t fault Amazon for giving me a bigger box.
The markers themselves come in a nice black fabric carrying case. When I opened the Ohuhu 48-pack, the first thing that hit me was how bright the colors appeared. When I was buying these, I debated between the 48, 72, 120, and 168 packs. I was honestly worried that 48 colors wouldn’t be enough, but the variety surprised me. There are neutrals, some beautiful bright shades, and even a few pastels. For a beginner, this is plenty to play with! So, at this point, I was happy with my choice.

And here’s a fun surprise: Even though it’s a “48 pack,” you actually get 49 markers since the colorless blender marker is a bonus and not counted as one of the colors. That instantly made me happy as I was sure that would not be the case.
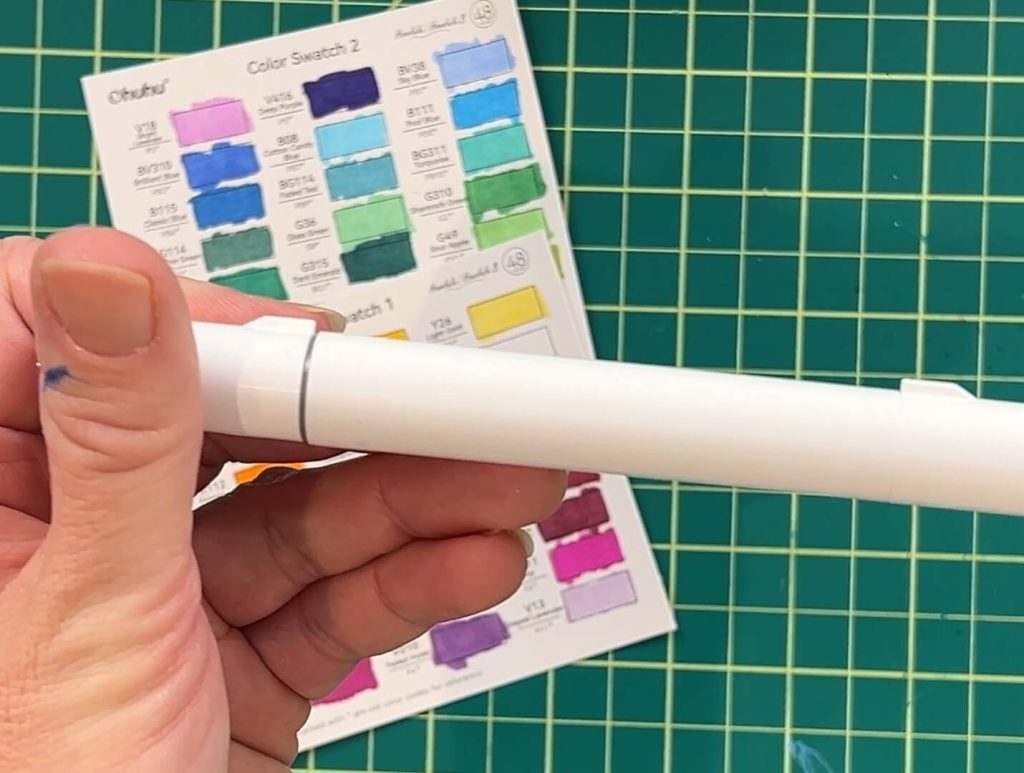
The 48-pack is called the Honolulu set, and in it, each marker has a brush tip on one side and a chisel tip on the other. The markers have images on each side indicating which side is which, but if you want a quick tip, the brush end has a silver ring near the cap to easily differentiate sides. A small detail, but a helpful one. Ohuhu also has fine and soft chisel tips in other sets, but the Honolulu 48-pack I purchased does not.
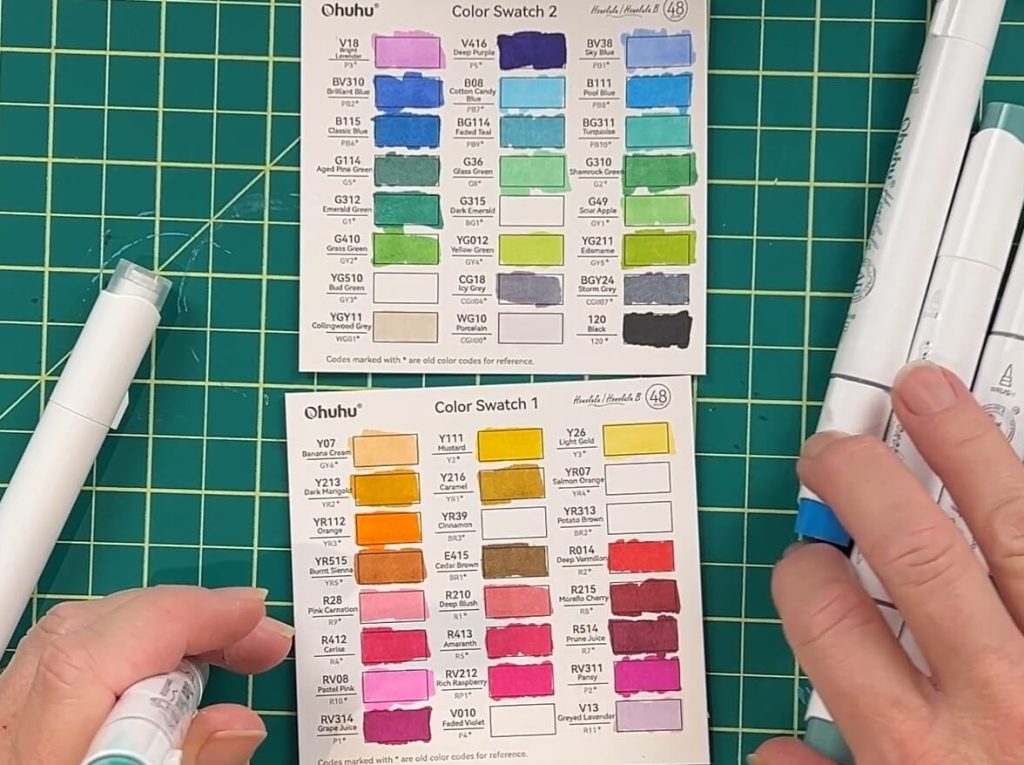
Inside the Ohuhu carrying case, you’ll also find:
- Two swatch sheets to test each of the colors,
- A plastic sheet to protect the next page from ink bleed and,
- A booklet with a couple of beginner tips and info on other products
It’s honestly a pretty solid package, especially for the price.
Before you color I recommend completing the color swatch. It may feel like a chore, but it only took me about 5 minutes, and WOW, the caps do not match the ink. You’ll thank yourself later as this really helps with color selection during coloring.
Why Paper Matters (More Than You Think)
Before I even started experimenting, I knew one thing: Not all paper is created equally. So I dug through my stash of printer paper, cardstock, sketchbooks, and coloring books to test the markers on everything.
Printer Paper
If you have a printer, you know that printer paper is thin. It is meant for printing, not coloring. I’m using inexpensive printer paper, not laser printer paper. Laser printer paper can be thicker. And I did not try that.
The alcohol ink bled straight through printer paper. It was instantly visible on the back of the paper, and it also bled onto the paper underneath.
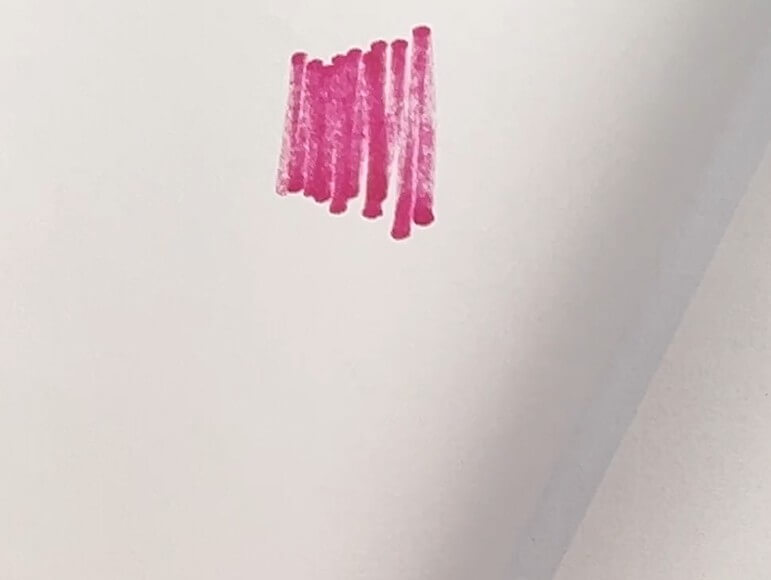
I also drew inside a square to see if the ink bled outside the coloring area, and it did. So I was not able to get nice, clean edges.
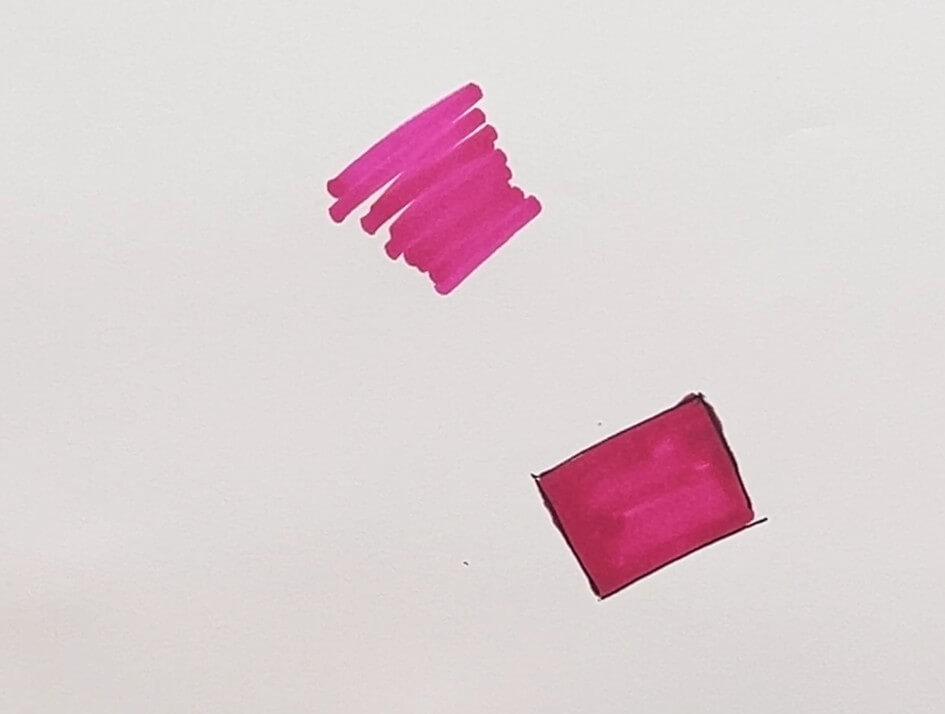
I would not recommend using printer paper.
Cardstock
Next, we are moving onto cardstock. I use white 60lb cardstock for crafting, so this was the next test paper. If you have never used cardstock, the main difference is that it is much thicker; you can feel it in your hands.
I again tested to see how the ink reacted to this paper. When performing a test color, the color did not bleed through the paper as quickly. You can see a faint hint of color on the back. However, if you color slowly and go over the same area several times, it will bleed through the cardstock.
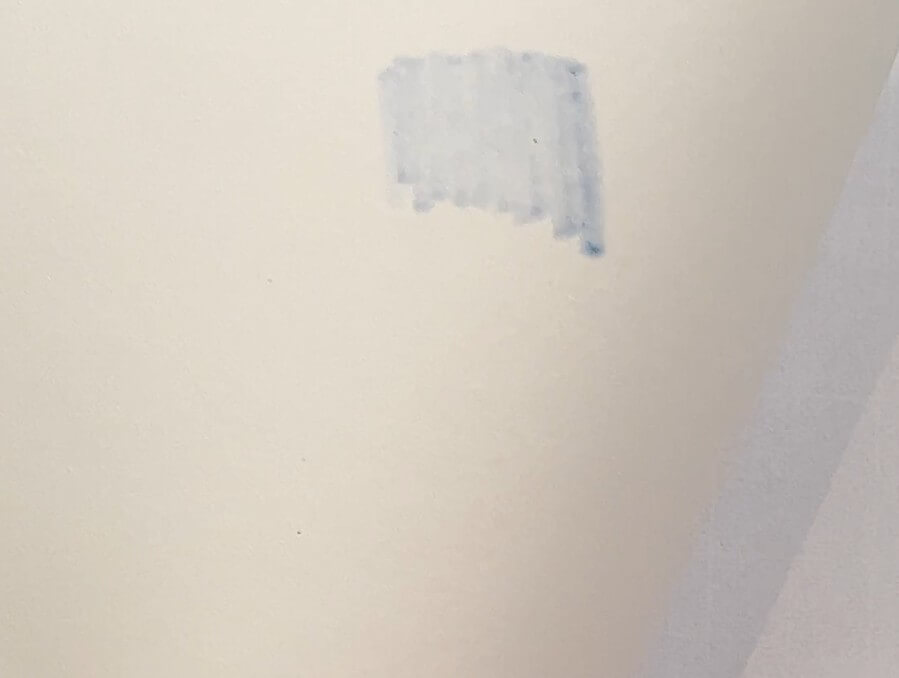
Once again, I colored inside a square. This time, the color did not bleed as much outside of the box. It did a decent job staying crisp.
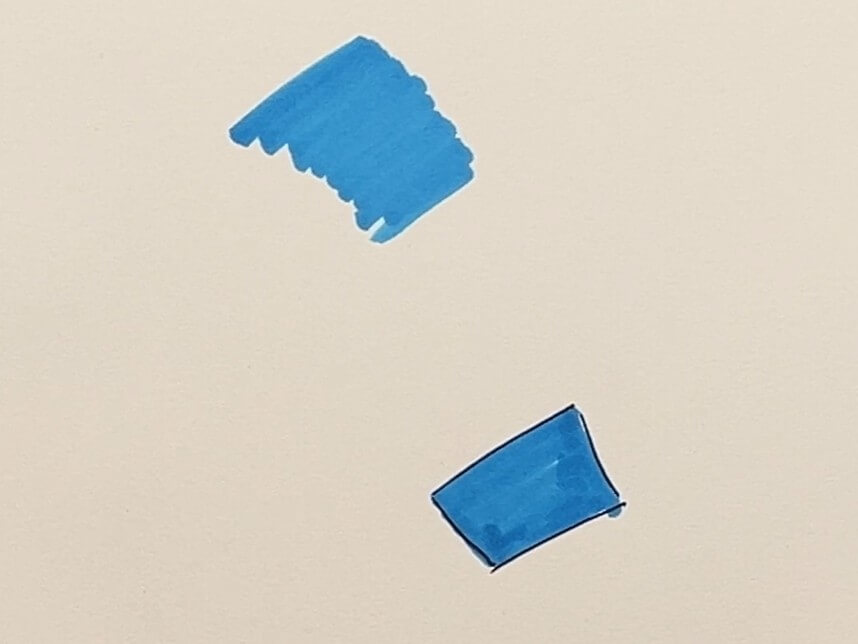
White cardstock gets a thumbs up from me, especially for beginners.
Sketchbooks
If you are a crafter, you probably have a sketchbook or two lying around. I have them all over the place, as everyone in my house has at least one. And everyone is different because we are all different. The only common factor we have with them is that they are all from the dollar store.
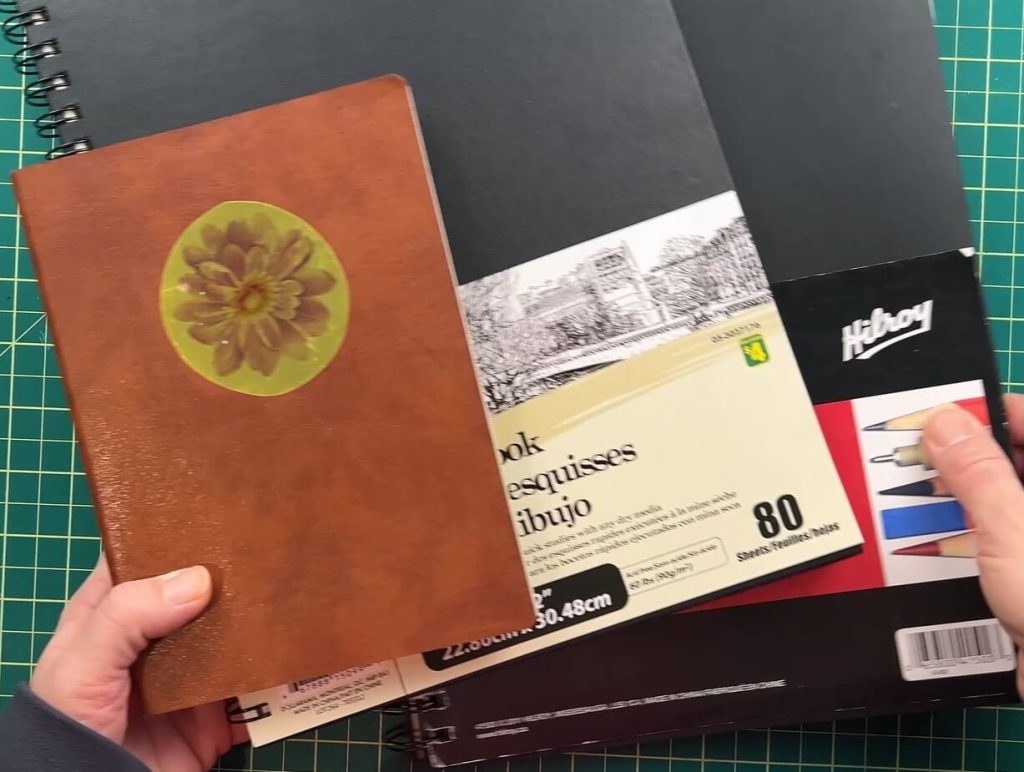
Each book was a different size and had a different paper thickness. So each book had different results. Some sketchbooks had thin paper, as thin as printer paper, and some had thicker paper, almost as thick as cardstock.
Since there was a variety of paper thicknesses, the bleed and sharpness varied as well. But the color looked very sharp on all the pages, especially the white (as opposed to the slightly brown/beige pages in some books).
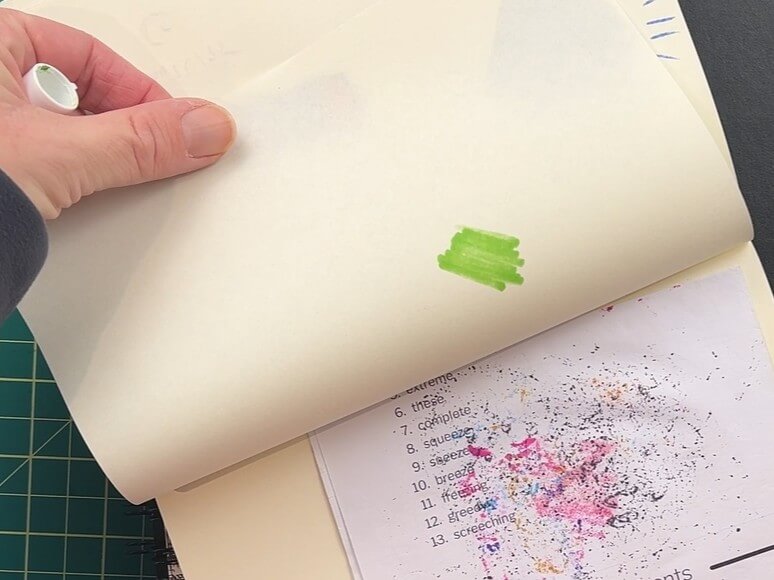
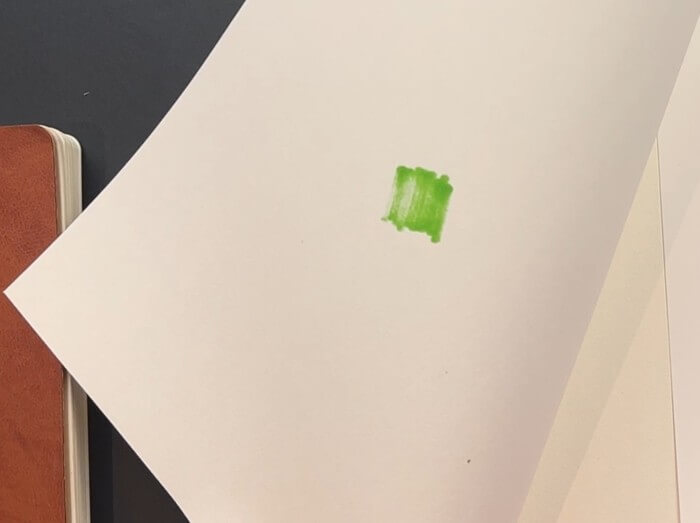
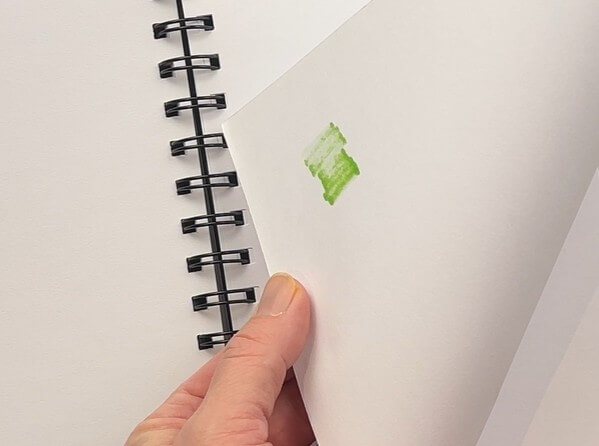
Even though the ink bled in the dollar store sketchbooks, I was happy with how the markers worked on them, and overall, these books give crisp results without spending a fortune.
👉 There are alcohol marker–specific sketchbooks too, and I linked the Ohuhu here. I haven’t tried them yet, but if you do, please tell me what you think. I’m curious to hear! I may try them out one day myself, but not just yet.
Coloring Books
Finally, we had coloring books. I’m not talking about the kind you get your kids that come on cheap paper and have the current favorite tv show characters. I’m talking about adult coloring books. These books are a bit different. These books typically use thicker paper and have images on one or both sides of the page.
You can grab adult coloring books from your local dollar store or bookstores, and they’re perfect for learning how the markers behave before moving into full illustrations. Having images to follow with guidelines really helps learn how these markers work.
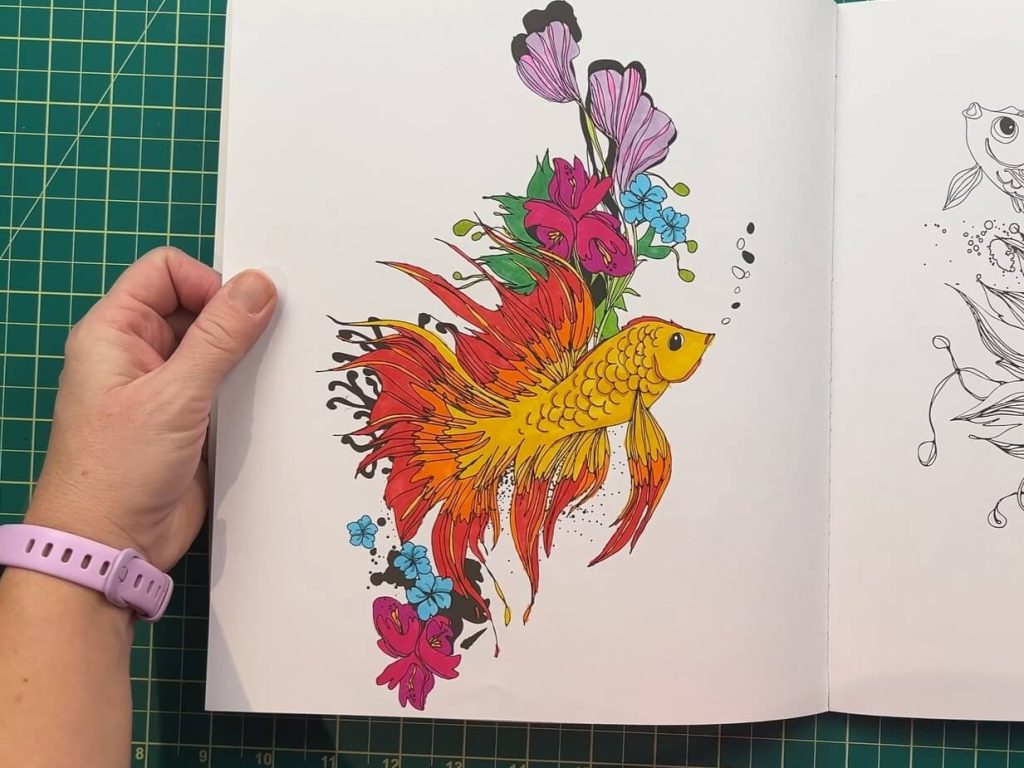
The coloring books will need to use either the protector sheet or a scrap piece of paper between pages. And if you have a design on both sides, you will have to sacrifice one side to bleed. Even if the paper is thick, over time, you will see more and more color popping through the back of the paper.
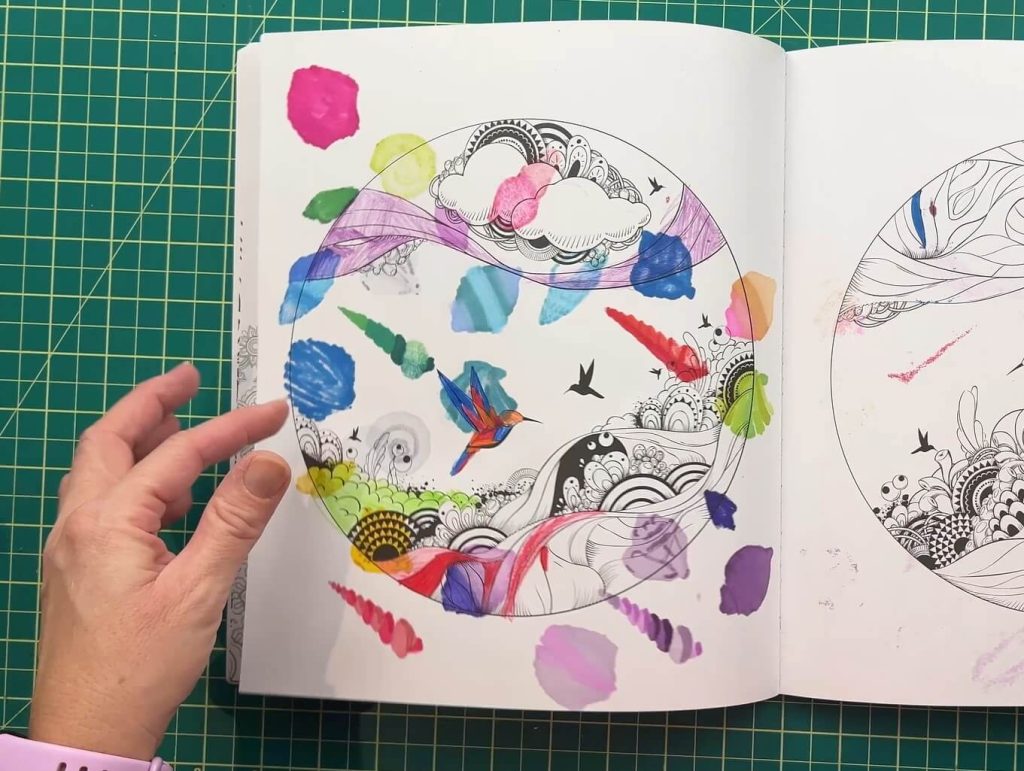
These are currently my go-to for coloring with these alcohol markers.
My Honest Paper Recommendation
If you’re just getting started with Ohuhu alcohol markers, I recommend:
- Adult Coloring books, or
- Budget sketchbooks
They’re cheap, forgiving, and great for learning.
Coloring with Alcohol Markers for the First Time
I’ve colored with pencil crayons for years, and they are my go-to coloring tool. So switching to alcohol markers was… a challenge. As with any new crafting tool, there is a learning curve. You need to be aware of that. You will not be amazing right away (aside from a few exceptions).
So, while using these alcohol markers for a few weeks now, I have learned a few things I would like to share:
Alcohol markers are WET
Alcohol ink flows fast and generously. You need to move your hand quickly while coloring, and try not to overlap areas too often. If you move slowly or overlap too much, the ink will pool and bleed more than you want.
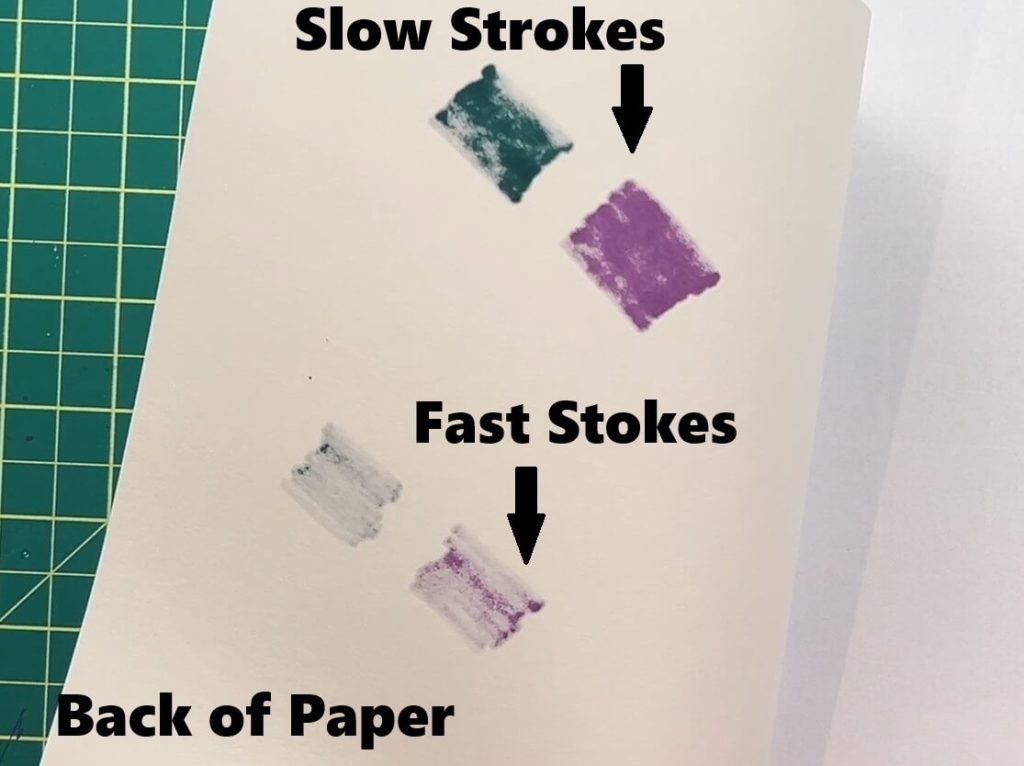
The trick is to keep your hand moving with smooth and steady strokes. This takes practice, but it is doable. Don’t hover in an area and don’t pause. Just keep coloring.
You can’t erase pencil underneath alcohol ink.
As I mentioned above, my go-to coloring tool is pencil crayons. And for that, I typically sketch out my drawing with pencil first, then outline it with marker (to have it pop), and then erase the pencil marks. But that doesn’t work with alcohol ink.
Alcohol ink seals in the pencil underneath it, and it cannot be erased. So I have had to start learning how to sketch without pencil outlines.
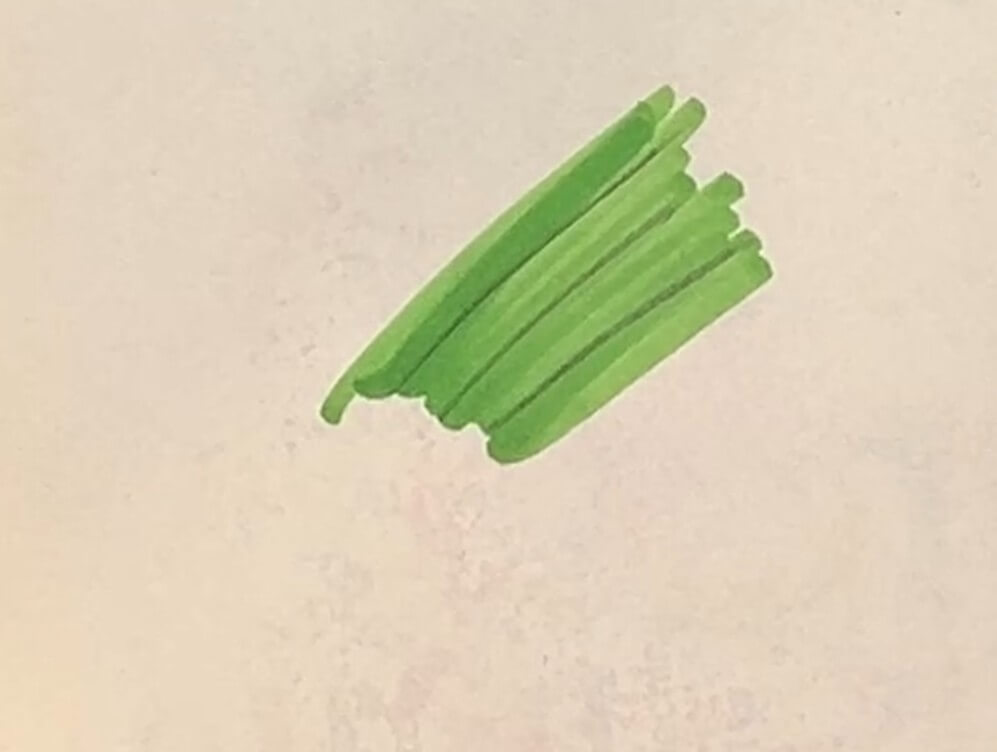
👉 If you sketch with alcohol markers, what do you do for your outlines? Is it all just from your head, or do you just outline with the markers and hope for the best?
Blending With Ohuhu Alcohol Markers (Beginner Tips That Actually Work)
Now, let’s move on to blending. I have heard so much about how alcohol markers are the best for blending, so I have to give it a try.
I learned two different ways to get colors to blend and shade the way I like. Both are easy, but take some patience.
Easy Shading With One Color
If you want to add a shadow or dimension to your images, having a darker shade on the side of the drawing is the effect you are looking for. When working with alcohol markers, there is a simple way to do this.
Color your first layer, say in pink. Then let it dry completely. Depending on the size of the area you colored and the wetness of your paper, this time may vary. I needed at least 10 minutes for a half-decent dry.
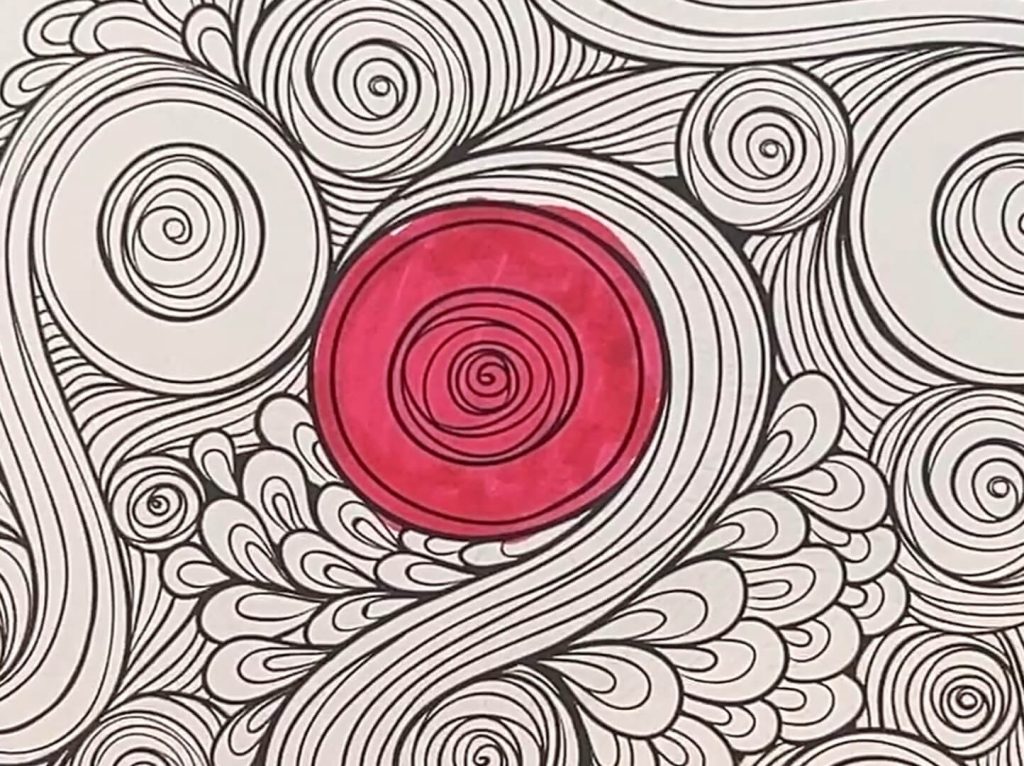
Once you are satisfied that the area is dry, go over the area where you want the shading with the same color. It naturally darkens and looks like soft shading.
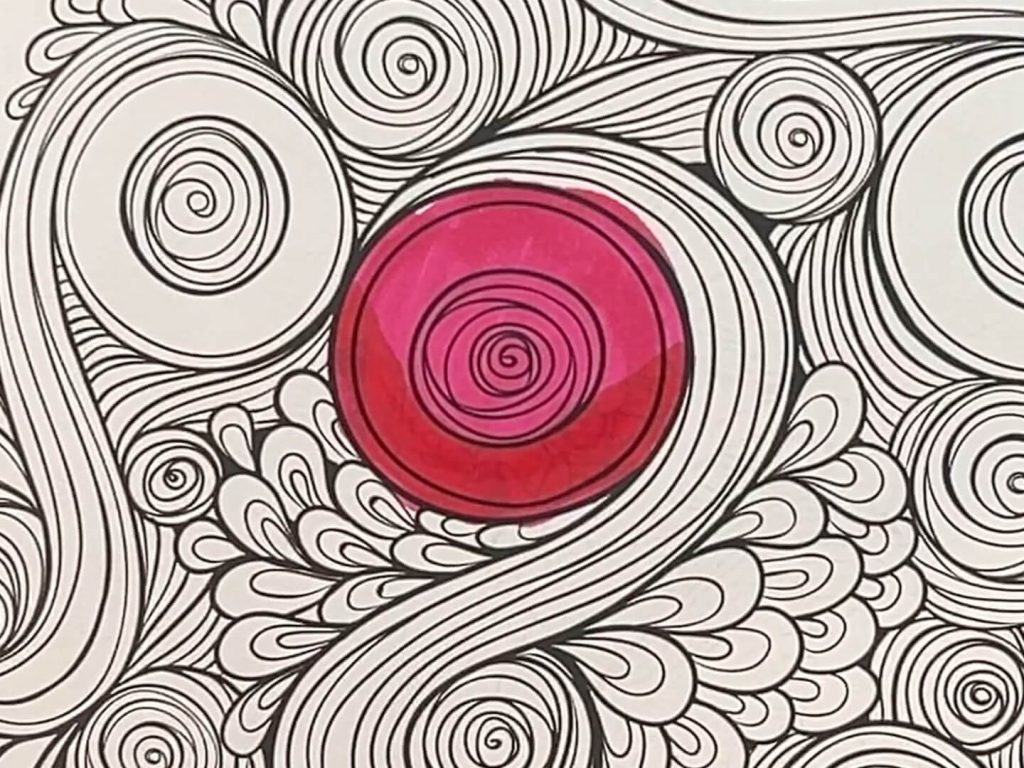
The one thing I want to point out with this technique is that you will need to practice your timing. You may want to finish coloring the entire image before doing the shading. You will, however, need to remember which color you used where, and depending on how complicated the images are, this may be a challenge.
Blending With Three Colors
Ok, so let’s talk about blending. The idea behind blending is to get from one shade of a color to another. You can blend from one color to another as well, but that takes more practice, and you need to figure out your transition colors. But the idea is the same.
Ideally, you want 3 colors or more. You can blend with 2 markers, for example, from light green to dark green, but the transition looks better with more markers.
Before we start, I want to point out that when blending, do it quickly. Blending happens best when the alcohol ink is wet.
So, here’s what worked best for me:
- Lay down the clear blender marker in the area you will be coloring and blending first.
- Apply the lightest color marker next.
- Follow this by adding your mid-tone, overlapping the light color.
- Next, you add your darkest color.
- Go back with your lightest color to soften the first transition, and your mid-tone to soften the second transition.
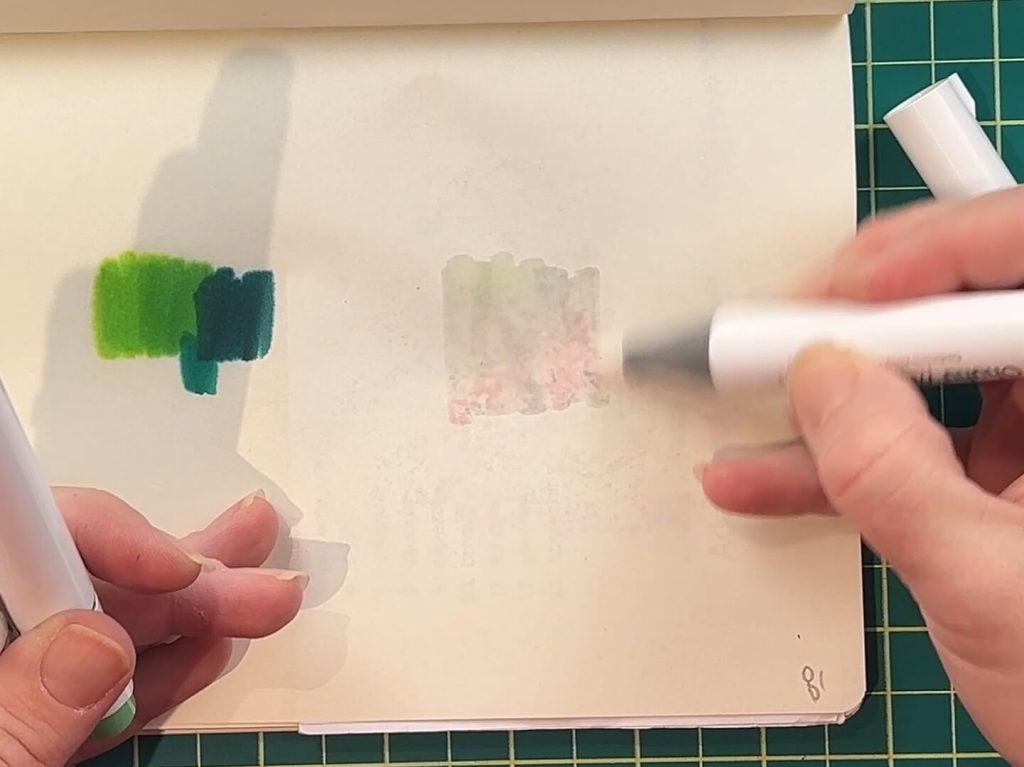
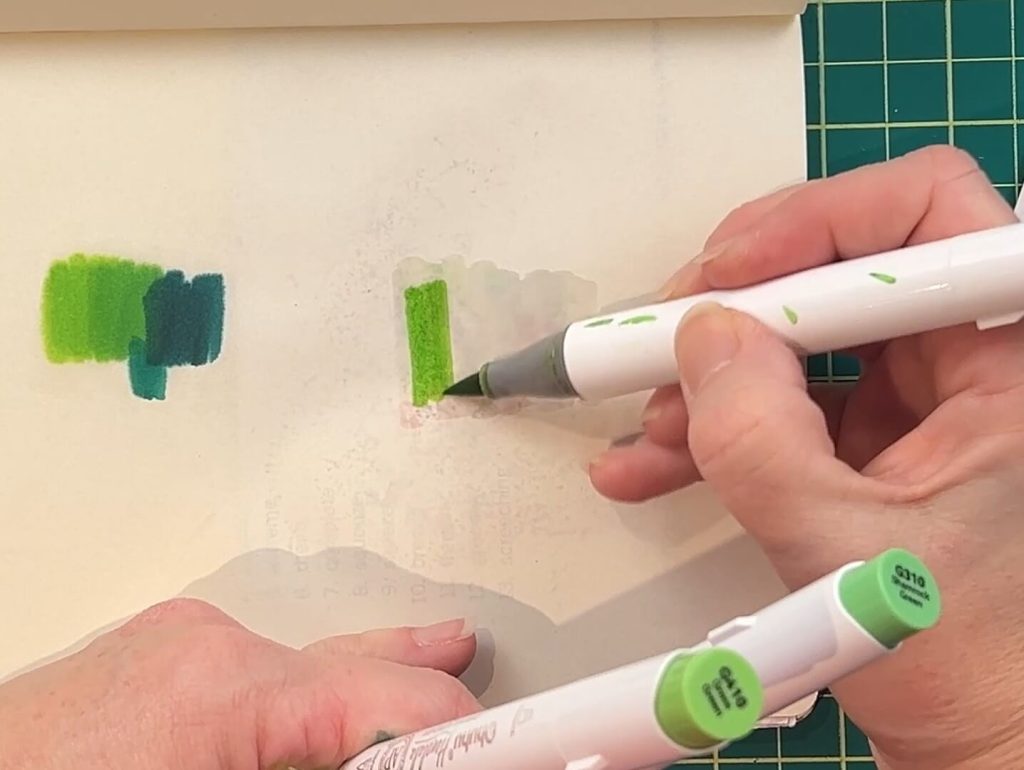
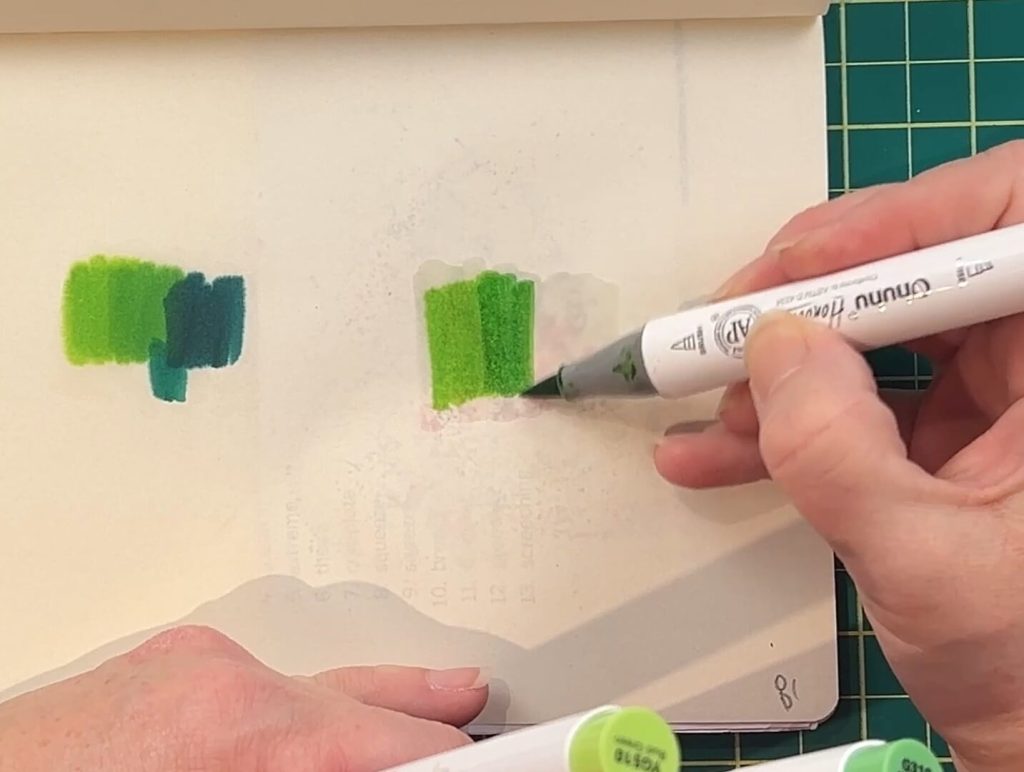
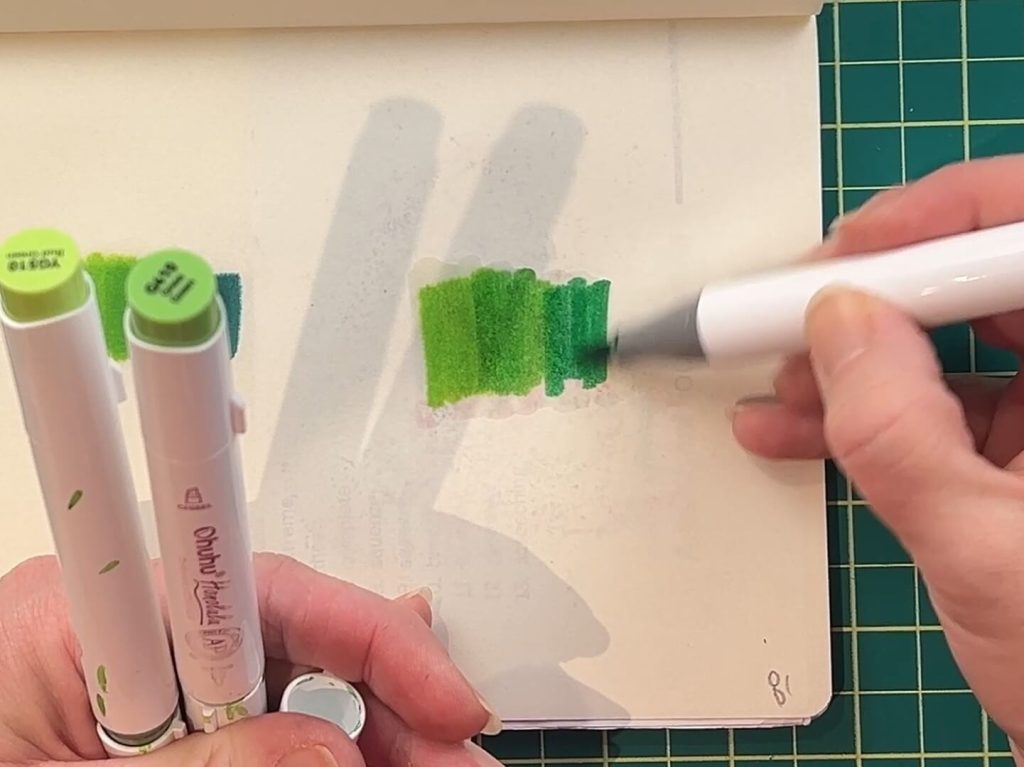
If you are using more than 3 colors, the concept is the same for each additional color. Just remember to move quickly. You want the ink wet during this process.
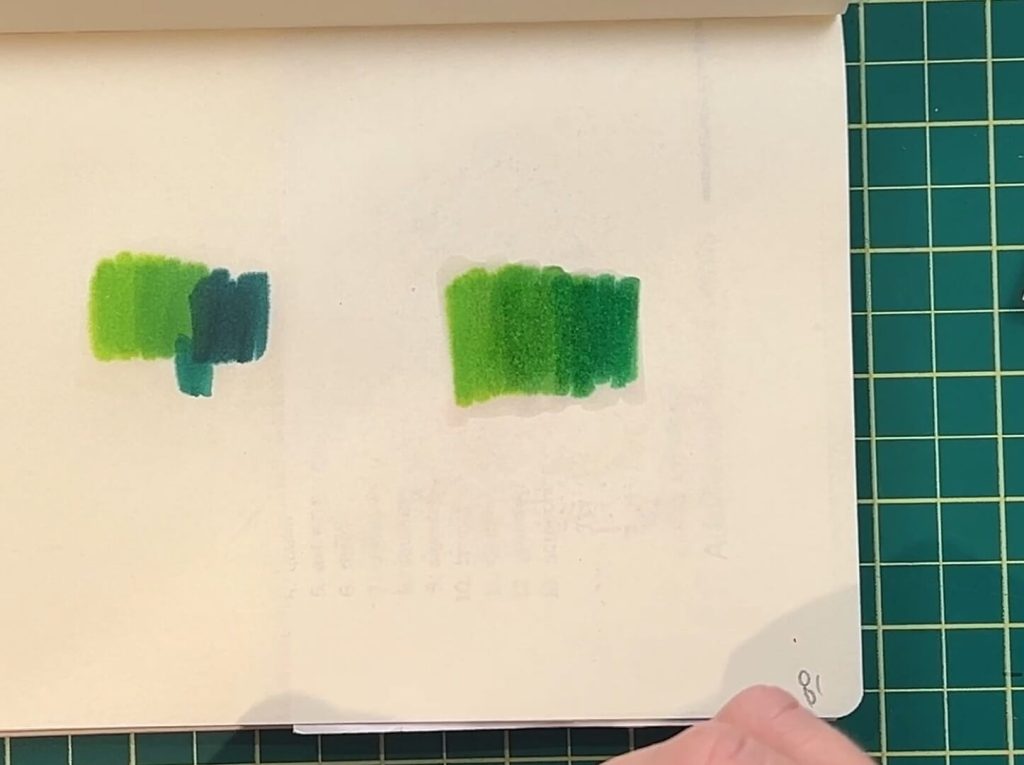
✨ My trick for moving quickly with alcohol markers
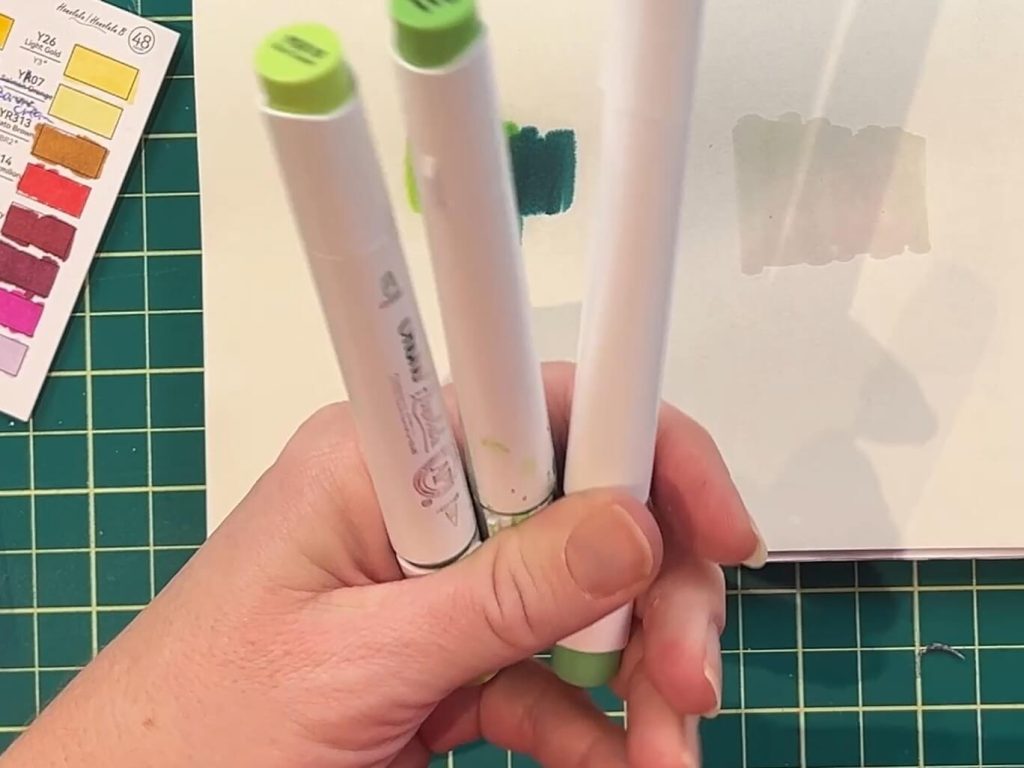
Hold all three marker caps in your hand. Have the markers sitting loosely in the caps. This allows you to pick up and place back the markers quickly. You never completely close the cap until the blending is completed. I find this makes blending so much easier.
Outlining Your Sketches
When I sketch, I love a crisp outline. It just makes everything look polished. And typically, I use a Sharpie for this. But when using alcohol markers, using a Sharpie or even another alcohol marker to outline doesn’t always work.
As I mentioned above, alcohol markers are wet, and they don’t dry quickly. So, if you are like me and you want to outline your drawings, you will need to do it in one of the following ways.
Either make the outline in a dark color (like black) before you start the drawing, let it dry, and then fill it in with color. Or you can make your sketch, let it dry, and then outline it afterwards.
You can use this for any type of marker, but keep in mind that different markers dry at different rates. If you are like me and have used Sharpies, you will need to wait a bit to make sure it is completely dry before you move on to the next step.
This is another activity that takes time and practice, so be prepared to test on scrap paper, and don’t expect to be an expert on your first try.
👉 If you like to outline your sketches, let me know how you do it when using alcohol markers.
How to Prevent Bleed-Through
Alcohol markers will bleed through everything, even thick paper, over time. So protecting the surface underneath is non-negotiable.
The Ohuhu set includes a little plastic mat for this, but here’s the downside:
- The protective sheet is only about 5″x 8″ and is smaller than most sketchbook pages. So, you will need to move it around when using it.
- The alcohol ink sits wet on plastic as it has nowhere to be absorbed into.
- This wet ink will transfer back onto your artwork from the underside and become one with your current coloring project.
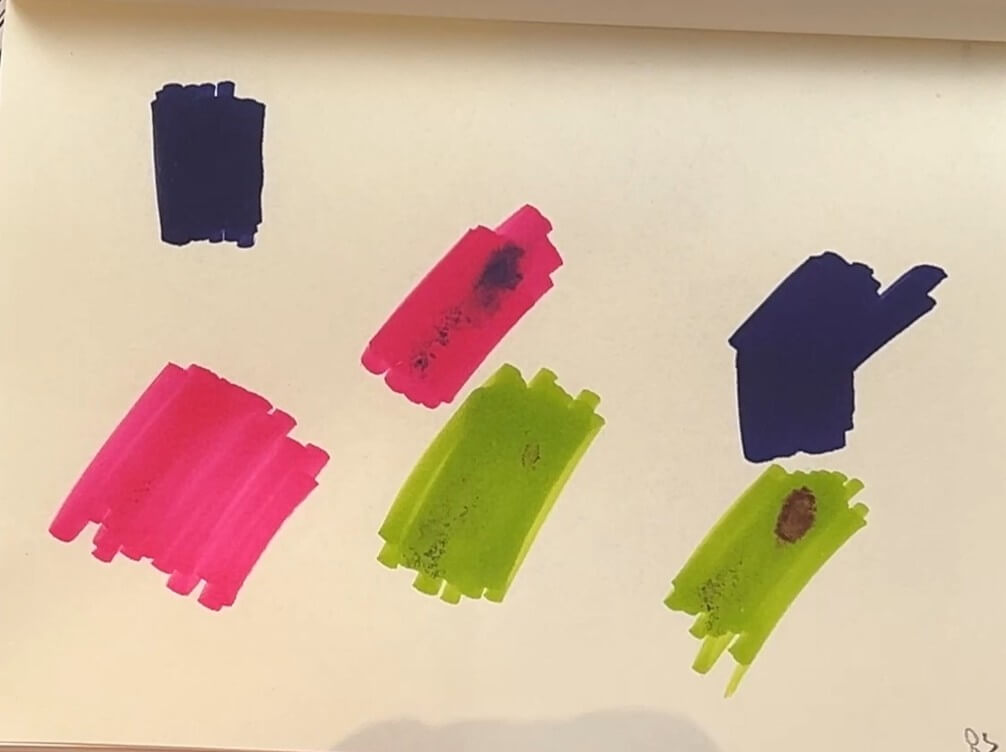
✨ My solution to this? A plain piece of scrap paper. It absorbs the ink and doesn’t smear. I can use a sheet the same size as my notebook paper or a smaller scrap, and move it around.
But remember, whatever you do, never color directly on a loose sheet sitting on your table. Your furniture will not forgive you.
Helpful Tips Every Alcohol Marker Beginner Should Know
Ok, so I think I’ve covered what I was hoping to, but some final tips that don’t really fit anywhere…
Alcohol markers don’t wash out easily
Alcohol ink is a bit of a nuisance if you get it into clothes, as it doesn’t like to come out. So, if they get on clothes, dab the affected area with rubbing alcohol. Do not rub, as this will spread the ink and not remove it.
If you get alcohol ink on your hand, you may find that soap may not do the trick. Some soaps may work with a lot of scrubbing, but I find rubbing alcohol works.
How to store your Alcohol Markers
OK, so this is a tough one, because there are lots of storage containers available in both vertical and horizontal layouts.
My research suggests that you should store your markers upright to avoid uneven pooling on one side, which may result in uneven ink flow. This may also prevent ink spillage. But as these are double-sided markers, standing them upright has the same effect; ink may pool and leak out the bottom.
So, I will say, store them upright if you want, but if you have a fancy marker display, why not store them sideways?
👉 Let me know how you store your alcohol markers? And have they ever leaked that way?
Practice with coloring books first
Alcohol markers have a learning curve, and I recommend starting out with an inexpensive coloring book. This is a low-pressure way to learn blending, shading, and pressure control before moving to full illustrations.
My Final Thoughts on Ohuhu Alcohol Markers
And finally, will I buy these markers again? After testing them out, my honest opinion is YES! The Ohuhu 48-pack is absolutely worth it for beginners.
They’re affordable, easy to use, and give you tons of room to learn without feeling overwhelmed. The color range is great, the dual tips are helpful, and the accessories make it really beginner-friendly.
In fact, these have become the go-to markers in my house… and I now have to share them with my kids. (So yes, we’ll definitely be buying replacements when they run out!)
If you’re just starting your alcohol marker journey, the Ohuhu 48-pack is an excellent place to begin.
👉 Have you tried Ohuhu alcohol markers yet? What’s your favorite paper to use with them? Let me know!
Happy crafting! 🎨✨
🎥 I also made a video about these markers. You can watch the YouTube Video Here.
Did you enjoy this 48-Pack of Ohuhu Alcohol marker Review?
Did you enjoy this 48-pack of Ohuhu alcohol marker review? If so, let me know in the comments below! If you enjoyed this review, be sure to check out some of my other reviews:
- Koala Product Review
- Koala Clear Waterslide Decal Paper Review
- Koala Gold Foil Glossy Vinyl Sticker Paper & Tracing Paper Review: Honest Results and Crafting Tips
- Unboxing a Cricut Joy
- Cricut Sticker Paper vs Koala Sticker
- Recollections Mini Scoring Board