For years, I have been making a giant spider web on my house at Halloween. Most of the time, I reuse the one from the year before, but after a few years, it starts to look tattered and worn and needs to be refreshed. So this year, I’m making a new one, and I thought I would quickly document how to make one for all my friends who want to make one but are just unsure where to start.
So let’s get started.
As an Amazon Associate, I earn from qualifying purchases. This post contains affiliate links. I may receive a commission if you purchase an item from one of my links. This will not change the price you pay.
Supplies Needed to Make a Giant Spider Web
The list for the supplies isn’t extensive, but some consideration needs to be taken on the supplies, so, here is what you need:
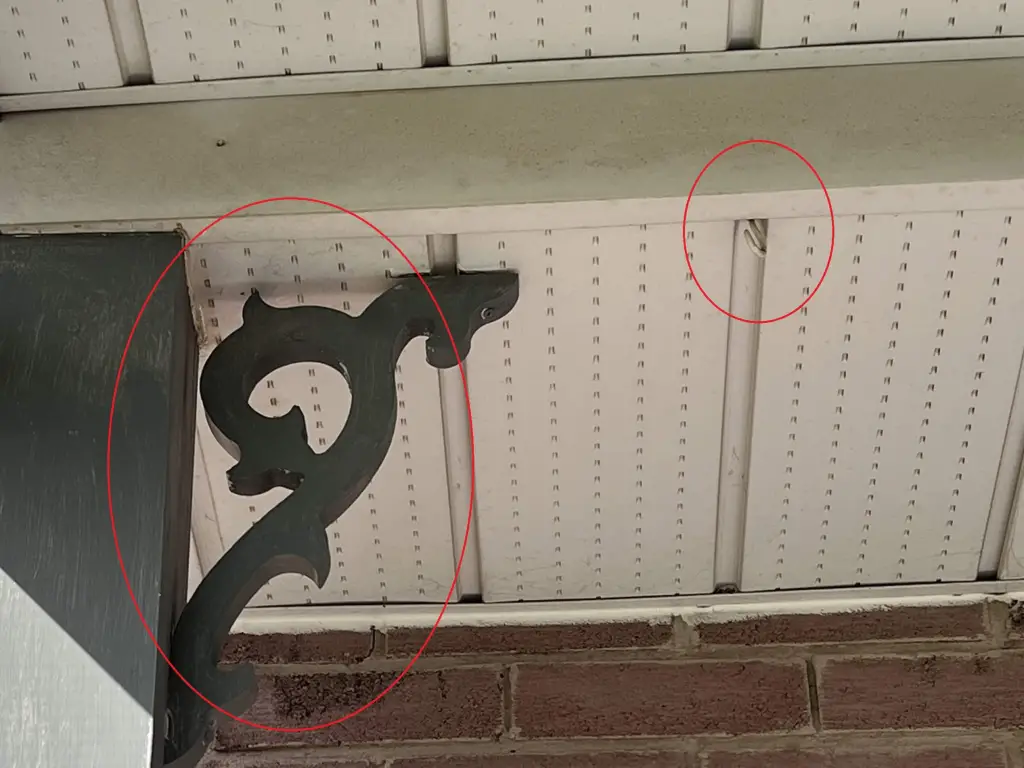
- You need to locate a high point on your house, one to which you can attach your spider web rope. The location needs to be steady and secure. The rope does not weigh much, but once installed the spider web will pull on your house. You will want to use an anchor or hook installed onto a solid support beam or a solid piece of lattice on an outdoor column. You should not use a piece of siding or eaves that can easily rip off.
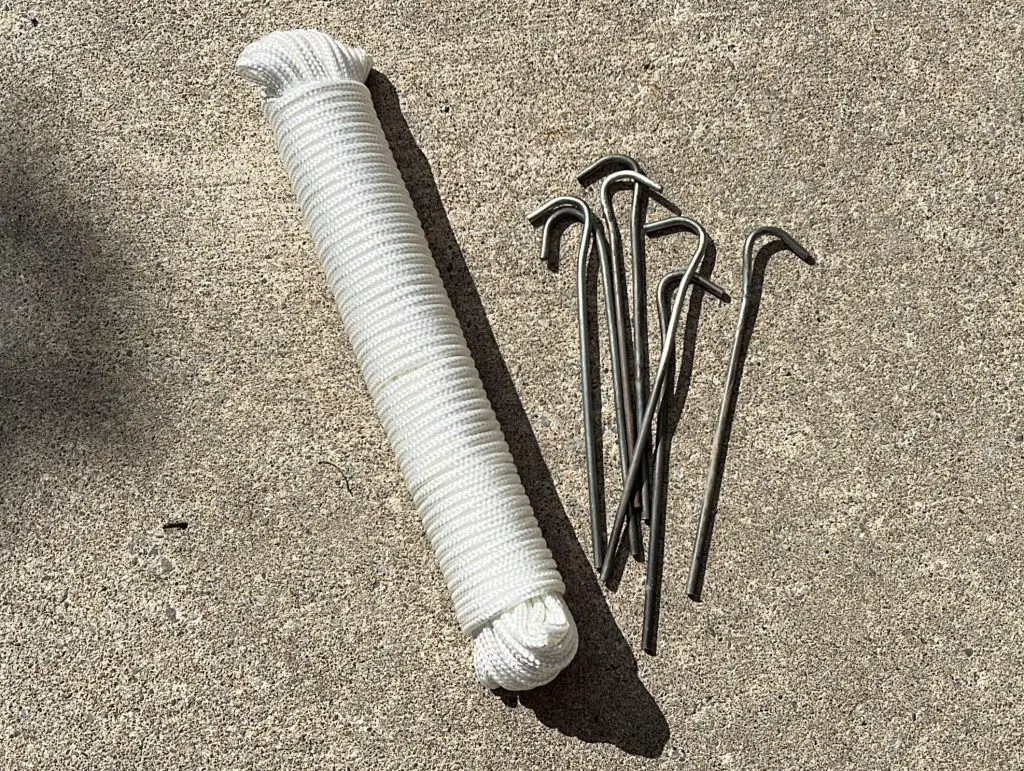
- White rope. I’m going to call it rope, but you can use many other things. I have used nylon rope, yarns and twine, in the past. I find nylon rope lasts the longest.
- Tent pegs. You will need about 4-8 tent pegs. I like to use tent pegs, but heavy rocks will do.
- A ladder to reach the high point of your spider web. I will not tell you how to use a ladder, but take safety precautions and if required, have someone hold the ladder stable for you.
I haven’t mentioned the exact quantities above. Every house is different and so every spider web will be different also. We will talk about it below.
Ok, so let’s jump in!
How to make a Giant Spider web
How much rope do you need to make a giant spider web?
This is a tricky question for many reasons. Mostly, because I don’t know where you will be installing this or how big you want it, but I will tell you that you need more than you think!
I recommend buying at least 200 ft of rope. The spider web I made in this tutorial used just shy of 400ft. Now, this may sound like a lot, but when you remember that you will be starting about 10ft in the air, and going about 20 ft out from the house, this will add up quickly. And then you need to account for all the cross-webbing you will be adding.
I recommend at least 200ft and be prepared for more. Must more.
Where do you attach the giant Spider web?
You will want to find a secure spot on your house. You can screw a hook into a solid section of your roof or a solid lattice piece on a pillar you may have.
I recommend using a spot that you can easily loop over so that at the end of the year, you can unhook the web and then reinstall it the following year. This is what I do every year.
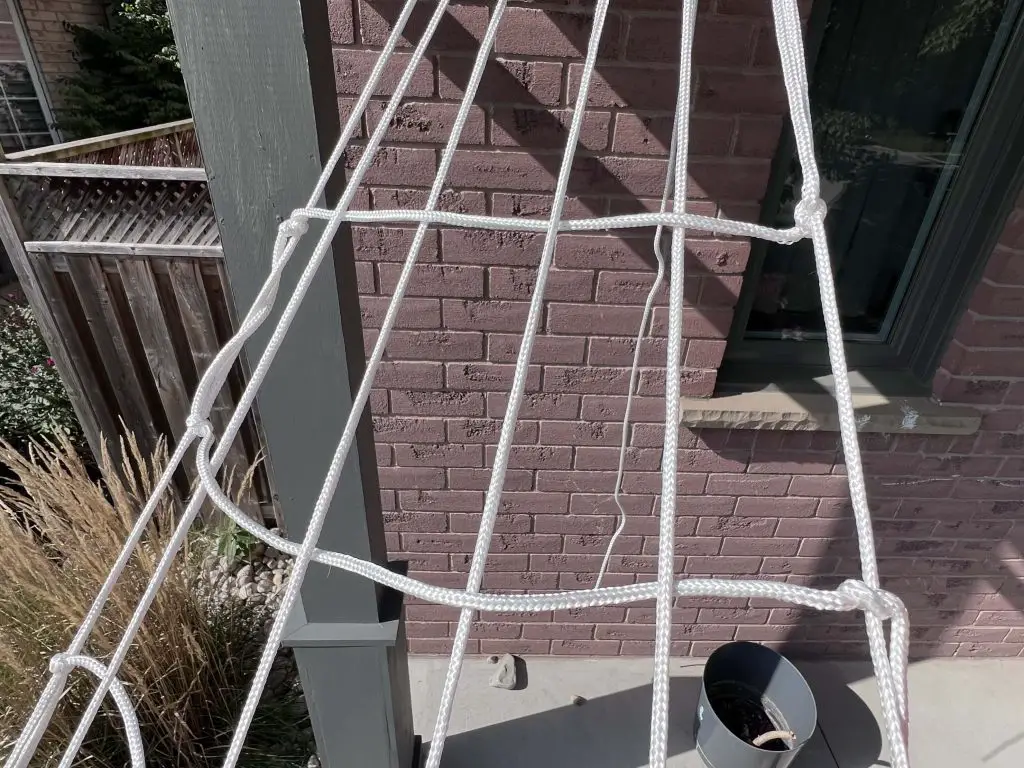
Making the Body of the Giant Spider Web
Once you have a location picked and have a connection point it is time to get this party started.
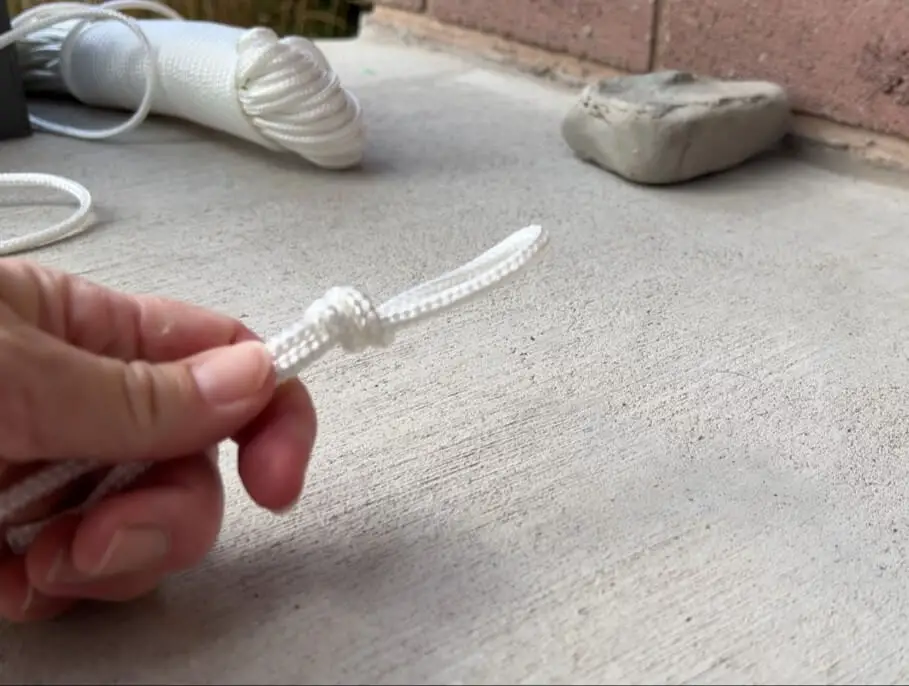
The first thing I recommend is tying a loop into the rope. This way you can easily attach and put your rope over your hook or loop.
Pull the rope down to the ground to the location where you want the first string of the web to connect. Using a tent peg, push the rope into the ground.
Move over slightly, still holding the rope taut, and attach it to the ground again. Then, proceed to the top of your house, up the ladder to your connection point. Before you put the rope around or over the loop/hook, I recommend you make another loop and place it over the first one. This will help with removal and reinstallation next year, trust me.
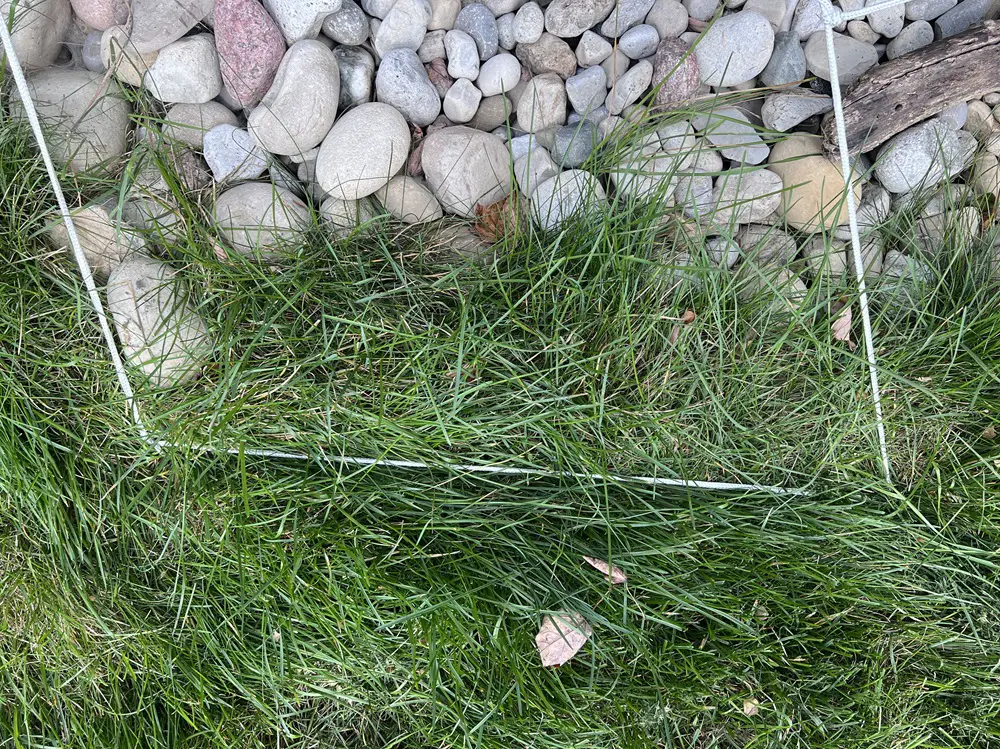
Repeat the above steps as many times as you want. Each time up and down will result in 2 web strands coming from the house.
For this above portion of my house, I used 200 ft of rope.
Adding Cross Hatches to the Giant Spider Web
With the body of the spider web complete, it is time to add the horizontal cross hatches to the web.
When making this section of the spider web, I do not cut the rope between layers, but you can if you want.
I like to start at the top of the spider web.
Start by tying a knot on the outer spider web. For the first 2-3 horizontal lines, I looped the rope under and over through the main web strands, alternating where the rope was. At the end of the first line, I again tied a knot.
Then moving down the main outer web, about 6-8″, I tied another knot and went under over again to the other side.
Once I had completed 4 horizontal spider web rungs down, I started to tie a knot at each web intersection. This produces more work, but it helps the web keep its shape better. Also, if you intend to put spiders or other items onto the web, this is very helpful.
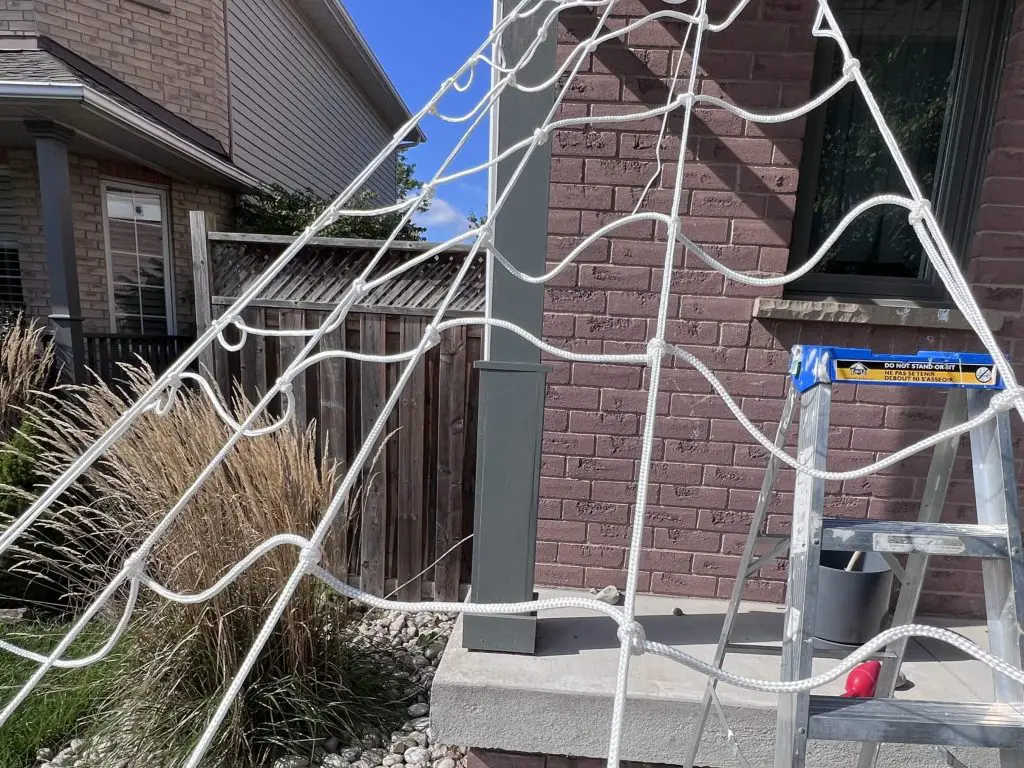
Continue to tie a knot at each web strand across the level that you are on. At the end of the row, again, tie a knot and move down about 6-8″, tie a knot and continue back across.
Continue this until you reach the bottom of the web.
As you get further down the web, you can increase the spacing between horizontal web runs from 6″ to 12″ or more. You want this to resemble a real web, and the further the web is from the center, the larger the spacing.
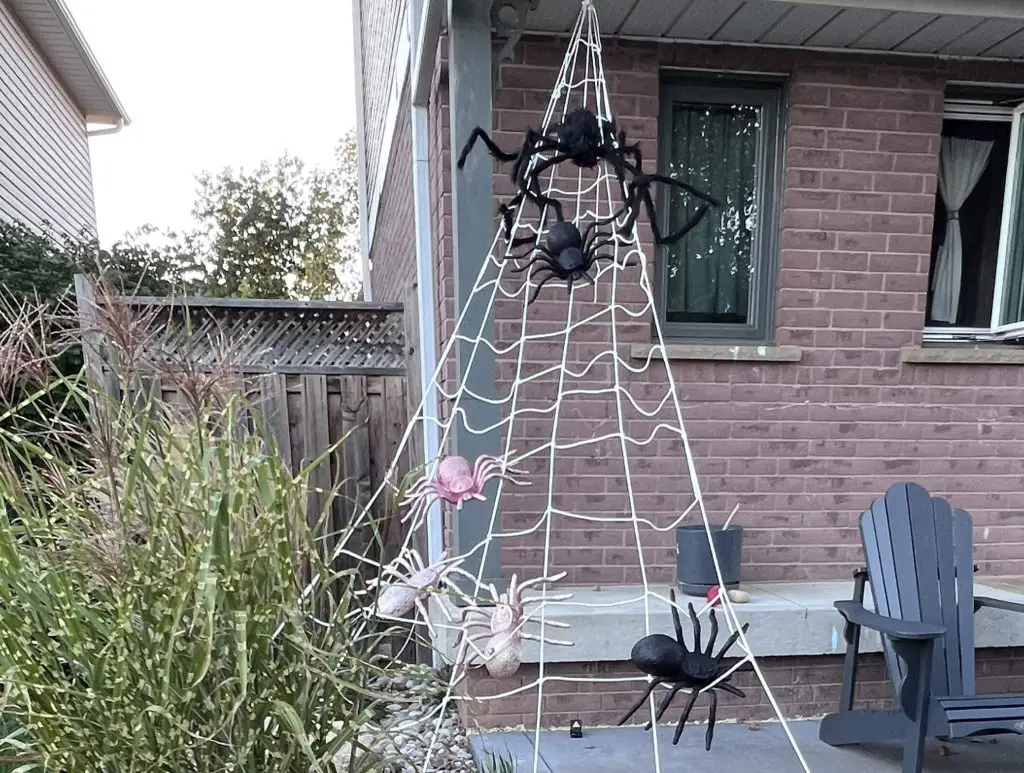
Add a spider to your Giant Spider Web
It is time to add decorations to the giant spider web to make it look spooky. We use spiders but fake body parts also do the trick.
With all the knots at each web intersection, the spiders stay in place more easily.
And that’s it! Your Giant Spider Web is complete!
Tips and Tricks for Making a Giant Spider Web
I have been making spider webs on my house for several years. Here are some things that I have learned along the way:
- Tent pegs are the best thing to hold the far end of the spider web in the ground. I have used many other things, but metal tent pegs are key. They go in easily, stay down, hold the spider web and then come out easy as well.
- I like to reuse my spider web. I normally make the web, and then reuse it year over year. With the loops and all the knots I made, it is very easy to pack up at the end of the season and redo it next year. After the first assembly, reassembly takes about 5 minutes.
- This is the third or fourth giant spider web I have made. They last for years. But we get tired of them, and take them apart, or they get ruined over time. But I find that the threaded rope that I detailed in the supplies above lasts the longest. I have previously used synthetic yarn and other things, but they wear over time and have a lot of stretch. That is not great when it rains or when you have spiders being placed on top.
- This is a great quick addition to your Halloween decorations. And it can be moved to different locations every year. I have had the giant spider web off the roof of my house, and through the body of my tree out front. There are many options for where it can go. You simply have to be creative and find a starting point.
- If you want to start the web in your tree, somewhere you are unable to add a hook or just in an awkward spot, I recommend making an attachment loop with the rope and using that as your attachment point. Then you can cut the attachment rope and keep the rest of the web intact.
Did you enjoy learning how to make a giant spider web?
Did you enjoy learning how to make a giant spider web? Let me know in the comments if you tried this out! Also, let me know if you have any other tips and tricks to make this better.
If you are a more visual person, you can check out the video for this post here.
If you enjoy this Halloween post, be sure to check out these other posts:
- Princess Peach Wheelchair Halloween Costume
- Glow in the Dark Magic Potion For Halloween
- Gates to Hell Zombie Pit
- How to Make a Cat Tail – Halloween Costume
- Homemade Fluorescent Halloween Decorations
- How To Make Maleficent Staff
Or, you can check out all my other Halloween posts here.