The Latest Dilemma with Face Masks
A few weeks ago, I posted a tutorial on how to make clean and dirty face mask bags because, at the time, they were needed in our lives and the lives of others. And to be honest, they have worked wonders with the kids, and for us adults as well.
In one of the comments, someone suggested that they just put all their dirty masks into a bag when they come home and throw it into the wash. It was a great idea, but I didn’t have time to think about it, let alone act on it. Life was in the way.
But with the cold season coming fast, there are more runny noses, the kind you get from being out in the cold. And those runny noses leave grossness all over the inside of masks. As a result, we go through many more face masks a day and a week. And keeping the face mask in the dirty bag alone was not cutting it. So, I have now made a quick and easy face mask laundry bag for the front door where all of the dirty masks accumulate during the week, and on laundry day, they get thrown into the wash. It’s just another laundry bag at the front door because the 6 other laundry baskets I have around the house don’t seem to be cutting it!
As an Amazon Associate, I earn from qualifying purchases. This post contains affiliate links. I may receive a commission if you purchase an item from one of my links. This will not change the price you pay.
How to make a Face Mask Laundry bag
As I do with a lot of my sewing projects, I try to repurpose old fabrics, or clothes, or my favorite, old shirts. So, I made a simple bag out of an old t-shirt and added a reinforced hole to hang it. It’s simple and doesn’t take much time. Just a few sections require sewing on the machine (or by hand) and, then you are complete!
What You Need:
- I’m using an old t-shirt as I seem to have a surplus of these that aren’t good enough to donate or sell, and I hate to throw things in the garbage. Or you can use some fabric – you’ll need about 1 ft x 2 ft.
- A sewing machine (or needle and thread).
- Hooks – This is what I use.
Let’s Begin!
Prepare your Fabric
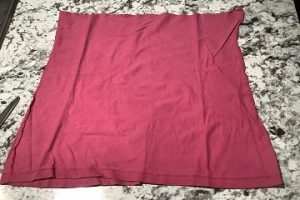
As I mentioned, I’m using an old t-shirt, but you can do this with just a piece of fabric by folding it in half.
We’re aiming to have a square, if possible.
With the shirt, I’m taking the top of the shirt off, so the neck, shoulders, and sleeves. I quickly cut below the armpits of the shirt, and I have half my bag made.
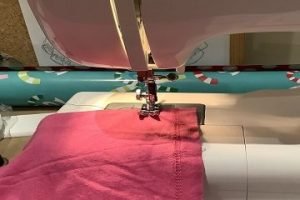
Sewing The Bottom of the bag
There are a few steps to sewing, all of which are straight lines.
First, I’m going to seal the bottom of the bag. So I sew the bottom of the shirt shut.
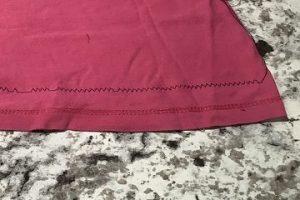
This step is optional, but I like to do it. I sew the corners of the bottom perpendicular to the first seam to force the bag open. To do this, open the shirt and fold it so that you can sew across the edge. Hopefully, the picture shows this well. I’ve tried to use a bright thread to make it more visible.
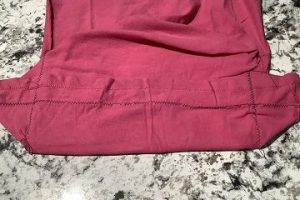
This forces the bottom of the laundry bag to stay open. It also helps with little hands trying to put things in there.
Sewing the Top of the Bag
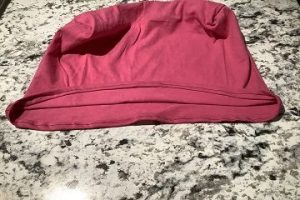
The top of the bag needs to look nice-ish, as it will be the most visible.
Fold the top edge. I like to do a double fold to make it look nice. Sew it all together.
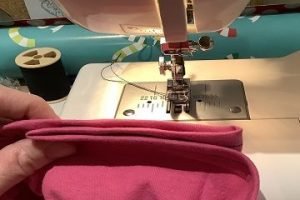
Make Opening Smaller
After I finished sewing the seam along the top of the face mask laundry bag, I saw how much surplus material there was (perhaps this is why I don’t wear this shirt anymore.) So I added several pleats around the top of the bag to make the opening smaller. I just folded the seam twice to make an S shape, as shown in the picture, and sewed it together. I did this in a few spots to get the desired opening size.
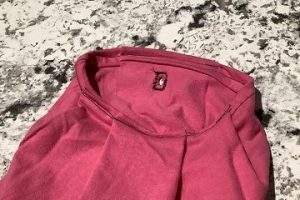
Add a Hanging Loop
The bag will hang on a hook, so I decided to add a little notch under the top seam. I cut a hole in the bag. Once it was a decent size (about 1/2″) I sewed around the hole to reinforce the material so that it won’t tear with use.
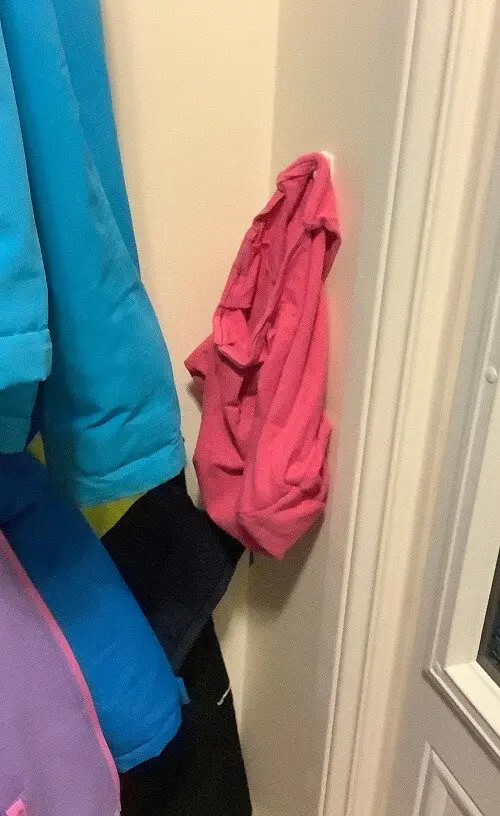
Hang it Up
The face mask laundry bag needs to be quick and easily accessible, so when the chaos of coming home from school and work hits, it’s not an added chore to find the mask bag. I just used a sticky 3M hook and stuck it to the wall. This way, when we no longer need this laundry bag, I can remove the hook and not have to worry about patching a hole and repainting.

And That’s It! You’re Done!
Additional Thoughts and Comments
While working on this project and putting it into place in the house, I realized the following:
- I was initially going to do a drawstring on the bag, but that will force the laundry bag to shut when it’s hanging up. I didn’t want it to be a nuisance to get the masks into the laundry bag, so I left the top open.
- The bag needs to be somewhere near the door that it is easily accessible by the whole family.
- Don’t forget to add this to the wash every week. You can add a string to the top of the bag so that you can tie it shut and keep the masks in the bag while washing (like a delicates bag), or you can dump the contents into the wash.
- Don’t forget to wash this bag weekly as well!
Was this Tutorial Helpful?
Did you find this tutorial on how to make a face mask laundry bag helpful? Let me know your thoughts in the comments below!
If you liked this tutorial, be sure to check out my other sewing tutorials here


That’s a totally cool idea. And good for other stuff that we need to keep separate.
You can never have too many laundry bags and baskets around the house! And even having individual places for everything helps so much with clutter!