I wanted to make cute ornaments for Christmas this year. And I sat down and drew them up in my sketchbook, and then I drafted them up in Inkscape, and then I cut them out with my Cricut… and they were great! The only problem was, as seems to be the case this year, they were WAY too complicated. I could have just made them super easy instead! And they would have looked great! Maybe even better. So, I have designed two sets of shaker ornaments. I have the Super Simple Shaker Ornament which is quick and easy, and I also have the not-to-simple shaker ornament. Both look great (I may be biased in saying that, but…) both look great!. I will walk you through making both. So, let’s jump in!
As an Amazon Associate, I earn from qualifying purchases. This post contains affiliate links. I may receive a commission if you purchase an item from one of my links. This will not change the price you pay.
Supplies Needed to Make Shaker Ornaments
Even though we are making two different ornaments, the supplies needed are basically the same. So, let’s talk about what we need:
- SVG cut file – I have created an SVG cut file for both types of shaker ornaments. One for the super simple ornaments, and one for the not-so-simple ornaments. You can get a copy of that here. They come as a package, so you get both.
- Cardstock – I used several different types of cardstock for this, so here is what I used:
- Glitter cardstock – I used red and silver glitter cardstock for the front of my ornaments.
- Xmas-themed cardstock – I use Xmas-themed cardstock for the back inside panel of the shaker ornament.
- Colored cardstock – I used standard Recollections cardstock for the designs within the shaker ornaments, specifically, white, black, green, orange and brown.
- Acetate – You need acetate for the window of your shaker card. You can use thicker stuff, buy special acetate sheets, or do what I do and use paper protector sheets. The protector sheets work great and they are much less expensive.
- Glitter/Gems/Confetti/Sparkles – You need a shaker material for your ornament. I used confetti this time, but you can use any glitter, gems, sparkles, punched paper, or whatever your heart desires. But you need something.
- Double-sided foam tape – For assembly of the shaker ornament. I use this stuff.
- Glue – You will need some glue to hold all this together. I use my crafting glue for this. I do not recommend a glue gun as it will melt and warp the acetate.
- Ribbon – you will need ribbon or string to hang the final ornament on your tree.
- Painters Tape – This is optional to help keep things put when working with glitter. Trust me on this one.
- Cutting Machine – I use my Cricut Explore Air 2, but any cutting machine will work.
Now that we have all our supplies gathered, let’s start putting this super simple shaker ornament together!
Shaker Ornament SVG File Adjustments
So, I have designed an SVG file for this project. You can get a copy here. However, if you prefer, you can follow along and create your own design based on what I have listed below. Either works.
Once you have downloaded my zip file, there will be 2 SVG files in there:
- Super Simple Shaker Ornament
- Not-So-Simple Shaker Ornament
You will need to unzip the file and save it somewhere on your computer to use.
Here are the steps you need to take within Cricut Design once you have the files on your computer:
- Import the file into Cricut Design Space:
- Select the Upload icon.
- Select the Upload Image button.
- Select the file from the location where you saved it.
- Select the design so that it has a rectangle around it.
- Verify that the dimensions lock is locked.
- Change the height of the design file to 4″. (Or any larger or smaller size you like, but 4″ worked well for me)
- Select the Ungroup icon to ungroup the design.
- You can modify the colors of any parts by selecting them and choosing a different color in the color pallet next to the Operation.
Once happy with your size and colors, select Make.
When cutting out all the pieces, 4 circles that are a light gray. Those are the acetate pieces, and you will need to adjust your Cricut Dial to Custom and select acetate or party foil to cut the clear sheet you have selected.
The full circle back pieces are the pieces that will be cut with Xmas-themed paper. They are all set to the same color, but you can modify those to your liking.
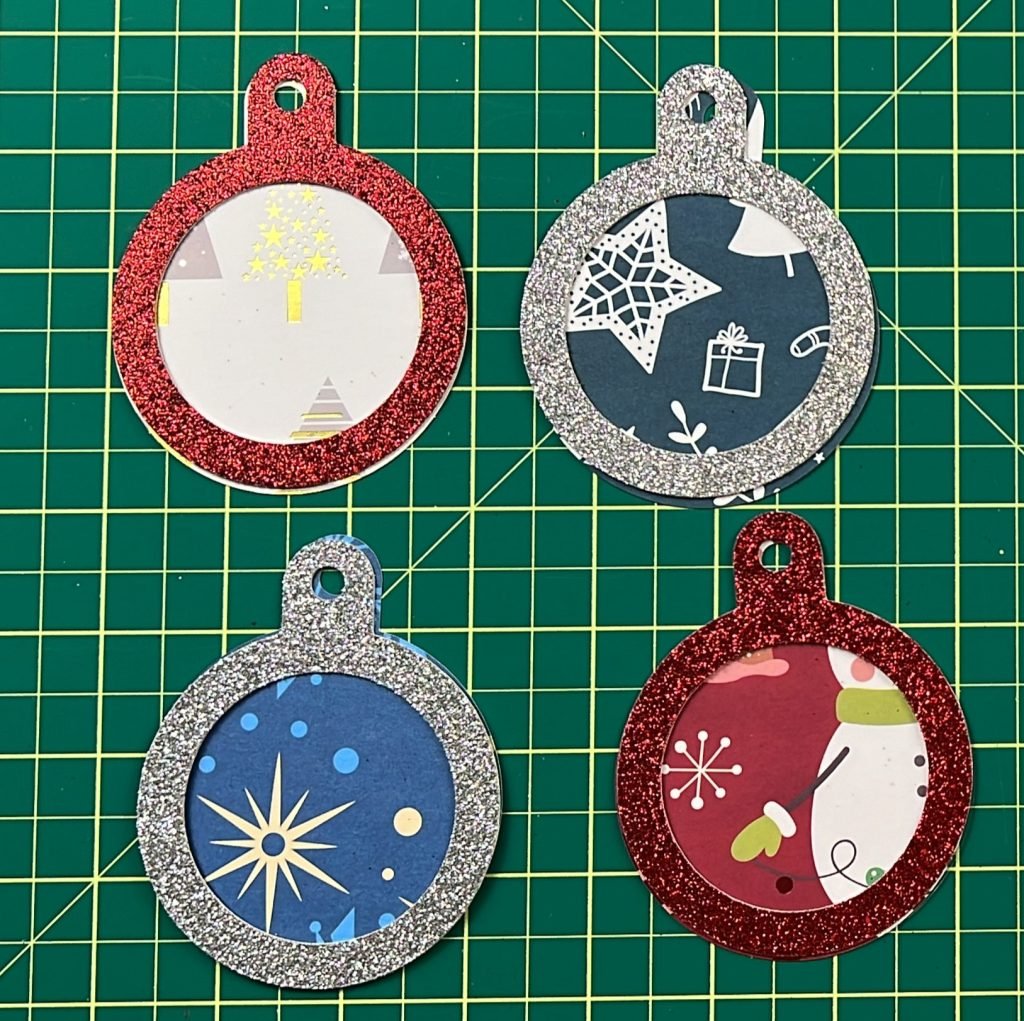
Assemble the Super Simple Shaker Ornament
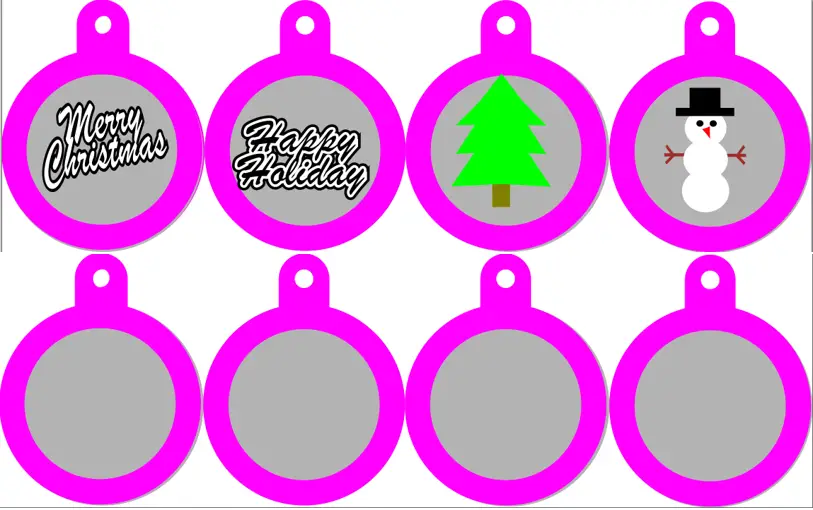
Ok, so now that we have our designs cut out, let’s do a quick review of what we should have:
- Super Simple Shaker Ornament
- 4 acetate circles
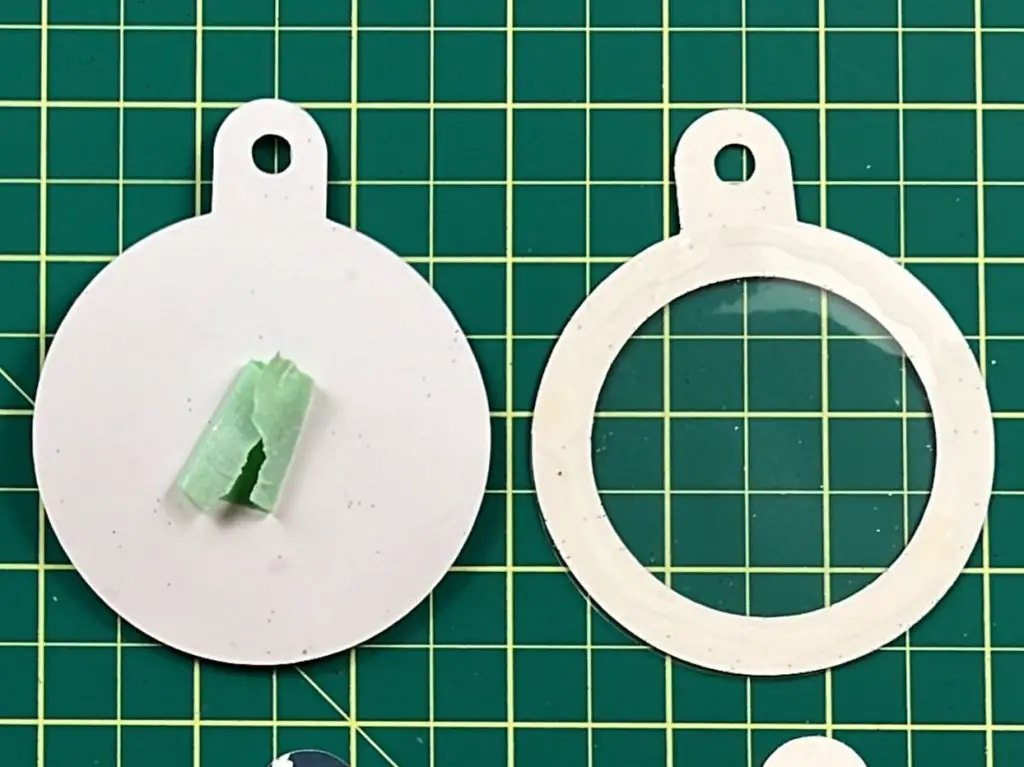
- 4 glitter front pieces – with a big circle cut out and a small circle cut out at the top.
- 4 Xmas-themed backing pieces – with one small circle cut out at the top
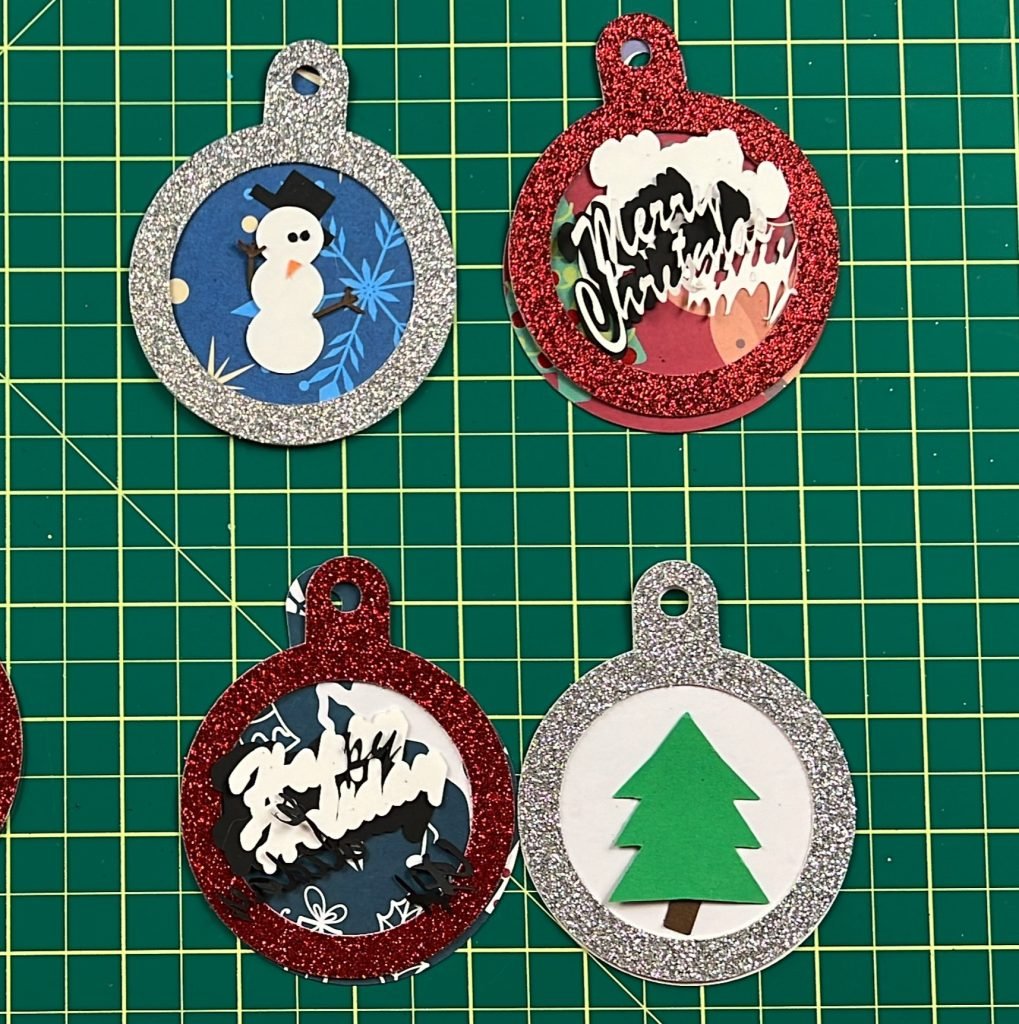
- Not-So-Super Simple Shaker Ornament
- 4 acetate circles
- 4 glitter front pieces – with a big circle cut out and a small circle cut out at the top.
- 4 Xmas-themed backing pieces – with one small circle cut out at top
- Xmas Tree – one green tree piece and one brown trunk piece
- Snowman – 1 white snowman outline, 1 orange nose, 1 black hat, 2 black eyes, 2 brown stick arms
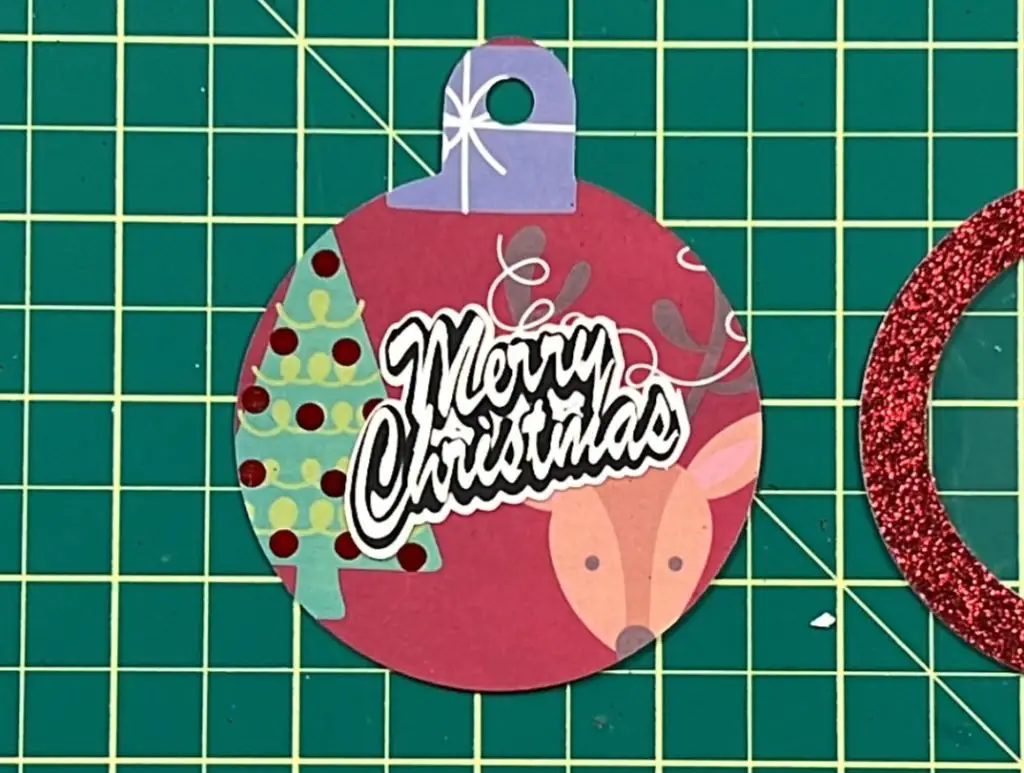
- Merry Christmas – 1 white text, 1 black outline for text, 1 larger white outline for text
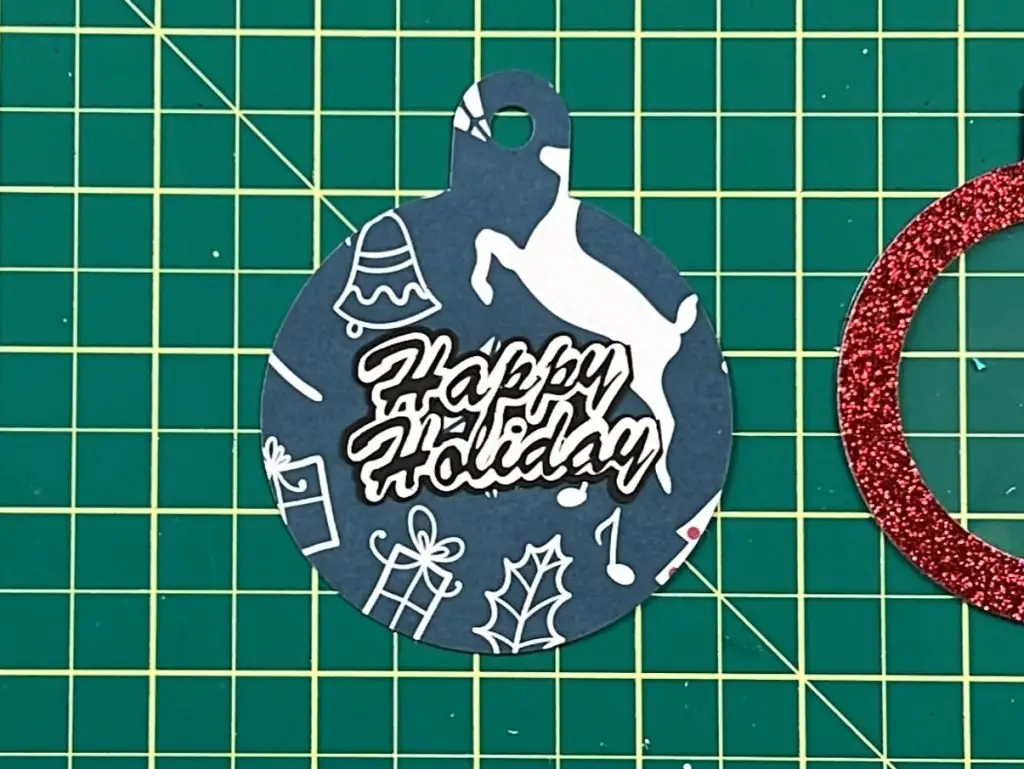
- Happy Holidays – 1 black text, 1 white outline for text, 1 larger black outline for text
So, now that we have all our pieces ready, let’s put these super simple shaker ornaments together!
Super Simple Shaker Ornament Assembly
We will start assembling the super simple shaker ornaments and then do a quick one-two on the not-so-simple shaker ornaments. So here goes!
For each super simple shaker ornament, the steps are the same.
First, we take our acetate circle and the glitter front piece. Apply glue onto the backside of the glitter front piece and carefully place the acetate circle on top. Place it over to the side to let the glue dry.
Next, get a piece of painter’s tape and fold it over on itself so it is sticky on both sides. Apply it to the ornament backing, and stick it to your workstation. This will keep everything steady later when you do not want things moving.
Slowly and carefully apply the double-sided foam tape around the edges of the circle and at the top of the ornament. Be mindful not to leave gaps between pieces of tape. You do not want your shaker bits escaping from your ornament through the gaps.
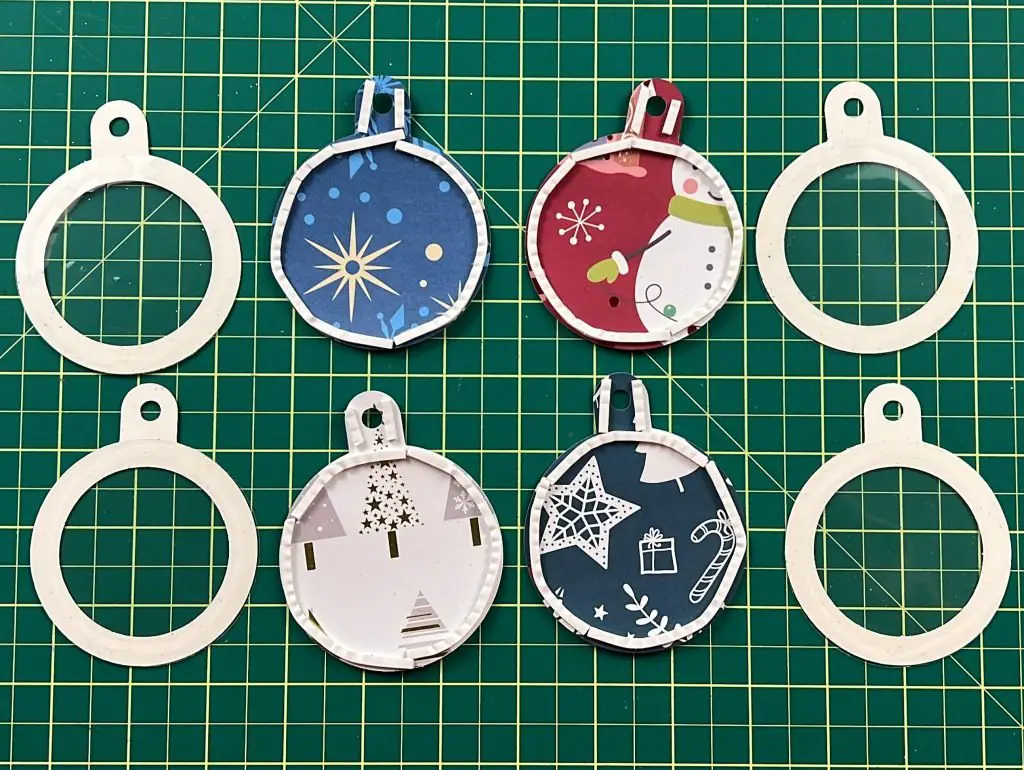
Slowly and carefully place your glitter or confetti into the center of the ornament. If you have a small spoon, this will be helpful. If you are like me and do not have one, be prepared for glitter and confetti to fly everywhere. Once you are happy with the amount of shaker bits in the ornament, move them into the center if they are not there already.

Before we move on to the next step, I quickly wipe my acetate sheet with isopropyl alcohol and a napkin. This will help reduce the static inside the ornament. This will dry quickly. Make sure to place the acetate sheet facing up so it does not touch your workstation.
Now, slowly and carefully remove the backing paper from the foam tape. If you did not place the painter’s tape on the back of the ornament earlier, be careful as things will move and shake, and your shaker bits will probably land on the double-sided foam tape.
Once all your foam tape backing is removed, quickly check that the shaker bits are inside the ornament and not on the tape. Once happy, carefully place the top of the ornament onto the foam tape. Keep in mind, that once you stick it down, you will not be able to pick it off, so do it slowly!

Not-So-Simple Shaker Ornament Assembly
So, now a quick one-two on the not-so-simple shaker ornaments.
The first and last steps of assembly are the same, so I will not rewrite those, but there are a few steps to talk about for each of the 4 not-so-simple ornaments. So, here goes:
Assemble the snowman Shaker Ornament
If using Christmas-themed backing paper, you want to make sure it is not too white, as the snowman will disappear in the paper.
Before using any glue, place the snowman body onto the backing paper and place the top cover over the ornament. You need to find the best placement for it so that it is not hidden by the top of the ornament.
Once you know where the snowman will go, use your craft glue and glue the snowman onto the backing paper. Then glue down the hat, eyes, nose and arms.

Now, you are ready to apply the foam tape and continue the assembly, as described above.
Assemble the Christmas Tree Shaker Ornament
If using Xmas-themed backing paper, you want to make sure it is not too green as the Christmas Tree will disappear into the paper.
Before using any glue, place the Christmas Tree onto the backing paper and place the top cover over the ornament. You need to find the best placement for the tree so that it is not hidden by the top of the ornament.
Once you know where the Christmas will go, use your craft glue and glue the tree and trunk onto the backing paper.

Now, you are ready to apply the foam tape and continue the assembly, as described above.
Assemble the Merry Christmas Shaker Ornament & Assemble the Happy Holidays Shaker Ornament
The text for both the Merry Christmas and Happy Holidays will be small when you cut it out, so be careful when working with it. Each text section has 2 backing and one text portion. Glue the smaller outline onto the larger outline first. You can use painter’s tape to tape the glued backing onto your workstation so that it does not move.
Using your glue and tweezer, slowly apply glue to the back of the letters and place them on the black backing. I have tried to keep as many of these letters together so you do not have many loose pieces. When placing the text down, do not worry if it does not go into the perfect spot right away. You can slide it a bit once you have the whole thing down to find the perfect spot.
Now, you are ready to apply the foam tape and continue the assembly, as described above.
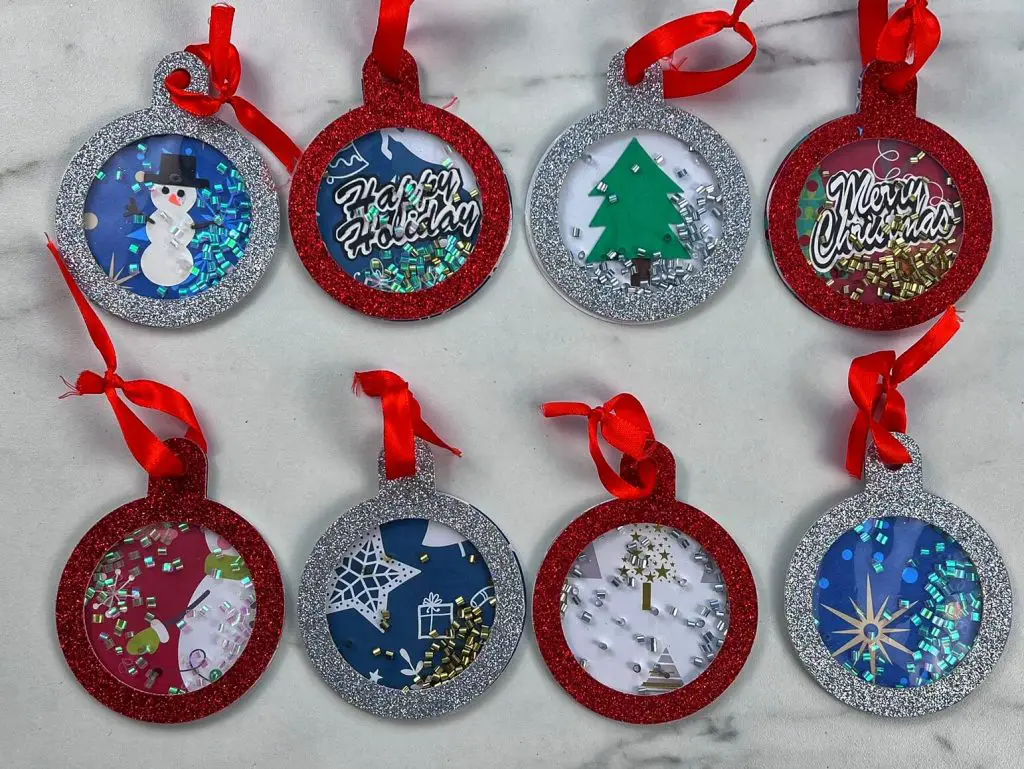
And there you have it! Your Super Simple Shaker Ornaments are done!
Things I learned While making this super simple shaker ornament
So, there seems to be a theme for me this year with my Christmas crafts, and that is overdesign, over-complicated and just too much…. so here are some things I learned while making this super simple shaker ornament:
- This was supposed to be a quick and simple shaker ornament. I thought I designed it that way, but when I started to cut and put it all together, I realized that my super simple design was anything but simple. Even a simple design inside the ornament proved to be excessive. So, doing a really simple shaker ornament with just Xmas-themed paper was easier, faster and looked just as good, if not better.
- Using themed paper is a great way to make any craft look amazing. I did not pay much attention to it when cutting the ornament pieces. I should have tried to strategically cut my ornament backing piece with the best portion of the design from the themed paper. But even without that, the offset cuts look great regardless
- When using shaker bits like glitter and confetti, I like to wipe the inside face of the acetate with isopropyl alcohol to remove the static. This works great for smaller bits of glitter but does not have much effect on the larger bits of confetti.
- orking with circles and double-sided foam tape is always a challenge. And you would think I would start designing more projects with straight lines as I know this. Yet, I keep making shaker crafts that are not straight lines. So, when putting the double-sided foam tape on the edges of the circular ornament, do it slowly. Do not be overly surprised when the edges curl a bit.
- I have designed these ornaments to be 4″, as described above. If you reduce the size to less than 4″, the edges of the walls may be too small to hide the double-sided foam tape. So, keep that in mind when reducing the size of the ornaments.
- For the not-so-simple shaker ornaments, I use Xmas-themed cardstock as well. I really could have gotten away with cardstock of one color instead. That would have allowed the design to pop more, but I still like how they turned out.
Did you enjoy this craft?
Did you enjoy this craft? Let me know in the comments below! Did you make this super simple shaker ornament? Did you like it? Let me know how it turned out!
If you liked this Christmas Craft, be sure to check out my other Christmas Crafts here.
Here are some of my favorite Christmas Crafts: