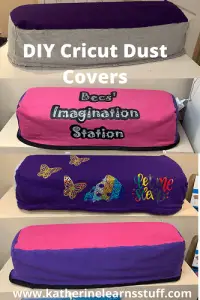
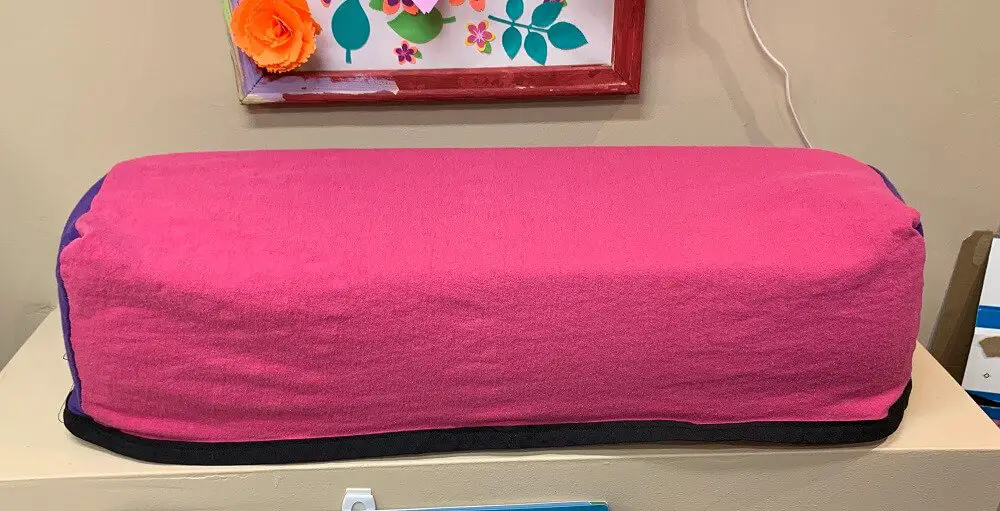
It’s funny because when I use my Cricut, I use it all the time, but then it will sit untouched for several weeks as I work on other things. But during idle times, I like to cover my Cricut and keep it dust-free. If you have been following me for a while, you will remember that I have tried this before. And you will remember that I made a mountain out of a mole-hill. My simple Cricut Dust Cover turned into a disaster. So I have gone back to the drawing board and created a new Simple DIY Cricut Dust Cover.
As an Amazon Associate, I earn from qualifying purchases. This post contains affiliate links. I may receive a commission if you purchase an item from one of my links. This will not change the price you pay.
Supplies needed to make a Simple Cricut Dust Cover
If you read my posts, you will know that most of my sewing activities involve using old fabric I have lying around the house. And this project is no different.
- Fabric – You need about 30″ x 30 “ of fabric. I used two old t-shirts that I cut up.
- Sewing Machine – you can do this by hand, but it is much faster with a sewing machine.
- Bias Tape – for finishing the edges.
- A Cricut – either a Maker (1, 2 or 3) or Explore Air (1 or 2). The only reason you need a Cricut Maker or Explore in this tutorial is to put the dust cover on it. You do not need to use the machine to make it.
Cricut Dimensions
Before you can cut your fabric, you need dimensions. Below you will find the dimensions of both the Cricut Explore and Cricut Maker Machines. Follow the dimensions of the machine you have.
Cricut Explore Machines Dimensions
- Length = 22.17″ (56.31cm)
- Width = 7.01″ (17.80cm)
- Height = 5.91″ (15.01cm)
Cricut Maker Machine Dimensions
Length = 21.18″ (53.80cm)
Width = 6.99″ (17.75cm)
Height = 5.93″ (15.06cm)
For ease of measurements and cutting, all of my dimensions are rounded up to the nearest 1/4″, so the Explore Machine at 22.17″ will be measured to 22.25″
Cricut Dust Cover pattern Dimensions:
For this tutorial, I am making a dust cover for a Cricut Maker, but I will walk through the pieces and sizes for both Explore and Maker, as not everyone has a Maker.
It is important to remember that each piece of fabric needs to have surplus material around the edges so that there is space to sew. I have allowed 1/4″ extra space on each side.
You will need 4 pieces cut:
- 2 squares for the ends
- 1 rectangle for the front
- 1 larger rectangle for the top and back
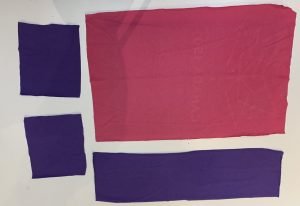
I have selected to use the larger piece for the top and back instead of having 3 rectangles of the same size. This just reduces the amount of sewing I have to do. I could have done one larger rectangle and had only 3 pieces, however, as I am upcycling old shirts, I did not have enough material to span the full Cricut.
Cricut Explore Dust Cover Pattern Dimensions:
- 2 squares – 6.25″ height, 7.5″ wide, each
- 1 rectangle – 22.75″ length, 7.25″ height
- 1 large rectangle – 22.75″ length, 13.5″ height
Cricut Maker Dust Cover Pattern Dimensions:
- 2 squares – 6.25″ height, 7.5″ wide, each
- 1 rectangle – 21.75″ length, 6.25″ height
- 1 large rectangle – 21.75″ length, 13.5″ height
Assemble and Sew the Cricut Duct Cover Pattern Pieces together
Once the pieces are cut out to the dimensions above, it is time to pin them all together and start sewing.
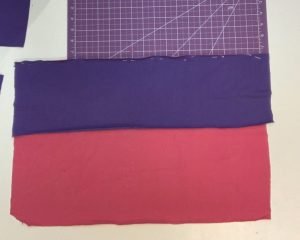
Laying the two rectangles side-by-side, with the long edges facing each other, pin them together, and sew.
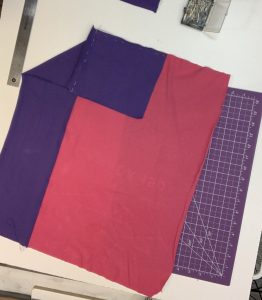
Then, pin the squares onto the large rectangles. This should make a box, minus the bottom. Sew the two ends connecting the square and rectangles.
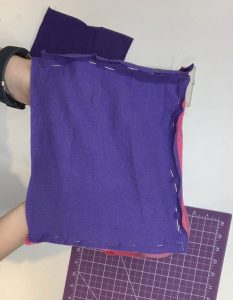
Sew on Bias tape
To make the dust cover look more polished and professional, sew double folded bias tape around the edges. This gives a nice finished look and hides unfinished edges.
And that’s it! Your Simple DIY Cricut Dust Cover is Complete!
Optional Design on your Cricut Dust Cover
I always like to add a vinyl design to my sewing projects. With some HTV vinyl and my heatpress, I just add some personal touches to it.

If you want to learn how to apply HTV Vinyl to a dust cover or any other project, check out this tutorial.
Frequently Asked Questions about Cricut Dust Covers?
Do I need a Cricut Dust Cover?
You never really need a dust cover, since the Cricut Maker and Explore Air are self-contained and have all of their moving parts hidden the doors of the unit. But I like to use them. I find that they keep away more than just dust, like spray back from other projects or spilled drinks.
Even if you use your Cricut all the time, there are times when you will not use it, so it might as well stay covered.
What fabric is best for sewing a Cricut Dust Cover?
I do not think there is the best fabric for this project as it is just a dust cover. But you can use the following
- Linen – Linen is typically used for clothing or bedding in the summer. It is a good conductor of heat and is very breathable. Also, linen is easy to sew as it does not slip or stretch when cut.
- Flannel – flannel is a thicker material that is very soft. It is often used for shirts, blankets and bedding. However, it can be hard to sew with, so some practice is required.
- Polyester – Polyester is typically used for pants, shirts and bedding. It is nice because it is mostly wrinkle-resistant. Polyester is best sewn with a machine and is easy to sew.
- Cotton – Cotton is used for clothes (ie: t-shirts), undergarments, bedding, towels, and much more. This is the simplest material to sew.
Did you find this tutorial Helpful?
Did you find this Simply DIY Cricut Dust Cover Tutorial helpful? Let me know in the comments below! Or share a picture of your final project!
If you liked this tutorial, be sure to check out my other sewing tutorials here, or my upcycling tutorials here.