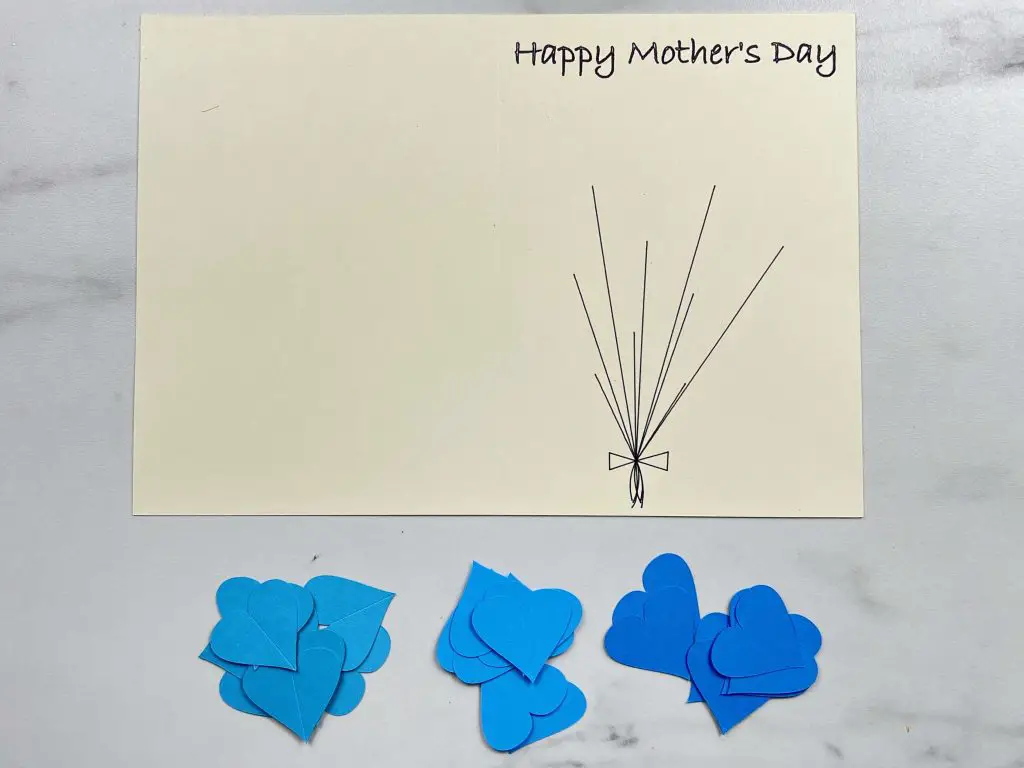
Mother’s Day is just around the corner, and it is time to make some Mother’s Day cards. I wanted to make something colorful and bright, so I decided on a Mother’s Day Heart Balloon Card. So, let’s jump in.
As an Amazon Associate, I earn from qualifying purchases. This post contains affiliate links. I may receive a commission if you purchase an item from one of my links. This will not change the price you pay.
Supplies needed to make a Mother’s Day Heart Balloon Card
Let’s start by reviewing the supplies and materials we need to make this Mother’s Day Heart Balloon card:
- Cardstock – you can use either 8.5″ x 11″ or 12″ x 12″ cardstock. For the card itself, I used a cream color, and then for the balloons, I used 3 different shades of blue. But you can use any color combination you like.
- Glue – I used my faithful Bearly Art Crafting glue for this, but any glue will work.
- Cutting Machine – I used my Cricut Explore Air 2, but any cutting machine will work.
- Cutting Mats – I use these cutting mats with my Cricut.
- Scoring Stylus/Scoring Wheel – I use my scoring stylus with my Cricut, but if you have a Maker, you will need the scoring wheel. Or, if you have neither a scoring stylus nor a wheel, you can add the fold lines afterwards with a pointed edge.
- Cricut Pen – I used my Cricut pens, but you can use compatible pens if you do not have one. You can read here how to use other pens with your Cricut.
- About 5 minutes for design modifications/checks and assembly.
Now that we have our supplies let’s start making this Mother’s Day Heart Balloon Card!
Accessing the Mother’s Day Heart Balloon Card SVG File
So, we can’t make this Mother’s Day Heart balloon card with the SVG file. So, you can get a copy of the file SVG here at my shop.
Using the Mother’s Day Heart Balloon Card SVG File in Cricut Design Space
Upload the Heart Balloon Card to Cricut Design Space
Once you have a copy of the Mother’s Day Heart balloon card SVG file, there are a few items we need to do to make sure there are no hiccups along the way.
- Unzip the file –
- Right-click on the file with your mouse and select Unzip
- Select a location where you want the file to be saved.
- Hit Enter and your file will be unzipped and saved.
- Upload the file to Cricut Design Space.
- Select the Upload Icon on the left side of your screen.
- Select the Upload Image button.
- Select the File from the location where the file was saved from above.
- Select the file from your DS Recently Uploaded documents. There should be a green rectangle around it.
- Hit the Add to Canvas button.
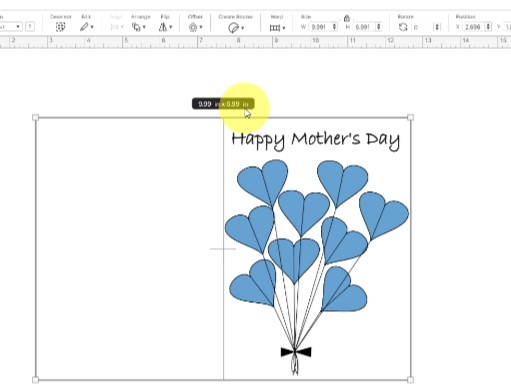
Modify the card dimensions
Once the Mother’s Day Heart Balloon Card is in your Cricut Design Space Canvas, we need to make a few quick modifications so it cuts and scores correctly.
- Select the design and verify the dimensions.
- Verify that the size of the card is 10″ wide. If it is not, then:
- Ensure that the lock proportions lock is locked.
- Adjust only the width to 10″.
- Verify that the size of the card is 10″ wide. If it is not, then:
- While the whole design is selected, hit the Ungroup button.
I have selected 10″ wide, as this will give me a 5″x 7″ card, but you can reduce or increase the size as you like.
Adjust the Heart Balloons
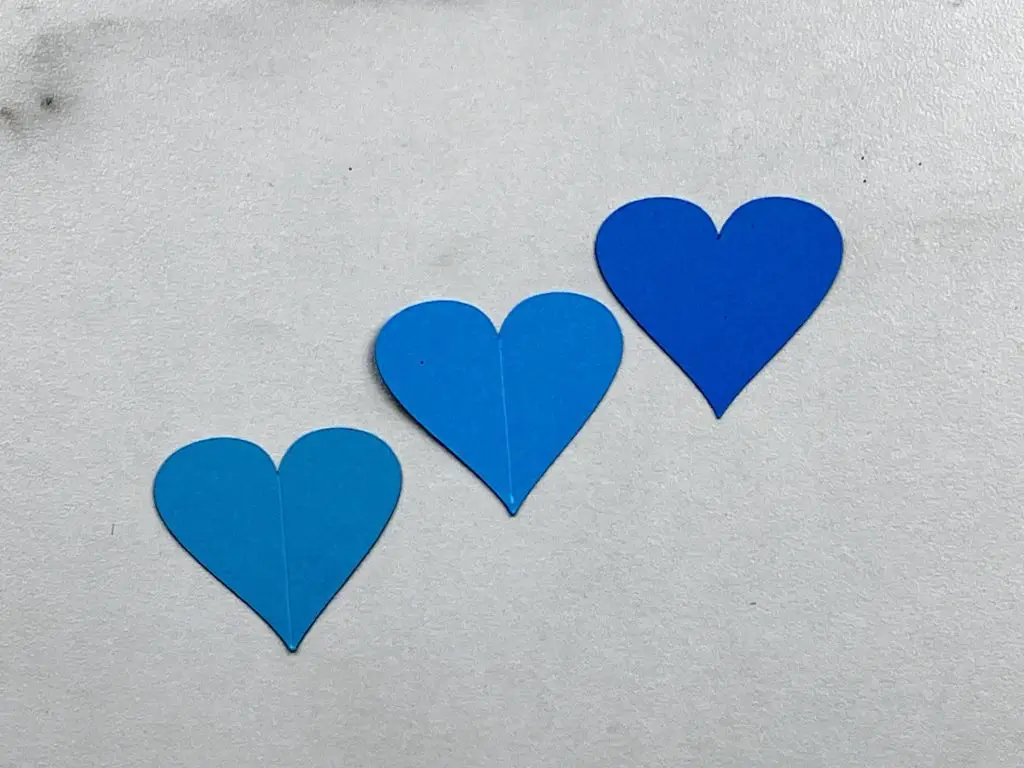
There are 9 heart balloons in this card design. Select one of the Balloon bunches and pull it over to the side. Verify they are ungrouped – so that you have 3 different hearts. Two of the hearts will have a cut line through the center. Select the cut line on your Layers Panel. Then, in the Operations Drop-Down Menu change the operation from Basic Cut to Score. Next, select the heart and score line, and press the Attach button to attach the score lines to the heart. Repeat this for the second heart heart.
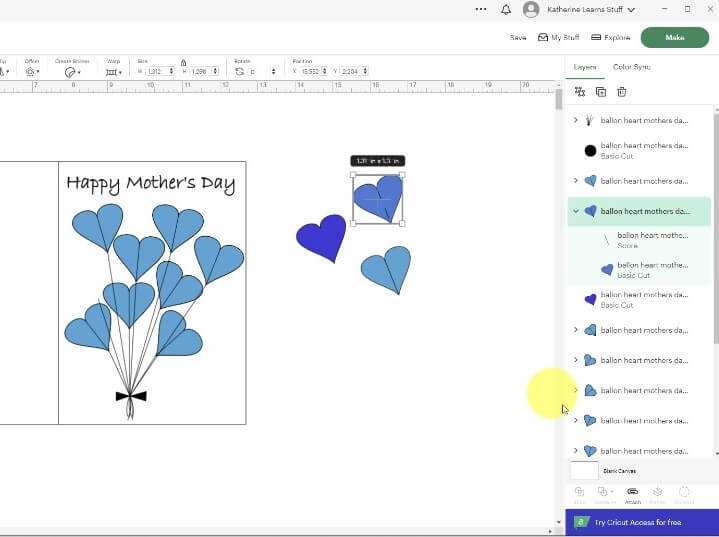
Once completed, repeat this step for the remaining 8 heart balloons. Or, you can select all 3 hearts you were working with – the 2 with score lines and one without and duplicate them 8 times. I find this is much faster. Then delete the other 8 hearts.
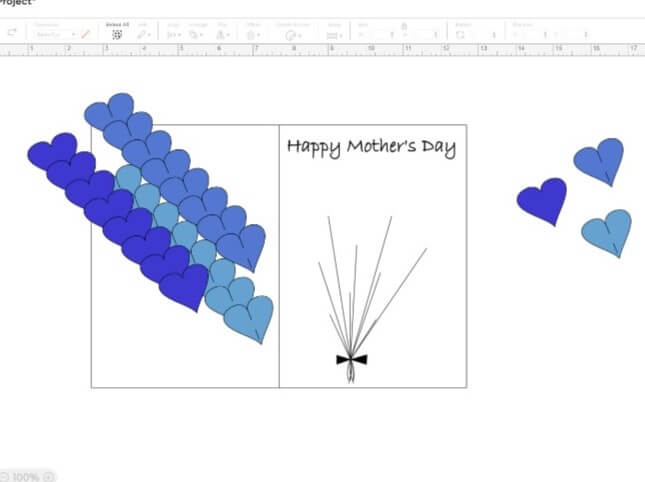
Adjust the text and Balloon Strings on the Card
The last things we need to adjust on this file are the balloon strings, the Happy Mother’s Day text and the score line for folding.
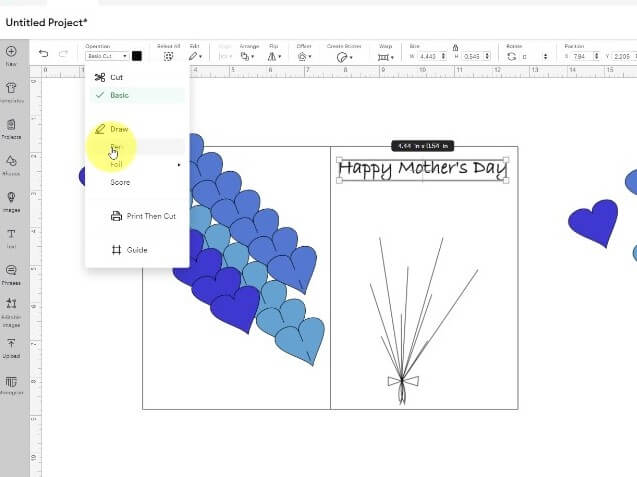
Select the balloon stings and the text. Then, in the Operations Drop-Down Menu change the operation from Basic Cut to Pen. If you want the balloon strings and text to be different colors, you can change the pen color on each individually. I opted to keep them the same color.
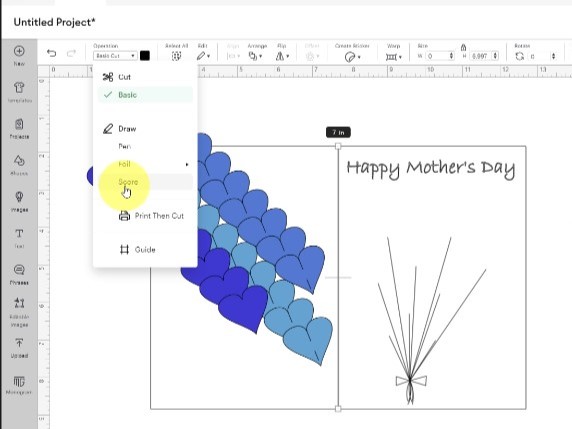
Then, select the line in the middle of the card. In the Operations Drop-Down Menu change the operation from Basic Cut to Score.
Finally, select the Happy Mother’s Day Text, the balloon strings, the score line and the card itself, and press the Attach button to attach all the pieces together. Make sure you are not selecting any of the balloons when doing this.
Assembling your Happy Mother’s Day Heart Balloon Card
Once you have completed all the modifications above, it is time to send the design to Cut. Once you have completed cutting out all of the pieces, you should have the following:
- 1 card with a score line, Happy Mother’s Day and balloon strings drawn on
- 9 dark blue balloons
- 9 medium blue balloons with a score line on them
- 9 light blue balloons with a score line on them
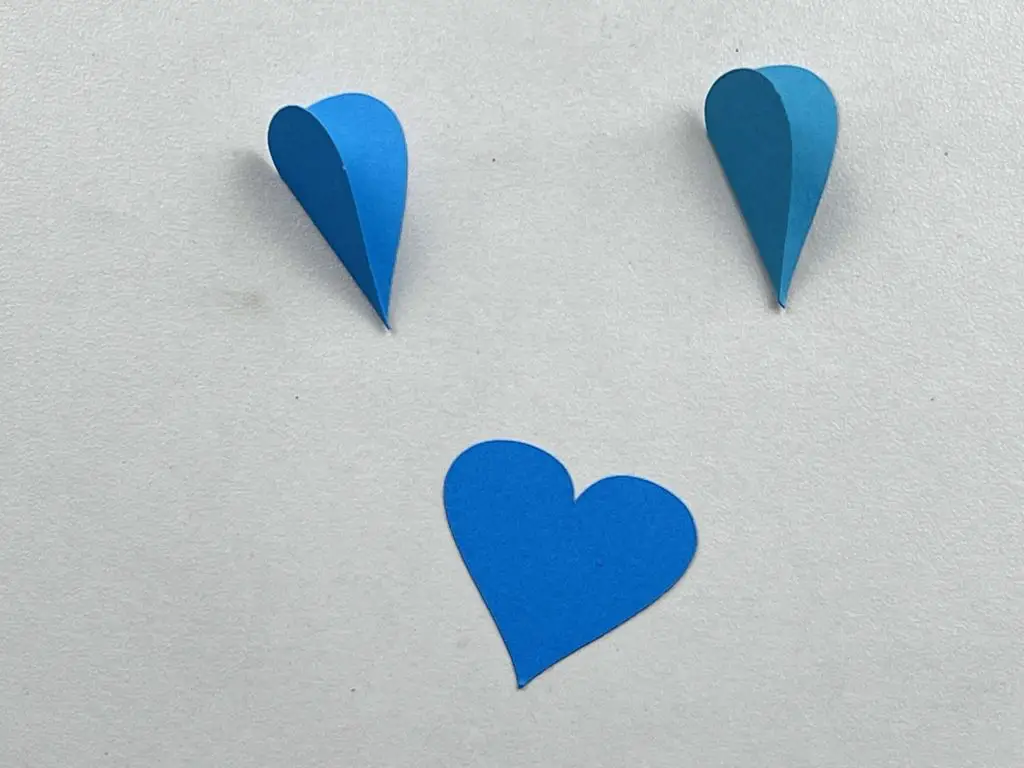
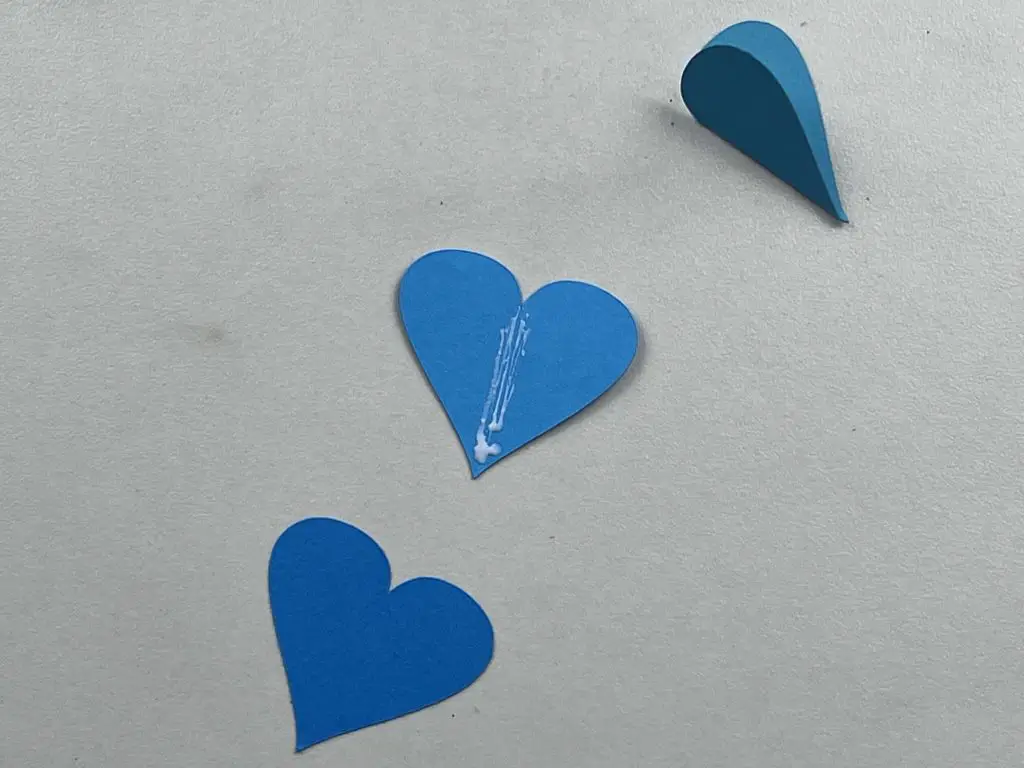
Folding the hearts along the Score Lines
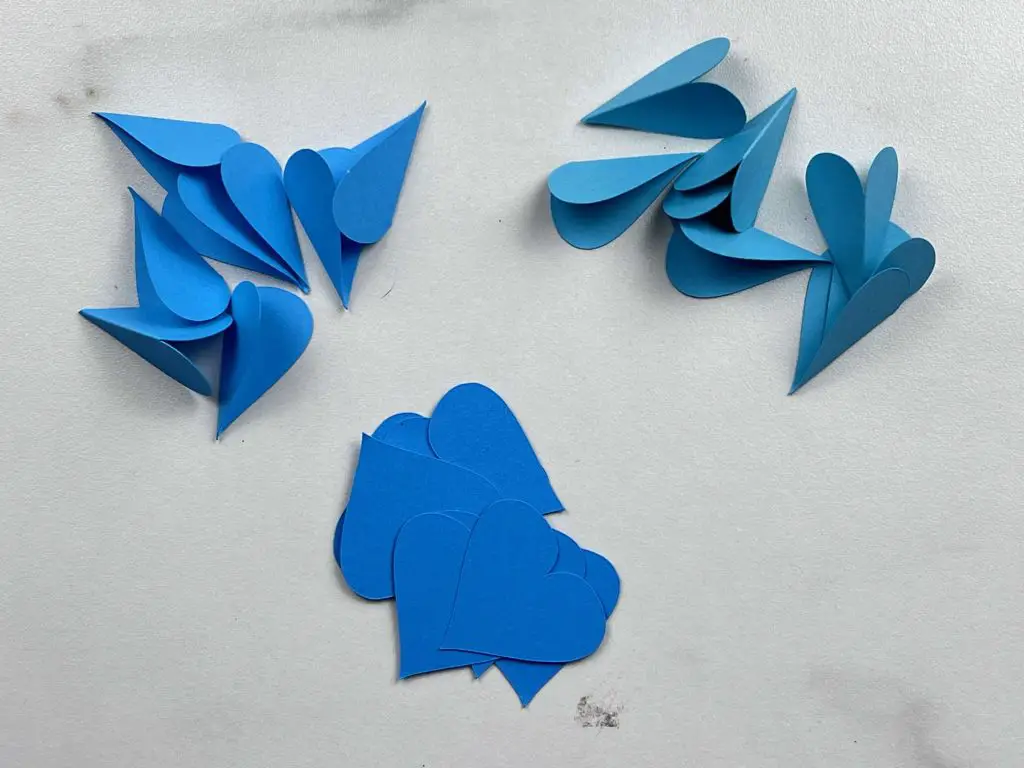
I like to keep my balloons in colored piles to keep them organized. Fold along the score line on each heart.
I like to have a score line done with my Cricut as it helps the folding process, but you can fold them without adding a score line.
You should have 2 piles of folded hearts and one pile of flat hearts.
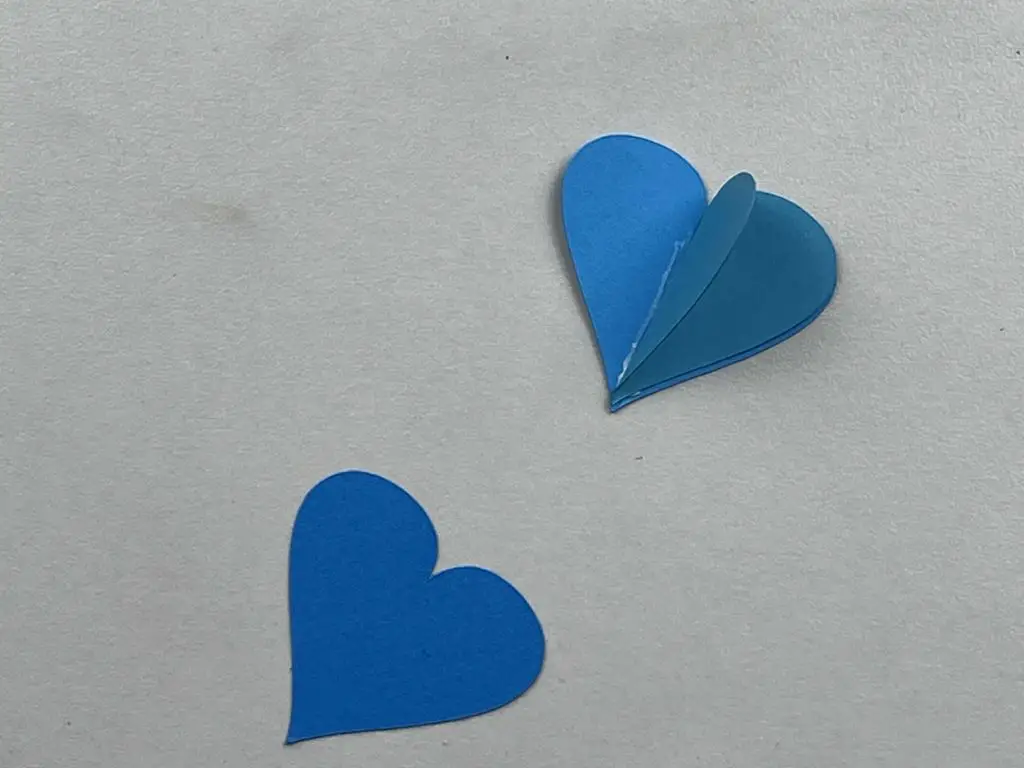
Gluing the Hearts together
Each balloon will have 3 hearts. Before you start gluing, you want to decide which blue will be on top and middle. Once you have selected the order, glue the hearts together.
I wanted to do light, medium and then dark. At one point, I wasn’t paying attention I mixed some up. I ended up with several with light, medium, and dark, and several with medium, light and dark.
You can opt to glue the hearts together in any color combination.

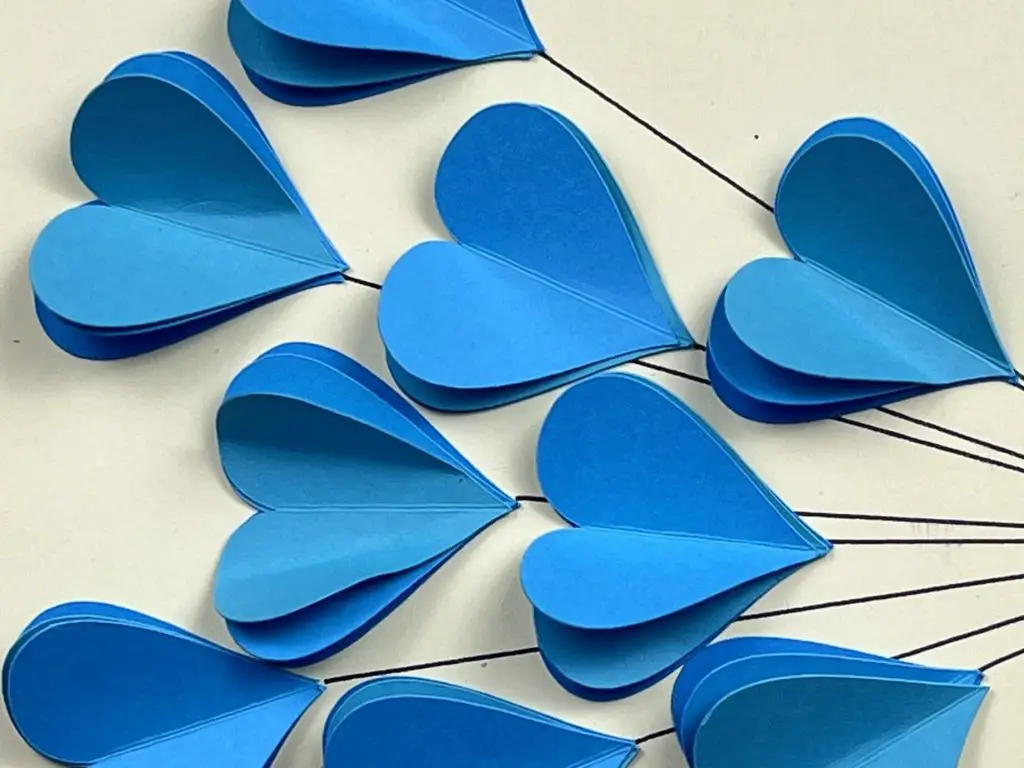
Once the hearts are dry, you can glue them onto the card.
I recommend lining the hearts up before gluing them down and then starting to glue them from the bottom up. Some of the strings are close together, so you want to make sure that the balloons fit before you commit to their locations.
They will all fit as per the design, but you need to pay attention to how they are placed.

Once all the balloons are glued and dry, you can ruffle the balloons and fold them up to give the card a 3D effect.
Add a Sentiment Inside the Mother’s Day Heart Balloon Card
Now, all that is left is to fold the card along the score line, add a sentiment inside the card and you are ready for Mother’s Day!
And that’s it! Your Mother’s Day Heart Balloon Card is Complete!

Things I Learned Along the way
So, let’s talk about how this project went. There were a few things I learned while making this card, so let’s jump in!
- I wasn’t paying attention when gluing my balloon hearts together. The result was that my balloons were not all the same color. This isn’t a big deal since the card looked nice when complete, but my intention was for them all to be the same. If had planned to make the balloons different colors, I would have made them all different instead. So you really need to pay attention when making the balloons.
- When gluing the balloons together, I was a bit sloppy applying the glue down the center of the hearts. This resulted in some of the hearts sticking together further than I wanted them to. So, be mindful of how straight and large your bead of glue is when gluing the balloons together.
- I wanted the balloons to be 3D. That is why there are 3 hearts for each balloon. I think the card would have looked just as nice with 1 heart on each balloon. So, if you are in a time crunch, you can use 1 heart per balloon instead.
- As with all 3D cards, when you put it into an envelope, the card gets flattened, so you will need to fan the balloons out again after the card has been given.
Would I make this card again? YES! Absolutely!
Did you enjoy this craft?
Did you enjoy this craft? Let me know in the comments below! Did you make this Mother’s Day Heart Balloon? Let me know how it turned out!
If you enjoyed this craft, be sure to check out my other paper crafts here.
If you are looking for other Mother’s Day crafts check out this matching card here.