Regardless of how many fun activities we find for our kids, they can always find a way to complain that the summer is boring. So, we decided they needed some fun and excitement to be added into the mix. And we created some simple DIY animal Pop-it fidget toys. These were simple to make, and we were lucky enough to use bits and pieces from around the house. So, come join us on our DIY Animal Pop-it adventure.
As an Amazon Associate, I earn from qualifying purchases. This post contains affiliate links. I may receive a commission if you purchase an item from one of my links. This will not change the price you pay.
Supplies needed to make a Pop-it
As I mentioned above, we used craft supplies that we already had around the house, and if you have kids, there is a good chance you have these lying around the house as well.
- Cardboard – I used an empty cereal box because I find these are very sturdy, and we eat lots of cereal, so there is never a shortage.
- Colored Construction Paper – I used Crayola construction paper. It is not very thick, so great for the kids to cut and play with
- Googly Eyes – Large ones preferably, but small works work as well.
- Glue – we used glue sticks this time to glue all the pieces together.
- Paint – we used both acrylic pain. I used Design Space and my Cricut to make the animal bodies.
Ok, let’s get started making our Animal Pop-it
We made 2 different types of animal pop-it, one pig and one bee. The concept is the same for each animal but slightly different because of the shape of the animal.
Also, the pig can be changed into any number of different animals by simply changing the color of the construction paper used.
How to Make a Pig Pop-it
Design the Pig Pop-it
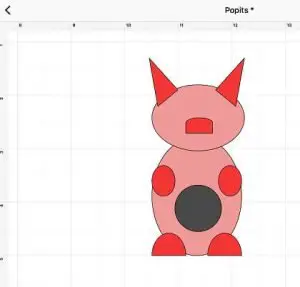
I used Cricut Design Space to design my animals. The pig was very simple. All I needed were the pre-existing free shapes in Design Space.
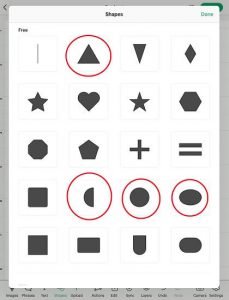
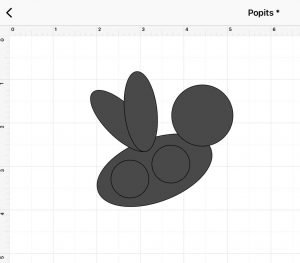
My pig consisted of:
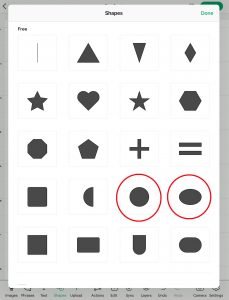
- 4 ovals – one for the head, one for the body, 2 small ones for the hands
- 2 triangles – for the ear
- 3 semi-circles – 2 for the feet and 1 for the snout
- 1 circle – for the stomach where the googly-eye will go. My googly eyes were ###. I made this circle slightly smaller to allow the lip of the googly eye to stay in the cut circle.
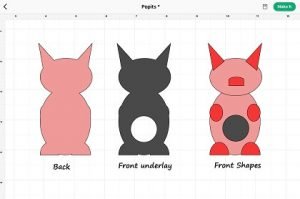
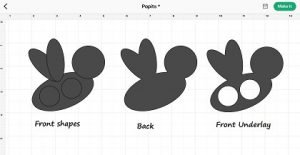
Once I had my design complete, I made 2 duplicates of the whole thing.
For the first duplicated design I removed the stomach circle and WELDED all the pieces together. This will be the back of the pig.
For the second duplicate, again I removed the stomach circle, WELDED all the pieces together, placed the circle back on the stomach and SLICED the circle out of the body. This will be the front of the body.
Cut Out The Pig Pieces
Once the design was completed, I cut all the pieces out in cardboard with my Cricut. The front, the back, and all of the individual shapes. The individual shape pieces are used to trace my colored construction paper.
I cut everything out in cardboard first because we were planning on making more of these later, so now I have a set ready to go. I could have just cut out the front and back in cardboard to provide rigidity to the pop-it.
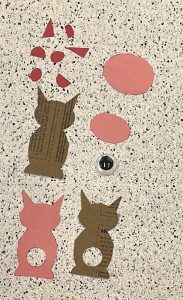
Trace around all the cardboard pieces in the color of construction paper that you want for the pig. We used a few different colors to make the hands, feet, nose, and ear stand out, so they were a slightly different color.
If you want to make the pig into a different animal, you can use the same design but different colors.
Paint the Googly-Eye
Since our pig is pink, we painted the googly-eye pink as well. We tried using a paint pen from the local Dollar Tree. It took 2 coats, but the second coat was hard to apply as it would often take the first layer of dried paint off. But once it was dry, it stayed on the googly-eye.
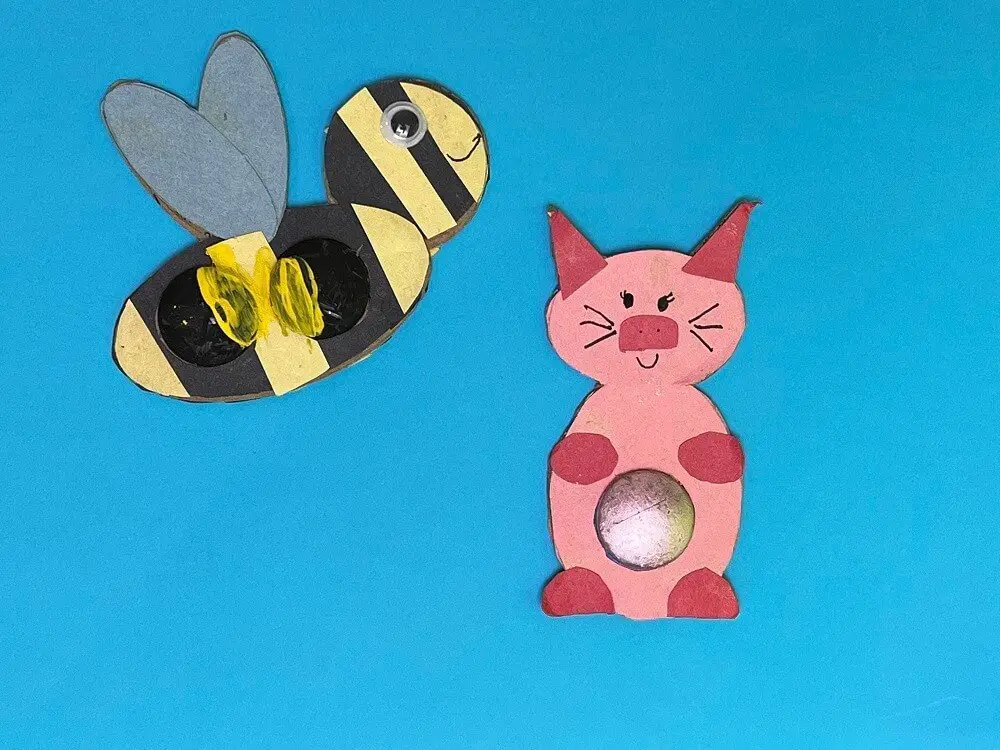
Assemble the Pig Pop-it
Once your googly-eye is dry and all of your pieces are cut out, it is time to start assembling.
Remember, the cardboard is only used for the front and back of the pop-it to give it rigidity. You will need to apply the construction paper on top of those layers to provide the color.
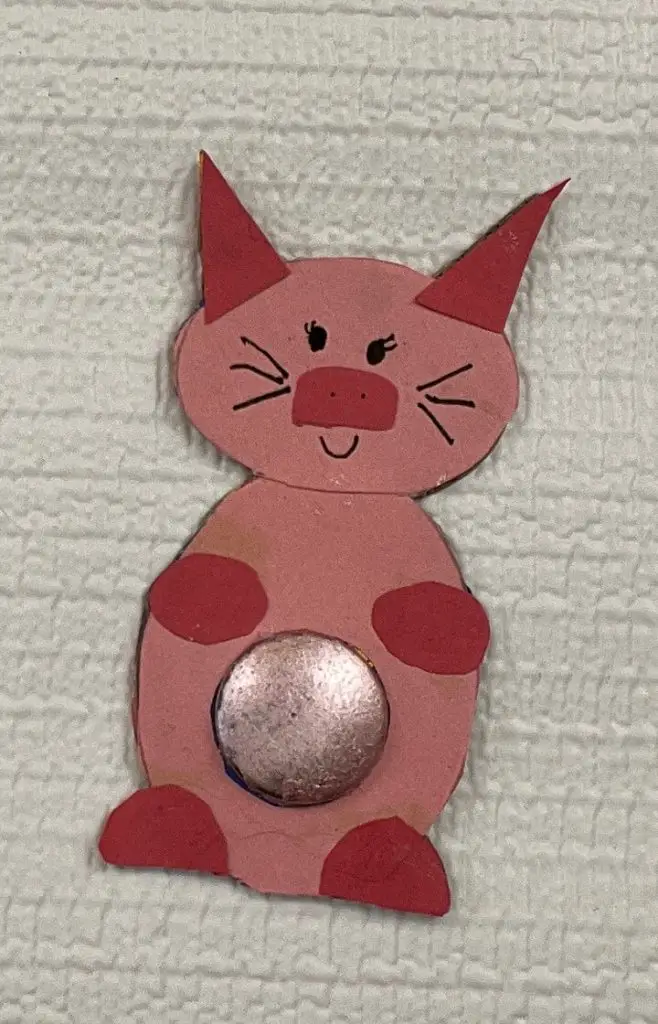
Once all the pieces were assembled, we drew on small eyes, finished the nose and added some whiskers.
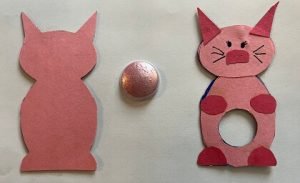
And that’s it! Your Pig Pop-it is done!
How to Make a Bee Pop-it
Design the Bee Pop-it
I used Cricut Design Space to design my animals. The bee was very simple. All I needed were the pre-existing free shapes in Design Space.
My bee consisted of:
- 3 ovals – one for the body, 2 for the wings
- 3 circles – two for the stomach where the googly-eyes will go and one for the head. My googly eyes were ###, so I made this circle slightly smaller to allow the lip of the googly eye to stay in the circles.
Once I had my design complete, I made 2 duplicates of the whole thing.
For the first duplicate, I removed the 2 stomach circles and WELDED all the pieces together. This will be the back of the bee.
For the second duplicate, again, I removed the 2 stomach circles, WELDED all the pieces together, but then I placed the circle back on the stomach and SLICED the circle out of the body, one at a time. This will be the front of the body.
Cut Out The Bee Pieces
Once the design was completed, I cut all the pieces out in cardboard with my Cricut. The front, the back, and all of the individual shapes. These individual-shaped pieces are used to trace my colored construction paper.
Cutting everything out in cardboard first because we were planning on making more of these later, so now I have a set ready to go. I could have just cut out the front and back in cardboard to provide rigidity to the pop-it.
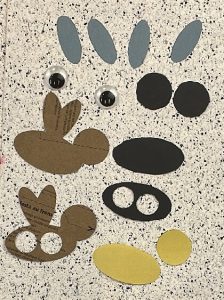
I used blue construction paper for the wings, so I trace a front and a back for the wings.
The body and the head I traced in both yellow and black. I cut the yellow oval and circle into strips so that I could glue them onto the bee in different locations to give the bee a yellow-black stripe look. I did not cut the black paper into strips, as it was used as the backing to hide all of the cardboard.
Paint the Googly-Eye
With the bee being yellow and black, we painted the googly-eyes black first, 2 coats and let dry. After assembly, we added some yellow to match the strips on the bee. For this, we used acrylic paint. It dried quickly, adding a second coat was easy, and it stayed on the googly-eye after being dry and popping for a while.
Assemble the Bee Pop-it
Once your googly-eyes are dry, and all of your pieces are cut out, it is time to start assembling.
Remember, the cardboard is only used for the front and back of the pop-it to give it rigidity. You will need to apply the construction paper on top of those layers to provide the color.
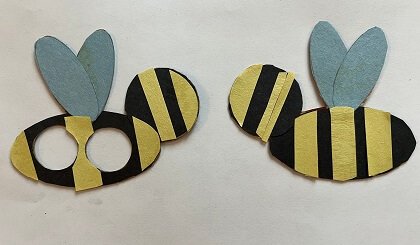
Once the pieces were assembled, we glued googly-eye to the face and a smile with a sharpie.
And that’s it! Your Bee Pop-it is done!

And that’s it! Now your animal pop-it are complete!
Frequently Asked Questions about Making animal pop-it
Are there other animals you can make?
Yes, there are lots of other animals you can make. The pig body can actually be used as other animals as well, you just need to change the color of the construction paper. We opted for pink, so it looks like a pig, but if you use:
- brown, it will be a bear.
- gray, it will be a cat
- black and white, it will be a panda
- brown and black, it will be a dog.
What Can I use as the Pop-it? Do I need to use googly-eyes as the pop-it?
I used googly-eyes because we have lots of them in our craft bin. But you can use any other number of things for the pop-it. Another popular one is cutting a ping-pong ball in half and using the two sides as the popping part.
How long does a pop-it last?
Our pop-its are still working several weeks after being made. My kids have lost interest in them before they have broken, so they lasted long enough.
Should I paint the googly-eye for the pop-it?
We used both acrylic paint and paint pens. I found that the acrylic paint went on easier and allowed for multiple coats of paint to go on.
We bought cheap dollar store paint pens, and they did not allow for a second layer of paint to be applied easily. However, once the paint was dry, it stayed on very well and did not come off on fingers.
Did you enjoy this tutorial on making an animal pop-it?
Did you enjoy this tutorial on making an animal pop-it? Have you tried it? How did it work out? Check out some of my other up-cycling crafts here, my paper crafts here, and my kid’s crafts here.