One of the decorations I make yearly is a little Christmas Tree. I have made a Simple Paper Christmas Tree, a Rainbow Circle Christmas Tree, and this year, I made a Spiral Christmas Tree. And there is a method behind my madness… I swear. I saw some cute wooden trees people had in the neighborhood and thought it would be nice to have a smaller, paper version indoors. So let’s get started!
As an Amazon Associate, I earn from qualifying purchases. This post contains affiliate links. I may receive a commission if you purchase an item from one of my links. This will not change the price you pay.
Supplies Needed to make a Spiral Christmas Tree
The list of supplies needed for this craft is not extensive but might be a bit odd, so bear with me… Here are the supplies we need:
- Wood base – I used some surplus 4×4 blanks that I had leftover from previous projects. You can use any piece of wood for the base. The ones I saw at the store have a similar base to these wood blanks.
- 3/16” Size wooden dowel – This will be the tree trunk for the Christmas tree. I bought mine at the dollar store, but you can buy them online here.
- Glue – You do not need much glue, but you need to glue the dowel onto the base so the tree stands tall. I used my glue gun and hot glue.
- Scissors/Cutting machine – I used my Cricut to cut the rectangles, but you can use scissors.
- Scoring Stylus – As I was using my Cricut for this project, I used a scoring stylus with my machine. If making this craft with scissors, you will need a scoring stylus or a hard edge to draw a line on the paper to help fold the paper straight.
- Drill – Optional – I pre-drilled a hole in the base for the dowel to fit into. This helps the dowel stay stable. But you can glue the dowel onto the base directly instead.
- Christmas Themed card stock – Any card stock will do, but either Christmas colors or Christmas Theme works best!
Now that we have all our supplies, it is time to start crafting.
Prepare your Spiral Christmas Tree SVG File
For this Spiral Christmas Tree, I have created an SVG file. You can get a copy of the file here or recreate your own. But if you use my file, here are some details you need to check and change in Design Space when you upload this file. So, let’s do a quick review of what we need to do:
- Upload the file to Cricut Design Space
- Select the Upload icon,
- Select the Upload Image button
- Select the file from the location where it was saved
- The file I have made will come as a zip file, so you will need to unzip it to access the files in DS
- Once the image is on your Design Space Canvas, you will need to make the following modifications
- Verify that the dimension lock is locked
- Select the design and change the width to be 10.5″.
- Select the Ungroup icon to ungroup the whole design.
- Each level on the design has 2 lines on it. Select the 2 lines and change them from Basic Cut to Draw- Score.
- Repeat for all lines
- Select each rectangle and the associated 2 score lines. Attach them together.
- Repeat for all rectangles.
- You are now ready to hit Make
The file I have created is set with one color. If you want to cut the tree out in different colors, you can make this switch before you cut it out or move the pieces around on your cutting mat when preparing to cut.
Prepare your Paper Spiral Christmas Tree
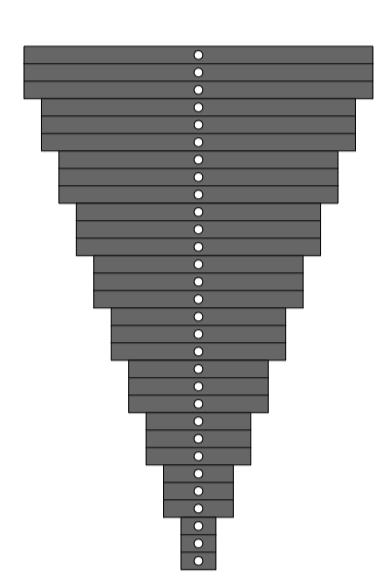
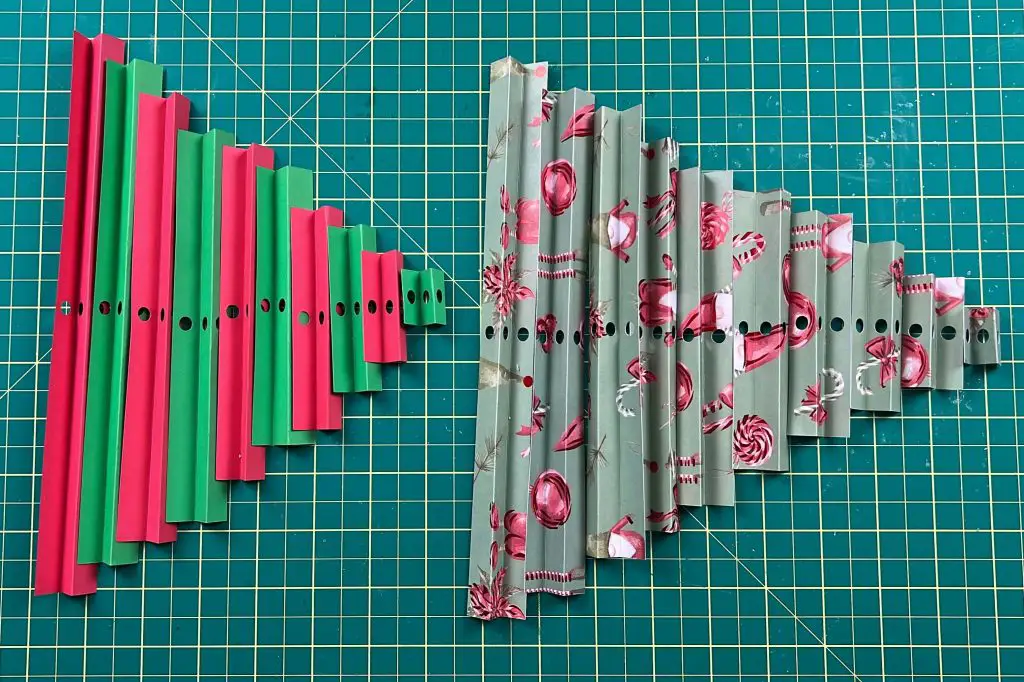
Now that all of your pieces are cut, you should have 10 rectangles cut out.
Each rectangle has 3 holes and 2 score lines. You want to fold the cardstock on each score line. When folding, you want to fold the lines so the cardstock looks like a Z and not a U.
Repeat this for all 10 rectangles.

Prepare your Spiral Christmas Tree Base
The base of the tree should be wood. I used surplus 4×4 pieces I sliced for another project, but any wood blank will do. Ideally, you would like it to be about 4″ in diameter.
Drill a hole in the middle of the wood blank. You will want to use the same size or slightly smaller than the wooden dowel. In my case, I have 3/16” dowels, so I drilled a 5/32” hole.
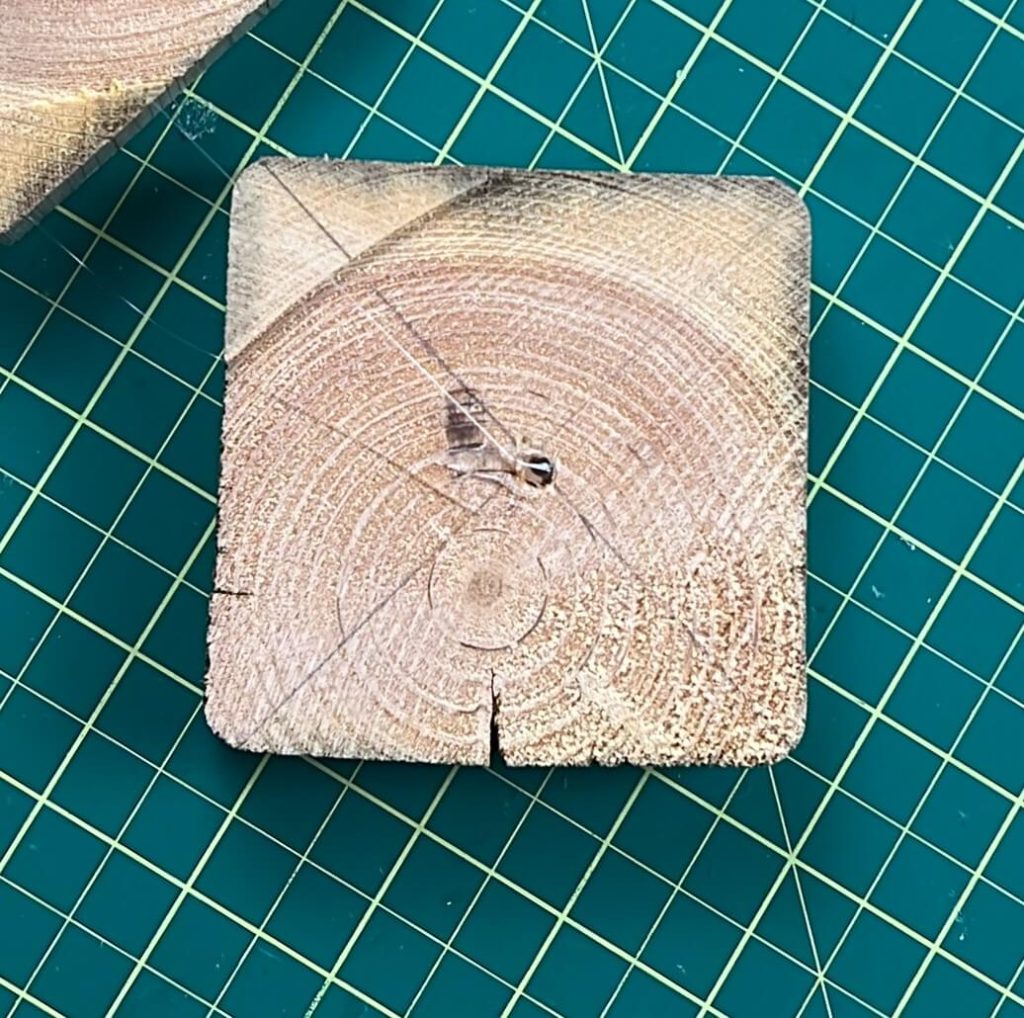
Using hot glue, I glued the dowel into the base.
On some previous trees, I did use a 3/16″ drill bit. This worked as well, but there was excess space in the base for the dowel. This was not a big issue as the glue held the dowel in place and filled the gaps.

Assemble your Spiral Christmas Tree
Before we assemble our spiral Christmas tree, we have one thing we need to finalize – the direction of the folded cardstock rectangles.
You can align your rectangles so the folds are all in the same direction – so it would like to be a bunch of N’s next to each other (N N N N).
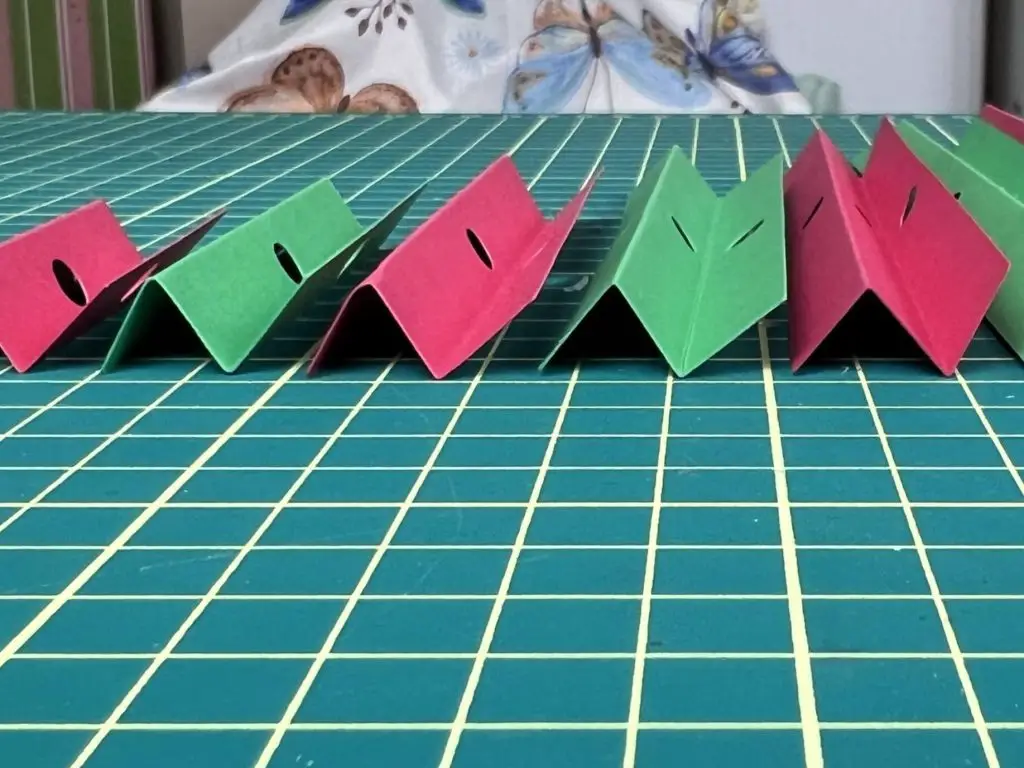
Or you can align the rectangles so the folds are in opposite directions – so it would be like an N, backward N, N, backwards N.
Both of these arrangements will work and produce great results. The main difference is when aligning the rectangles in the same direction, you will lose sight of 1 side on each piece. This will make your tree shorts and less vibrant.
I found arranging them on my tabletop worked best to help keep things in order.
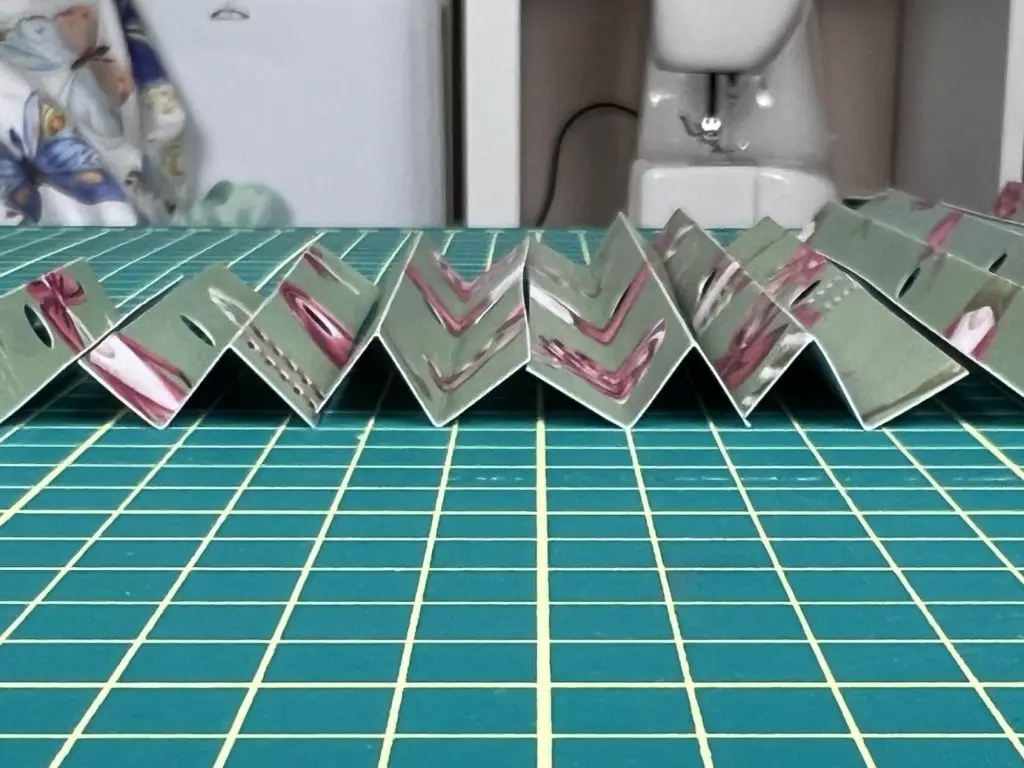
Once you have your rectangles in order, slide them onto the dowel of your Christmas tree base. I have made the design so that the circles on each rectangle are slightly larger than 3/16″ so that when the cardstock is folded, it will still fit on the dowel. If you reduce the size of the original file, it may be a tight squeeze.
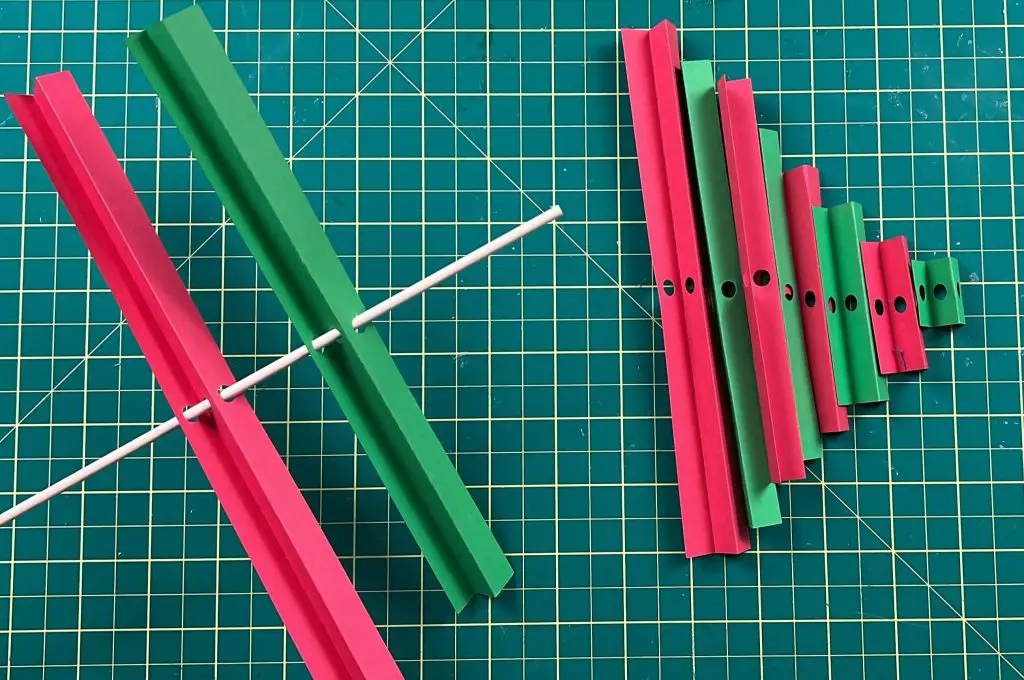
Once you have your branches on the tree, you can start to rotate them slightly to make your tree into a spiral.
Cut the top of your tree
Now that you know how big your tree is, there may be a surplus dowel past the top of the branches. You can cut it just past the last rectangle or leave an inch.
You can add a star to the top of your tree or leave it plain. The choice is up to you. For this tree, I left it plane.
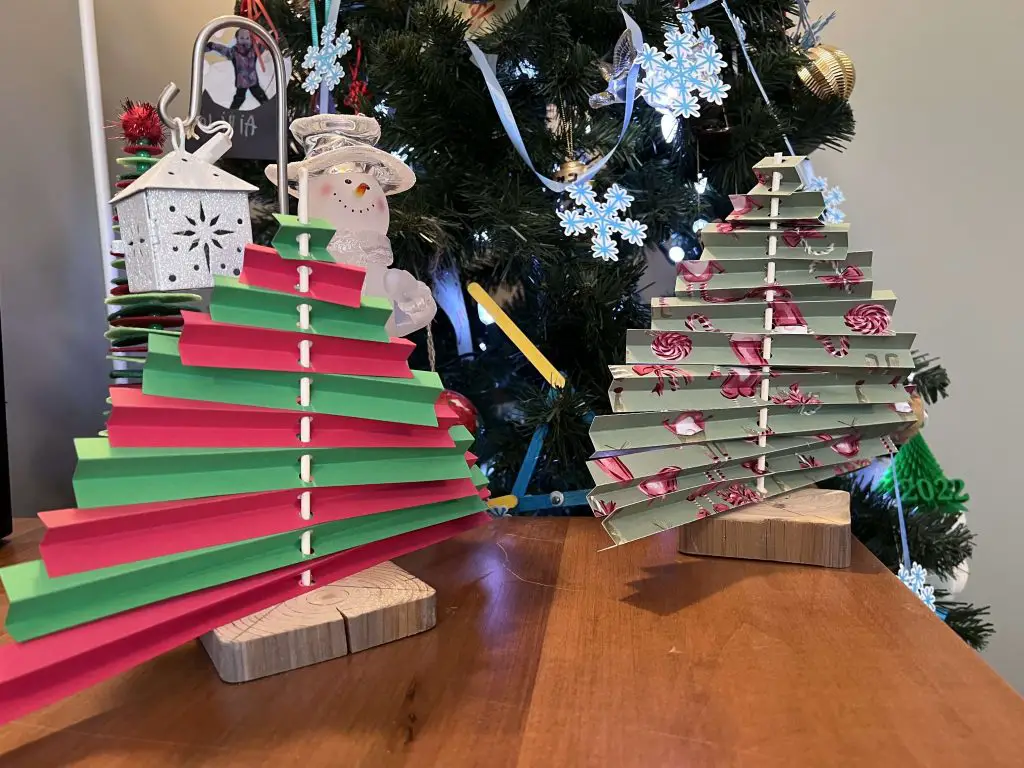
And that’s it! Your Spiral Christmas Tree is done!
Things I learned while making a spiral Christmas Tree:
So, this was not a very difficult craft, but there were some challenges and some learning opportunities… so, here goes:
- The direction you align the branches or rectangles makes a big difference. This will alter the final appearance of the tree, in color, height and rotation. I found the alternating rectangle patterns worked best to make the nicest tree.
- Using Christmas-themed paper was a great idea, it made the tree look very festive. The only downfall with the paper I used was that it was white on the backside. In the future, I might redo it but either use themed paper that has a design on both sides or use two sheets and glue them together.
- These trees look cute, but if they get touched the branches can easily get out of the spiral position and mess up the design of the tree. It is not a big deal, and they can be put back into place easily.
- I tried using a zig-zag design for the branches to keep the project simple. It might have been better and made a nicer tree if I had turned the zig-zags into actual 3D rectangles – making 5 sides on the paper and using glue – to make it look like a wooden plank. But maybe that will be next year’s project.
- I made 2 different trees for this. One with Christmas-theme paper and one with alternating red and green cardstock. Both trees turned out great. I like the look of the Christmas-theme paper better, but the solid cardstock had the added bonus of having color on both sides.
did you enjoy this Paper Craft?
Did you enjoy making this spiral Christmas tree? Let me know in the comments below. If you liked it and want to try more of my holiday crafts, check out other Christmas Crafts here.