In the past, I have created several smaller, less-than-standard paper boxes. And I realized as I was packing up some gifts that I needed a large paper gift box. One that could not be cut out of one piece of 12″ x 12″ cardstock. So I quickly sat down and designed one. And now that I have designed a large paper gift box, it’s time for me to teach you how to design your own. So, let’s get started.
What you need to Design a Large PaperGift Box
- A design program – I am designing the box in Cricut Design Space, but any design program will work. The concepts are the same in all design programs but may use different terminology. One of my favorites is Vectornator, as I use it on my iPad.
- 20 minutes to design the box.
Don’t want to design a large paper Gift box?
Don’t have time to design your own gift box? No worries, you can find the completed design in my resource library. Don’t have access to my resource library? Then sign up below, and I’ll send you an email with the details!

Let’s Start Designing our Large Paper Box
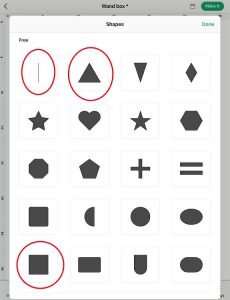
Like with all designs in Cricut Design Space, we need to work with some basic shapes. This design needs squares, triangles and score lines.
General Notes about the Design of my Custom Large Paper Box
I like boxes with a lid where the sides go to the bottom and top of the other box. I find this makes the box feel more secure and looks nicer. So, for this box, the walls of the lid and base will be full length.
Also, the top and bottom of the box will be duplicates of each other, so I will mainly focus on the top portion of the box. The bottom will be a copy and paste with a few minor modifications.
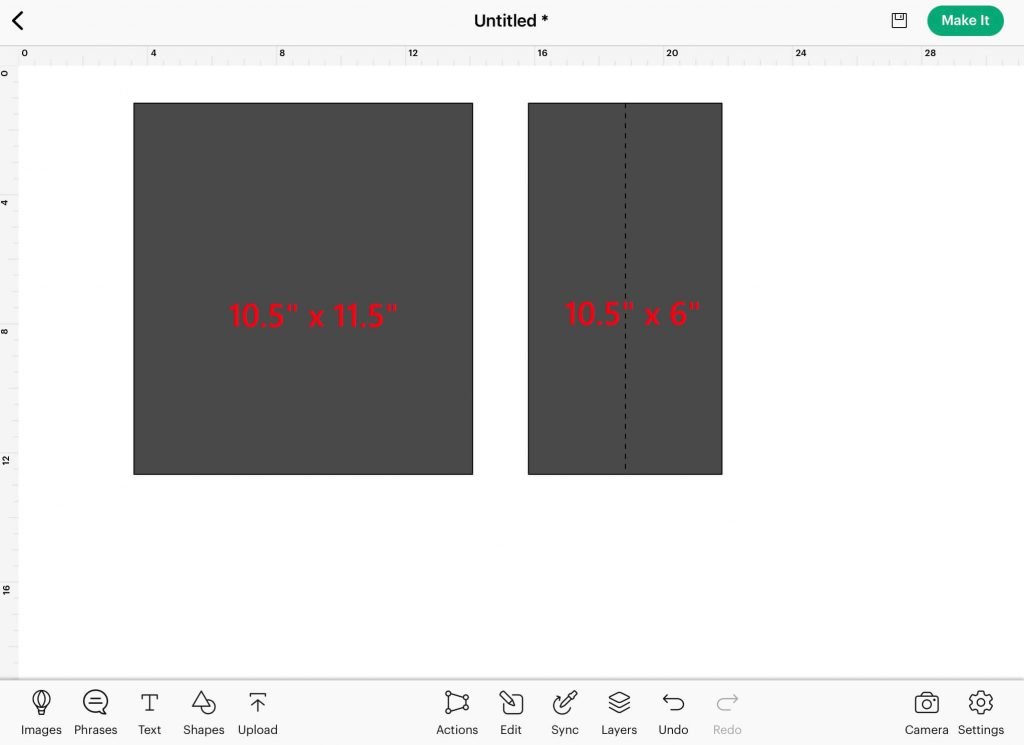
We are making a 10.5″ x 11.5″ as we are limited to 12″ x 12″ cardstock and the maximum size that can be cut on the Cricut without additional modifications to the design. If you have access to larger cardstock, you can increase the dimensions keeping in mind that the one short wall will have to be 11.5″ with or without tabs.
I like the inside walls of my paper box to have a cardstock design, so the walls of my paper box will all be folded over to allow for this feature. If you want it to have just plain white inside or a smaller tab that can be created instead.
Top Of The Box Design
Using the shapes outlined above, we are going to make a 10.5″ x 11.5″ rectangle. This will be the top of the box.
Like with each box, there are 4 sides. The two walls on the 11.5″ side will be identical, and the two walls on the 10.5″ side will be identical, but different than the 11.5″ sides.
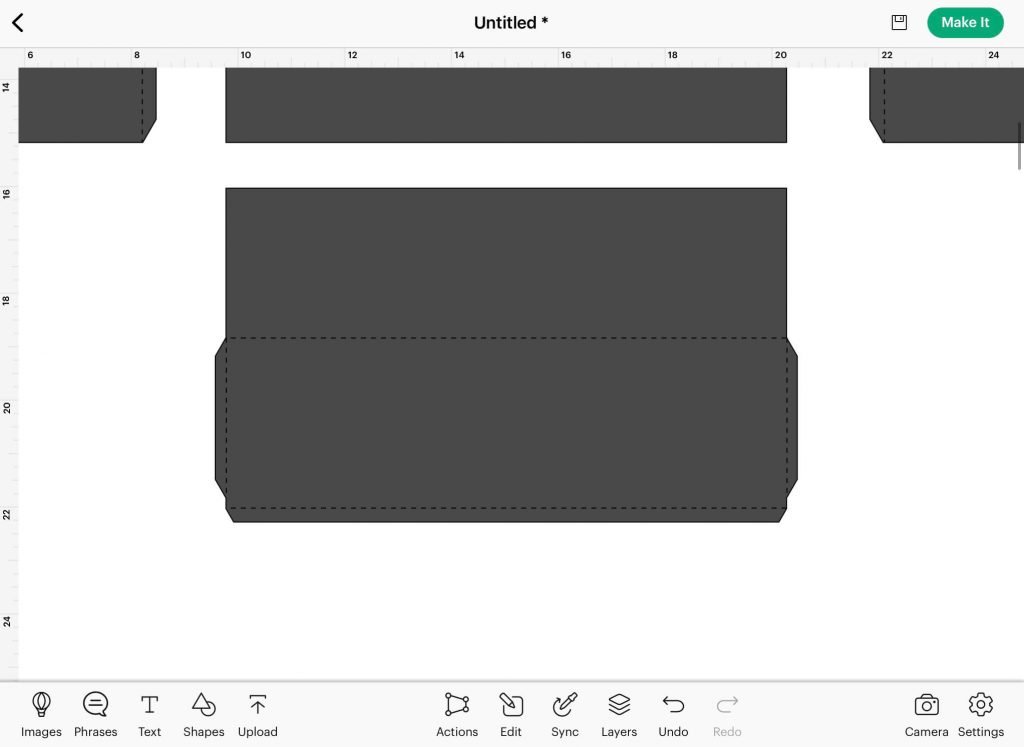
Make a rectangle that is 6″ x 11.5″. Attaching a score line to the middle to allow for folding.
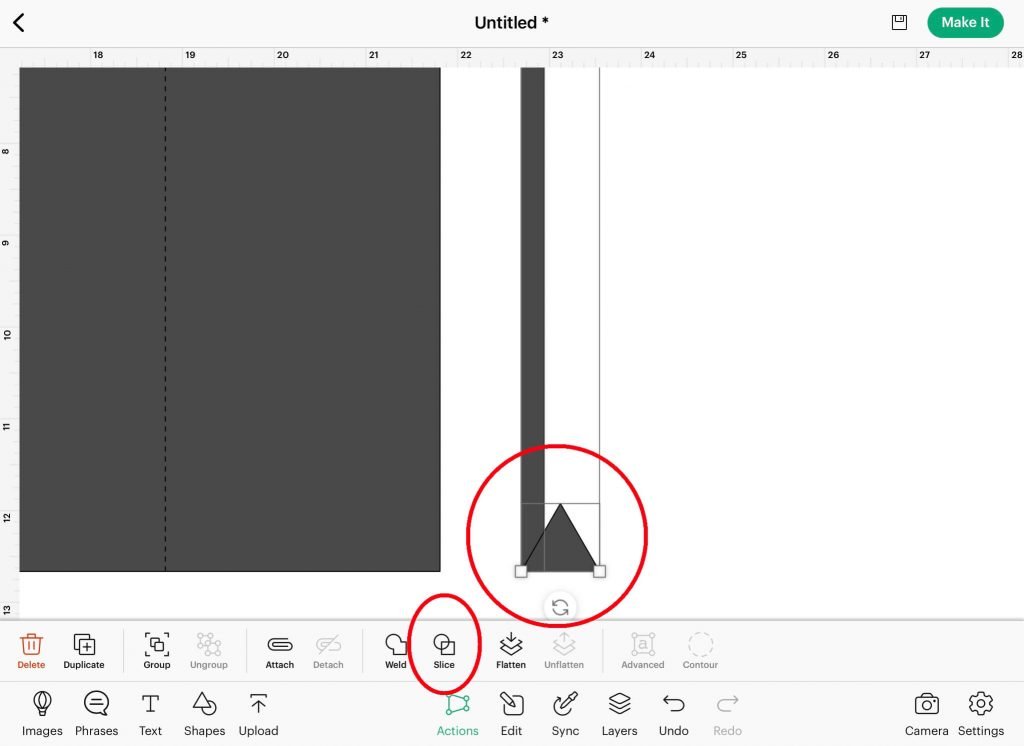
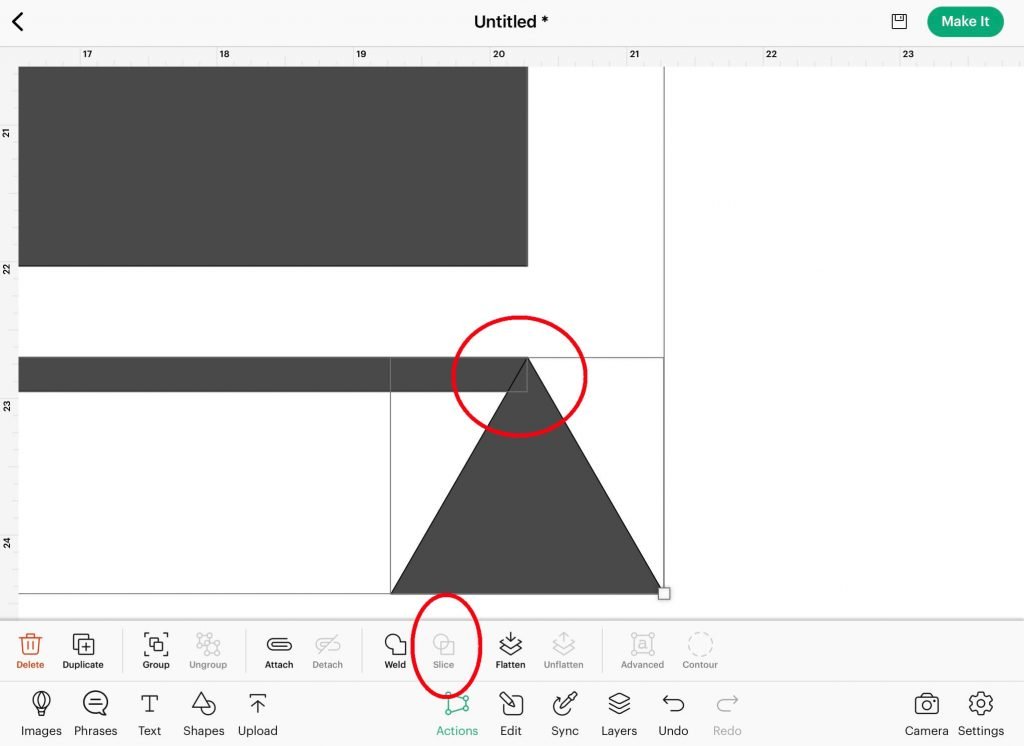
Now, add a small 0.25″ x 11.5″ rectangle to one side. Using a triangle to slide the corner on both the top and bottom of this long thin rectangle – this is the tab that holds the box walls to the top of the box. Deleting these excess triangles, and weld the two rectangles together. Again, create a score line, 11.5″ long, this time placing it at the joining line of the two rectangles. Attach the pieces together.
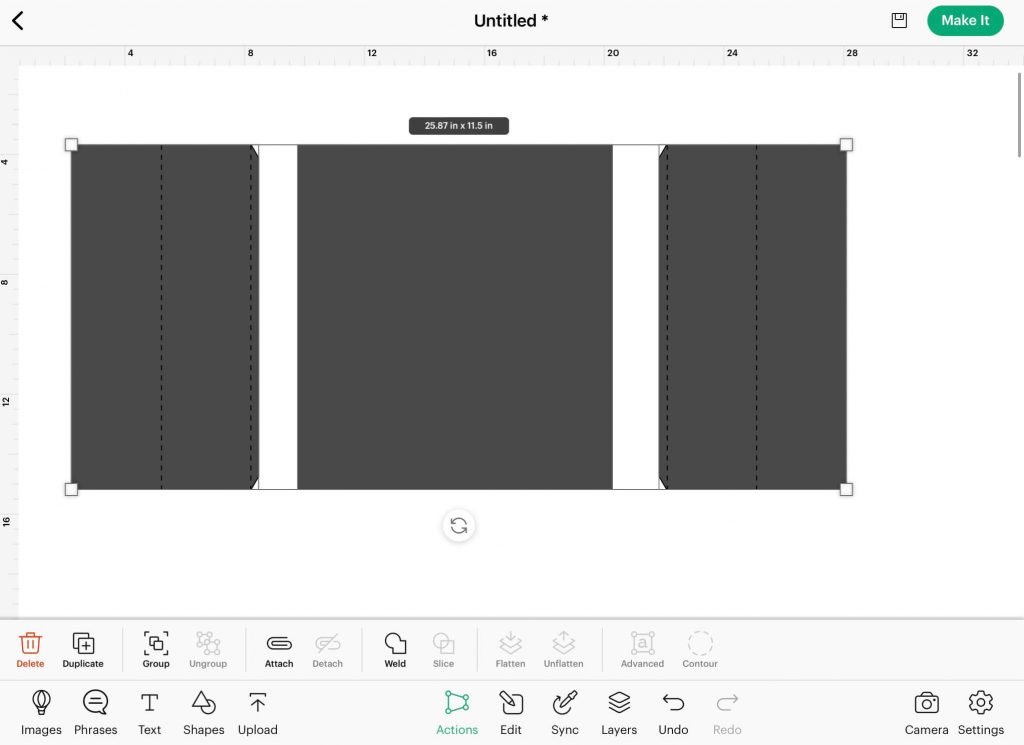
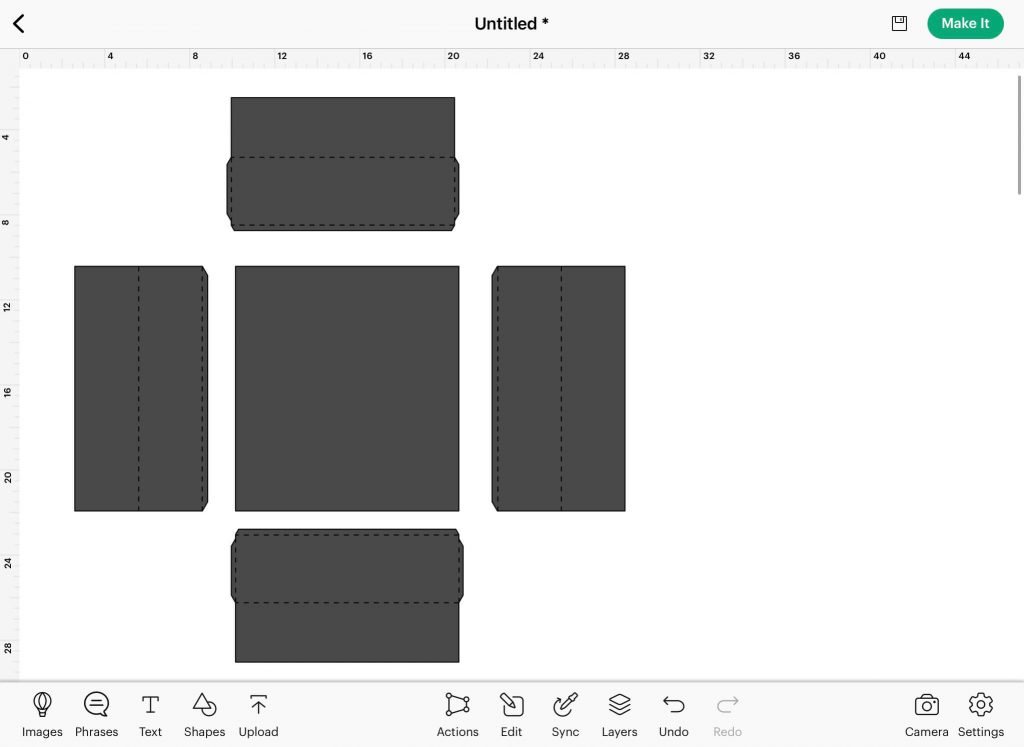
Duplicate this side panel, flip it and place it on the opposite side of the box top.
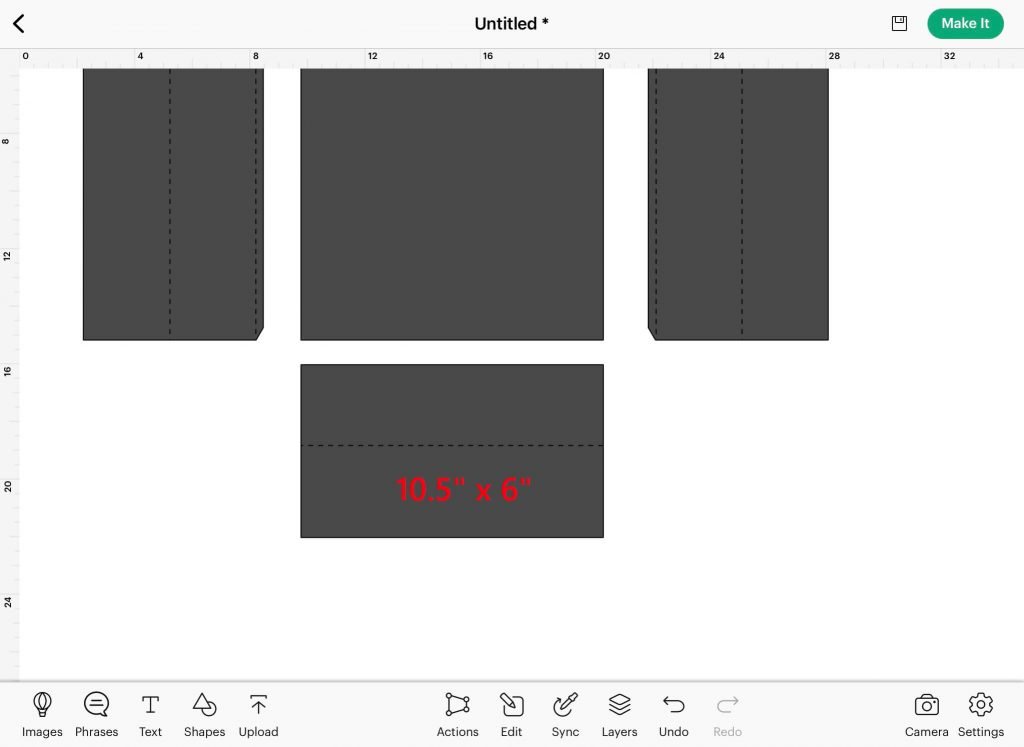
Employing a similar method as above, we will create a rectangle that is 10.5″ x 6″. This side panel will require 3 tabs, one to attach the wall to the top of the box and two to attach the sides together.
The bottom tab will be 10.5″ x 0.25″. Again, use a triangle to slide the end off the tab, to avoid interference when you are assembling the box later.
The other tab will be 3″ x 0.25″. You only need this tab to be the height of a folded side, so only one portion needs a tab. Again, with the triangle, slice off the top and bottom.
Create 4 score lines. Two will need to be 10.5″ long, and 2 will need to be 3″ long. First, place the 10.5″ score line in the middle of the 10.5″ x 6″ rectangle and attach it. Once it is attached, you can place all 3 tabs onto the box wall and weld them together, being mindful not to grab the score line. Then, place the remaining 3 score lines at the edge of the tab and wall rectangle. Attach them all together. Some of the score lines may have shifted to be below the rectangle, so you will simply need to select the rectangle, go to edit, arrange and send it to the back. This will push the rectangle behind the score lines.
Again, duplicate this wall and flip. You can rearrange the box walls to be around the top panel of the box.
Bottom of the Box Design
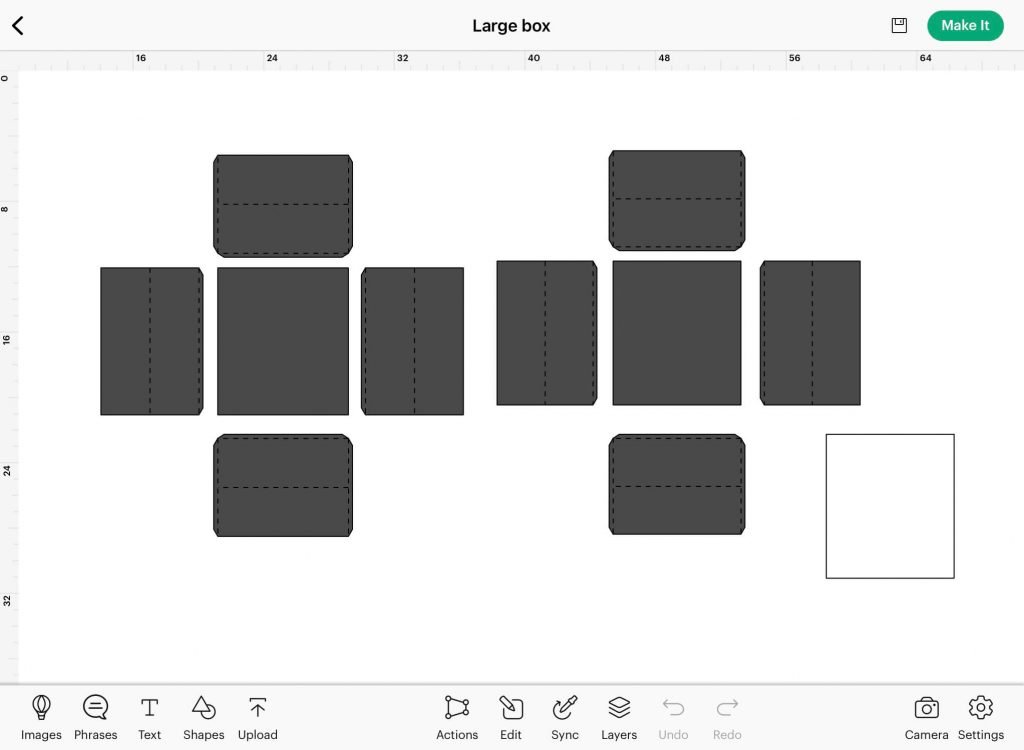
Now that we have one full box designed, select all 5 pieces, and duplicate them. Move the duplicated pieces to the side so they don’t interfere with the top of the box.
You will want the base of the box to be 1/8th of an inch smaller in both the length and width of the top, so we will need to reduce our sizes.
It is important to remember to remove the lock on the length and width as this change is not propionate.
Starting with the bottom face of the box, reduce the size from 10.5″ x 11.5″ to 10.375 x 11.375″.
The two walls with only 1 connecting tab will need to be reduced to 11.375″ in length, but all other sizes remain the same.
The two walls with 3 connecting tabs will need to be reduced to 10.875″. All other sizes remain the same.
Remember: This wall is 11″ long – 10.5″ for the rectangle and 2 tabs at 0.25″ each.
Remember to make these changes on all 4 walls.
Box Insert
Finally, as an optional item, you can create a duplicate of the top and bottom faces so that they can be used inside the box and have nice cardstock inside the faces of the box.
And that’s it! Your Design of a Large Paper Box is Complete!
Frequently asked questions about large paper boxes
How to add a peek a boo window on the box?
Adding a peek a boo window to the top of the box is very simple. All you need to do is make another rectangle that is at largest 10″ x 11″, place it on top of, and centered on the top face of the box and slice it. You need to have this dimension at most, as the tabs need space to attach the walls to the top of the box.
You can see this explained step by step in this custom wand box tutorial here.
Can I make my custom large paper box larger than 12″ x 12″?
Yes, you can. However, there are limits to what the Cricut can cut out. Remember that the maximum size on one of the widths will be 11.5″. The Cricut Maker 3 can cut longer than the 24″ mats, but it cannot cut wider than 11.5″. You can always cut by hand also.
Additionally, I have not found nice cardstock in dimensions that are larger than 12″ x 12″. I have cut up posterboard to allow longer box sizes, but these are limited to one color and are less fancy.
How long goes it take to design a large paper box?
This box takes about 15-20 minutes to design. On your first try, it may take a bit longer, but with more practice designing your own items, the time will decrease significantly.
Do I need the tabs to connect to the corners of the box face and walls?
No, you do not. You could simply make a rectangle that is 0.5″ shorter than the side it needs to be on, and align it at the center, but I prefer to use the triangle slice method.
Did you find this tutorial on how to design a large paper gift box helpful?
Did you find this tutorial on how to design a large paper gift box helpful? Let me know in the comments below! Did you try this project? Let me know how it turned out!
If you liked this design project, make sure to check out my other paper projects here.